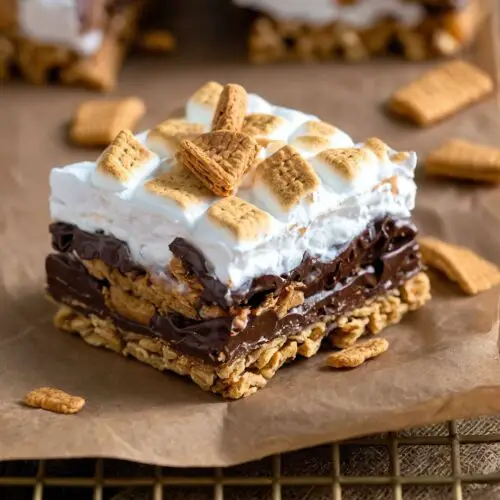
Golden Grahams S'mores Bars recipe
As the summer sun sets and the chill of the evening creeps in, there's a call to gather around a fire. S’mores are a classic treat that brings together friends and family, creating memories over toasted marshmallows, melty chocolate, and crunchy graham crackers.
Print
Pin
Rate
Servings: 12
Calories: 190kcal
Equipment
Ingredients
- 5 1/2 cups Golden Grahams cereal: This will provide that classic graham flavor.
- 16- ounce bag of classic marshmallows: Essential for that gooey texture.
- 1/3 cup unsalted European-style butter: Adds richness and binds everything together.
- 1/2 cup milk chocolate chunks: Use rough pieces from Hershey’s bars or similar for a decadent touch.
- 1 1/2 cups mini marshmallows: These will fold into the bar for extra marshmallow goodness.
- Pinch of fine sea salt: A touch of salt enhances overall flavor.
- 1/4 teaspoon pure vanilla extract: Just a hint brings together all the flavors beautifully.
Instructions
Step 1: Prepare the Baking Dish
- Start by preheating your oven to 350°F (175°C). Line a 9x13-inch baking dish with parchment paper, allowing some excess around the sides. This will make it easier to lift the finished bars out later. Lightly grease the parchment paper with cooking spray to ensure easy removal.
Step 2: Melt the Butter and Marshmallows
- In a large saucepan over low heat, melt the unsalted butter. Once melted, add the 16-ounce bag of classic marshmallows. Stir occasionally until the marshmallows are fully melted and smooth. Keep an eye on them; we don't want them to burn. This mixture should look luscious and creamy.
Step 3: Combine with Cereal
- Remove from heat and stir in the pure vanilla extract and a pinch of fine sea salt. Next, add the Golden Grahams cereal into the marshmallow mixture. Stir until all the cereal is well-coated. It should feel sticky and clump together nicely.
Step 4: Add Chocolate and Mini Marshmallows
- Now, fold in 1/2 cup of chocolate chunks and 1 1/2 cups of mini marshmallows. The chocolate chunks will melt slightly, creating chocolate rivers throughout the bars.
Step 5: Press the Mixture into the Dish
- Transfer the mixture to your prepared baking dish. With slightly damp hands (to prevent sticking), press the mixture evenly into the dish. Make sure to pack it down tightly. This helps the bars hold together once cooled.
Step 6: Bake
- Place the dish into your preheated oven and bake for about 10-12 minutes. You want the top to be lightly golden and the bars to appear set but still soft in the center. Remove them from the oven and let them cool for about 30 minutes in the pan.
Step 7: Cut and Serve
- Once cooled, use the parchment paper to lift the bars out of the dish. Cut them into squares or rectangles, and serve. You can also sprinkle extra chocolate on top or revisit the mini marshmallows for an added treat. Enjoy your creation!
Notes
- Use European-Style Butter for Better Flavor: This butter has a higher fat content, enhancing richness.
2. Don’t Overheat the Marshmallows: This can make them tough. Stir on low heat until just melted.
3. Let Them Cool Completely: Allow the bars to cool completely in the pan for best slicing results.
4. Customize with Add-ins: Feel free to add nuts or different types of chocolate to suit your taste.
5. Cut with a Greased Knife: To make cutting easier, use a greased knife. It helps prevent sticking, giving you nice clean edges on your bars.