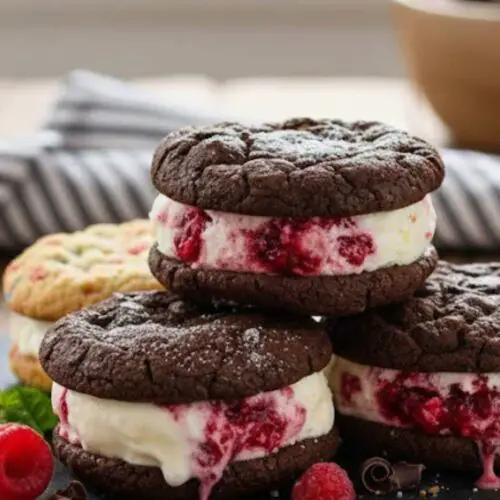
Icecream Cookie
So, what’s all the fuss about Ice Cream Cookies? Picture this: warm, chewy cookies filled with gooey chocolate and sandwiching a generous scoop of your favorite ice cream. Sounds dreamy, right?
Print
Pin
Rate
Servings: 12
Equipment
- ice cream scoop
- Cookie Sheet
- Parchment paper
Ingredients
- - ⅓ cup softened butter
- - 1 cup packed light brown sugar
- - ⅔ cup granulated sugar
- - 2 large eggs
- - 1½ teaspoons baking soda
- - 1 teaspoon pure vanilla extract
- - 1 tablespoon maple syrup or pancake syrup
- - 1 cup creamy peanut butter
- - 3 cups quick-cooking oats
- - ⅔ cup semi-sweet chocolate chips
- - ½ teaspoon sea salt adds flavor balance
- - 1/2 cup chopped walnuts adds texture
Instructions
- Making Ice Cream Cookies is a simple process. I'll guide you through the steps to whip them up in no time.
Step 1: Preheat Your Oven
- Preheat the oven to 350°F (175°C). This step is crucial because you want your cookies to start baking at the right temperature. A hot oven helps them rise perfectly and develop that wonderful golden edge.
Step 2: Cream the Butter and Sugars
- In a large mixing bowl, cream together the softened butter, light brown sugar, and granulated sugar using an electric mixer. You’re looking for a light, fluffy mixture here. This process incorporates air, which gives your cookies a lovely texture.
Step 3: Mix in Wet Ingredients
- Add the eggs, vanilla extract, maple syrup, and baking soda to the mixture. Beat this well until it’s all blended into a smooth batter. Don’t rush this step; letting it blend gives your cookies a great foundation of flavor.
Step 4: Add Peanut Butter
- Stir in the creamy peanut butter until it's well combined. The mixture will start to pull together nicely at this stage. Peanut butter adds richness and lends a delightful flavor that pairs perfectly with the chocolate chips.
Step 5: Incorporate Oats and Add-ins
- Gradually mix in the quick oats, sea salt, and chopped walnuts. The oats add some bulk and chewiness to your cookies, while the walnuts bring that extra crunch. Stir until everything is evenly distributed.
Step 6: Fold in Chocolate Chips
- Lastly, fold in your semi-sweet chocolate chips. This step is where you’ll be tempted to “taste test” the dough—trust me, it’s hard to resist!
Step 7: Scoop the Dough
- Use a large cookie scoop to drop rounded dough balls onto a parchment-lined baking sheet. You can fit eight balls on a half-size sheet. Roll each ball between your hands to ensure they’re smooth and nice to look at.
Step 8: Bake the Cookies
- Bake in the preheated oven for about 12 minutes. Keep an eye on them; you want the edges to be lightly browned and the tops just past looking wet. Underbaking slightly ensures that they remain soft inside.
Step 9: Cool the Cookies
- Let the cookies cool on the baking sheet for about 1 minute before transferring them to a wire rack. Cooling on the sheet allows them to set just enough to keep their shape, while the wire rack will cool them down perfectly so they’re ready for the ice cream.
Step 10: Assemble the Ice Cream Sandwiches
- Once your cookies are completely cool, scoop about 1/3 cup of ice cream onto the flat side of one cookie. I love to use the same scoop here to keep things consistent. Then, gently press a second cookie on top to create your sandwich. You want to push down just enough to spread the ice cream slightly without squeezing it out the sides.
Step 11: Freeze the Sandwiches
- Arrange your ice cream sandwiches on a large tray and place them in the freezer until firm. This part is essential for enjoying them. Once they’re frozen, they’re ready to be devoured and are great for summer parties or just a sweet treat on a hot day!
Notes
- Cooling is Key: Let the cookies cool as mentioned to avoid melting the ice cream before you're ready.
- Variety is Fun: Feel free to mix in different add-ins like crushed pretzels or other types of chips for a new twist.
- Watch the Bake Time: Ovens can differ, so keep an eye on the cookies during baking to prevent overbaking.
- Scoop Smart: Using a cookie scoop helps create evenly sized cookies that bake uniformly.
- Dough Storage: If you're not ready to bake them all, you can chill the dough for later use or freeze it for a quick dessert later.