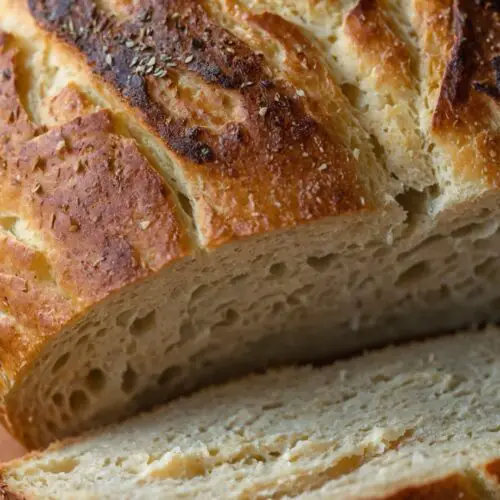
No Knead Bread Recipe
No Knead Bread is a delightful canvas for various toppings and pairings. Imagine slathering buttery garlic spread onto a warm slice or dipping it into a rich, velvety marinara.
Print
Pin
Rate
Servings: 10
Calories: 155kcal
Equipment
- bowl
Ingredients
Instructions
Step 1: Prepare Your Ingredients
- Begin by gathering all your ingredients. It’s important to have everything ready. I usually set them out on the counter and measure as I go. The key is to enjoy the process.
Step 2: Mix the Dough
- In a large mixing bowl, combine the lukewarm water, honey, and yeast. Give it a gentle stir. In another bowl, whisk together the flour and salt. When they’re well mixed, pour this dry mixture into the bowl with the water.
- Skip the kneading—seriously! Just stir until the flour is fully incorporated. It should look shaggy, and that’s okay.
Step 3: Let the Dough Rest
- Cover the bowl with plastic wrap or a clean kitchen towel. Leave it at room temperature for about 12 to 18 hours. I often do this overnight. You’ll know it’s ready when the dough is bubbly and has doubled in size.
Step 4: Shape the Dough
- Sprinkle flour on a clean surface. Turn the dough out onto this floured area. With floured hands, gently shape it into a ball. Remember, no heavy kneading is required!
Step 5: Second Rise
- Place the shaped dough on a piece of parchment paper. Dust the top lightly with flour. Cover it with a towel and let it rise for another 1 to 2 hours. You want to see it puff up nicely.
Step 6: Preheat Your Oven
- About 30 minutes before you’re ready to bake, preheat your oven to 450°F (230°C). If you have a Dutch oven, place it in the oven as it heats. This step is crucial for achieving that perfect crust.
Step 7: Bake the Bread
- Once the oven is hot, carefully lift the dough, parchment paper and all, and place them into the Dutch oven. Use caution; it will be hot! Cover it with the lid and bake for 30 minutes.
- After 30 minutes, remove the lid to allow that glorious crust to form. Bake for an additional 15 to 20 minutes until the top is golden brown. The aroma should be heavenly by now!
Step 8: Cool Down & Enjoy
- Transfer your bread to a wire rack to cool. Honestly, waiting is the hardest part. Let it cool for at least 30 minutes before slicing into it.
Notes
- Lukewarm Water: The water temperature should be between 100°F to 110°F. Think of it as a warm bath—just right for the yeast to thrive.
- All-purpose vs. Bread Flour: All-purpose flour is versatile, while bread flour has a higher protein content, giving your loaf more chew and structure.
- Honey’s Role: It’s not just for sweetness; honey helps the yeast rise. If you don’t have honey, sugar can also do the trick.
- Yeast Choices: Instant yeast doesn’t require active proofing, saving time. Yeast can be picky, so above all, check the expiration date!
- Olive Oil: A good olive oil enhances flavor. Your taste buds will thank you.
- Salt Importance: Salt not only flavors the bread but also strengthens gluten formation, essential for a good rise and texture.