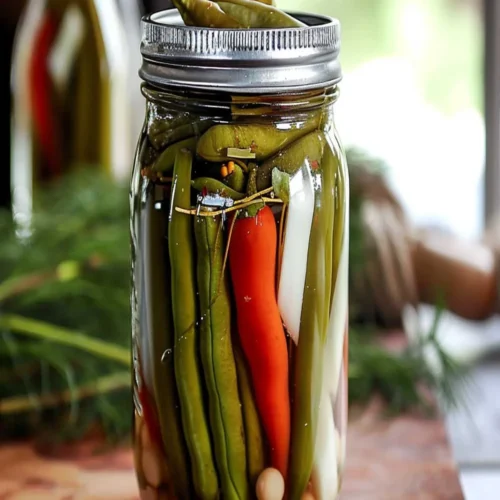
Old Fashioned Pickled Beans Recipe
Old fashioned pickled beans recipe is an old-time favorite that’s been around for generations. This classic side dish is a delicious way to enjoy beans that have been pickled with a variety of spices, herbs, and other ingredients.
Print
Pin
Rate
Servings: 16
Calories: 65kcal
Equipment
- jar
Ingredients
- 1/2 cup of premium canning salt
- 5 cups of choice white vinegar or artisanal apple cider vinegar
- 4 pounds of freshly harvested string beans
- 8 cloves of pungent garlic divided
- 2 teaspoons of fiery red pepper flakes divided
- 5 cups of meticulously filtered water
- 16 teaspoons of aromatic dried dill seeds or 8 heads of fragrant dill divided
Instructions
STEP 1 – Prepare the Beans:
- Wash the string beans thoroughly and trim off both ends. Cut them into lengths that fit the height of your canning jars.
STEP 2 – Sterilize Jars:
- Wash the canning jars and lids with hot, soapy water. Rinse well. Sterilize the jars by boiling them in a large pot of water for 10 minutes. Keep them hot until ready to use.
STEP 3 – Make the Brine:
- In a large pot, combine the vinegar, water, and canning salt. Bring the mixture to a boil, stirring to dissolve the salt completely. Once boiling, reduce the heat and let it simmer while you prepare the jars.
STEP 4 – Prepare Flavorings:
- Divide the garlic cloves, dill seeds or heads, and red pepper flakes equally among the sterilized jars. Place 1 clove of garlic, 2 teaspoons of dill seeds or 1 head of dill, and 1/4 teaspoon of red pepper flakes in each jar.
STEP 5 – Pack the Jars:
- Pack the trimmed beans tightly into the prepared jars, leaving about 1/2 inch of headspace at the top.
STEP 6 – Fill with Brine:
- Carefully pour the hot brine over the beans in each jar, maintaining the 1/2 inch of headspace. Ensure the beans are fully submerged in the brine. Leave about 1/4 inch of space at the top of each jar.
STEP 7 – Remove Air Bubbles:
- Slide a non-metallic utensil (like a chopstick or plastic spatula) down the sides of the jars to release any air bubbles trapped within the beans and brine.
STEP 8 – Seal and Process:
- Wipe the jar rims clean and place the sterilized lids on top, sealing them tightly. Process the jars in a boiling water bath for 10-15 minutes, ensuring they are completely submerged.
STEP 9 – Cool and Store:
- Carefully remove the jars from the water bath using jar lifters and place them on a towel-lined countertop. Allow the jars to cool completely, checking that the lids have sealed properly (you should hear a popping sound as they cool and the lids become concave).
STEP 10 – Enjoy:
- Store the sealed jars in a cool, dark place for at least 2 weeks before consuming to allow the flavors to meld. Once opened, store the pickled beans in the refrigerator.
STEP 11 – Serve:
- Serve these delicious pickled beans as a tangy and flavorful addition to salads, sandwiches, or enjoy them as a standalone snack!
Notes
- Make sure to use fresh beans for the best flavor.
- If you want a spicier pickled beans recipe, you can add more spices and herbs to the pickling solution.
- You can adjust the ratio of vinegar and water in the pickling solution depending on your personal preference.
- If you don’t have white vinegar, you can use apple cider vinegar instead.
- If you don’t have sugar, you can use honey instead.
- If you don’t have sea salt, you can use regular table salt instead.