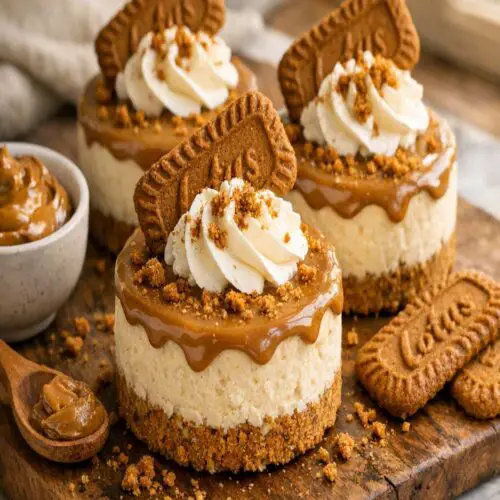
Biscoff Mini Cheesecake Recipe
There's something magical about serving individual cheesecakes at a dinner party—they feel fancy, they look impressive, and your guests think you spent hours in the kitchen. These Biscoff mini cheesecakes pair beautifully with a warm cup of coffee after dinner or alongside kiwi chocolate for an elegant dessert board. The cookie butter layer brings that beloved caramel-spiced flavor everyone adores, and I'm going to show you how to make them stress-free on standard kitchen equipment.
Print
Pin
Rate
Servings: 24 4
Calories: 224kcal
Ingredients
For the Crust
- 250 gram Biscoff spiced cookies about 8.8 ounces
- ½ cup unsalted butter melted and slightly cooled
For the Filling
- 1 cup creamy Biscoff cookie butter or similar caramel cookie butter spread
- 24 ounce cream cheese three 8-ounce blocks, softened to room temperature
- 1 cup powdered sugar sifted to remove lumps
- 2 teaspoon pure vanilla extract not imitation
- ⅓ cup full-fat sour cream at room temperature
- 1 cup heavy cream very cold, straight from the refrigerator
- ¼ teaspoon fine sea salt
For the Topping
- Whipped cream store-bought or homemade, optional
- ½ cup creamy Biscoff cookie butter for the glossy ganache layer
- Whole Biscoff cookies or crushed cookie pieces for garnish
Instructions
Step 1: Make the Cookie Crust Foundation
- Pour your Biscoff cookies into a food processor and pulse until they resemble fine breadcrumbs. You want tiny, uniform pieces—if some crumbs are too chunky, they won't press down evenly. This takes about 30 to 45 seconds of pulsing. Pour the melted butter into the processor while it's running, and mix until the entire mixture looks like damp sand that holds together when you squeeze it. Spray your mini cheesecake pans (or muffin tins with liners) generously with nonstick spray. Using the back of a measuring spoon or your fingers, press about 1 tablespoon of the crust mixture firmly into each cup. You want it compact but not rock-hard—think of the texture of packed brown sugar. Place the pans in the refrigerator or freezer while you prepare the filling. A chilled crust helps the filling set faster later on.

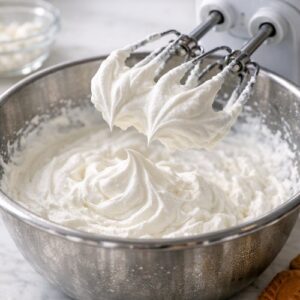
Step 2: Whip the Heavy Cream to Cloud-Like Peaks
- Pour your cold heavy cream into a medium mixing bowl (a chilled bowl works even better—pop it in the freezer for 5 minutes). Using a hand mixer or stand mixer fitted with the whisk attachment, beat on medium-high speed. You'll see it go from liquid to frothy to soft peaks in about 1 to 2 minutes. Keep going until stiff peaks form—that means when you lift the whisk, the cream stands straight up without drooping. Here's the tricky part: don't overbeat, or you'll end up with sweet butter. Once you reach stiff peaks, stop immediately. Transfer the whipped cream to a separate bowl and refrigerate it while you build the filling. This step is crucial because the whipped cream makes the final cheesecake mousse-like rather than dense.
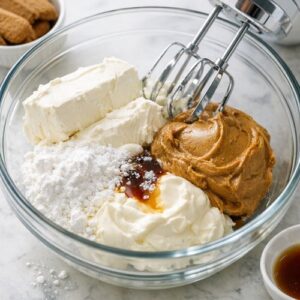
Step 3: Combine the Cream Cheese Base
- In a separate medium-large mixing bowl, add your softened cream cheese, powdered sugar, cookie butter, sour cream, vanilla extract, and sea salt. Beat on medium speed with an electric mixer until everything is completely smooth and no streaks of cream cheese remain. This takes about 2 to 3 minutes. Scrape down the sides of the bowl halfway through to make sure you're incorporating everything evenly. The mixture should look pale, fluffy, and cloud-like—not thin or liquidy. If it seems too soft or warm, refrigerate the bowl for 10 minutes. The consistency matters because you're about to fold in the whipped cream, and you need the base to be stable enough to hold those airy bubbles.
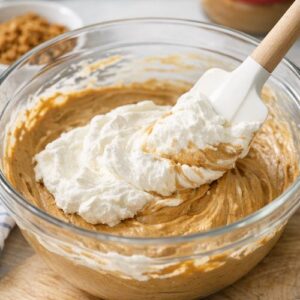
Step 4: The Gentle Fold
- This is where patience pays off. Using a rubber spatula, gently fold the cold whipped cream into the cookie butter mixture in three additions. Start by spooning about one-third of the whipped cream onto the cream cheese base, then fold slowly and deliberately—slide the spatula down the center of the bowl, along the bottom, and bring it back up and over, rotating the bowl slightly after each motion. Keep folding until you see no white streaks remaining. This process takes about 1 to 2 minutes per addition. You're trying to maintain those air bubbles you worked hard to create—aggressive stirring will deflate them and ruin the mousse-like texture. Once all the whipped cream is incorporated, you have your final filling.
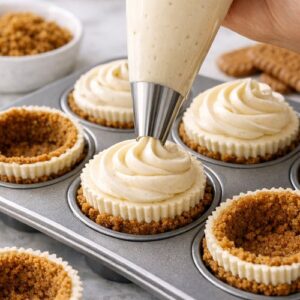
Step 5: Fill the Crusts
- Transfer your filling into a piping bag fitted with a round tip (a 1A tip creates a professional-looking swirl). Remove the chilled crusts from the refrigerator. Pipe the filling into each cup in a smooth, even spiral, starting from the outside and working toward the center. Fill until the filling reaches just about ¼ inch from the top of each liner. If you don't have a piping bag, a spoon works too—just smooth the filling gently with an offset spatula or the back of a spoon for even coverage. The goal is neat, even tops so the ganache layer sits flat and looks intentional.
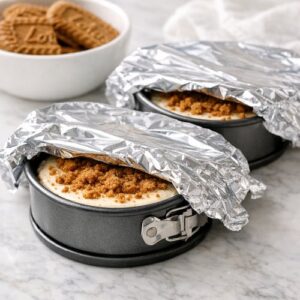
Step 6: Chill and Set the Filling
- Cover the pans loosely with plastic wrap or aluminum foil (you don't need an airtight seal; just protect them from absorbing flavors from the fridge). Place them in the refrigerator for at least 6 hours, but overnight is ideal. This resting time allows the filling to firm up and the flavors to meld together. I promise the wait is worth it.
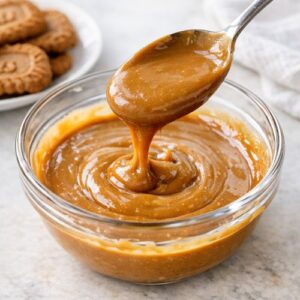
Step 7: Add the Cookie Butter Ganache Topping
- Place your ½ cup of cookie butter in a microwave-safe bowl. Heat it in the microwave in 15-second intervals, stirring between each burst, until it's completely melted and pourable. This usually takes 20 to 30 seconds total—cookie butter melts quickly, so watch it carefully to prevent burning. The mixture should be glossy and smooth like warm caramel. Spoon or drizzle the warm cookie butter ganache over each chilled cheesecake. It will naturally flow down the sides, creating that bakery-style look. Don't stress about perfection here—slight drips look rustic and intentional. Place the pans back in the refrigerator for 15 to 20 minutes until the ganache sets completely.
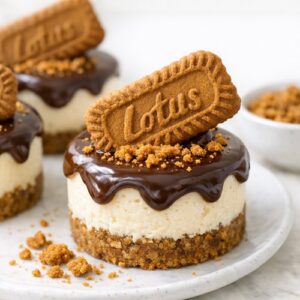
Step 8: Garnish and Serve
- Once the ganache has set, it's time to add the finishing touches. Press a whole Biscoff cookie onto the top of each cheesecake at a slight angle, or sprinkle crushed cookie pieces over the ganache. A small dollop of whipped cream on top adds an elegant touch if you're serving these at a special occasion. Remove the cheesecakes from their liners if you're using muffin cups, or serve them directly in their mini pans for a more casual presentation. Keep them refrigerated until serving time. These are best enjoyed chilled and fresh from the fridge.
Notes
- Room temperature matters more than you think - Cream cheese that's truly soft beats more smoothly and creates a fluffier filling. Take it out of the fridge 30 minutes before mixing. Cold cream cheese leads to lumps no matter how much you beat it.
- Invest in a piping bag - These cost a few dollars and make filling the cups dramatically faster and neater. It's one of my essential kitchen tools for any individual dessert project.
- Don't skip the sour cream - It adds a subtle tang that balances the sweetness and creates a more sophisticated flavor profile. It's not just filler; it's intentional.
- Make the crumbs uniform - Uneven cookie pieces create gaps in your crust where filling can seep through. Spend an extra 30 seconds in the food processor to get consistent crumb size.
- Seal your pans while chilling - Even loose covering prevents the filling from absorbing fridge odors and keeps the tops from drying out.
- Serve straight from the fridge - These taste best when they're properly chilled. Cold filling is creamy; room-temperature filling becomes greasy and loses its texture.