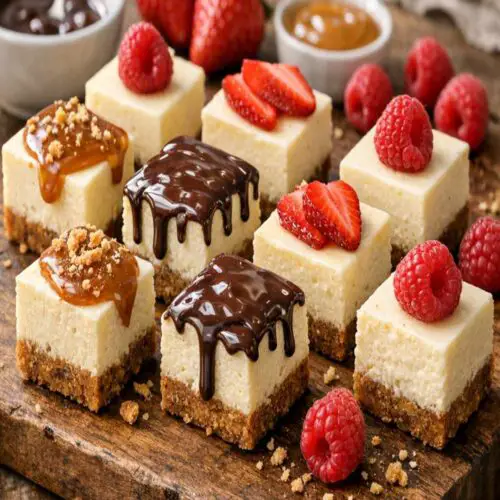
Cheesecake Bites Recipe
If you're hunting for a dessert that looks like you spent hours in the kitchen but honestly takes minutes, these mini cheesecake bites are your answer. I pair mine with fresh berries, a strong cup of coffee, or even alongside savory appetizers like Italian Sandwich Pinwheels for a balanced dessert spread. They're sophisticated enough for dinner parties yet simple enough for weeknight cravings.
Print
Pin
Rate
Servings: 12 2
Calories: 161kcal
Ingredients
For the Crust
- 3 tablespoon granulated sugar white or coconut sugar both work
- 1 cup graham cracker crumbs finely crushed from about 8 full crackers
- ¼ cup unsalted butter softened to room temperature, easier to mix
For the Filling
- 3 tablespoon granulated sugar or honey for subtle depth
- ½ teaspoon fresh lemon juice brightens the flavor and prevents heaviness
- ½ cup heavy whipping cream cold, straight from the refrigerator
- 8 oz cream cheese softened at room temperature for 30 minutes before mixing
- Fresh berries or fruit compote optional, for topping and brightness
- 2 tablespoon honey drizzle optional, for serving and depth of flavor
- 1 tablespoon sour cream adds tang; full-fat Greek yogurt is an excellent substitute
- ½ teaspoon pure vanilla extract not imitation, which tastes flat
Instructions
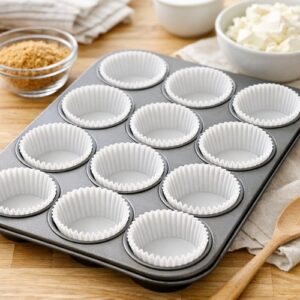
Step 1: Line Your Muffin Tin and Prepare the Work Space
- Start by lining a standard 12-cup muffin tin with paper liners. I prefer liners because they make removal effortless—no sticky fingers or broken bites. Set your prepared tin on the counter where you'll be working. This takes 2 minutes maximum and sets you up for success.
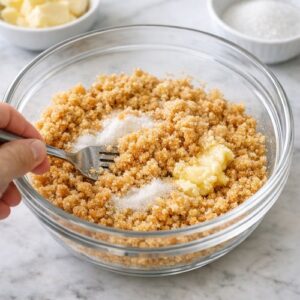
Step 2: Make the Graham Cracker Crust Base
- In a small bowl, combine your crushed graham crackers, sugar, and softened butter. Use a fork or your fingertips to mix until the texture resembles coarse sand—you want small, butter-coated crumbs, not a wet paste. This should take about 1-2 minutes of mixing. Divide the mixture evenly among all 12 liners, pressing gently with the back of a spoon or your thumb until each crust is compact and level. Don't press too hard or you'll create dense, hard bites. You're looking for a light, even layer that holds together when pressed gently. Place your crust-lined tin in the refrigerator while you prepare the filling. The cold base helps the filling set faster.
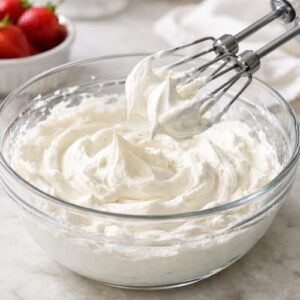
Step 3: Whip the Heavy Cream to Stiff Peaks
- Pour your cold heavy cream into a clean bowl. Using an electric mixer on medium-high speed, beat the cream for 2-3 minutes until stiff peaks form. You'll know it's ready when you lift the beaters and the peaks stand straight up without drooping. This is a crucial step—don't skip it or rush it. Over-whipping creates butter, so stop as soon as you see stiff peaks. Transfer the whipped cream to a separate bowl and set aside. Keep it in a cool spot while you finish the next step.
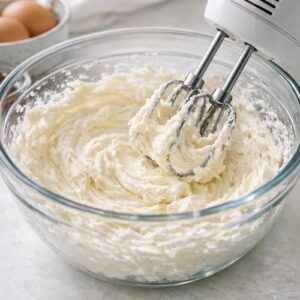
Step 4: Cream the Cheese and Sugar
- In another clean bowl, add your softened cream cheese and sugar. Beat on medium speed for about 1-2 minutes until the mixture is smooth and fluffy. You're looking for a texture that's light and creamy, with no visible lumps or hard cream cheese pieces. This step is essential for texture. Properly beaten cream cheese creates a smoother filling than cheese that hasn't been whipped. If your kitchen is warm, you may need to pause and let the bowl chill in the refrigerator for 5 minutes.
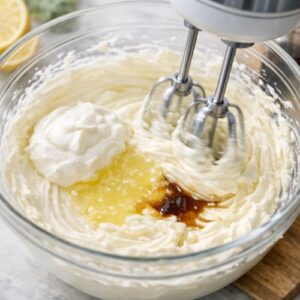
Step 5: Add the Flavor Elements and Combine
- To your creamed cheese mixture, add the sour cream, lemon juice, and vanilla extract. Beat on medium speed for about 1 minute until everything is fully incorporated and smooth. The filling should be silky and pale, with absolutely no visible lumps or streaks. The lemon juice is subtle but important—it prevents the filling from tasting one-dimensional and adds freshness that guests will notice but won't identify. Taste a tiny spoonful if you'd like. It should taste creamy and slightly tangy.
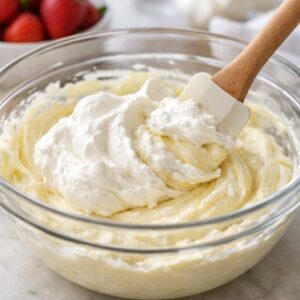
Step 6: Fold in the Whipped Cream Gently
- This is where the magic happens. Add your whipped cream to the cheese mixture in two additions. First, fold in about half the whipped cream using a rubber spatula, using a gentle down-and-across motion rather than stirring. This helps the filling become light and airy. Once incorporated, fold in the remaining whipped cream with the same gentle technique. Stop folding as soon as everything is combined and no white streaks remain. Over-folding deflates the whipped cream and defeats the purpose. Your filling should now look cloud-like, mousse-like, and noticeably lighter than it was when you started. This texture is what makes these bites special—airy, creamy, and not heavy.
Step 7: Pipe the Filling Into Crusts
- Transfer your filling into a piping bag fitted with a large star or round tip. Pipe about 2 tablespoons of filling into each crust, starting from the center and working outward. The filling should mound slightly above each crust. If you don't have a piping bag, you can use two spoons to divide the filling evenly, or even use a small ice cream scoop for consistent portions. A piping bag just makes it look prettier and feels more special—not required for delicious results.

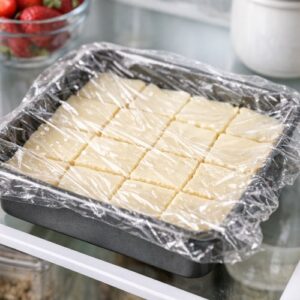
Step 8: Chill Overnight and Top Before Serving
- Cover your pan loosely with plastic wrap or foil and refrigerate for at least 8 hours, preferably overnight. The filling will firm up and set completely as the gelatin from the sour cream and the cold temperature do their work. Just before serving, top each bite with a small dollop of whipped cream, fresh berries, a drizzle of honey, or a sprinkle of crushed graham crackers. The bites are now ready to serve chilled and will keep for up to 3 days in the refrigerator.
Notes
- Soften cream cheese properly - Leave it on the counter for 30 minutes. Cold cream cheese creates lumps no matter how much you beat it. Room temperature cream cheese mixes smoothly in seconds.
- Use cold heavy cream - Keep it in the coldest part of your refrigerator until the moment you whip it. Warm cream won't whip to stiff peaks and your filling will be dense.
- Don't skip the overnight chill - I know it's tempting to serve them after 4 hours, but they genuinely taste better and hold their shape better after a full night in the refrigerator. The flavors meld and intensify.
- Make a double batch and freeze - Prepare these up to one week ahead and freeze them in an airtight container. Thaw in the refrigerator for 2 hours before serving. They taste freshly made.
- Customize the crust - Swap graham crackers for crushed vanilla wafers, digestive biscuits, or even Oreos for chocolate flavor. Keep the ratio of crumbs to butter the same.
- Flavor variations are your friend - Add 1 teaspoon of lemon zest, use almond extract instead of vanilla, or add a splash of liqueur like Kahlúa or Grand Marnier for adults.