This post contains affiliate links. As an Amazon Associate I earn from qualifying purchases.
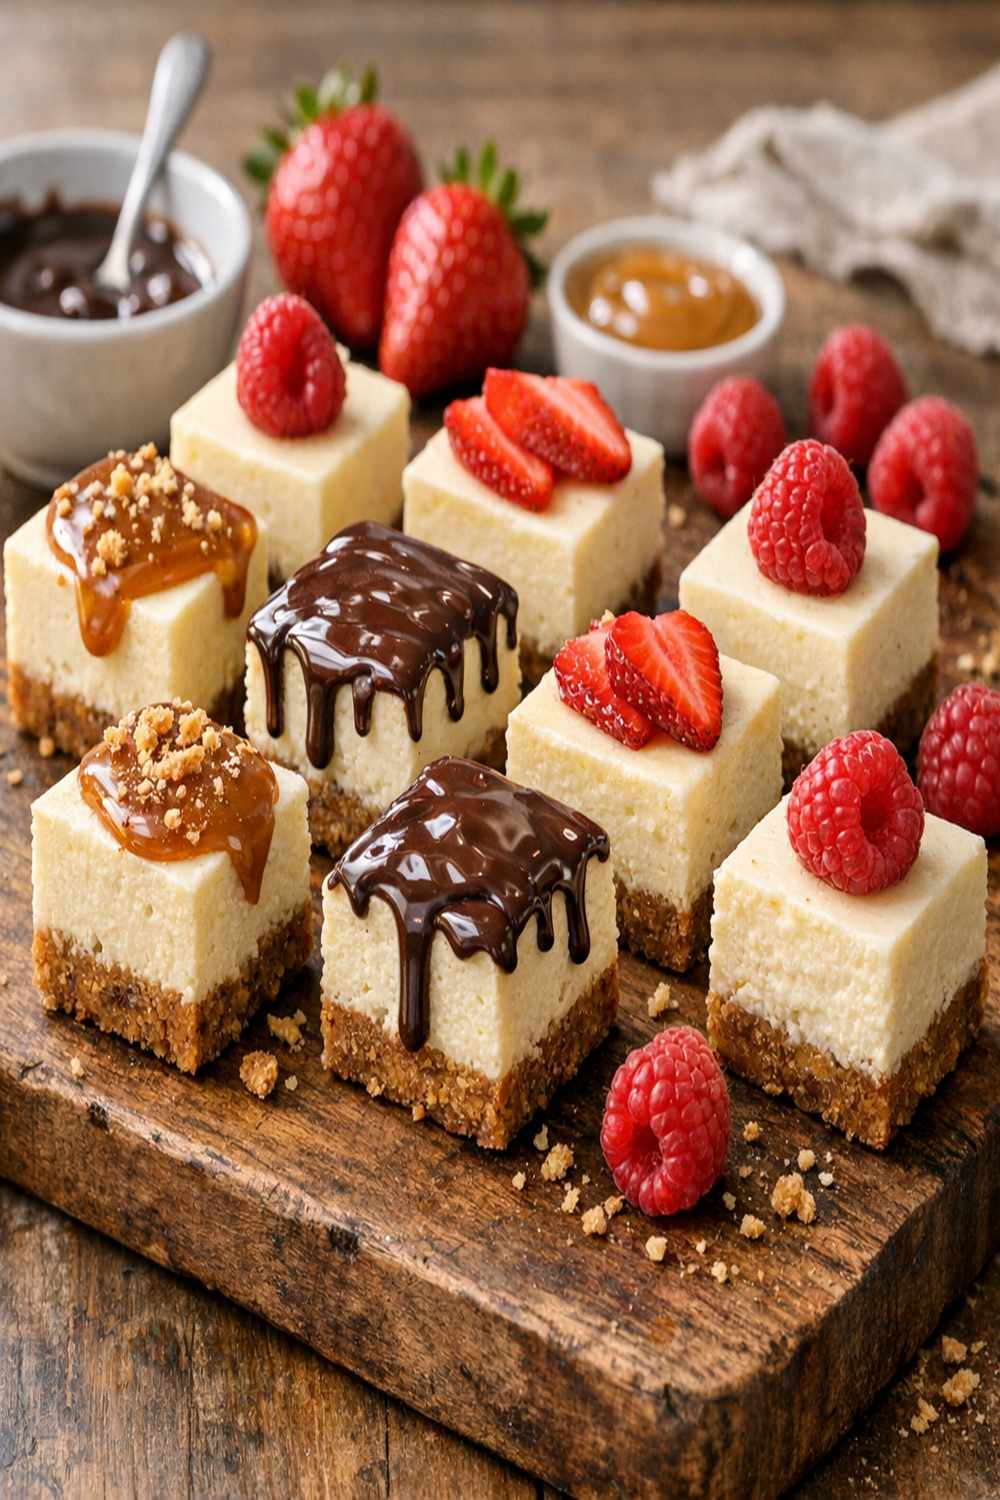
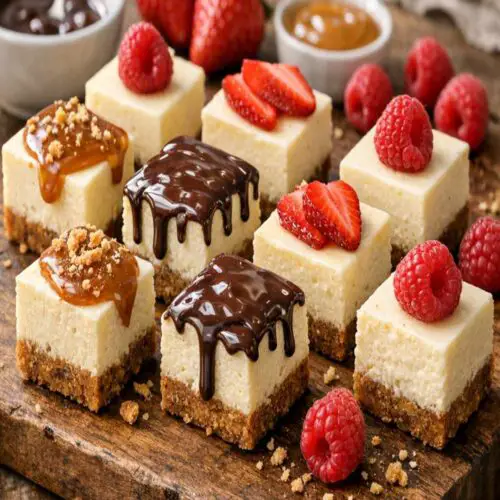
If you’re hunting for a dessert that looks like you spent hours in the kitchen but honestly takes minutes, these mini cheesecake bites are your answer. I pair mine with fresh berries, a strong cup of coffee, or even alongside savory appetizers like Italian Sandwich Pinwheels for a balanced dessert spread. They’re sophisticated enough for dinner parties yet simple enough for weeknight cravings.
How I Fell in Love With Bite-Sized Cheesecake
Back in 2021, my sister called asking for help with her bridal shower menu. She wanted something elegant that wouldn’t keep her in the kitchen all morning. I remember testing recipe after recipe in my home kitchen, getting frustrated with full-size cheesecakes that cracked or took forever to chill.
Then I had a moment—why not make them small? I grabbed my muffin tin, mixed up a simple no-bake filling, and within two hours, I had a gorgeous platter of individual bites ready to refrigerate overnight. When the shower arrived, guests raved about them. I realized that day: sometimes the best recipes aren’t about complexity. They’re about smart shortcuts that actually work.
What Is a Mini Cheesecake Bite?
A mini cheesecake bite is an individual, no-bake dessert made in a standard muffin tin. Unlike traditional cheesecake, which requires baking, water baths, and careful crack-prevention, these bites use a simple graham cracker base, a whipped cream filling, and refrigeration to set perfectly.
The magic is in the technique: we whip heavy cream to stiff peaks, then fold it into a sweetened cream cheese mixture. This creates an airy, mousse-like texture that’s lighter than baked cheesecake but just as satisfying. The result is creamy, no-fuss, and portable—ideal for entertaining or meal prep.
Why You’ll Love This Mini Cheesecake Bites Recipe
- Zero baking required – No oven, no water bath, no cracked tops. Just mix, chill, and serve. Perfect for warm weather entertaining when you don’t want to heat your kitchen.
- Make ahead by 24 hours – I prepare these the night before, which means less stress on serving day. They actually taste better after overnight refrigeration as flavors meld.
- Individually portioned – No slicing needed. Each guest gets their own perfect bite with no mess. Great for parties, potlucks, or portion-controlled snacking.
- Endlessly customizable – Change the toppings, swap the extract, add lemon zest, or drizzle with fruit coulis. The base recipe is your blank canvas.
- Requires basic equipment only – Muffin tin, mixing bowls, and an electric mixer. Nothing fancy needed for restaurant-quality results.
- Cost-effective for feeding a crowd – One batch makes 12 bites. Cream cheese and heavy cream stretch further than you’d expect when whipped and portioned this way.
The Ingredients
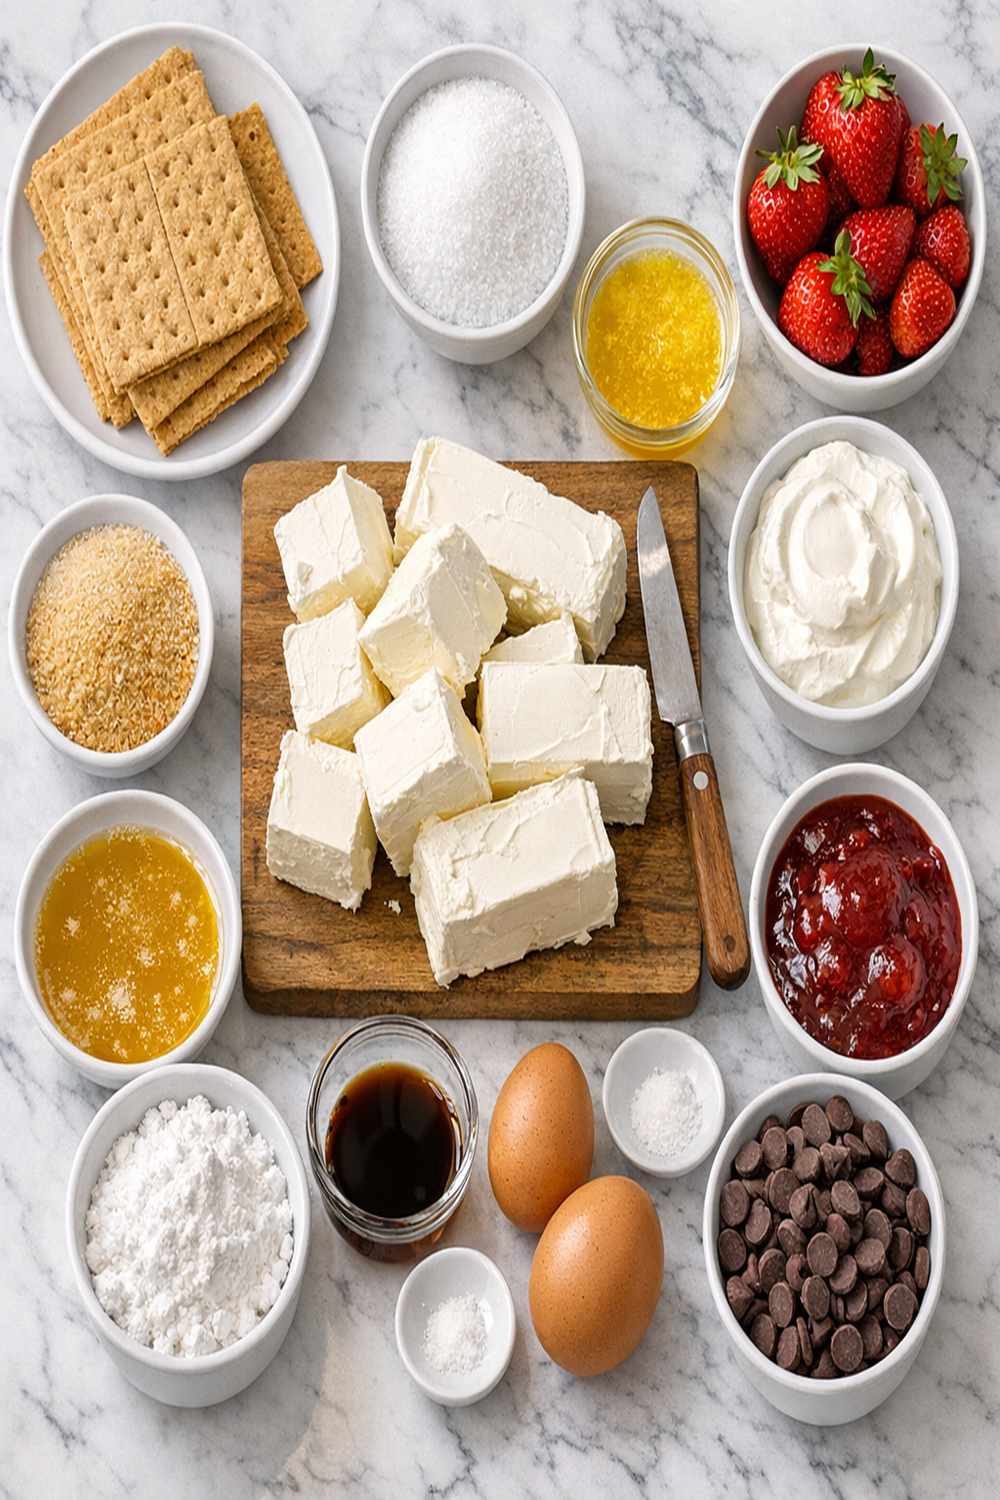
I’ve tested these bites with standard grocery store ingredients on regular equipment, so everything here is accessible. My ingredient list is intentionally simple—no specialty items or hard-to-find products. Makes 12 individual bites.
For the Crust
- 3 tablespoons granulated sugar (white or coconut sugar both work)
- 1 cup graham cracker crumbs (finely crushed from about 8 full crackers)
- ¼ cup unsalted butter (softened to room temperature, easier to mix)
For the Filling
- 3 tablespoons granulated sugar (or honey for subtle depth)
- ½ teaspoon fresh lemon juice (brightens the flavor and prevents heaviness)
- ½ cup heavy whipping cream (cold, straight from the refrigerator)
- 8 oz cream cheese (softened at room temperature for 30 minutes before mixing)
- Fresh berries or fruit compote (optional, for topping and brightness)
- 2 tablespoons honey drizzle (optional, for serving and depth of flavor)
- 1 tablespoon sour cream (adds tang; full-fat Greek yogurt is an excellent substitute)
- ½ teaspoon pure vanilla extract (not imitation, which tastes flat)
How to Make Mini Cheesecake Bites
This recipe is straightforward once you understand the two-part method: build the crust, prepare the filling, chill overnight. I’ve included timing cues and sensory clues so you know exactly when each step is complete. Let’s make these bites happen.
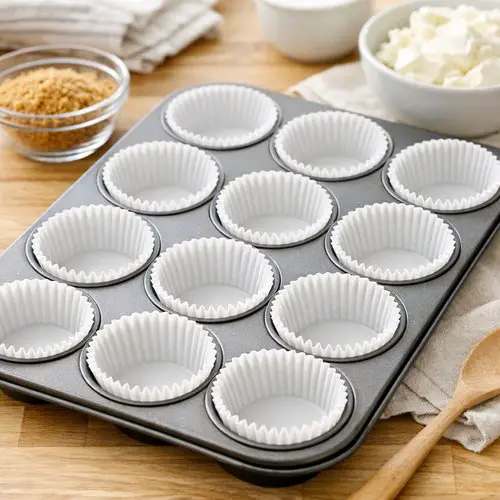
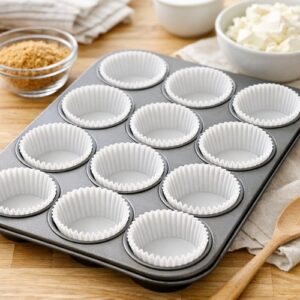
Step 1: Line Your Muffin Tin and Prepare the Work Space
Start by lining a standard 12-cup muffin tin with paper liners. I prefer liners because they make removal effortless—no sticky fingers or broken bites. Set your prepared tin on the counter where you’ll be working. This takes 2 minutes maximum and sets you up for success.
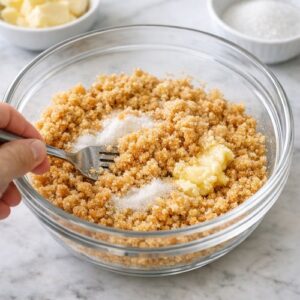
Step 2: Make the Graham Cracker Crust Base
In a small bowl, combine your crushed graham crackers, sugar, and softened butter. Use a fork or your fingertips to mix until the texture resembles coarse sand—you want small, butter-coated crumbs, not a wet paste. This should take about 1-2 minutes of mixing.
Divide the mixture evenly among all 12 liners, pressing gently with the back of a spoon or your thumb until each crust is compact and level. Don’t press too hard or you’ll create dense, hard bites. You’re looking for a light, even layer that holds together when pressed gently.
Place your crust-lined tin in the refrigerator while you prepare the filling. The cold base helps the filling set faster.

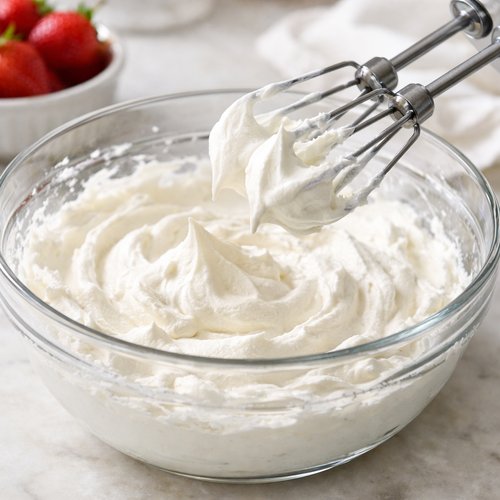
Step 3: Whip the Heavy Cream to Stiff Peaks
Pour your cold heavy cream into a clean bowl. Using an electric mixer on medium-high speed, beat the cream for 2-3 minutes until stiff peaks form. You’ll know it’s ready when you lift the beaters and the peaks stand straight up without drooping. This is a crucial step—don’t skip it or rush it.
Over-whipping creates butter, so stop as soon as you see stiff peaks. Transfer the whipped cream to a separate bowl and set aside. Keep it in a cool spot while you finish the next step.
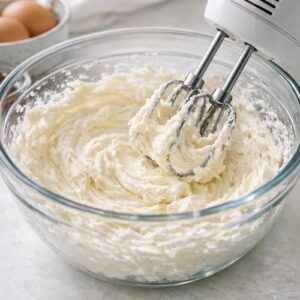
Step 4: Cream the Cheese and Sugar
In another clean bowl, add your softened cream cheese and sugar. Beat on medium speed for about 1-2 minutes until the mixture is smooth and fluffy. You’re looking for a texture that’s light and creamy, with no visible lumps or hard cream cheese pieces.
This step is essential for texture. Properly beaten cream cheese creates a smoother filling than cheese that hasn’t been whipped. If your kitchen is warm, you may need to pause and let the bowl chill in the refrigerator for 5 minutes.

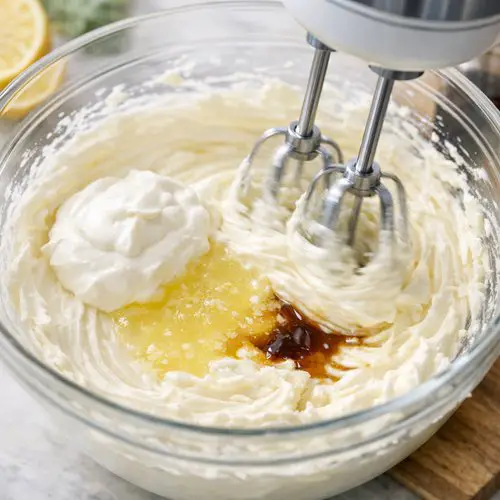
Step 5: Add the Flavor Elements and Combine
To your creamed cheese mixture, add the sour cream, lemon juice, and vanilla extract. Beat on medium speed for about 1 minute until everything is fully incorporated and smooth. The filling should be silky and pale, with absolutely no visible lumps or streaks.
The lemon juice is subtle but important—it prevents the filling from tasting one-dimensional and adds freshness that guests will notice but won’t identify. Taste a tiny spoonful if you’d like. It should taste creamy and slightly tangy.
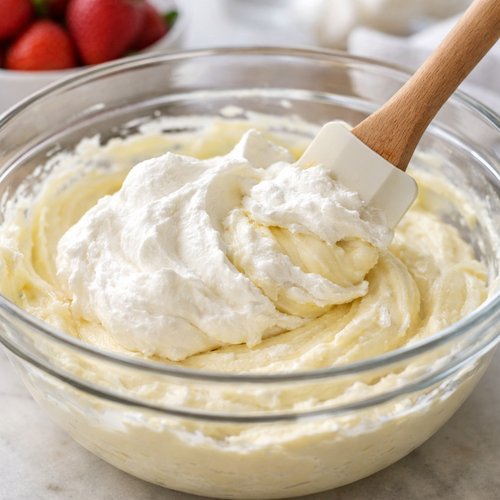
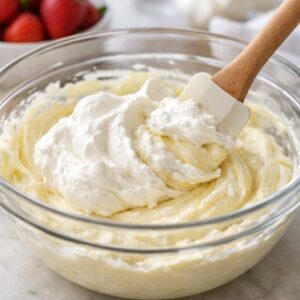
Step 6: Fold in the Whipped Cream Gently
This is where the magic happens. Add your whipped cream to the cheese mixture in two additions. First, fold in about half the whipped cream using a rubber spatula, using a gentle down-and-across motion rather than stirring. This helps the filling become light and airy.
Once incorporated, fold in the remaining whipped cream with the same gentle technique. Stop folding as soon as everything is combined and no white streaks remain. Over-folding deflates the whipped cream and defeats the purpose.
Your filling should now look cloud-like, mousse-like, and noticeably lighter than it was when you started. This texture is what makes these bites special—airy, creamy, and not heavy.
Step 7: Pipe the Filling Into Crusts
Transfer your filling into a piping bag fitted with a large star or round tip. Pipe about 2 tablespoons of filling into each crust, starting from the center and working outward. The filling should mound slightly above each crust.
If you don’t have a piping bag, you can use two spoons to divide the filling evenly, or even use a small ice cream scoop for consistent portions. A piping bag just makes it look prettier and feels more special—not required for delicious results.

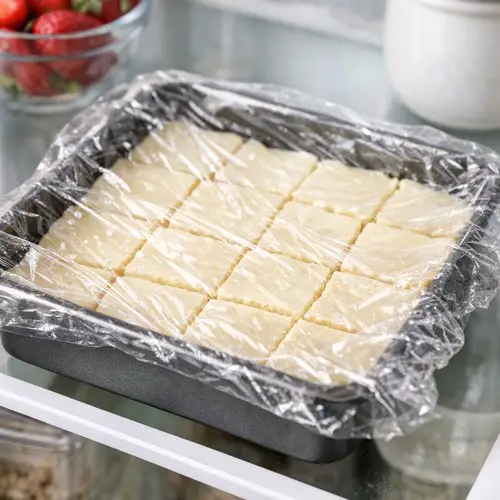
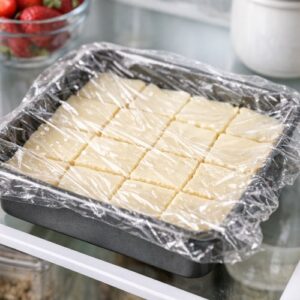
Step 8: Chill Overnight and Top Before Serving
Cover your pan loosely with plastic wrap or foil and refrigerate for at least 8 hours, preferably overnight. The filling will firm up and set completely as the gelatin from the sour cream and the cold temperature do their work.
Just before serving, top each bite with a small dollop of whipped cream, fresh berries, a drizzle of honey, or a sprinkle of crushed graham crackers. The bites are now ready to serve chilled and will keep for up to 3 days in the refrigerator.
Expert’s Nutritional Tip
As a registered dietitian, I’m often asked about the cream cheese in this recipe. Here’s what I tell clients: while cream cheese is higher in saturated fat, the portion size and the airy texture created by whipping keeps these bites modest in actual calories consumed per serving.
One bite contains approximately 180 calories but delivers about 3 grams of protein and a satisfying creamy texture that prevents overeating. The sour cream or Greek yogurt adds beneficial probiotics and extra richness without excess. When served with fresh berries, you’re adding fiber, antioxidants, and volume—making the dessert more balanced than you’d expect.
If you’re watching sodium or trying to reduce saturated fat, use half cream cheese and half ricotta cheese, or swap the sour cream for low-fat Greek yogurt. The filling will be slightly less rich but still delicious and more nutritious.
Tips and Tricks for Perfect Mini Cheesecake Bites
- Soften cream cheese properly – Leave it on the counter for 30 minutes. Cold cream cheese creates lumps no matter how much you beat it. Room temperature cream cheese mixes smoothly in seconds.
- Use cold heavy cream – Keep it in the coldest part of your refrigerator until the moment you whip it. Warm cream won’t whip to stiff peaks and your filling will be dense.
- Don’t skip the overnight chill – I know it’s tempting to serve them after 4 hours, but they genuinely taste better and hold their shape better after a full night in the refrigerator. The flavors meld and intensify.
- Make a double batch and freeze – Prepare these up to one week ahead and freeze them in an airtight container. Thaw in the refrigerator for 2 hours before serving. They taste freshly made.
- Customize the crust – Swap graham crackers for crushed vanilla wafers, digestive biscuits, or even Oreos for chocolate flavor. Keep the ratio of crumbs to butter the same.
- Flavor variations are your friend – Add 1 teaspoon of lemon zest, use almond extract instead of vanilla, or add a splash of liqueur like Kahlúa or Grand Marnier for adults.
- Use a piping bag for consistency – Piping ensures each bite gets exactly the same amount of filling, which looks professional and tastes consistent.
- Chill your bowl before whipping cream – Pop the mixing bowl and beaters in the freezer for 10 minutes before whipping. Cold equipment whips faster and more efficiently.
Make-Ahead Guide for Meal Prep
Up to 7 days ahead: Crush your graham crackers and store in an airtight container. Mix the dry crust ingredients (crumbs, sugar, butter) and refrigerate. This saves 10 minutes on assembly day.
2 days ahead: Prepare the entire recipe through Step 6. Cover and refrigerate. The filling actually firms up better with extra time, and you can top them the morning of serving.
1 day ahead (my preferred method): Complete the entire recipe, cover, and refrigerate overnight. Top with fresh berries and whipped cream no more than 2 hours before serving to keep them looking pristine.
Morning of serving: Remove from refrigerator 15 minutes before serving to slightly soften. Top with your chosen garnish. They’ll still be cold and creamy, with a slightly softer texture that’s actually more luxurious.
Freezing for later: Prepare through Step 7, cover tightly, and freeze for up to 2 weeks. Thaw in the refrigerator overnight before serving. They thaw beautifully and taste freshly made.
Can I Store Mini Cheesecake Bites?
Yes! These bites are actually perfect for making ahead. Store them in an airtight container in the refrigerator for up to 3 days. The filling stays creamy and the crust maintains its texture.
For longer storage, freeze them for up to 2 weeks in a freezer-safe container. Thaw overnight in the refrigerator before serving. I often make a double batch on Sunday and portion them throughout the week for grab-and-go breakfasts or afternoon treats.
Pro tip: If you’ve already topped them with whipped cream and berries, eat within 24 hours as the fresh toppings will soften. Store the plain bites and add toppings fresh, which only takes 2 minutes.
Nutrition Information
Based on USDA nutritional data per bite (12 servings per batch): Each mini cheesecake bite contains approximately 180 calories, 14 grams of total fat, 8 grams of carbohydrates, 3 grams of protein, and 85 milligrams of sodium.
The primary fat source is cream cheese and butter, with some from whipped cream—mostly saturated but in a balanced, satisfying form. When topped with fresh berries, you’re adding fiber, vitamin C, and natural sweetness without added sugar. These bites satisfy the cheesecake craving while staying reasonable for most eating plans.
If reducing calories, use reduced-fat cream cheese and Greek yogurt instead of sour cream, which brings the bite to approximately 140 calories with similar protein and improved nutritional profile.
What Can I Serve With Mini Cheesecake Bites?
These bites shine as a standalone dessert, but pairing them thoughtfully makes entertaining easier. I often serve them alongside coffee after dinner, with fresh fruit for brunch, or as part of a dessert spread at parties. They also pair beautifully with savory appetizers if you’re creating a mixed menu—the richness balances lighter bites like Cheeseburger Sliders.
- Fresh berries and whipped cream – The classic pairing. Raspberries, blueberries, or strawberries add brightness and cut through the richness perfectly.
- Fruit coulis or berry compote – A drizzle of homemade or store-bought berry sauce adds elegance and sophisticated flavor without much effort.
- Chocolate shavings and cocoa powder – Dust with dark chocolate powder or add shaved chocolate on top for decadence. Dark chocolate complements creamy cheesecake beautifully.
- Honey drizzle and crushed nuts – A small drizzle of honey, some crushed almonds or pecans, and a pinch of sea salt creates balance between sweet, salty, and nutty.
- Lemon curd or passion fruit curd – A small dollop of tangy curd on top adds brightness and visual appeal. This elevates the presentation instantly.
- Candied lemon slices – Since the filling has lemon juice, topping with a single candied lemon slice ties the flavor together and looks restaurant-quality.
- Coffee or espresso pairing – Serve alongside strong black coffee, espresso, or cold brew. The bitter notes of coffee balance the sweetness of cheesecake.
- Sparkling wine or dessert wine – A light sparkling wine or sweet Riesling pairs well for adult entertaining. The bubbles cleanse the palate between bites.
Common Mistakes to Avoid
- Using cold cream cheese – Cold cream cheese doesn’t blend smoothly and creates lumps that ruin texture. Always soften at room temperature for 30 minutes first.
- Overmixing the whipped cream into the filling – This deflates all the air you worked hard to whip in. Use gentle folding motions, not stirring. Once combined, stop immediately.
- Skipping the overnight chill – Rushing this step results in a softer, less-set filling that’s harder to serve and tastes less developed. Patience here is non-negotiable.
- Pressing the crust too firmly – Over-compacting the crust creates a hard, unpleasant bite texture. Press gently until the crust just holds together.
- Using room temperature whipped cream – If your whipped cream warms up while you’re folding, it collapses and won’t incorporate properly. Keep everything cold until the last moment.
Seasonal Variations
- Spring (strawberry lemon) – Add 1 teaspoon of lemon zest to the filling and top with fresh strawberries and a tiny lemon curd dollop. Fresh and bright.
- Summer (berry medley) – Top with a mix of raspberries, blackberries, and blueberries. Add fresh mint leaves for color and freshness.
- Fall (maple pecan) – Swap vanilla for maple extract, add ¼ teaspoon of cinnamon to the filling, and top with crushed candied pecans and a tiny drizzle of maple syrup.
- Winter (peppermint white chocolate) – Use peppermint extract instead of vanilla, add crushed candy canes to the crust, and drizzle white chocolate on top. Festive and cozy.
- Year-round (salted caramel) – Drizzle with salted caramel sauce and sprinkle with fleur de sel. Sweet, salty, and luxurious.
Substitutes and Swaps
- Reduced-fat cream cheese – Works well; the filling will be slightly less rich but still creamy. Use the same amount.
- Greek yogurt instead of sour cream – Use full-fat Greek yogurt for tang without sourness. Swap 1:1 by volume. Adds extra protein and probiotics.
- Almond flour crust – Mix ¾ cup almond flour with 3 tablespoons melted butter and 2 tablespoons honey instead of graham crackers. Slightly nuttier and lower-carb.
- Coconut cream instead of heavy whipping cream – Use full-fat canned coconut cream, chilled overnight. It whips similarly and adds tropical flavor. Use same amount.
- Alternative extracts – Almond extract, coconut extract, or orange extract all work beautifully. Use ½ teaspoon and adjust to taste.
- Honey or maple syrup instead of granulated sugar – These add depth and subtle complexity. Use slightly less (2 tablespoons instead of 3) as they’re sweeter and provide moisture.
- Ricotta cheese mixed with cream cheese – Blend 4 oz cream cheese with 4 oz ricotta for a lighter filling with slightly different texture. Still creamy but less dense.
Cheesecake Bites Recipe
Ingredients
For the Crust
- 3 tablespoon granulated sugar white or coconut sugar both work
- 1 cup graham cracker crumbs finely crushed from about 8 full crackers
- ¼ cup unsalted butter softened to room temperature, easier to mix
For the Filling
- 3 tablespoon granulated sugar or honey for subtle depth
- ½ teaspoon fresh lemon juice brightens the flavor and prevents heaviness
- ½ cup heavy whipping cream cold, straight from the refrigerator
- 8 oz cream cheese softened at room temperature for 30 minutes before mixing
- Fresh berries or fruit compote optional, for topping and brightness
- 2 tablespoon honey drizzle optional, for serving and depth of flavor
- 1 tablespoon sour cream adds tang; full-fat Greek yogurt is an excellent substitute
- ½ teaspoon pure vanilla extract not imitation, which tastes flat
Instructions
Step 1: Line Your Muffin Tin and Prepare the Work Space
- Start by lining a standard 12-cup muffin tin with paper liners. I prefer liners because they make removal effortless—no sticky fingers or broken bites. Set your prepared tin on the counter where you'll be working. This takes 2 minutes maximum and sets you up for success.
Step 2: Make the Graham Cracker Crust Base
- In a small bowl, combine your crushed graham crackers, sugar, and softened butter. Use a fork or your fingertips to mix until the texture resembles coarse sand—you want small, butter-coated crumbs, not a wet paste. This should take about 1-2 minutes of mixing. Divide the mixture evenly among all 12 liners, pressing gently with the back of a spoon or your thumb until each crust is compact and level. Don't press too hard or you'll create dense, hard bites. You're looking for a light, even layer that holds together when pressed gently. Place your crust-lined tin in the refrigerator while you prepare the filling. The cold base helps the filling set faster.
Step 3: Whip the Heavy Cream to Stiff Peaks
- Pour your cold heavy cream into a clean bowl. Using an electric mixer on medium-high speed, beat the cream for 2-3 minutes until stiff peaks form. You'll know it's ready when you lift the beaters and the peaks stand straight up without drooping. This is a crucial step—don't skip it or rush it. Over-whipping creates butter, so stop as soon as you see stiff peaks. Transfer the whipped cream to a separate bowl and set aside. Keep it in a cool spot while you finish the next step.

Step 4: Cream the Cheese and Sugar
- In another clean bowl, add your softened cream cheese and sugar. Beat on medium speed for about 1-2 minutes until the mixture is smooth and fluffy. You're looking for a texture that's light and creamy, with no visible lumps or hard cream cheese pieces. This step is essential for texture. Properly beaten cream cheese creates a smoother filling than cheese that hasn't been whipped. If your kitchen is warm, you may need to pause and let the bowl chill in the refrigerator for 5 minutes.
Step 5: Add the Flavor Elements and Combine
- To your creamed cheese mixture, add the sour cream, lemon juice, and vanilla extract. Beat on medium speed for about 1 minute until everything is fully incorporated and smooth. The filling should be silky and pale, with absolutely no visible lumps or streaks. The lemon juice is subtle but important—it prevents the filling from tasting one-dimensional and adds freshness that guests will notice but won't identify. Taste a tiny spoonful if you'd like. It should taste creamy and slightly tangy.

Step 6: Fold in the Whipped Cream Gently
- This is where the magic happens. Add your whipped cream to the cheese mixture in two additions. First, fold in about half the whipped cream using a rubber spatula, using a gentle down-and-across motion rather than stirring. This helps the filling become light and airy. Once incorporated, fold in the remaining whipped cream with the same gentle technique. Stop folding as soon as everything is combined and no white streaks remain. Over-folding deflates the whipped cream and defeats the purpose. Your filling should now look cloud-like, mousse-like, and noticeably lighter than it was when you started. This texture is what makes these bites special—airy, creamy, and not heavy.
Step 7: Pipe the Filling Into Crusts
- Transfer your filling into a piping bag fitted with a large star or round tip. Pipe about 2 tablespoons of filling into each crust, starting from the center and working outward. The filling should mound slightly above each crust. If you don't have a piping bag, you can use two spoons to divide the filling evenly, or even use a small ice cream scoop for consistent portions. A piping bag just makes it look prettier and feels more special—not required for delicious results.

Step 8: Chill Overnight and Top Before Serving
- Cover your pan loosely with plastic wrap or foil and refrigerate for at least 8 hours, preferably overnight. The filling will firm up and set completely as the gelatin from the sour cream and the cold temperature do their work. Just before serving, top each bite with a small dollop of whipped cream, fresh berries, a drizzle of honey, or a sprinkle of crushed graham crackers. The bites are now ready to serve chilled and will keep for up to 3 days in the refrigerator.
Notes
FAQs
Can I make these bites without heavy cream?
Technically yes, but they won’t have the same light, airy texture that makes them special. If you must skip heavy cream, increase the cream cheese to 10 oz and add 2 tablespoons of mascarpone for richness. The texture will be denser, more like traditional cheesecake filling. You could also use whipped coconut cream or cashew cream as alternatives that whip similarly to heavy cream.
How do I prevent cracks in the filling?
Cracks occur when the filling is overmixed or when temperatures aren’t consistent. Follow these three rules: soften cream cheese to room temperature, keep heavy cream cold, and fold gently rather than stir. If you do see cracks after chilling, smooth them with a warm knife or cover with toppings. The whipped texture of this filling is forgiving compared to baked cheesecake.
Can I make these in advance for a party?
Absolutely—this is my favorite use for this recipe. Prepare them 1-2 days in advance, cover tightly, and refrigerate. Top with fresh berries and whipped cream no more than 2 hours before serving. They actually taste better with time as flavors meld. I’ve made these up to a week ahead and frozen them successfully.
What’s the best way to remove them from the liners?
The paper liners should peel away easily. Gently run a thin knife around the edge if they stick, then peel slowly. If your kitchen was warm during prep, they might be softer than you’d like. Pop them back in the refrigerator for 15 minutes, then try again. For removal without liners, lightly spray the muffin tin with cooking spray first.
Can I double or triple this recipe?
Yes, and I do this often for parties. Simply multiply all ingredients by the number of batches you need. One important note: when whipping cream in larger quantities, it may take slightly longer to reach stiff peaks. Use a stand mixer if you’re making 3+ batches at once. The technique remains the same—just more of it.
Do these work for dietary restrictions?
With modifications, yes. For dairy-free, use cashew cream and dairy-free cream cheese (though texture will differ). For lower-carb, use almond flour crust and adjust sweetener. For gluten-free, use gluten-free graham crackers. For lower-sugar, use monk fruit or erythritol instead of sugar. Each swap changes the outcome slightly, so test a single batch first.
More Recipes You’ll Love
- this simple cake – A warm, spiced take on cheesecake that’s baked in an Instant Pot for foolproof results.
- these homemade cookies – Layered cookie dough in jars makes a gorgeous gift and feels as special as these bites.
- Instant Pot Teriyaki Chicken and Rice – When you need a complete weeknight meal before dessert, this delivers.
- This Homemade Lemon Recipe – Worth adding to your recipe collection.
- My Go-To Cookie Recipe – Worth adding to your recipe collection.
- These Crowd-Pleasing Cookies – Worth adding to your recipe collection.
These mini cheesecake bites have become my secret weapon for entertaining, meal prep, and those moments when I want something that feels indulgent but actually isn’t stressful to make. They’ve appeared at baby showers, dinner parties, family gatherings, and countless afternoons when I simply wanted something beautiful and creamy without heating my oven.
What I love most is how they prove you don’t need complicated techniques or fancy equipment to create something restaurant-quality. Your standard muffin tin, some cream cheese, and patience deliver cheesecake magic. These bites remind me why I became a dietitian who loves cooking: good food connects us to people we care about, and when that food is easy enough to make stress-free, everyone wins.
Make a batch this week. Chill them overnight. Top them however you like. Serve them with pride. Your guests will think you spent hours in the kitchen, and you’ll smile knowing the secret: good food is a good mood!

My name is Lori Walker. I’m a registered dietitian, food blogger and food enthusiast. I share easy healthy, delicious recipes on my blog and review necessary kitchen items. The recipes I share take less… Read more