
Crunchy Tacos Recipe
There's something magical about biting into a perfectly crispy taco—that satisfying crunch followed by warm, seasoned beef and melted cheese. I'm sharing my go-to crunchy tacos recipe that delivers restaurant-quality results in your own kitchen. Pair these with a fresh my favorite salad for a complete meal, or serve them alongside Korean Asparagus for a fun fusion dinner night.
Print
Pin
Rate
Servings: 8
Calories: 322kcal
Ingredients
For the Beef Filling
- 2 tablespoon taco seasoning a convenient packet works wonderfully, or use homemade if you prefer
- 8 ounce Colby Jack cheese (shredded into two portions
- 8 to 10 corn tortillas 6-inch size, white or yellow, whatever you prefer
- 1 tablespoon neutral cooking oil canola or vegetable oil is my go-to
- Additional neutral oil for brushing the folded tortillas
- 1 can diced green chiles 4 ounces
- ½ cup water this helps the spices bloom and distribute evenly
- 1 pound ground beef 85% lean/15% fat blend works perfectly for maximum flavor
- Salt and pepper to taste, added at the end
- 3 clove garlic freshly minced, never from a jar
- 1 lime juiced, approximately 2 tablespoons of fresh juice
For the Chipotle Crema
- 2 chipotle peppers in adobo sauce, these add gorgeous smoky heat
- Salt to taste
- 1 clove garlic minced, for bright flavor
- ¾ cup Mexican crema or sour cream full-fat versions create the creamiest sauce
- ½ lime juiced, approximately 1 tablespoon fresh juice
- 1 teaspoon honey or light sugar balances the heat beautifully
Instructions
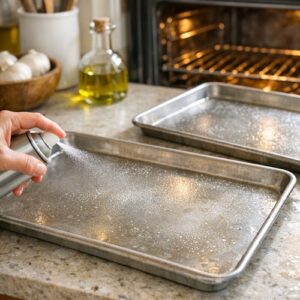
Step 1: Prepare Your Oven and Baking Sheets
- Start by preheating your oven to 425°F. While it's heating, lightly oil or spray two standard baking sheets (I use regular half-sheet pans measuring 18 by 13 inches) with nonstick spray. This prevents sticking and makes cleanup much easier. Set them aside near your cooking station.
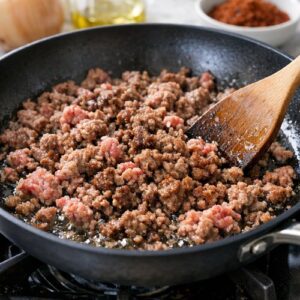
Step 2: Brown the Ground Beef
- Pour 1 tablespoon of neutral oil into a medium-sized skillet and heat it over medium heat for about 1 minute—you want it hot enough that a small piece of beef sizzles immediately when it hits the pan. Add your ground beef and cook, breaking it into small crumbles with a wooden spoon or spatula, until no pink remains, approximately 5 to 7 minutes. You should hear it sizzling gently throughout cooking. Once cooked through, carefully pour the beef into a fine-mesh strainer to drain excess fat—this step prevents greasy tacos.
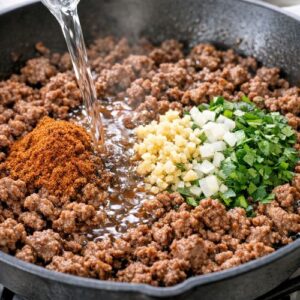
Step 3: Build the Flavorful Beef Mixture
- Return the drained beef to the skillet (no need to rinse it) and place it back over medium heat. Add your taco seasoning, water, minced garlic, fresh lime juice, canned green chiles (including their liquid for extra flavor), and a pinch of salt and pepper to your preference. Stir everything together thoroughly to combine. Let this simmer gently, stirring occasionally, until most of the liquid has evaporated, approximately 5 minutes. You'll notice the mixture becoming more concentrated and fragrant as the water reduces. The beef should look moist but not soupy. Once it reaches this stage, stir in 1 cup of your shredded Colby Jack cheese until it's completely melted and distributed throughout. The cheese creates creamy pockets that make each bite delicious. Turn off the burner and remove the skillet from heat.
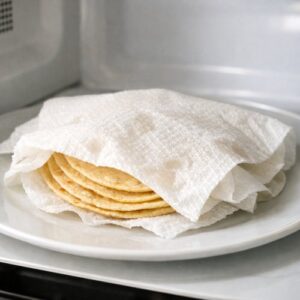
Step 4: Warm Your Tortillas for Perfect Pliability
- This step is crucial for preventing broken tacos, so don't skip it. Wrap your corn tortillas in a slightly damp paper towel and microwave them for 45 to 60 seconds, then flip the stack over halfway through. The steam softens the tortillas and makes them pliable instead of brittle. Once the time is up, carefully unwrap them and test one by trying to fold it gently. If the tortilla breaks or resists folding, give them another 10 seconds in the microwave. Pliable tortillas will fold smoothly without cracking—this is your signal that they're ready.
Step 5: Fill and Fold Your Tacos
- Working with one tortilla at a time, spread approximately ¼ cup of the warm beef mixture down one half of the tortilla, leaving about ½ inch from the edges. Top that filling with a modest pinch of your remaining shredded cheese—we're not aiming for overflowing tacos here, as excess filling tends to ooze out during baking and create a mess on your baking sheets. Fold the tortilla in half over the filling, pressing gently so everything stays inside. Place the folded taco on your prepared baking sheet. Repeat with remaining tortillas and filling. I typically fit about 6 tacos per standard baking sheet comfortably. You should yield 8 to 10 tacos total from this recipe.

Step 6: Brush with Oil for Golden Crispiness
- Using a pastry brush or even a clean fingertip, lightly brush just a little additional oil over the top surface of each folded taco. This is what creates that golden-brown, crispy exterior we're after. You don't need much—just enough to coat the surface lightly. Less oil here means healthier tacos without sacrificing that satisfying crunch.

Step 7: Bake Until Golden and Crispy
- Place your baking sheets in the preheated 425°F oven. Bake for 15 to 20 minutes without flipping—there's no need to turn them. You're looking for the tacos to become golden brown and noticeably crispy to the touch. The tortillas should sound crispy when you tap them lightly with a fork. The exact timing depends on your oven's personality (every oven bakes slightly differently), so start checking around the 15-minute mark. The first time you make these, you might peek a few times—that's completely normal and actually helpful for learning your oven's timing.

Step 8: Make Your Chipotle Crema While Tacos Bake
- While your tacos are baking, prepare the crema—it only takes 2 minutes. Add your Mexican crema or sour cream, chipotle peppers in adobo sauce, honey or sugar, fresh lime juice, minced garlic, and a pinch of salt to a food processor. Blend until completely smooth, approximately 1 to 2 minutes. Taste a small spoonful and adjust to your preference. If you want it spicier, add another half chipotle pepper. If you prefer it less spicy, add a touch more crema. If it tastes slightly sharp, a pinch more honey rounds it out beautifully. This crema is forgiving, so trust your palate.

Step 9: Assemble and Serve
- Remove your crispy tacos from the oven and let them cool for just 2 to 3 minutes—they'll continue crisping slightly as they cool. Arrange them on a serving platter and set out your prepared toppings in small bowls so everyone can customize their own tacos. Drizzle or dollop the chipotle crema over each taco, then add your favorite toppings. The combination of hot, crispy tacos with cool, creamy toppings creates an absolutely magical eating experience.

Notes
- Don't skip the tortilla steaming step - This single step prevents broken tacos and makes the entire process feel less stressful. Warm, pliable tortillas are the foundation of success.
- Use 85/15 ground beef for the best balance - It has enough fat to stay flavorful but not so much that you're draining excess liquid constantly. This ratio prevents greasy tacos while keeping everything tender.
- Fresh lime juice makes a noticeable difference - Bottled juice tastes noticeably different and less bright. Spend 30 seconds squeezing fresh limes—your tacos will taste noticeably better.
- Fill conservatively to prevent oozing - You might feel tempted to stuff these tacos generously, but restraint prevents filling from leaking out during baking. About ¼ cup per taco is your sweet spot.
- Set up a toppings station - Having all your toppings prepped and arranged before you serve makes the meal feel more special and restaurant-like. Plus, it's less chaotic than hunting through the fridge.
- Let tacos cool slightly before eating - They continue crisping during the 2-to-3-minute cooling window, creating an even better texture than eating them straight from the oven.