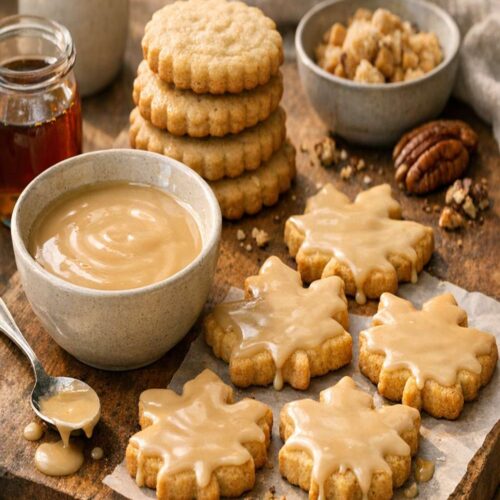
Maple Cookie Glaze Recipe
There's nothing quite like a warm maple cookie fresh from the oven, paired with a steaming mug of coffee or a cold glass of milk. I've spent the last five years recording family recipes, and the maple cookies with that signature glaze keep showing up in my most-requested boxes. They're the kind of treat that brings everyone to the kitchen table—no matter the season. If you love classic fall flavors, you might also enjoy my Krollskorner Pumpkin Bread, which pairs beautifully with these glazed beauties for an autumn dessert spread.
Print
Pin
Rate
Servings: 28 8
Ingredients
For the Cookies
- 2⅓ cup all-purpose flour 292g, spooned and leveled, never packed
- 1 teaspoon baking soda leavening agent for tender cookies
- 1 cup chopped pecans 120g, toasted for deeper flavor
- 1 large egg room temperature for better incorporation
- ½ cup unsalted butter 8 tablespoons, or 113g, softened to room temperature
- 1 teaspoon maple extract this is non-negotiable for authentic flavor
- 1 cup packed dark brown sugar 200g, provides moisture and caramel notes
- 2 tablespoon granulated sugar optional but recommended, for rolling before baking
- 1 teaspoon pure vanilla extract not imitation, enhances sweetness
- ⅓ cup pure maple syrup 113g or 80ml, use real syrup, never imitation
- ¼ teaspoon salt balances sweetness and enhances flavor
For the Glaze
- 2 tablespoon unsalted butter 28g, for silky texture
- ⅓ cup pure maple syrup 113g or 80ml, the foundation of the glaze
- Pinch of salt to taste, balances sweetness
- 1 cup confectioners' sugar 112g, sifted to prevent lumps
Instructions
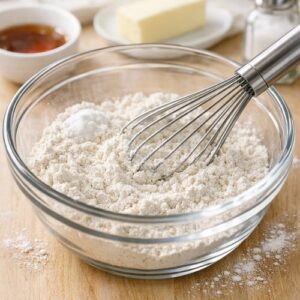
Step 1: Mix Your Dry Ingredients
- Start with a medium-sized mixing bowl. Add your flour, baking soda, and salt together. Use a whisk to combine them thoroughly—this distributes the baking soda evenly so your cookies rise uniformly. The mixture should look light and homogeneous, with no streaks of baking soda visible. Set this bowl aside while you work on the wet ingredients. This seems like a small step, but it's crucial for consistent results.
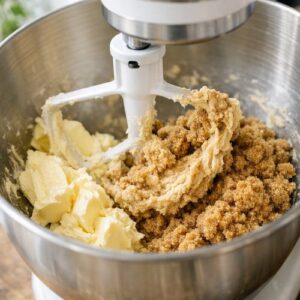
Step 2: Cream Butter and Brown Sugar
- In a large mixing bowl (use a stand mixer fitted with a paddle attachment, or a handheld mixer), add your softened butter and packed brown sugar. Beat on medium-high speed for approximately 3 minutes until the mixture becomes light, fluffy, and noticeably pale in color. You should be able to see air bubbles incorporated throughout. This step is essential—you're aerating the mixture, which helps the cookies rise evenly and creates that tender crumb. If your butter is cold, the mixture will look grainy and refuse to fluff up. Room temperature really matters here. I learned this the hard way after baking in a chilly kitchen one January morning!
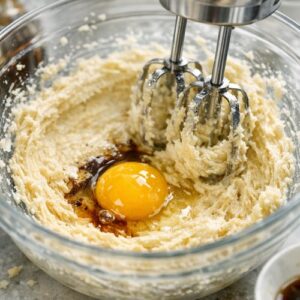
Step 3: Add Egg and Extracts
- Crack your room-temperature egg directly into the butter mixture. Beat on high speed for about 30 seconds until the egg is fully incorporated and the mixture looks smooth again. You might see it look slightly curdled for a moment—that's normal, and it will smooth out. Now add your maple syrup, vanilla extract, and maple extract all at once. Beat on high speed for approximately 1 minute until everything is completely combined and the mixture looks silky. The maple extract is what gives these cookies their distinctive flavor—don't skip it, even though it seems like a small amount. Pure maple extract is potent and creates an authentic taste you simply cannot achieve with syrup alone.
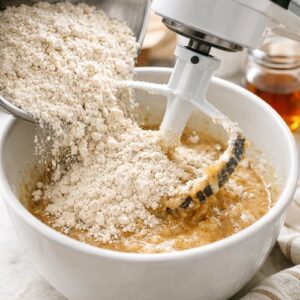
Step 4: Combine Wet and Dry Ingredients
- Pour your dry ingredient mixture into the wet ingredients. Reduce your mixer speed to low and beat until just combined—this should take about 1 minute. The dough will look slightly thick and creamy. Be careful not to overmix at this stage, as that can lead to tough cookies. You want just enough mixing to incorporate the flour.
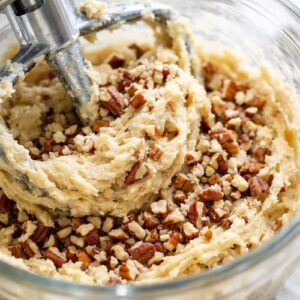
Step 5: Fold in the Pecans
- Add your chopped pecans to the dough and beat on low speed until they're just incorporated throughout, about 30 seconds. The dough should look creamy and soft, studded with pecan pieces. If you prefer more pecan flavor in every bite, you can fold them in by hand using a rubber spatula instead of the mixer—this gives you more control.
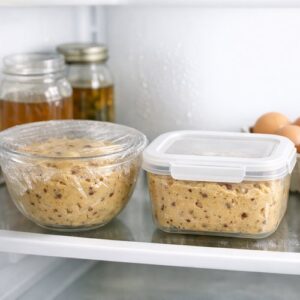
Step 6: Refrigerate the Dough
- Cover your dough tightly with plastic wrap or transfer it to an airtight container. Place it in the refrigerator for at least 2 hours, and up to 3 days. This resting period allows the flavors to develop and makes the dough much easier to scoop and shape. I often prepare my dough the night before baking, which means fresh cookies for breakfast or as an afternoon snack. If you've refrigerated your dough for longer than 3 hours, let it sit at room temperature for about 30 minutes before scooping. Cold dough is harder to work with and may crack when you try to roll it into balls.
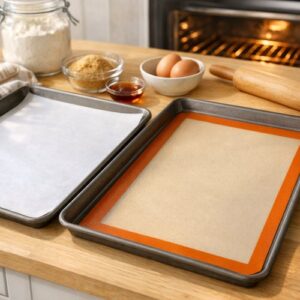
Step 7: Prepare Your Baking Station
- Preheat your oven to 350°F (177°C) about 15 minutes before you plan to bake. Line two large baking sheets with parchment paper or silicone baking mats. I always recommend using mats or parchment—they prevent sticking, ensure even browning, and make cleanup effortless. This is one of my top time-saving tips.
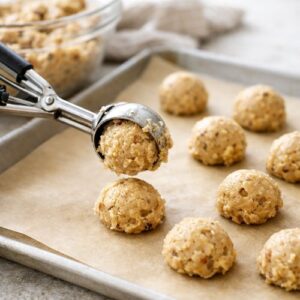
Step 8: Scoop and Shape the Cookies
- Using a cookie scoop or measuring spoon, portion out the dough into balls. Each cookie should be approximately 1.5 tablespoons (35g) of dough. If you want an optional decorative touch, gently roll each ball in a tiny pinch of granulated sugar before placing it on the baking sheet—this creates a subtle sparkle and adds a hint of crunch to the edges. Arrange the cookies at least 3 inches apart on your prepared baking sheets. They will spread slightly during baking, so adequate spacing is important. I typically fit about 12 cookies per standard baking sheet.
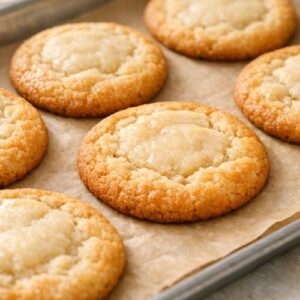
Step 9: Bake Until Golden
- Bake for 12 to 13 minutes until the edges are lightly browned and set, but the centers still look very soft and slightly underbaked. This is the key to soft, chewy cookies—you want to pull them out while the middle still has a little give. They will continue to cook on the hot pan after you remove them from the oven. If your oven tends to run hot, check at 11 minutes. If it runs cool, you might need the full 13 minutes. Every oven is different, and I've tested this recipe on three different models to ensure it works in real home kitchens.
Step 10: Cool the Cookies Properly
- Remove the baking sheets from the oven and let the cookies cool directly on the pan for exactly 5 minutes. During this time, they will firm up enough to transfer but remain soft. Using a wide spatula, carefully transfer each cookie to a cooling rack to cool completely. Complete cooling takes about 20 to 30 minutes at room temperature. This is crucial before you apply the glaze—warm cookies will melt the glaze, and it won't set properly. I use this cooling time to clean up my mixing bowls and prepare the glaze ingredients.
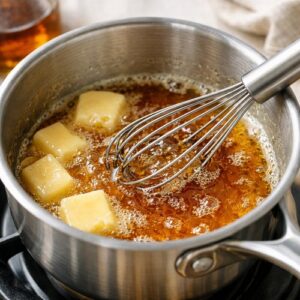
Step 11: Make the Maple Glaze
- While your cookies cool, prepare the glaze. In a small saucepan over low heat, combine your butter and pure maple syrup. Whisk occasionally as the butter melts—this takes about 2 to 3 minutes. You want everything to combine smoothly without simmering or bubbling. Once the butter is completely melted and the mixture looks homogeneous, remove the pan from heat. Whisk in your sifted confectioners' sugar and a pinch of salt. The mixture will thicken as it cools slightly. Whisk until smooth and pourable—it should have the consistency of thin syrup, not thick frosting. Taste a tiny spoonful of the glaze. If it needs a touch more salt to balance the sweetness, add another pinch. This is how I've always done it, and it ensures every batch tastes perfect.
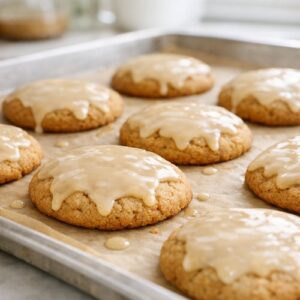
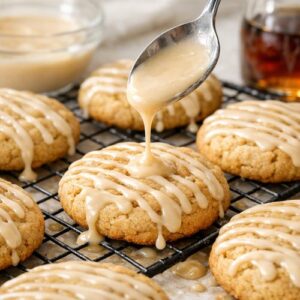
Step 12: Glaze and Set
- Once your cookies are completely cooled, drizzle the maple glaze over each one using a fork or the back of a spoon. You can be generous or subtle—it's entirely up to your preference. I like to create a thin, even coating that covers most of the top but allows some of the cookie to show through. Place the glazed cookies on a clean cooling rack or parchment paper and let the glaze set at room temperature for about 1 hour. You can speed this up slightly by placing cookies in a cool part of your kitchen or near an open window, but avoid refrigerating—cold temperatures can cause the glaze to become too firm and thick.
Notes
- Use a cookie scoop for uniform sizing - Consistent cookie size means consistent baking time. I use a standard 1.5-tablespoon scoop, and it's made my baking so much more reliable. Uniform cookies also look beautiful when stacked for gift-giving.
- Room temperature ingredients are non-negotiable - Bring your egg, butter, and maple syrup to room temperature before mixing. Cold ingredients won't incorporate smoothly, and you'll end up with a grainy dough instead of a creamy one. I set my ingredients on the counter about 1 hour before baking.
- Don't overbake—embrace the soft center - The centers should look underbaked when you pull them from the oven. They firm up on the hot pan and create that perfect chewy texture. Overbaking is the most common mistake I see, and it results in crispy, hard cookies instead of soft ones.
- Pure maple syrup and maple extract are worth the investment - Don't use pancake syrup or imitation maple flavoring. The real ingredients taste dramatically different and justify their higher cost. Your maple cookies should taste authentically maple, not artificial.
- Sift your confectioners' sugar for the glaze - Lumpy glaze is frustrating. A fine-mesh sieve takes 30 seconds and ensures your glaze is silky smooth. This is a small step that makes a big difference in how professional your finished cookies look.
- Store cooled cookies and glaze separately if making ahead - If you're baking cookies days in advance, store them unglazed in an airtight container. Make the glaze fresh and drizzle just before serving for the most beautiful presentation.