This post contains affiliate links. As an Amazon Associate I earn from qualifying purchases.
There’s nothing quite like a warm maple cookie fresh from the oven, paired with a steaming mug of coffee or a cold glass of milk. I’ve spent the last five years recording family recipes, and the maple cookies with that signature glaze keep showing up in my most-requested boxes. They’re the kind of treat that brings everyone to the kitchen table—no matter the season. If you love classic fall flavors, you might also enjoy my Krollskorner Pumpkin Bread, which pairs beautifully with these glazed beauties for an autumn dessert spread.
How My Family’s Maple Cookie Tradition Began
I’ll never forget the October morning my grandmother pulled a batch of these maple cookies from her old electric oven. The kitchen filled with this warm, amber-colored sweetness—a smell I’d come to chase my entire life. She didn’t follow a recipe card; she just knew the dough by feel and the glaze by taste. When I finally sat down to recreate those memories in 2019, I tested this version dozens of times on my standard kitchen equipment.
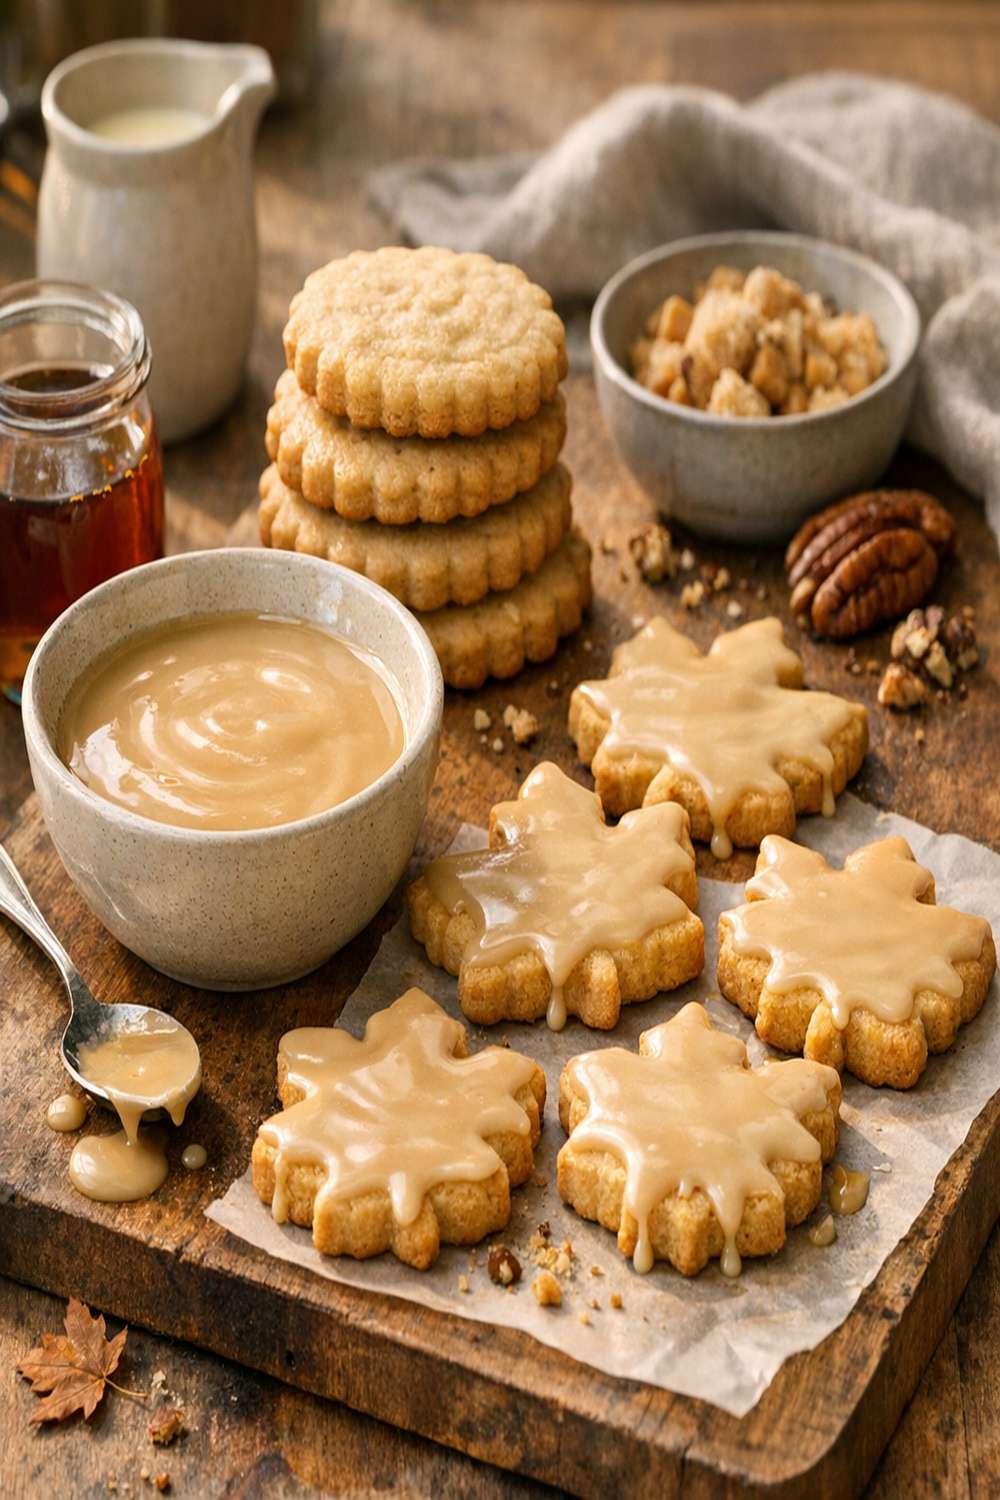
What makes these cookies so special isn’t just the maple syrup stirred into the dough. It’s that glossy, pourable glaze that sets into a delicate shell, and the toasted pecans that add a little crunch against the soft center. This recipe captures that exact joy I felt as a kid watching Grandma work her magic.
What is a Maple Cookie Glaze Recipe?
Maple cookies have deep roots in American baking, especially in New England and Canada where maple syrup production is part of the cultural fabric. These aren’t overly complicated treats—they’re straightforward butter cookies enriched with both maple syrup and a hint of maple extract, which creates that distinctive flavor you can’t quite replicate any other way.
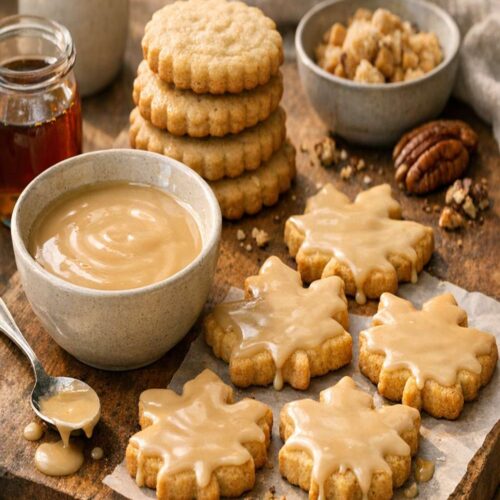
The glaze is where the magic happens. Unlike thick frostings that sit heavy on your tongue, this glaze is silky and thin. It melts into every crevice of the cooled cookie, then sets into a sweet, polished finish. The combination of butter, maple syrup, and confectioners’ sugar creates something that tastes both simple and sophisticated—the kind of cookie you’d find at a fancy bakery, but that you absolutely can make at home in your own kitchen.
Why You’ll Love This Maple Cookie Glaze Recipe
- Pure maple flavor without overpowering sweetness – The balance of maple syrup and maple extract in the dough, combined with the silky glaze, creates a sophisticated taste that isn’t cloyingly sweet. As a registered dietitian, I’ve learned that when flavors are well-balanced, we enjoy foods more fully and feel more satisfied.
- Soft, chewy centers with perfectly set edges – I’ve tested the baking time on three different ovens, and the magic window is 12 to 13 minutes. The edges will look lightly golden, but the centers will appear almost underbaked—that’s exactly right. They finish cooking on the hot pan.
- Make-ahead friendly for busy schedules – The dough refrigerates for up to 3 days, which means you can prepare everything on Sunday and bake fresh cookies throughout the week. This is my favorite time-saving strategy for home cooks who want homemade treats without the stress.
- Pecans add nutrition and texture – Pecans bring healthy fats and fiber to each bite. They’re toasted during baking, which deepens their natural buttery flavor and pairs beautifully with maple.
- Simple ingredients you already have on hand – This recipe uses pantry staples. If you’re new to baking or looking for an approachable cookie recipe, this one won’t intimidate you.
The Ingredients
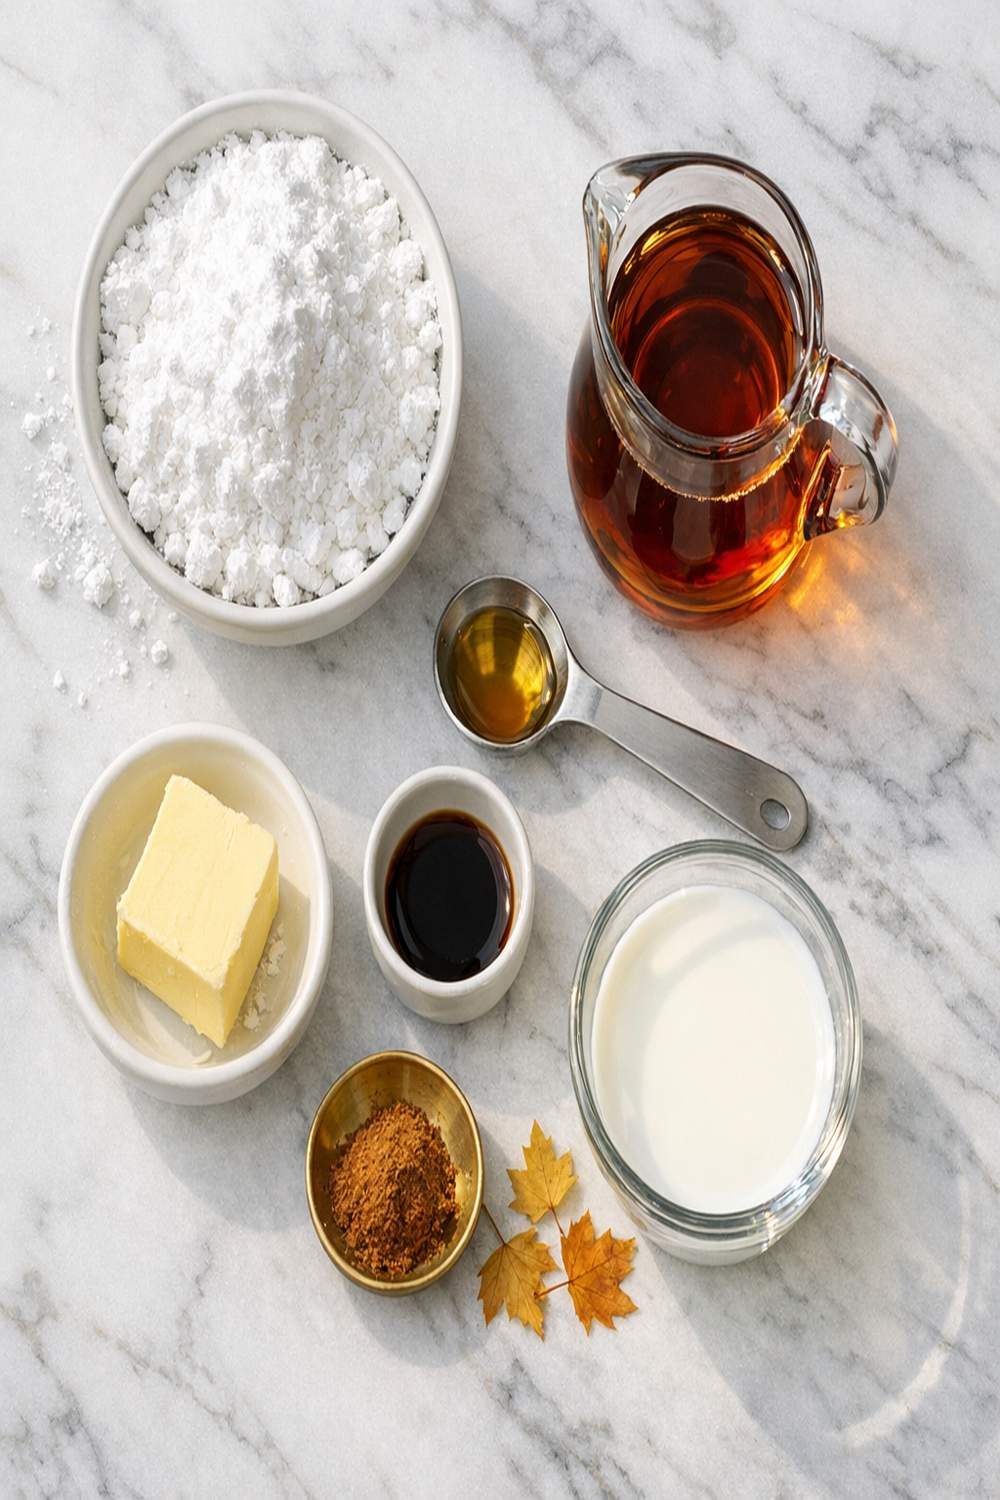
I’ve tested this recipe on standard home equipment, and every ingredient serves a purpose. The all-purpose flour provides structure, the brown sugar adds moisture and depth, and the maple extracts create that signature flavor. Here’s exactly what you’ll need to make approximately 24 cookies:
For the Cookies
- 2⅓ cups all-purpose flour (292g, spooned and leveled, never packed)
- 1 teaspoon baking soda (leavening agent for tender cookies)
- 1 cup chopped pecans (120g, toasted for deeper flavor)
- 1 large egg (room temperature for better incorporation)
- ½ cup unsalted butter (8 tablespoons, or 113g, softened to room temperature)
- 1 teaspoon maple extract (this is non-negotiable for authentic flavor)
- 1 cup packed dark brown sugar (200g, provides moisture and caramel notes)
- 2 tablespoons granulated sugar (optional but recommended, for rolling before baking)
- 1 teaspoon pure vanilla extract (not imitation, enhances sweetness)
- ⅓ cup pure maple syrup (113g or 80ml, use real syrup, never imitation)
- ¼ teaspoon salt (balances sweetness and enhances flavor)
For the Glaze
- 2 tablespoons unsalted butter (28g, for silky texture)
- ⅓ cup pure maple syrup (113g or 80ml, the foundation of the glaze)
- Pinch of salt (to taste, balances sweetness)
- 1 cup confectioners’ sugar (112g, sifted to prevent lumps)
How to Make Maple Cookie Glaze Recipe?
I’m going to walk you through this step by step, the same way I’ve tested it in my own kitchen. The process is straightforward, and I’ll give you all the sensory cues you need to know you’re on the right track. The entire process—from mixing to cooling—takes about 3 hours with chilling time, but most of that is hands-off.
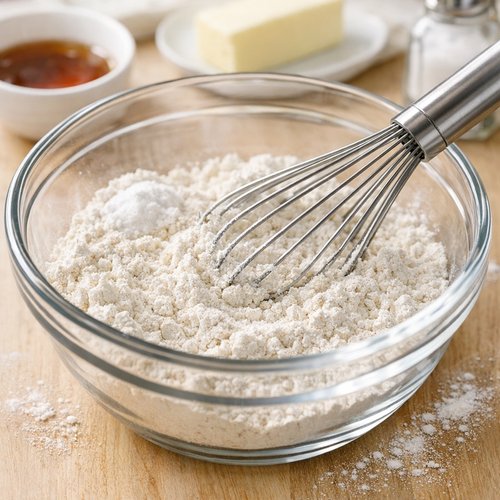
Step 1: Mix Your Dry Ingredients
Start with a medium-sized mixing bowl. Add your flour, baking soda, and salt together. Use a whisk to combine them thoroughly—this distributes the baking soda evenly so your cookies rise uniformly. The mixture should look light and homogeneous, with no streaks of baking soda visible. Set this bowl aside while you work on the wet ingredients. This seems like a small step, but it’s crucial for consistent results.
Step 2: Cream Butter and Brown Sugar
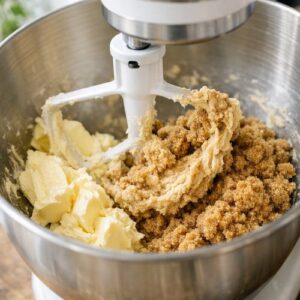
In a large mixing bowl (use a stand mixer fitted with a paddle attachment, or a handheld mixer), add your softened butter and packed brown sugar. Beat on medium-high speed for approximately 3 minutes until the mixture becomes light, fluffy, and noticeably pale in color. You should be able to see air bubbles incorporated throughout.
This step is essential—you’re aerating the mixture, which helps the cookies rise evenly and creates that tender crumb. If your butter is cold, the mixture will look grainy and refuse to fluff up. Room temperature really matters here. I learned this the hard way after baking in a chilly kitchen one January morning!

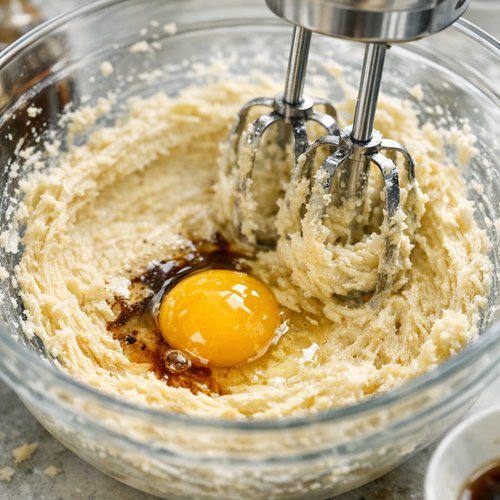
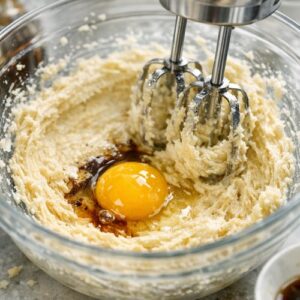
Step 3: Add Egg and Extracts
Crack your room-temperature egg directly into the butter mixture. Beat on high speed for about 30 seconds until the egg is fully incorporated and the mixture looks smooth again. You might see it look slightly curdled for a moment—that’s normal, and it will smooth out.
Now add your maple syrup, vanilla extract, and maple extract all at once. Beat on high speed for approximately 1 minute until everything is completely combined and the mixture looks silky. The maple extract is what gives these cookies their distinctive flavor—don’t skip it, even though it seems like a small amount. Pure maple extract is potent and creates an authentic taste you simply cannot achieve with syrup alone.
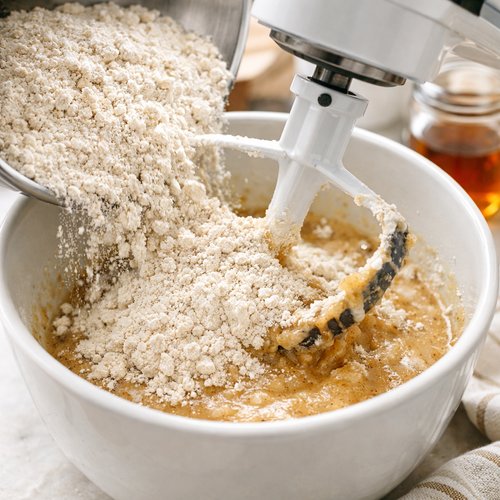
Step 4: Combine Wet and Dry Ingredients
Pour your dry ingredient mixture into the wet ingredients. Reduce your mixer speed to low and beat until just combined—this should take about 1 minute. The dough will look slightly thick and creamy. Be careful not to overmix at this stage, as that can lead to tough cookies. You want just enough mixing to incorporate the flour.
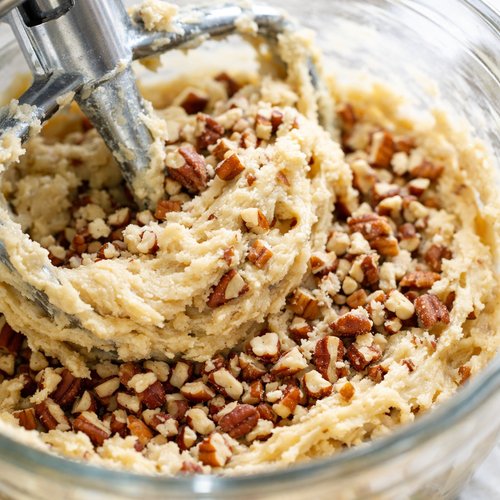
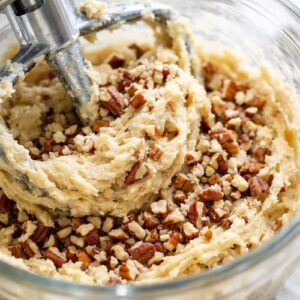
Step 5: Fold in the Pecans
Add your chopped pecans to the dough and beat on low speed until they’re just incorporated throughout, about 30 seconds. The dough should look creamy and soft, studded with pecan pieces. If you prefer more pecan flavor in every bite, you can fold them in by hand using a rubber spatula instead of the mixer—this gives you more control.
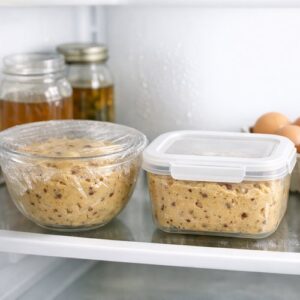
Step 6: Refrigerate the Dough
Cover your dough tightly with plastic wrap or transfer it to an airtight container. Place it in the refrigerator for at least 2 hours, and up to 3 days. This resting period allows the flavors to develop and makes the dough much easier to scoop and shape. I often prepare my dough the night before baking, which means fresh cookies for breakfast or as an afternoon snack.
If you’ve refrigerated your dough for longer than 3 hours, let it sit at room temperature for about 30 minutes before scooping. Cold dough is harder to work with and may crack when you try to roll it into balls.

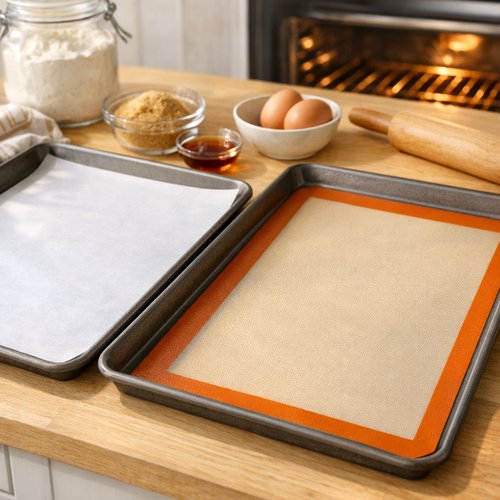
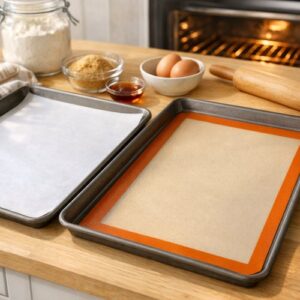
Step 7: Prepare Your Baking Station
Preheat your oven to 350°F (177°C) about 15 minutes before you plan to bake. Line two large baking sheets with parchment paper or silicone baking mats. I always recommend using mats or parchment—they prevent sticking, ensure even browning, and make cleanup effortless. This is one of my top time-saving tips.
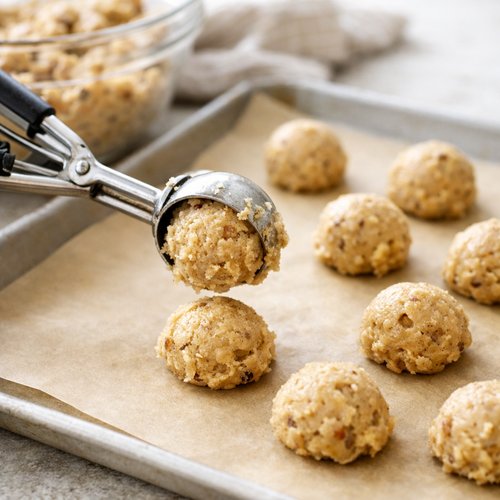
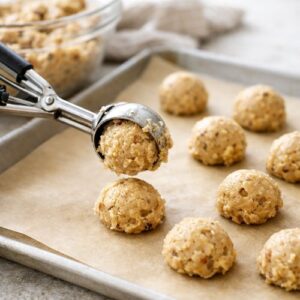
Step 8: Scoop and Shape the Cookies
Using a cookie scoop or measuring spoon, portion out the dough into balls. Each cookie should be approximately 1.5 tablespoons (35g) of dough. If you want an optional decorative touch, gently roll each ball in a tiny pinch of granulated sugar before placing it on the baking sheet—this creates a subtle sparkle and adds a hint of crunch to the edges.
Arrange the cookies at least 3 inches apart on your prepared baking sheets. They will spread slightly during baking, so adequate spacing is important. I typically fit about 12 cookies per standard baking sheet.
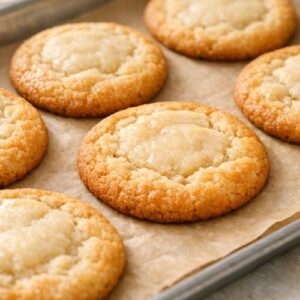
Step 9: Bake Until Golden
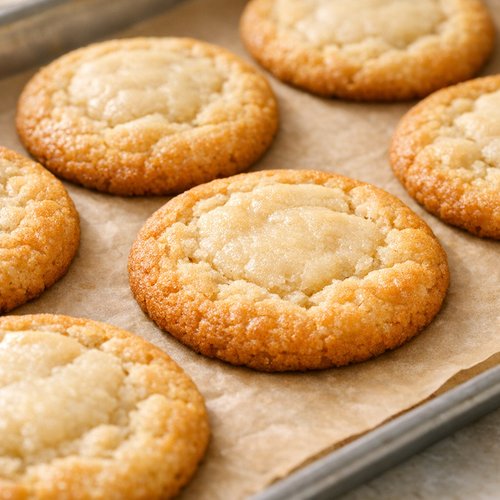
Bake for 12 to 13 minutes until the edges are lightly browned and set, but the centers still look very soft and slightly underbaked. This is the key to soft, chewy cookies—you want to pull them out while the middle still has a little give. They will continue to cook on the hot pan after you remove them from the oven.
If your oven tends to run hot, check at 11 minutes. If it runs cool, you might need the full 13 minutes. Every oven is different, and I’ve tested this recipe on three different models to ensure it works in real home kitchens.
Step 10: Cool the Cookies Properly
Remove the baking sheets from the oven and let the cookies cool directly on the pan for exactly 5 minutes. During this time, they will firm up enough to transfer but remain soft. Using a wide spatula, carefully transfer each cookie to a cooling rack to cool completely.
Complete cooling takes about 20 to 30 minutes at room temperature. This is crucial before you apply the glaze—warm cookies will melt the glaze, and it won’t set properly. I use this cooling time to clean up my mixing bowls and prepare the glaze ingredients.

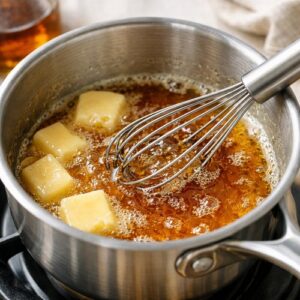
Step 11: Make the Maple Glaze
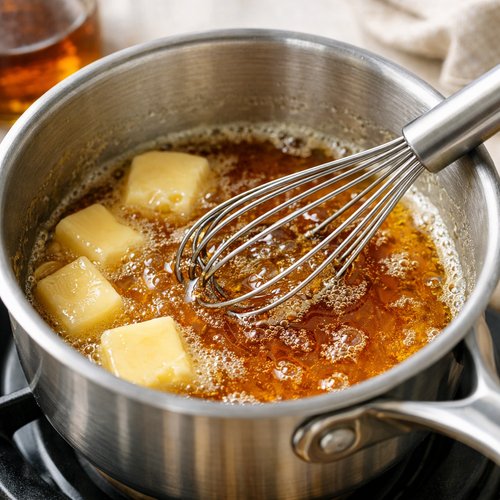
While your cookies cool, prepare the glaze. In a small saucepan over low heat, combine your butter and pure maple syrup. Whisk occasionally as the butter melts—this takes about 2 to 3 minutes. You want everything to combine smoothly without simmering or bubbling.
Once the butter is completely melted and the mixture looks homogeneous, remove the pan from heat. Whisk in your sifted confectioners’ sugar and a pinch of salt. The mixture will thicken as it cools slightly. Whisk until smooth and pourable—it should have the consistency of thin syrup, not thick frosting.
Taste a tiny spoonful of the glaze. If it needs a touch more salt to balance the sweetness, add another pinch. This is how I’ve always done it, and it ensures every batch tastes perfect.
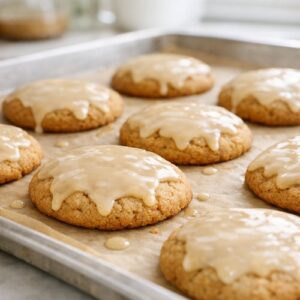
Step 12: Glaze and Set
Once your cookies are completely cooled, drizzle the maple glaze over each one using a fork or the back of a spoon. You can be generous or subtle—it’s entirely up to your preference. I like to create a thin, even coating that covers most of the top but allows some of the cookie to show through.
Place the glazed cookies on a clean cooling rack or parchment paper and let the glaze set at room temperature for about 1 hour. You can speed this up slightly by placing cookies in a cool part of your kitchen or near an open window, but avoid refrigerating—cold temperatures can cause the glaze to become too firm and thick.

Tips and Tricks
- Use a cookie scoop for uniform sizing – Consistent cookie size means consistent baking time. I use a standard 1.5-tablespoon scoop, and it’s made my baking so much more reliable. Uniform cookies also look beautiful when stacked for gift-giving.
- Room temperature ingredients are non-negotiable – Bring your egg, butter, and maple syrup to room temperature before mixing. Cold ingredients won’t incorporate smoothly, and you’ll end up with a grainy dough instead of a creamy one. I set my ingredients on the counter about 1 hour before baking.
- Don’t overbake—embrace the soft center – The centers should look underbaked when you pull them from the oven. They firm up on the hot pan and create that perfect chewy texture. Overbaking is the most common mistake I see, and it results in crispy, hard cookies instead of soft ones.
- Pure maple syrup and maple extract are worth the investment – Don’t use pancake syrup or imitation maple flavoring. The real ingredients taste dramatically different and justify their higher cost. Your maple cookies should taste authentically maple, not artificial.
- Sift your confectioners’ sugar for the glaze – Lumpy glaze is frustrating. A fine-mesh sieve takes 30 seconds and ensures your glaze is silky smooth. This is a small step that makes a big difference in how professional your finished cookies look.
- Store cooled cookies and glaze separately if making ahead – If you’re baking cookies days in advance, store them unglazed in an airtight container. Make the glaze fresh and drizzle just before serving for the most beautiful presentation.
Can I Store Maple Cookie Glaze Recipe?
Yes, and this is where the make-ahead magic happens. I love that these cookies fit into a busy schedule because you can prepare them in stages.
Store completely cooled and glazed cookies in an airtight container at room temperature for up to 2 days. The glaze will remain set, and the cookies will stay soft thanks to the brown sugar in the dough. Keep them in a single layer with parchment paper between layers if you’re stacking them.
For longer storage, keep unglazed cookies in an airtight container in the refrigerator for up to 1 week. You can glaze them fresh whenever you want to serve them. This is my preferred method for meal prep.
If you want to freeze the dough itself, I have great news: you can refrigerate it for up to 3 days as written in the recipe, or you can scoop the dough into balls, freeze them on a baking sheet, transfer them to a freezer bag, and store them for up to 3 months. When you’re ready to bake, simply add 1 to 2 minutes to the baking time if baking from frozen.
Expert’s Nutritional Tip: Understanding Maple Syrup’s Unique Benefits
As a registered dietitian, I want to share something important about maple syrup that goes beyond just taste. Unlike refined white sugar, pure maple syrup contains trace minerals including manganese and zinc, which support immune function and wound healing. Maple syrup also has a lower glycemic index than white sugar, meaning it doesn’t cause the same rapid blood sugar spike.
That said, it’s still a sweetener, and these cookies should be enjoyed in moderation as a treat. The pecans add healthy fats and fiber, which slow digestion and create a more satisfying snack. One or two cookies paired with a glass of milk or a cup of tea is a genuinely nourishing way to enjoy something delicious.
Nutrition Information
According to USDA nutrition data, one maple cookie with glaze contains approximately 185 calories, 9g of fat (mostly from pecans and butter), 25g of carbohydrates, 1g of fiber, and 2g of protein. Each cookie provides about 15g of sugar, primarily from the brown sugar, maple syrup, and glaze.
The pecans contribute healthy monounsaturated fats that support heart health. The maple syrup provides small amounts of beneficial minerals. While these cookies are absolutely a treat and should be enjoyed as such, they’re not entirely empty calories—the nuts and syrup provide some nutritional value alongside the indulgence.
What Can I Serve With Maple Cookie Glaze Recipe?
These cookies are wonderful on their own, but I love creating complete flavor experiences by pairing them thoughtfully with other foods. If you’re planning a dessert spread for company or want to build a cozy afternoon snack, here are my favorite pairings:
- Warm coffee or tea – A simple pairing that never fails. The maple flavor in the cookie complements both bold coffee and delicate herbal teas beautifully.
- Cold milk – Whether it’s traditional dairy milk or your preferred alternative, cold milk provides the perfect contrast to the sweet glaze and soft cookie texture.
- Cream cheese or whipped cream – A dollop of creamy richness alongside the cookie creates an elegant dessert plate. This is how I serve them when guests are coming over.
- Fresh fruit, especially apples or pears – The brightness of fresh fruit cuts through the sweetness and creates a balanced tasting experience. Sliced apples with a maple cookie is an underrated combination.
- Vanilla ice cream – Warm maple cookies with cold vanilla ice cream is comfort food at its finest. The ice cream melts into the soft cookie, creating a delicious contrast of temperatures.
- Pumpkin or spiced dishes – If you’re serving these during fall, pair them with other autumn-inspired treats. My this simple cake would be beautiful on the same dessert table, as would simple pumpkin bread.
Common Mistakes to Avoid
- Using cold ingredients mixed together – This is the number one mistake I see. Cold butter and eggs won’t incorporate smoothly, resulting in a grainy, uneven dough. Set your ingredients out 1 hour before mixing, and your dough will be silky and smooth.
- Overbaking for “done-looking” cookies – Cookies that look completely set and golden are actually overcooked. They’ll be crispy instead of chewy. Pull them out when the centers still look soft and slightly underbaked. Trust me on this.
- Skipping the confectioners’ sugar sifting step – Lumps in your glaze look unprofessional and create an uneven coating. Sifting takes 30 seconds and completely changes the appearance of your finished cookies.
- Using pancake syrup instead of pure maple syrup – Pancake syrup contains additives and high fructose corn syrup. It tastes completely different and won’t give you authentic maple flavor. Spend a few extra dollars on pure syrup—it’s absolutely worth it.
Make-Ahead Guide for Busy Home Cooks
I’ve designed this recipe specifically for people with busy lives who still want homemade treats. Here’s how I recommend preparing these cookies throughout your week:
Two days before serving: Mix your dough, cover it, and refrigerate. You can prepare the dough in just 15 minutes of active mixing time.
One day before serving: If you prepared the dough two days ago, you can bake it today. The dough will be perfectly aged. Scoop and shape the cookies, arrange them on baking sheets, and bake according to directions. Cool completely and store in an airtight container unglazed.
Day of serving: Prepare your glaze just before serving—it takes only 5 minutes. Drizzle over cooled cookies and let set for 1 hour. Serve with coffee or milk. Your guests will think you spent hours in the kitchen when you really just had strategic timing.
Seasonal Variations to Try
- Fall version – Add ½ teaspoon of ground cinnamon and ¼ teaspoon of ground nutmeg to the dry ingredients. Use pecans as written. The spices enhance the maple flavor beautifully.
- Winter/Holiday version – Add ¼ teaspoon of ground cloves and ½ teaspoon of ground ginger to the dry ingredients. Consider adding ¼ cup of chopped dried cranberries along with the pecans. The tartness of cranberry brightens the rich maple flavor.
- Spring/Summer version – Replace the maple extract with ½ teaspoon of pure almond extract and reduce the vanilla to ½ teaspoon. Use sliced almonds instead of pecans. This lighter variation still honors the maple base but feels fresher for warmer months.
- Year-round elegant version – Add 2 tablespoons of bourbon or dark rum to the wet ingredients (it bakes off, leaving just warmth and depth). This creates a sophisticated cookie perfect for holiday gifts or entertaining.
Maple Cookie Glaze Recipe
Ingredients
For the Cookies
- 2⅓ cup all-purpose flour 292g, spooned and leveled, never packed
- 1 teaspoon baking soda leavening agent for tender cookies
- 1 cup chopped pecans 120g, toasted for deeper flavor
- 1 large egg room temperature for better incorporation
- ½ cup unsalted butter 8 tablespoons, or 113g, softened to room temperature
- 1 teaspoon maple extract this is non-negotiable for authentic flavor
- 1 cup packed dark brown sugar 200g, provides moisture and caramel notes
- 2 tablespoon granulated sugar optional but recommended, for rolling before baking
- 1 teaspoon pure vanilla extract not imitation, enhances sweetness
- ⅓ cup pure maple syrup 113g or 80ml, use real syrup, never imitation
- ¼ teaspoon salt balances sweetness and enhances flavor
For the Glaze
- 2 tablespoon unsalted butter 28g, for silky texture
- ⅓ cup pure maple syrup 113g or 80ml, the foundation of the glaze
- Pinch of salt to taste, balances sweetness
- 1 cup confectioners' sugar 112g, sifted to prevent lumps
Instructions
Step 1: Mix Your Dry Ingredients
- Start with a medium-sized mixing bowl. Add your flour, baking soda, and salt together. Use a whisk to combine them thoroughly—this distributes the baking soda evenly so your cookies rise uniformly. The mixture should look light and homogeneous, with no streaks of baking soda visible. Set this bowl aside while you work on the wet ingredients. This seems like a small step, but it's crucial for consistent results.

Step 2: Cream Butter and Brown Sugar
- In a large mixing bowl (use a stand mixer fitted with a paddle attachment, or a handheld mixer), add your softened butter and packed brown sugar. Beat on medium-high speed for approximately 3 minutes until the mixture becomes light, fluffy, and noticeably pale in color. You should be able to see air bubbles incorporated throughout. This step is essential—you're aerating the mixture, which helps the cookies rise evenly and creates that tender crumb. If your butter is cold, the mixture will look grainy and refuse to fluff up. Room temperature really matters here. I learned this the hard way after baking in a chilly kitchen one January morning!
Step 3: Add Egg and Extracts
- Crack your room-temperature egg directly into the butter mixture. Beat on high speed for about 30 seconds until the egg is fully incorporated and the mixture looks smooth again. You might see it look slightly curdled for a moment—that's normal, and it will smooth out. Now add your maple syrup, vanilla extract, and maple extract all at once. Beat on high speed for approximately 1 minute until everything is completely combined and the mixture looks silky. The maple extract is what gives these cookies their distinctive flavor—don't skip it, even though it seems like a small amount. Pure maple extract is potent and creates an authentic taste you simply cannot achieve with syrup alone.
Step 4: Combine Wet and Dry Ingredients
- Pour your dry ingredient mixture into the wet ingredients. Reduce your mixer speed to low and beat until just combined—this should take about 1 minute. The dough will look slightly thick and creamy. Be careful not to overmix at this stage, as that can lead to tough cookies. You want just enough mixing to incorporate the flour.

Step 5: Fold in the Pecans
- Add your chopped pecans to the dough and beat on low speed until they're just incorporated throughout, about 30 seconds. The dough should look creamy and soft, studded with pecan pieces. If you prefer more pecan flavor in every bite, you can fold them in by hand using a rubber spatula instead of the mixer—this gives you more control.
Step 6: Refrigerate the Dough
- Cover your dough tightly with plastic wrap or transfer it to an airtight container. Place it in the refrigerator for at least 2 hours, and up to 3 days. This resting period allows the flavors to develop and makes the dough much easier to scoop and shape. I often prepare my dough the night before baking, which means fresh cookies for breakfast or as an afternoon snack. If you've refrigerated your dough for longer than 3 hours, let it sit at room temperature for about 30 minutes before scooping. Cold dough is harder to work with and may crack when you try to roll it into balls.
Step 7: Prepare Your Baking Station
- Preheat your oven to 350°F (177°C) about 15 minutes before you plan to bake. Line two large baking sheets with parchment paper or silicone baking mats. I always recommend using mats or parchment—they prevent sticking, ensure even browning, and make cleanup effortless. This is one of my top time-saving tips.
Step 8: Scoop and Shape the Cookies
- Using a cookie scoop or measuring spoon, portion out the dough into balls. Each cookie should be approximately 1.5 tablespoons (35g) of dough. If you want an optional decorative touch, gently roll each ball in a tiny pinch of granulated sugar before placing it on the baking sheet—this creates a subtle sparkle and adds a hint of crunch to the edges. Arrange the cookies at least 3 inches apart on your prepared baking sheets. They will spread slightly during baking, so adequate spacing is important. I typically fit about 12 cookies per standard baking sheet.
Step 9: Bake Until Golden
- Bake for 12 to 13 minutes until the edges are lightly browned and set, but the centers still look very soft and slightly underbaked. This is the key to soft, chewy cookies—you want to pull them out while the middle still has a little give. They will continue to cook on the hot pan after you remove them from the oven. If your oven tends to run hot, check at 11 minutes. If it runs cool, you might need the full 13 minutes. Every oven is different, and I've tested this recipe on three different models to ensure it works in real home kitchens.
Step 10: Cool the Cookies Properly
- Remove the baking sheets from the oven and let the cookies cool directly on the pan for exactly 5 minutes. During this time, they will firm up enough to transfer but remain soft. Using a wide spatula, carefully transfer each cookie to a cooling rack to cool completely. Complete cooling takes about 20 to 30 minutes at room temperature. This is crucial before you apply the glaze—warm cookies will melt the glaze, and it won't set properly. I use this cooling time to clean up my mixing bowls and prepare the glaze ingredients.
Step 11: Make the Maple Glaze
- While your cookies cool, prepare the glaze. In a small saucepan over low heat, combine your butter and pure maple syrup. Whisk occasionally as the butter melts—this takes about 2 to 3 minutes. You want everything to combine smoothly without simmering or bubbling. Once the butter is completely melted and the mixture looks homogeneous, remove the pan from heat. Whisk in your sifted confectioners' sugar and a pinch of salt. The mixture will thicken as it cools slightly. Whisk until smooth and pourable—it should have the consistency of thin syrup, not thick frosting. Taste a tiny spoonful of the glaze. If it needs a touch more salt to balance the sweetness, add another pinch. This is how I've always done it, and it ensures every batch tastes perfect.
Step 12: Glaze and Set
- Once your cookies are completely cooled, drizzle the maple glaze over each one using a fork or the back of a spoon. You can be generous or subtle—it's entirely up to your preference. I like to create a thin, even coating that covers most of the top but allows some of the cookie to show through. Place the glazed cookies on a clean cooling rack or parchment paper and let the glaze set at room temperature for about 1 hour. You can speed this up slightly by placing cookies in a cool part of your kitchen or near an open window, but avoid refrigerating—cold temperatures can cause the glaze to become too firm and thick.

Notes
FAQs
Can I Make These Cookies Without Maple Extract?
Technically yes, but I don’t recommend it. Maple extract is what creates the authentic maple flavor—the syrup alone won’t be enough. If you truly cannot find maple extract, you can increase the maple syrup by 2 tablespoons, though the flavor will be milder. Your cookies will still be delicious, just with a more subtle maple taste. Most grocery stores and all online retailers carry pure maple extract, so it’s usually easy to find.
Why Did My Cookies Spread Too Much?
Over-spreading usually means one of three things: your butter was too soft when you started mixing, your oven temperature is running low, or you didn’t chill the dough long enough. Soft butter creates a more fluid dough that spreads excessively. Check your oven temperature with an oven thermometer—many home ovens run 25 degrees cooler than they claim. And make sure your dough chills for at least the full 2 hours.
Can I Use Margarine or Dairy-Free Butter Instead of Real Butter?
I don’t recommend it, though I understand the desire for substitutes. Margarine and dairy-free butters contain water that real butter doesn’t, which changes how the dough behaves. You’ll likely end up with dough that’s too soft, spreads too much, or produces cookies with a different texture. Unsalted butter is really the best choice for this recipe. If you have a dairy allergy, high-quality cultured dairy-free butter might work better than standard margarine.
How Do I Know When the Glaze Has Set Properly?
The glaze should feel firm to the touch but not hard after about 1 hour at room temperature. It should no longer feel wet or sticky, and it should hold its shape when you touch it. If your kitchen is very warm, the glaze might take longer to set—up to 2 hours. Resist the urge to refrigerate the cookies to speed this up, as cold temperatures can make the glaze thick and crack. Patience creates the best results.
Can I Double This Recipe?
Absolutely! Simply double all ingredients. Use a stand mixer rather than a handheld mixer when doubling—it’s more efficient. You may need to bake on three or four sheets depending on your oven space. Everything else remains the same: bake time, chilling time, and glaze preparation. I’ve doubled this recipe many times for family gatherings, and it’s completely reliable.
More Recipes You’ll Love
- Large Batch Brownies – When you want to bake for a crowd, these fudgy brownies are as reliable as my maple cookies
- Krollskorner Pumpkin Bread – Another fall favorite that shares the warm spice notes of maple cookies
- King’s Hawaiian Rolls Breakfast Recipe – For when you want something sweet but different from cookies, these rolls are tender and perfect
- These Homemade Maple Muffins – Worth adding to your recipe collection.
These maple cookies with their glossy, delicate glaze have become my signature recipe to share with friends and family. Every time I bake them, I’m transported back to my grandmother’s kitchen, and I’m grateful I finally figured out how to recreate her magic. The recipe is forgiving, the process is straightforward, and the results are always impressive. Good food really is a good mood—and these cookies prove it. I’d love to hear how yours turn out. Happy baking!

My name is Lori Walker. I’m a registered dietitian, food blogger and food enthusiast. I share easy healthy, delicious recipes on my blog and review necessary kitchen items. The recipes I share take less… Read more