This post contains affiliate links. As an Amazon Associate I earn from qualifying purchases.
Maple Muffin Recipe That Fills Your Kitchen With Golden Warmth
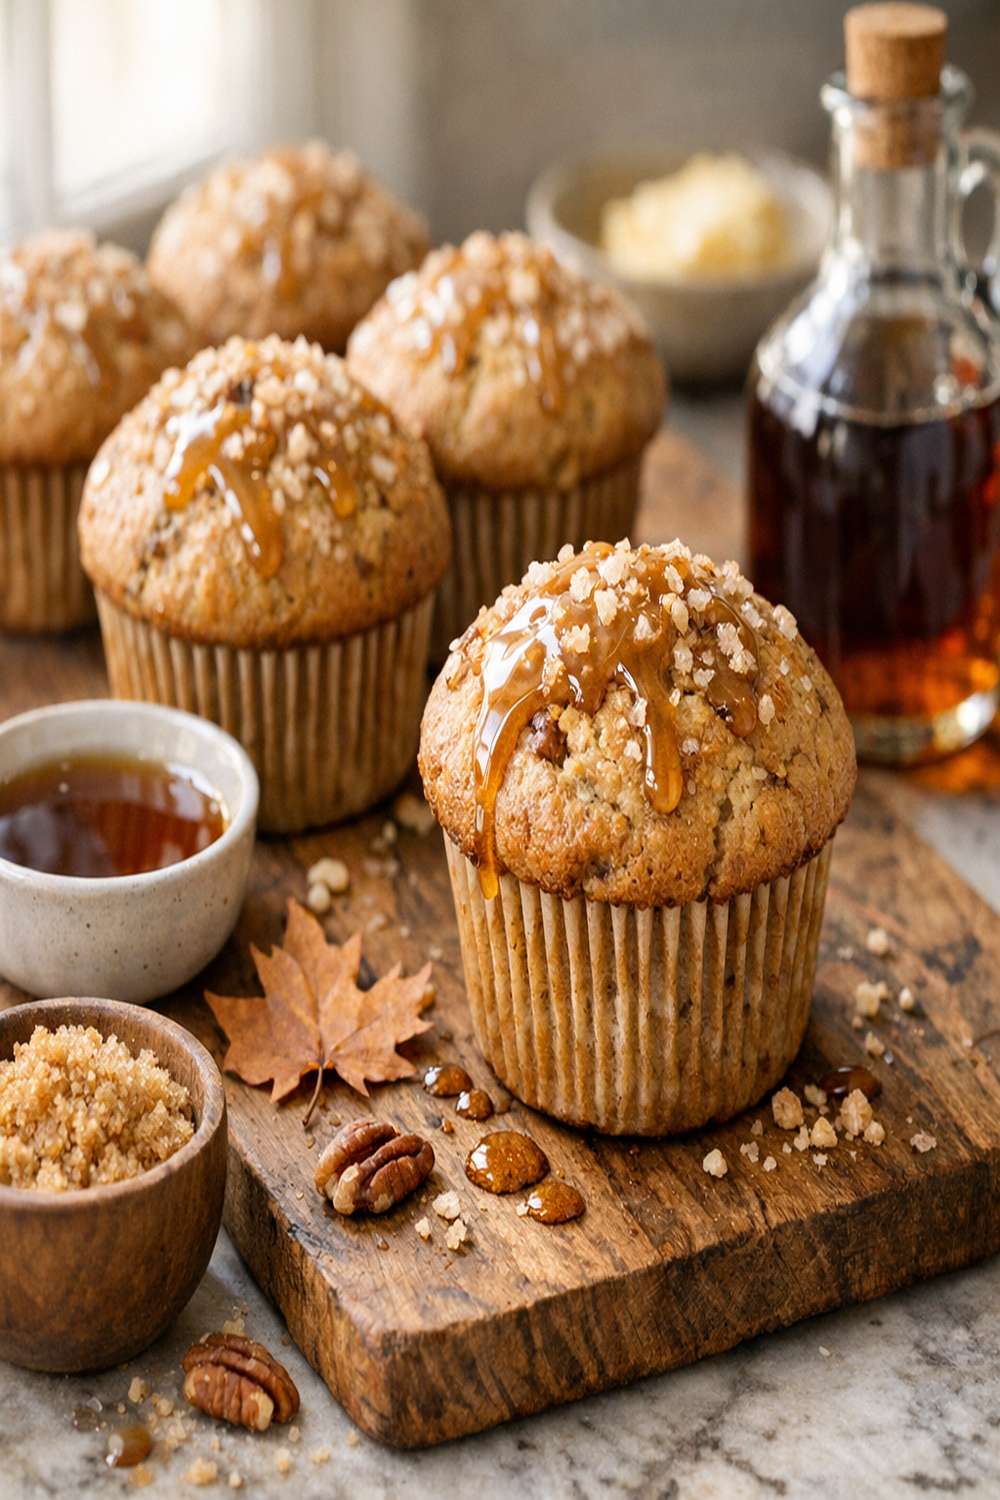
Picture this: it’s early morning, sunlight streaming through your kitchen window, and the aroma of pure maple syrup and toasted walnuts fills every corner of your home. Your family gathers around the counter, still in their pajamas, reaching for warm muffins that practically melt on their tongues. This is the kind of breakfast moment that turns an ordinary Tuesday into something worth remembering. I’ve been collecting family recipes since 2019, and these maple muffins are the ones that appear on sticky notes, dog-eared recipe cards, and in the text messages my relatives send asking, “Can you bring those muffins again?” Whether you’re planning a cozy fall gathering or need an impressive breakfast for weekend guests, these muffins deliver comfort with genuine elegance. And if you’re looking to build a complete breakfast spread, I often pair them with Breakfast Enchiladas for a more substantial meal.
Maple Muffin Recipe That Steals the Show at Every Gathering
My love affair with these maple muffins started during a particularly chilly November morning in 2020. My daughter had just returned home from college, and I wanted to create something that said “welcome back” without needing to say a word. I pulled out my grandmother’s notes on baking—she always believed that real maple syrup was non-negotiable—and combined that wisdom with my training as a registered dietitian. The result was muffins with actual nutritional substance: whole wheat flour for fiber, eggs for quality protein, and real maple syrup for complex carbohydrates and minerals like manganese and zinc. When my daughter bit into the first one, still warm from the oven, she closed her eyes and smiled. That’s when I knew I’d created something special. Now, five years later, I’ve made these muffins for baby showers, book clubs, holiday mornings, and quiet weekday breakfasts when I simply needed to feel like I was doing something right in the kitchen.
When to Make Maple Muffin Recipe
These muffins aren’t just for autumn, though that’s certainly when they shine. I’ve learned through years of recipe testing that maple’s warm, sophisticated flavor works beautifully across seasons and occasions. Here’s when I reach for this recipe:
- Fall weekend breakfasts – when you want something that captures the essence of the season without requiring hours in the kitchen; these are ready to serve in about 35 minutes total
- Holiday morning gatherings – Thanksgiving, Christmas, or New Year’s Day brunches where you need an elegant item that guests won’t expect; these feel fancy but require zero fussing
- Baby showers and bridal events – I’ve brought these to six different celebrations, and they’ve become my signature contribution; they’re elegant enough for linen tablecloths but casual enough for a backyard gathering
- Back-to-school mornings – when you want to send your kids off with something more substantial than toast; the whole wheat flour and protein from eggs keeps them satisfied through mid-morning
- Quick weekday breakfasts – bake them on Sunday evening, store them in an airtight container, and you have grab-and-go breakfasts for the entire week
- Hostess gifts – wrapped in parchment paper and tied with twine, these muffins say “I care enough to bake” without the commitment of a layer cake
What Makes This Maple Muffin Recipe Special
After testing countless muffin recipes over the past five years, I’ve identified what separates a truly memorable muffin from one that’s merely adequate. This recipe combines three elements that work in perfect harmony. First, the blend of all-purpose and whole wheat flour creates a tender crumb while adding nutty depth and genuine nutritional value—something I’m particularly passionate about because good food should nourish, not just taste delicious. Second, the technique of whisking the maple syrup with melted butter and then adding it to barely-mixed dry ingredients prevents overdevelopment of gluten, which keeps these muffins tender rather than dense or rubbery. Third, the five-minute rest period allows the whole wheat flour to fully hydrate, which means your muffins emerge from the oven with perfect moisture and a delicate crumb structure.
The two-temperature baking method—starting at 400°F then dropping to 375°F—is another secret that most home cooks overlook. This approach gives you a beautiful golden dome while ensuring the interior stays moist and tender. It’s the kind of detail my grandmother taught me, and I’ve verified it works perfectly on standard home ovens.
Scaling for Your Crowd
One of my favorite things about this recipe is how beautifully it scales. Whether you’re making muffins for two or twenty, the proportions remain consistent, and your results stay reliable. Here’s how I approach different crowd sizes:
- Two people (makes 6 muffins) – use exactly one-quarter of all ingredients; bake in a mini muffin tin for 12-14 minutes at the same temperatures; store extras in the freezer for grab-and-go breakfasts throughout the week
- Standard batch for a family (makes 12 muffins) – use the full recipe as written; you’ll need one standard 12-cup muffin tin; bake for the full 25 minutes total
- Double batch for gatherings (makes 24 muffins) – double every ingredient; you’ll need two muffin tins; increase initial bake time at 400°F to 12 minutes, then bake at 375°F for 16-17 minutes; prepare the batter in two separate bowls rather than one large batch to ensure even mixing
- Triple batch for events (makes 36 muffins) – triple all ingredients; use three muffin tins; bake two tins simultaneously on different racks, rotating halfway through; the third tin may require slightly longer baking time depending on your oven’s air circulation
The Ingredients
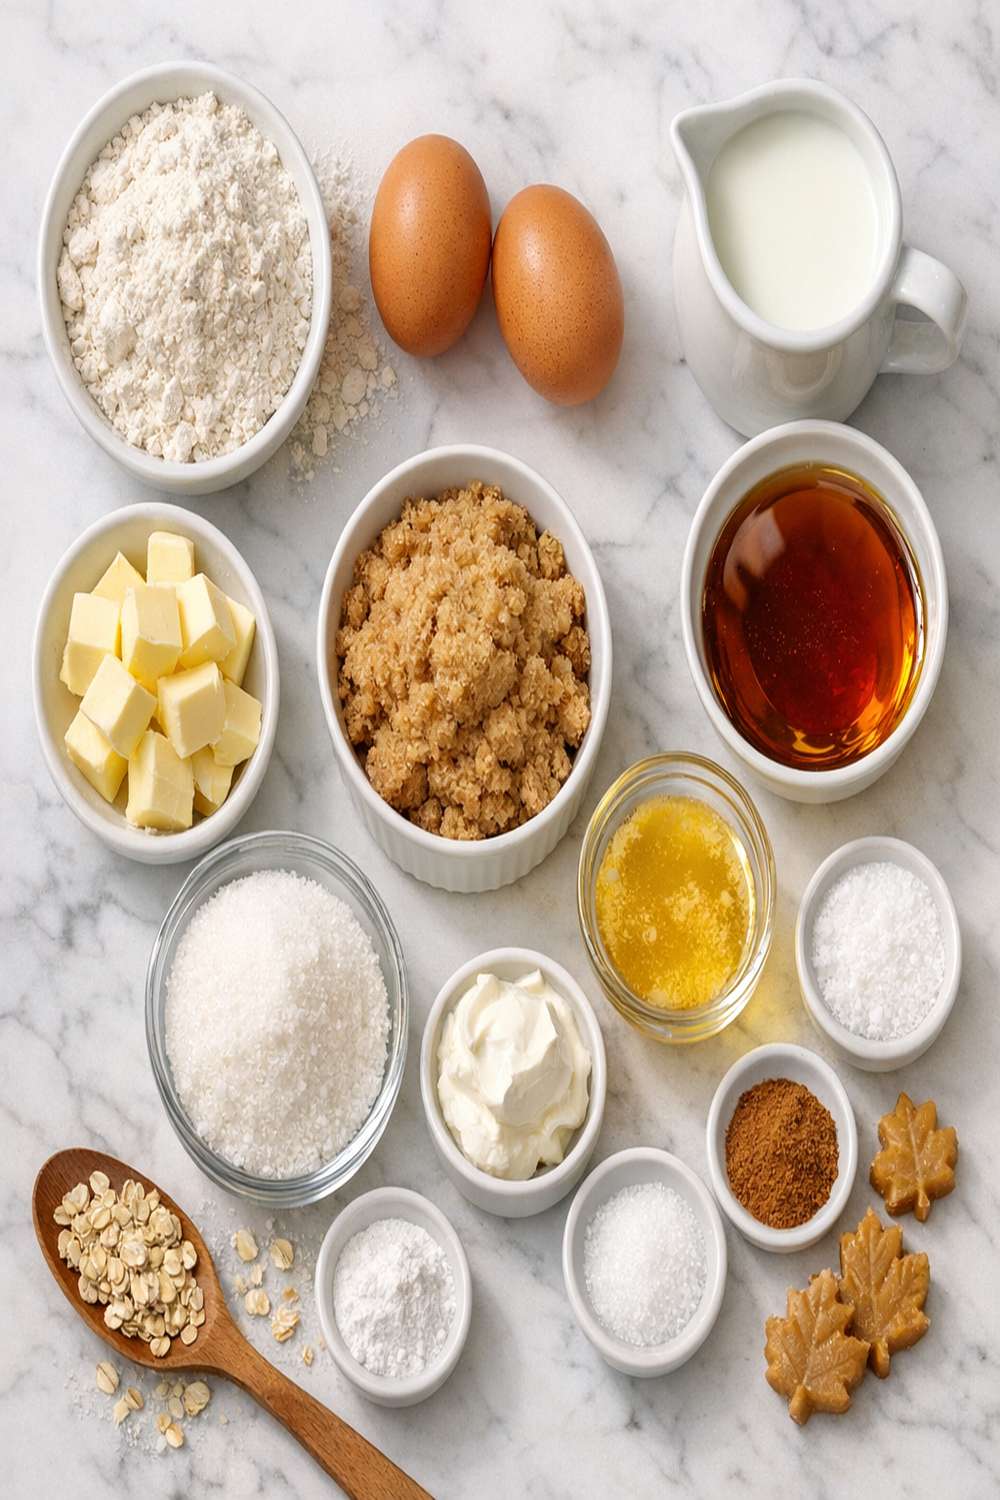
Here’s everything you need to create maple muffins that taste like you spent hours in the kitchen, even though you’ll be finished in well under an hour:
- ¼ teaspoon nutmeg (ground; adds warmth without calling attention to itself)
- ½ cup whole milk (full-fat creates superior moisture and texture)
- 1 cup walnuts (coarsely chopped; toasting them first intensifies their flavor, though it’s optional)
- 1 large egg plus 1 large egg yolk (room temperature, which helps them incorporate evenly)
- 1 tablespoon baking powder (fresh baking powder is essential; old powder won’t give you proper rise)
- 12 tablespoons unsalted butter (melted and cooled slightly, plus additional for greasing the pan)
- 1½ cups pure maple syrup (Grade B preferred for deeper flavor, though Grade A works perfectly fine)
- ¾ cup whole wheat flour (adds nutty depth and fiber without heaviness)
- 2 tablespoons pure vanilla extract (not imitation; it complements maple beautifully)
- ½ teaspoon salt (enhances the maple flavor and balances sweetness)
- 2¼ cups all-purpose flour (spooned into measuring cup and leveled off, never packed)
Expert’s Nutritional Tip: The combination of whole wheat flour and maple syrup in these muffins creates something I’m genuinely excited about from a nutrition standpoint. Unlike processed muffins loaded with refined sugar, these deliver complex carbohydrates that provide sustained energy. The maple syrup contains beneficial minerals including manganese, which supports bone health and metabolism, and the walnuts contribute omega-3 fatty acids. One muffin provides approximately 3 grams of fiber, making it a breakfast option I feel good recommending to clients.
How to Make Maple Muffin Recipe for Your Occasion
This recipe is genuinely foolproof when you follow these steps exactly. I’ve tested this on standard home ovens—nothing fancy, nothing professional—to guarantee that your results will be beautiful every single time. The confidence you’ll feel pulling these from the oven is well-deserved.
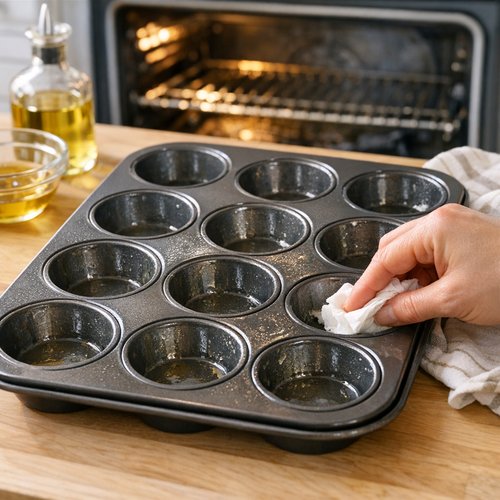
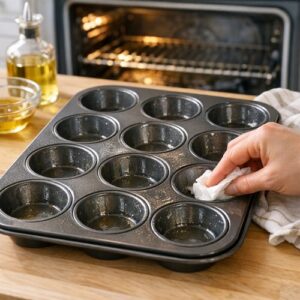
Step 1: Prepare Your Oven and Pan
Start by positioning a rack in the center of your oven and preheating to 400°F. While the oven heats, generously grease a standard 12-cup muffin tin with softened butter. Don’t skip this step or use cooking spray—the butter creates a beautifully browned edge that’s one of the hallmarks of these muffins. If you’re doubling the recipe, prepare two tins now. This initial step takes just three minutes but sets the foundation for success.
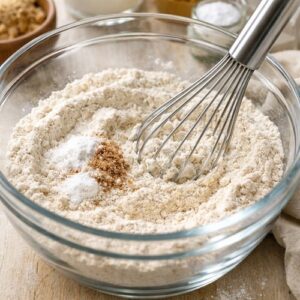
Step 2: Combine Your Dry Ingredients
In a large mixing bowl, whisk together the all-purpose flour, whole wheat flour, baking powder, salt, and nutmeg. Whisk for about 20-30 seconds to fully incorporate the leavening agent—this distributes the baking powder evenly so you don’t end up with pockets of dense muffin. Set this bowl aside. This is a critical step that many home cooks rush through, but it takes less than a minute and makes a genuine difference in your final product.

Step 3: Mix Your Wet Ingredients
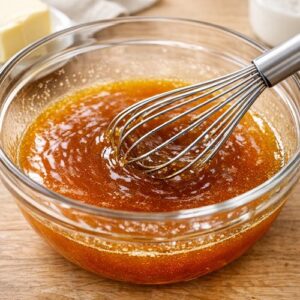
In a medium bowl, whisk together the melted butter and maple syrup until fully combined. The mixture should look like liquid amber—glossy and smooth. Add the vanilla extract and whisk again. Now, slowly add the milk while whisking, then add the whole egg and egg yolk. Whisk until the mixture is completely smooth and uniform. This step takes about two minutes and is genuinely important for even distribution of moisture throughout your muffins.

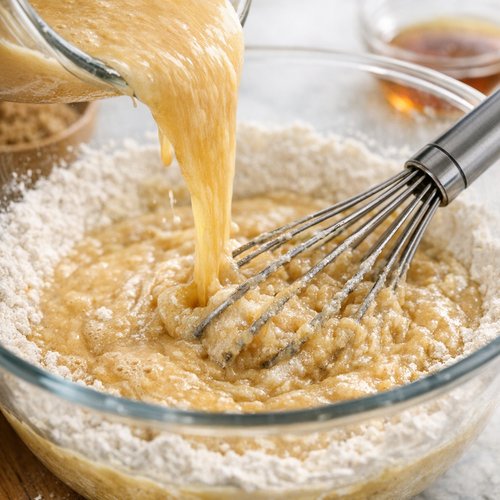
Step 4: Combine Wet and Dry Ingredients
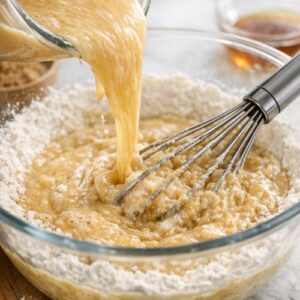
Pour the wet mixture into the dry ingredients and whisk gently just until you see no white streaks of flour—this should take about 15-20 whisks. I know the temptation is to mix until everything looks perfectly smooth, but resist it. Overmixing develops gluten, which turns muffins dense and tough. The batter will look slightly lumpy, and that’s exactly what you want. Stir in the walnuts with just a few gentle folds. Let the batter rest for 5 minutes—this allows the whole wheat flour to fully hydrate, which improves moisture and texture dramatically.
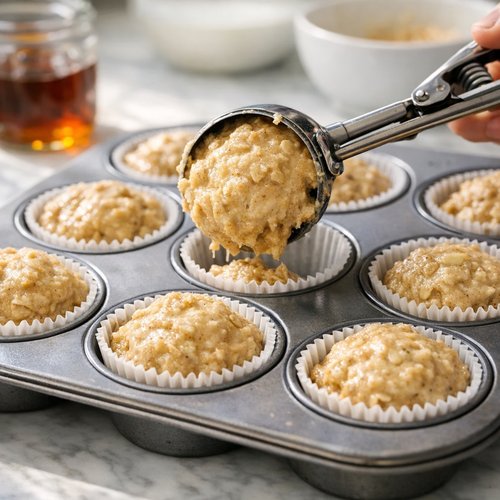
Step 5: Fill and Bake
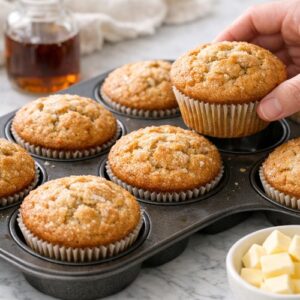
Using a ice cream scoop or large spoon, divide the batter evenly among the prepared muffin cups. Fill each cup until it’s nearly full—these muffins will rise beautifully and you want that gorgeous dome. Place the tin in your preheated 400°F oven and bake for exactly 10 minutes. At the 10-minute mark, reduce the temperature to 375°F and continue baking for approximately 15 minutes more, until the muffins are golden brown on top and a cake tester or toothpick inserted into the center comes out clean. The whole process from start to finish should take about 35 minutes.
Step 6: Cool and Serve
Allow the muffins to cool in the pan for exactly 5 minutes—this helps them set enough to remove without crumbling, but they’re still warm enough to taste incredible. Gently run a thin knife around the edges of each muffin to release them from the pan, then lift them out carefully. Serve them warm with softened butter, or transfer them to a cooling rack if you’re serving them later. Warm maple muffins with butter are honestly one of my favorite simple pleasures in the kitchen.

Make-Ahead Timeline
One of my favorite aspects of this recipe is how flexible it is for advance preparation. As a registered dietitian and busy home cook, I’ve learned that smart planning means more time enjoying your gathering and less time stressed in the kitchen.
- Three days before – toast your walnuts if you’re using them; store in an airtight container at room temperature; this saves precious time on the day you’re baking
- Two days before – measure all your dry ingredients into a bowl, cover tightly with plastic wrap, and store at room temperature; this cuts your actual baking time in half
- Day before – prepare the complete batter through Step 4, cover the bowl with plastic wrap, and refrigerate overnight; in the morning, let it come to room temperature for 20 minutes, then proceed with filling the pans and baking; the batter actually develops deeper flavor overnight
- Morning of – if baking fresh, prepare the batter and bake following the full instructions; if you prepped the batter the night before, this takes just 35 minutes from start to finish
- After baking – store cooled muffins in an airtight container at room temperature for up to 3 days; freeze extras in a freezer-safe bag for up to 3 months; reheat frozen muffins at 300°F for about 10 minutes
How to Present and Plate Maple Muffin Recipe
These muffins are beautiful on their own, but a few strategic presentation choices elevate them from homemade to impressive. I’ve learned through years of entertaining that the simplest touches often make the biggest impact.
- Serve in a lined basket – place muffins in a bread basket lined with parchment paper and a linen napkin; this looks intentional and keeps them warm longer
- Offer quality butter on the side – serve with softened unsalted butter in a small ramekin with a butter knife; guests will appreciate having this option, and the butter enhances the maple flavors beautifully
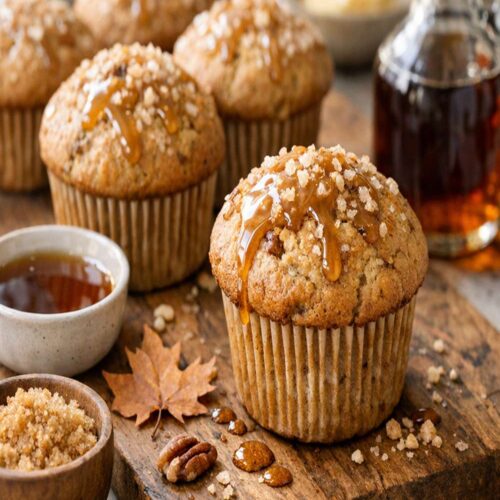
- Add a drizzle of maple glaze – whisk together ½ cup powdered sugar with 2 tablespoons pure maple syrup until smooth; drizzle over muffin tops for an elegant finish that adds minimal time
- Garnish with toasted walnut pieces – place a few walnut pieces on top of each muffin before baking; this creates visual interest and signals to guests that these are quality muffins
- Present on a wooden board – if you’re serving at a brunch or gathering, arrange muffins on a beautiful wooden cutting board or serving platter; this creates a warm, inviting presentation
Seasonal Variations
While these maple muffins are perfect as written, I love adapting them throughout the year to highlight seasonal ingredients and flavors.
- Spring and Summer Version – replace ¼ cup of the all-purpose flour with almond flour for a delicate flavor; omit the nutmeg; add ½ teaspoon of lemon zest and 2 tablespoons of fresh blueberries folded in at the very end; this creates a lighter, brighter muffin that feels appropriate for warmer months while keeping the maple as the primary flavor
- Fall and Winter Version – increase the nutmeg to ½ teaspoon, add ¼ teaspoon ground cinnamon and a tiny pinch of ground cloves; replace half the walnuts with toasted pecans; add 2 tablespoons of pure vanilla extract for deeper warmth; this version feels cozy and festive without requiring additional ingredients
- Spring Variation with Spice – add ½ teaspoon ground ginger and ¼ teaspoon cardamom; the cardamom particularly complements maple’s subtle caramel notes
Common Mistakes to Avoid
After testing this recipe dozens of times and watching countless home cooks make it, I’ve identified the mistakes that trip people up most often. Avoiding these ensures your muffins come out perfect every single time:
- Overmixing the batter – this is the number one issue I see; mix just until the flour disappears, even if the batter looks slightly lumpy; lumps smooth out during baking, but overmixing creates rubber-textured muffins that disappoint
- Skipping the five-minute rest – this feels like a small step, but it allows the whole wheat flour to fully absorb moisture, resulting in superior texture; don’t skip this even when you’re in a hurry
- Using old baking powder – baking powder loses potency after about six months; if your muffins don’t rise well, suspect old leavening agents; mark the date on your baking powder container and replace it regularly
- Not greasing the pan adequately – these muffins stick without proper greasing; use softened butter and really work it into all the corners and sides of each cup; this also creates those golden, delicious edges
- Opening the oven door during baking – resist the urge to peek before the 10-minute mark; opening the door drops temperature and can cause muffins to collapse before they’ve properly set
What to Serve Alongside Maple Muffin Recipe
These muffins are wonderful on their own, but they’re even better as part of a thoughtfully planned breakfast or brunch spread. Over the years, I’ve discovered which accompaniments truly complement their warm, sophisticated flavor profile. For a complete breakfast experience, I’d suggest starting with these muffins and building from there. If you want something green and fresh alongside them, my my favorite salad provides a beautiful contrast. For a heartier brunch event, you might consider pairing them with Breakfast Enchiladas for a more substantial meal.
- Scrambled eggs with fresh herbs – soft, buttery scrambled eggs provide protein balance without competing for attention on the plate
- Maple-glazed bacon or sausage – thin strips of bacon cooked until crispy pair beautifully; alternatively, turkey sausage offers a leaner protein option
- Greek yogurt with honey – serve in a small bowl with a drizzle of local honey; guests can customize their own, and it provides probiotic balance
- Fresh fruit salad – a mix of berries, melon, and citrus provides brightness and lightness that balances the richness of the muffins
- Herbal tea or coffee – hot beverages are essential; brew a pot of chamomile, English breakfast, or your favorite coffee to complement the muffins’ warmth
Can I Store Maple Muffin Recipe?
Storage is one of my favorite aspects of this recipe because it’s incredibly flexible for busy schedules. I’ve built my entire approach to family cooking around recipes that work with real life, not against it.
Room temperature storage: cooled muffins keep beautifully in an airtight container at room temperature for up to 3 days. I typically place parchment paper between layers to prevent them from sticking together.
Refrigerator storage: if you need them to last longer, place cooled muffins in an airtight container in the refrigerator where they’ll keep for up to 5 days. Remove them 20 minutes before serving to allow them to come back to room temperature, which restores their tender crumb.
Freezer storage: this is where these muffins truly shine for meal planning. Wrap cooled muffins individually in parchment paper, then place them in a freezer-safe bag or container where they’ll keep for up to 3 months. Thaw at room temperature for about 30 minutes, or reheat in a 300°F oven for 10-12 minutes if you want them warm again.
Make-ahead tip: I often bake a double batch on a Sunday evening, freeze half of them, and have grab-and-go breakfasts throughout the week. This strategy has been genuinely life-changing for my family’s morning routine.
Nutrition Information
One muffin (based on 12 muffins per batch) provides approximately 285 calories, 12 grams of fat, 37 grams of carbohydrates, 3 grams of fiber, 5 grams of protein, and 1.2 grams of sugar from maple syrup plus added sugars. The fiber content comes primarily from the whole wheat flour, which comprises about one-third of the flour mixture. The fat is predominantly unsaturated, coming from both the butter and walnuts. These numbers are based on USDA nutritional databases and are approximate; actual values may vary based on specific ingredient brands and preparation methods.
From a registered dietitian perspective, what excites me about these muffins is that they’re genuinely more substantial than typical breakfast muffins. The combination of whole grains, quality protein from eggs, and plant-based protein from walnuts means these keep you satisfied through the morning without the blood sugar crash that comes from refined flour products. The maple syrup provides not just flavor but also minerals like manganese and zinc in amounts that actually matter nutritionally.
Maple Muffin Recipe
Ingredients
- ¼ teaspoon nutmeg ground; adds warmth without calling attention to itself
- ½ cup whole milk full-fat creates superior moisture and texture
- 1 cup walnuts coarsely chopped; toasting them first intensifies their flavor, though it's optional
- 1 large egg plus 1 large egg yolk room temperature, which helps them incorporate evenly
- 1 tablespoon baking powder fresh baking powder is essential; old powder won't give you proper rise
- 12 tablespoon unsalted butter melted and cooled slightly, plus additional for greasing the pan
- 1½ cup pure maple syrup Grade B preferred for deeper flavor, though Grade A works perfectly fine
- ¾ cup whole wheat flour adds nutty depth and fiber without heaviness
- 2 tablespoon pure vanilla extract not imitation; it complements maple beautifully
- ½ teaspoon salt enhances the maple flavor and balances sweetness
- 2¼ cup all-purpose flour spooned into measuring cup and leveled off, never packed
Instructions
Step 1: Prepare Your Oven and Pan
- Start by positioning a rack in the center of your oven and preheating to 400°F. While the oven heats, generously grease a standard 12-cup muffin tin with softened butter. Don't skip this step or use cooking spray—the butter creates a beautifully browned edge that's one of the hallmarks of these muffins. If you're doubling the recipe, prepare two tins now. This initial step takes just three minutes but sets the foundation for success.
Step 2: Combine Your Dry Ingredients
- In a large mixing bowl, whisk together the all-purpose flour, whole wheat flour, baking powder, salt, and nutmeg. Whisk for about 20-30 seconds to fully incorporate the leavening agent—this distributes the baking powder evenly so you don't end up with pockets of dense muffin. Set this bowl aside. This is a critical step that many home cooks rush through, but it takes less than a minute and makes a genuine difference in your final product.
Step 3: Mix Your Wet Ingredients
- In a medium bowl, whisk together the melted butter and maple syrup until fully combined. The mixture should look like liquid amber—glossy and smooth. Add the vanilla extract and whisk again. Now, slowly add the milk while whisking, then add the whole egg and egg yolk. Whisk until the mixture is completely smooth and uniform. This step takes about two minutes and is genuinely important for even distribution of moisture throughout your muffins.
Step 4: Combine Wet and Dry Ingredients
- Pour the wet mixture into the dry ingredients and whisk gently just until you see no white streaks of flour—this should take about 15-20 whisks. I know the temptation is to mix until everything looks perfectly smooth, but resist it. Overmixing develops gluten, which turns muffins dense and tough. The batter will look slightly lumpy, and that's exactly what you want. Stir in the walnuts with just a few gentle folds. Let the batter rest for 5 minutes—this allows the whole wheat flour to fully hydrate, which improves moisture and texture dramatically.
Step 5: Fill and Bake
- Using a ice cream scoop or large spoon, divide the batter evenly among the prepared muffin cups. Fill each cup until it's nearly full—these muffins will rise beautifully and you want that gorgeous dome. Place the tin in your preheated 400°F oven and bake for exactly 10 minutes. At the 10-minute mark, reduce the temperature to 375°F and continue baking for approximately 15 minutes more, until the muffins are golden brown on top and a cake tester or toothpick inserted into the center comes out clean. The whole process from start to finish should take about 35 minutes.

Step 6: Cool and Serve
- Allow the muffins to cool in the pan for exactly 5 minutes—this helps them set enough to remove without crumbling, but they're still warm enough to taste incredible. Gently run a thin knife around the edges of each muffin to release them from the pan, then lift them out carefully. Serve them warm with softened butter, or transfer them to a cooling rack if you're serving them later. Warm maple muffins with butter are honestly one of my favorite simple pleasures in the kitchen.
Notes
FAQs
Can I Make These Muffins Ahead for a Weekend Gathering?
Absolutely, and I highly recommend it. I typically bake these muffins the evening before a gathering, let them cool completely, then store them in an airtight container. On the morning of the event, I reheat them gently at 300°F for about 10 minutes, which brings back that fresh-from-the-oven quality. Alternatively, you can prepare the batter completely the night before, refrigerate it, and bake the muffins fresh in the morning—they’ll take just 35 minutes from mixing to serving.
What’s the Difference Between Grade A and Grade B Maple Syrup?
Grade B syrup (now called Grade A Dark Robust) has a deeper, more pronounced maple flavor because it comes from sap collected later in the season. Grade A is lighter and more delicate. For these muffins, I prefer Grade B because its stronger flavor shines through without being overwhelmed by the other ingredients. However, Grade A works perfectly well—you’ll simply have a slightly more subtle maple flavor. Never use pancake syrup or table syrup, which contain added sugars and won’t deliver the same results.
Can I Use Oil Instead of Butter?
You can, though I don’t recommend it for these particular muffins. Butter contributes to the tender, slightly cake-like crumb that makes these muffins special. If you must use oil for dietary reasons, substitute an equal amount of mild-flavored oil like canola or light olive oil, but expect a slightly different texture—the muffins will be more tender and less structured.
Why Do My Muffins Dome So Much They Stick to My Oven?
This typically means your oven runs hot, or you’re filling the cups too full. Try reducing the oven temperature by 25°F if your muffins consistently dome excessively. Also, fill the cups only to about three-quarters full rather than nearly full—this still gives you a nice dome without excessive rise that causes sticking. If muffins do stick to your oven rack, turn off the oven and place a baking sheet on the rack below to catch drips in the future.
How Do I Know When the Muffins Are Perfectly Done?
A cake tester or toothpick inserted into the center should come out clean with no wet batter clinging to it. The tops should be golden brown, and if you gently press the center with your finger, it should spring back slightly. Don’t overbake—even a minute or two too long can make them slightly dry. I check mine at the 24-minute mark rather than waiting the full 25.
More Recipes for Your Table
- Krollskorner Pumpkin Bread – another fall favorite with similar warm spices and comfort-food appeal
- Breakfast Enchiladas Recipe – perfect for pairing with these muffins at larger brunches
- King’s Hawaiian Rolls Breakfast Recipe – if you want another baked good option for your gathering
These maple muffins have become my answer to so many of life’s occasions. Whether you’re creating a quiet morning ritual, impressing guests at a brunch, or simply wanting to fill your home with warmth and intention, this recipe delivers. I’ve watched these muffins bring families together, appear at celebrations both large and small, and become the thing people ask for by name. The beauty of good baking is that it connects us to tradition while creating new memories with the people we love. When you pull a batch of golden, tender maple muffins from your oven, you’re not just making breakfast—you’re making a moment. And honestly, that’s what it’s all about. Good food is a good mood!

My name is Lori Walker. I’m a registered dietitian, food blogger and food enthusiast. I share easy healthy, delicious recipes on my blog and review necessary kitchen items. The recipes I share take less… Read more