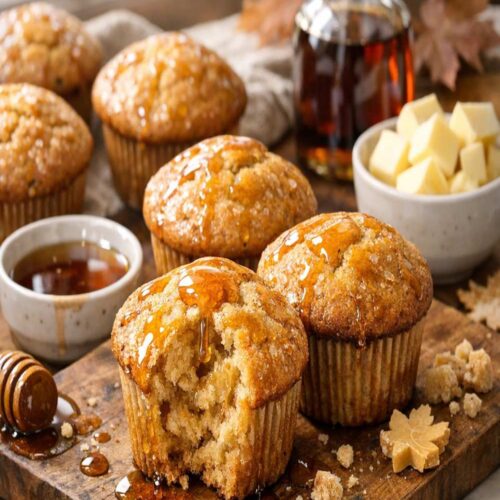
Maple Syrup Muffins Recipe
If you've always wanted to make maple syrup muffins but felt intimidated by baking, this is your starting point. I'm going to walk you through every single step—from measuring flour to pulling golden muffins from your oven—with the confidence of someone who has tested this recipe dozens of times on standard home equipment. These muffins are tender, moist, and genuinely foolproof. If you're looking for other accessible baked goods to master, I'd recommend checking out my Krollskorner Pumpkin Bread guide, which uses the same relaxed, step-by-step approach. Good food is a good mood—and that starts with recipes designed for real people in real kitchens.
Print
Pin
Rate
Servings: 12 2
Calories: 332kcal
Equipment
- A standard 12-cup muffin tin. This is essential. Look for sturdy metal, ideally with a non-stick coating—or plan to use paper liners. If you only have a jumbo muffin tin or mini muffin tin, you'll need to adjust baking time significantly (jumbo: add 8-10 minutes; mini: subtract 5-7 minutes). A standard tin is your best bet for following this recipe exactly.
- Two mixing bowls—one large, one medium. Any bowls you have at home work perfectly. Glass, ceramic, metal—it doesn't matter. Just make sure one is noticeably larger than the other so you have room to whisk without splashing batter everywhere.
- A whisk (or fork if that's what you have). A proper whisk incorporates air and combines ingredients more evenly, but I've made these muffins with a fork in a pinch. A whisk just makes it slightly easier and faster.
- Measuring cups and spoons. These are essential for accuracy. Measuring by weight (using a kitchen scale) is even better if you have one, but measuring cups work beautifully—just remember to spoon flour into the cup and level it off rather than scooping directly from the bag, which packs the flour and throws off your measurements.
- A cake tester or toothpick. Optional but genuinely helpful. A thin wooden skewer or even a toothpick works perfectly to test doneness. If you don't have one, a clean knife works fine.
- A cooling rack. Optional. If you don't have one, you can cool the muffins right on the counter or even on a clean kitchen towel.
Ingredients
- 1 tablespoon baking powder (check the expiration date
- 2¼ cup all-purpose flour spooned into measuring cup and leveled off, never scooped directly from the bag
- 2 tablespoon softened butter for greasing the pan, plus more if needed
- 1 cup walnut pieces, coarsely chopped toasted optional, adds richness; omit entirely if you have a nut allergy
- ½ cup whole milk full-fat milk creates a more tender crumb; low-fat works but texture is slightly denser
- 1½ cup pure maple syrup look for "100% pure maple syrup" on the label; Grade B has deeper flavor, Grade A is lighter and still delicious
- 12 tablespoon unsalted butter 1½ sticks, melted and slightly cooled; salted butter changes the flavor balance
- ¾ cup whole wheat flour adds subtle nutty flavor and nutrition; all-purpose works if you can't find whole wheat
- ½ teaspoon salt enhances maple flavor; use fine sea salt or table salt
- 1 large egg plus 1 large egg yolk room temperature eggs mix more smoothly; use eggs within 3-4 weeks of purchase
Instructions
Step 1: Preheat Your Oven and Arrange the Rack
- Start by positioning one oven rack in the center of your oven—that's the exact middle, where heat circulates most evenly. Then preheat your oven to 400°F. Yes, 400°F to start. This high initial temperature does something important: it creates quick, aggressive heat that helps the batter rise beautifully and set the structure before the muffins can spread out flat. While your oven heats, allow at least 5-8 minutes for it to reach true temperature. Many home ovens reach the displayed temperature but aren't actually ready. If you have an oven thermometer, place it on the center rack while preheating—it shows you the real temperature. If you don't, just give it a few extra minutes.

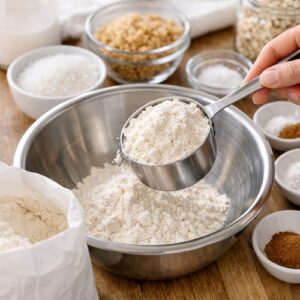
Step 2: Measure and Mix Your Dry Ingredients
- Take your large mixing bowl and gather your dry ingredients nearby. Grab a measuring cup and the all-purpose flour. Here's the critical part: spoon the flour into the measuring cup and level it off with a knife—don't pack it down, and don't scoop the measuring cup directly into the flour bag. Scooping packs the flour and adds too much to your recipe, which creates dense, dry muffins. This is the most common measuring mistake I see, and fixing it changes everything. Measure 2¼ cups of all-purpose flour this way (three ¾-cup measures, or two 1-cup measures plus one ¼-cup measure—whatever works for you). Pour it into the large bowl. Repeat with the whole wheat flour, measuring out ¾ cup. Add 1 tablespoon of baking powder and ½ teaspoon of salt to the flour mixture. Use a whisk or fork to combine thoroughly, stirring for about 20 seconds. You'll see the baking powder distribute evenly through the flour. Set this bowl aside.
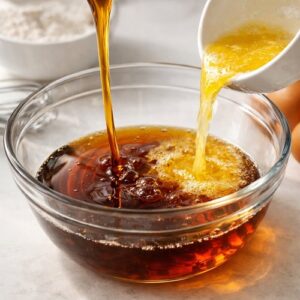
Step 3: Combine Your Wet Ingredients
- Take your medium mixing bowl and pour in 1½ cups of pure maple syrup. If your butter is already melted and has cooled slightly (it should be warm, not hot—if it's steaming, let it sit for 3-5 minutes), add 12 tablespoons of it to the maple syrup. Why cooled slightly? Hot butter can scramble the egg when you add it next. Whisk together the maple syrup and melted butter for about 10 seconds until they're combined. The mixture won't be completely smooth—a few swirls of butter are fine. Pour in ½ cup of whole milk and whisk for another 5 seconds. Crack 1 large egg into the bowl and whisk it in completely—you want to see no streaks of egg white. Then crack open another egg, separate out the white (you can eat or discard it), and add just the 1 egg yolk to the bowl. Whisk everything for about 15 seconds until it's light and uniform. The mixture should look fairly smooth and cohesive.
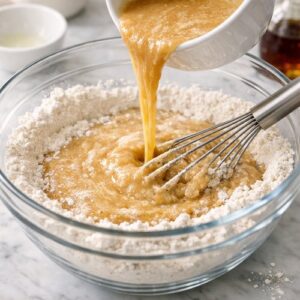
Step 4: Combine Wet and Dry Ingredients
- Now comes the gentle part. Pour the wet ingredient mixture into the dry ingredients and whisk everything together until just combined. This takes about 15-20 seconds of gentle whisking. You'll see the batter come together. Stop as soon as you don't see streaks of flour anymore—small lumps are completely fine and actually desirable in muffins. Why gentle mixing? Muffin batter should be lumpy, not smooth. Overmixing develops gluten in the flour, which makes the muffins tough and dense. A few small lumps mean tender, delicate muffins. I know this goes against some instincts, but trust me—lumps are good. If you're using walnuts, stir in 1 cup of coarsely chopped walnuts—just fold them in gently with a few turns of your whisk or a wooden spoon. Let the batter rest undisturbed for exactly 5 minutes. During this rest, the flour continues to hydrate and the batter becomes slightly thicker, which helps the muffins rise evenly.
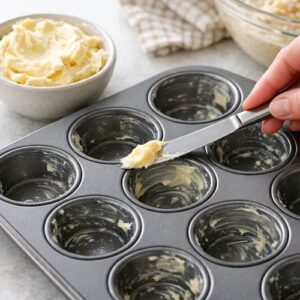
Step 5: Grease Your Muffin Pan
- While the batter rests, prepare your muffin tin. Take about 2 tablespoons of softened butter (the kind you can spread easily with a butter knife, not melted). Use a butter wrapper, a small brush, or your fingers to coat the inside of each muffin cup generously. I mean really generously—a thin coat isn't enough. Maple muffins are rich and stick more readily than plain muffins, so don't hold back. Coat the top of the tin too, where the muffin tops will rest. If you don't have enough butter, use more from your stick. The goal is a visible sheen of butter in every cup. If you prefer, you can use paper liners instead—they work perfectly and actually make cleanup easier, though greasing the tin itself works beautifully.
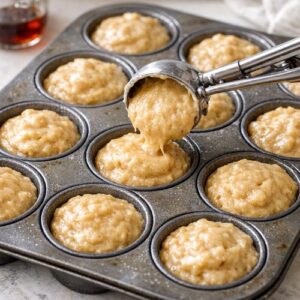
Step 6: Fill the Muffin Cups
- Your batter has now rested for 5 minutes and is ready to go. Spoon the batter evenly into each greased muffin cup—aim for filling each one almost to the top. These cups should be nearly full, about ¾ inch from the rim. The batter is thick and won't overflow when the muffins rise. I use an ice cream scoop (a ⅓-cup size works perfectly) to fill each cup evenly, which takes the guesswork out and ensures they bake at the same rate. If you don't have a scoop, two spoons work fine—one to scoop, one to push the batter in.
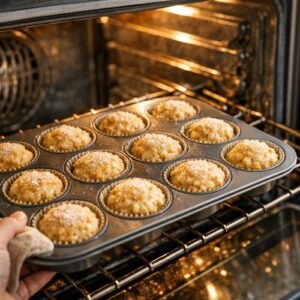
Step 7: The Two-Temperature Bake
- Slide the filled muffin tin into the center of your preheated 400°F oven. Bake for exactly 10 minutes at this temperature. Don't open the door during these 10 minutes—the oven needs to stay hot and undisturbed. At the 10-minute mark, carefully open the oven door and reduce the temperature to 375°F. The muffins will look pale and risen but not fully baked. Close the door gently and bake for 15 minutes more at 375°F. Around the 20-25 minute mark total, the tops should turn golden brown. Insert a cake tester or toothpick into the center of the largest-looking muffin—it should come out clean or with just a tiny crumb or two, not wet batter. If batter clings to the tester, bake for 2-3 more minutes and test again.
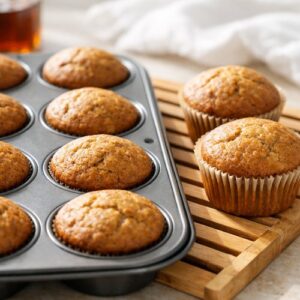
Step 8: Cool and Remove from Pan
- When the muffins are done, remove the pan from the oven and let the muffins cool in the pan for exactly 5 minutes. This resting period is crucial—it lets the structure set just enough that they release cleanly without falling apart. Run a thin knife around the edge of each muffin if they seem stuck, then tip them out onto a cooling rack or clean counter. Serve them warm with softened butter if you like, or let them cool completely and enjoy them at room temperature. The maple flavor actually deepens slightly as they cool.
Notes
- 1 tablespoon baking powder (check the expiration date—old baking powder won't create proper rise)
- 2¼ cups all-purpose flour (spooned into measuring cup and leveled off, never scooped directly from the bag)
- 2 tablespoons softened butter (for greasing the pan, plus more if needed)
- 1 cup walnut pieces, coarsely chopped (toasted optional, adds richness; omit entirely if you have a nut allergy)
- ½ cup whole milk (full-fat milk creates a more tender crumb; low-fat works but texture is slightly denser)
- 1½ cups pure maple syrup (look for "100% pure maple syrup" on the label; Grade B has deeper flavor, Grade A is lighter and still delicious)