This post contains affiliate links. As an Amazon Associate I earn from qualifying purchases.
If you’ve always wanted to make maple syrup muffins but felt intimidated by baking, this is your starting point. I’m going to walk you through every single step—from measuring flour to pulling golden muffins from your oven—with the confidence of someone who has tested this recipe dozens of times on standard home equipment. These muffins are tender, moist, and genuinely foolproof. If you’re looking for other accessible baked goods to master, I’d recommend checking out my Krollskorner Pumpkin Bread guide, which uses the same relaxed, step-by-step approach. Good food is a good mood—and that starts with recipes designed for real people in real kitchens.
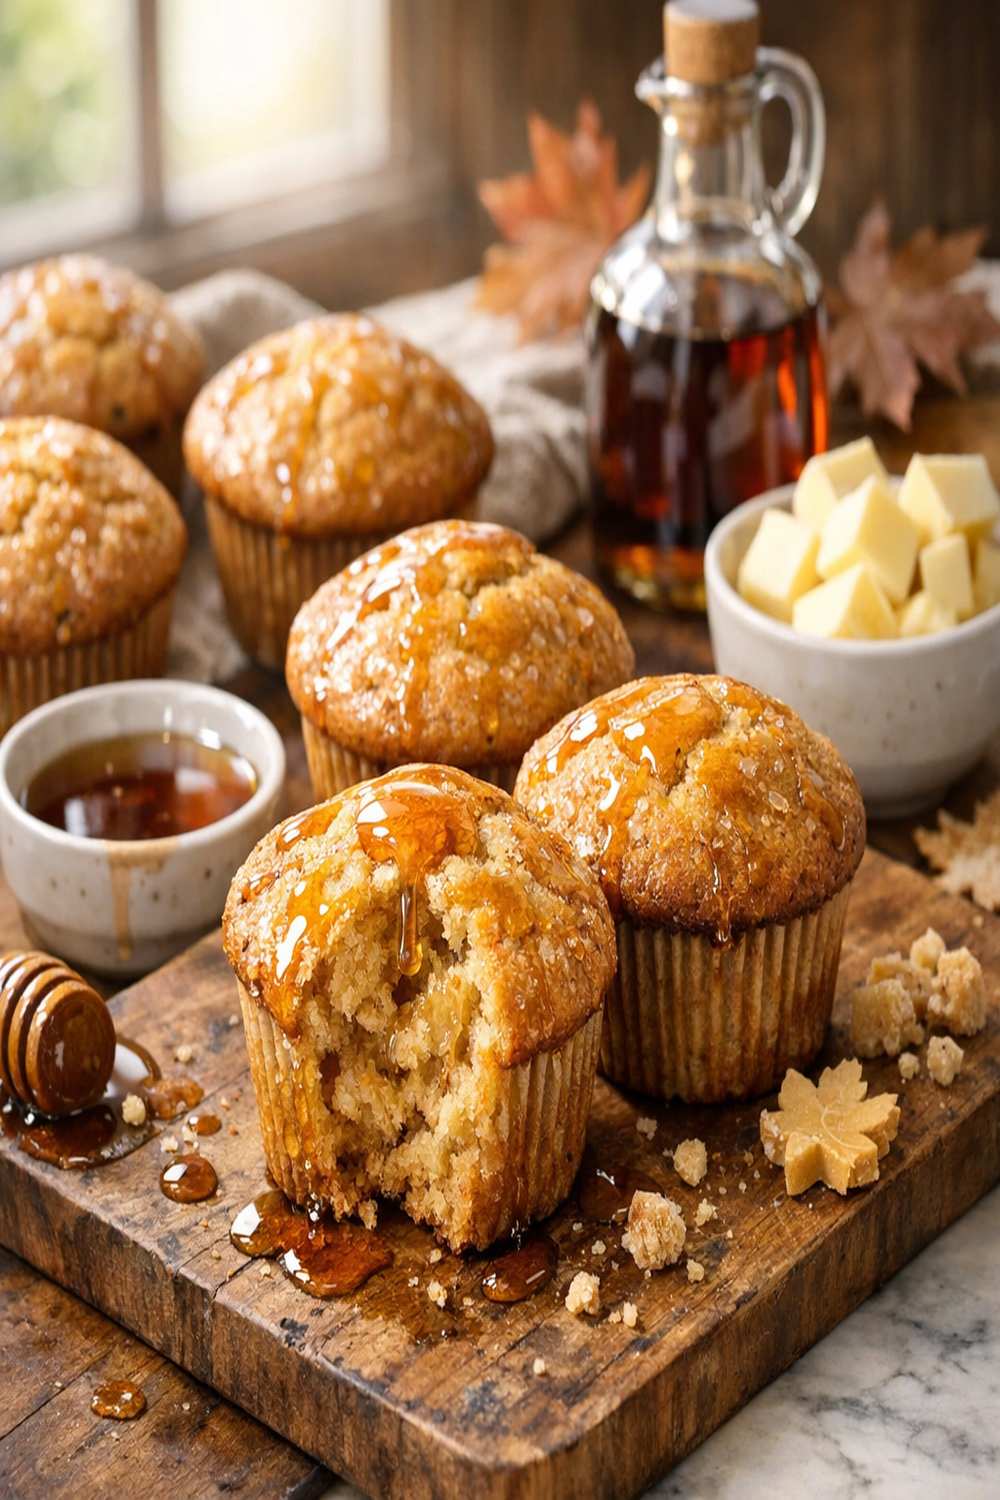
How to Make Maple Syrup Muffins for the First Time (You’ve Got This)
I still remember the first time I made maple muffins from a family recipe my grandmother passed down. I was nervous about the texture—would they be too dense? Too dry? I whisked the batter carefully, filled the cups almost to the brim like the recipe said, and set the timer. When I pulled them out, the kitchen smelled like pure maple and butter. I bit into one while it was still warm, and the flavor was bright, rich, and unmistakably maple. My kids devoured three muffins each before breakfast was officially over.
That moment taught me something crucial: baking doesn’t have to be scary. It just requires attention and the right guidance. This recipe has been refined through years of testing, and I’m sharing it with you exactly as it works in my kitchen—which is probably very similar to yours.
What to Expect Before You Start
Let me set realistic expectations so you walk into this with confidence. These muffins take about 30 minutes from measuring dry ingredients to pulling them from the oven. The difficulty level is beginner-friendly—there’s no folding technique, no temperature-sensitive steps, and no fancy timing tricks. You’ll need a standard muffin tin, a couple of mixing bowls, and basic measuring tools.
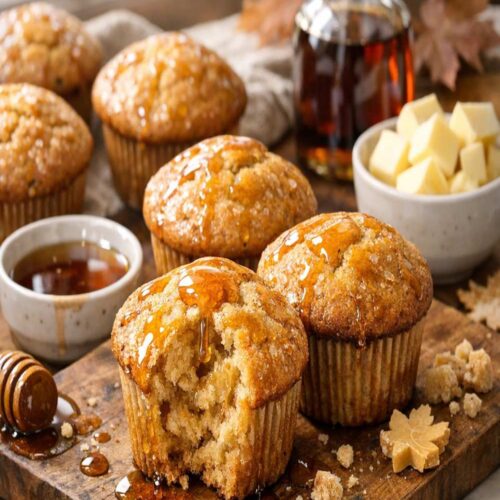
Success looks like golden-brown muffins with a tender crumb that springs back slightly when you touch it. The tops should be domed and caramel-colored. Inside, each muffin should be moist but not gummy, with visible specks of walnut if you choose to add them. The maple flavor should come through clearly on the first bite.
- Mixing is simple and forgiving. Unlike some baking recipes that require precise whisking or folding, this one is straightforward. You mix dry ingredients, then wet ingredients, then combine them gently. Overmixing actually isn’t a concern here because the wet ingredients are already rich with fat and maple syrup, which keeps the crumb tender even if you’re slightly enthusiastic with your whisk.
- The two-temperature bake is intentional, not complicated. Starting at 400°F and dropping to 375°F might sound fussy, but it’s actually a beginner’s best friend. The high heat sets the structure quickly so your muffins rise beautifully; the lower heat finishes them gently so the tops brown without the insides drying out. You’ll only adjust the temperature once, and I’ll tell you exactly when.
Equipment You’ll Need (And What You Can Skip)
I’ve tested this recipe on every kind of standard kitchen equipment you might have at home. You don’t need anything fancy or specialized. Here’s exactly what matters:
- A standard 12-cup muffin tin. This is essential. Look for sturdy metal, ideally with a non-stick coating—or plan to use paper liners. If you only have a jumbo muffin tin or mini muffin tin, you’ll need to adjust baking time significantly (jumbo: add 8-10 minutes; mini: subtract 5-7 minutes). A standard tin is your best bet for following this recipe exactly.
- Two mixing bowls—one large, one medium. Any bowls you have at home work perfectly. Glass, ceramic, metal—it doesn’t matter. Just make sure one is noticeably larger than the other so you have room to whisk without splashing batter everywhere.
- A whisk (or fork if that’s what you have). A proper whisk incorporates air and combines ingredients more evenly, but I’ve made these muffins with a fork in a pinch. A whisk just makes it slightly easier and faster.
- Measuring cups and spoons. These are essential for accuracy. Measuring by weight (using a kitchen scale) is even better if you have one, but measuring cups work beautifully—just remember to spoon flour into the cup and level it off rather than scooping directly from the bag, which packs the flour and throws off your measurements.
- A cake tester or toothpick. Optional but genuinely helpful. A thin wooden skewer or even a toothpick works perfectly to test doneness. If you don’t have one, a clean knife works fine.
- A cooling rack. Optional. If you don’t have one, you can cool the muffins right on the counter or even on a clean kitchen towel.
The Ingredients – A Beginner’s Shopping Guide
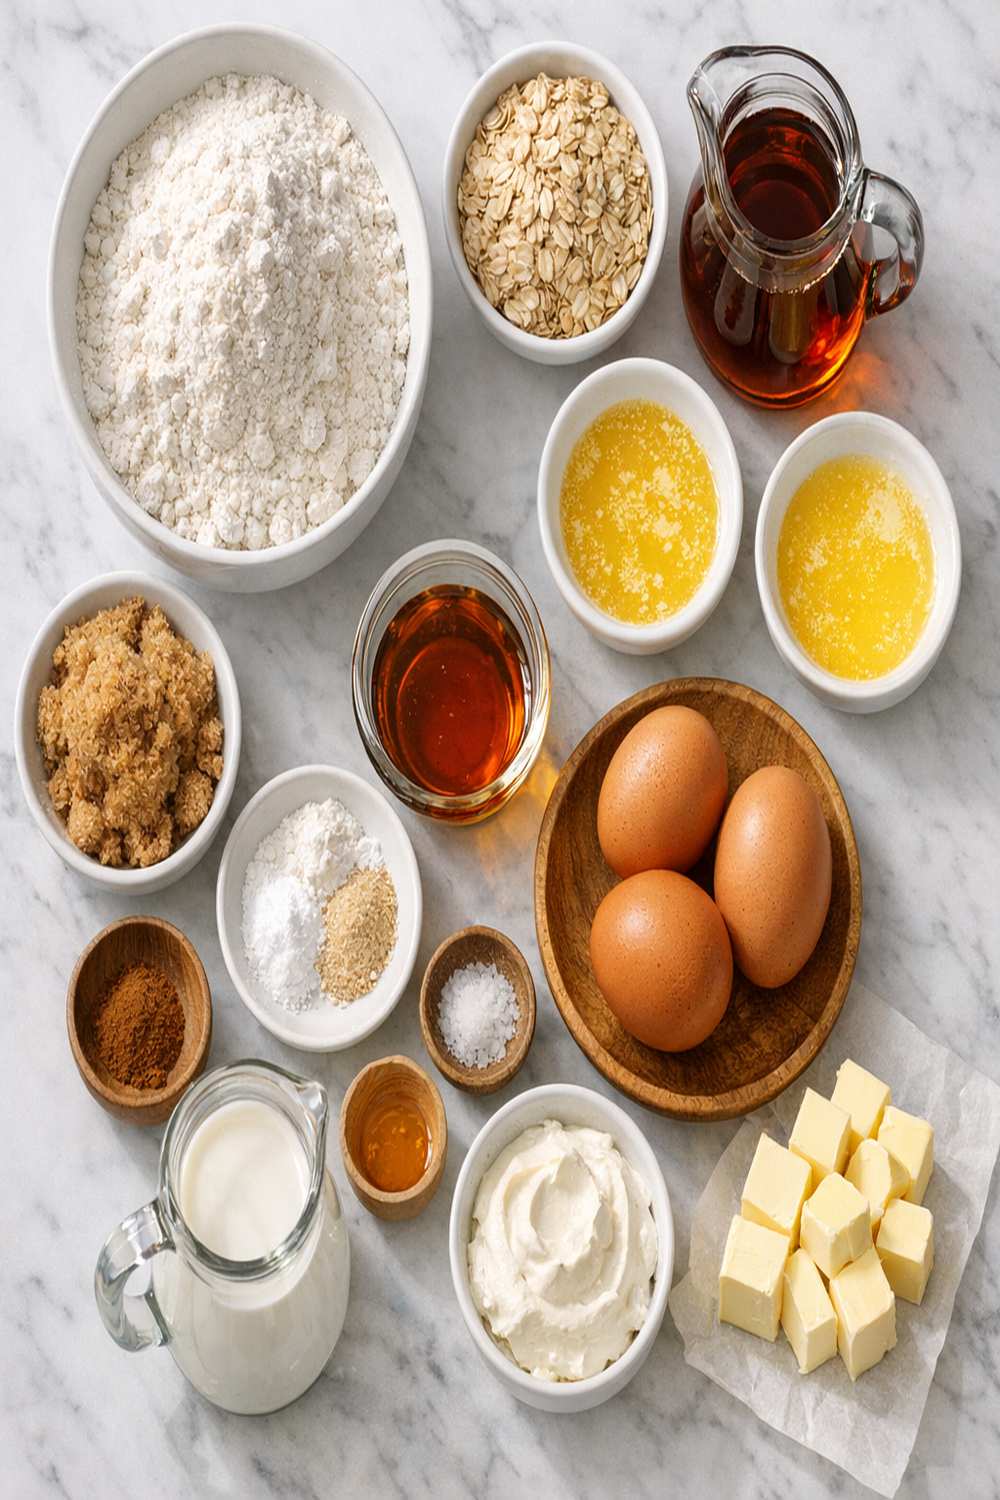
One of the beautiful things about this recipe is that most ingredients are already in your pantry. The star here is genuine maple syrup—and yes, it makes a difference. I always look for pure maple syrup, Grade B if I can find it (it has a more robust maple flavor), but Grade A works beautifully too. Avoid “maple-flavored syrup” or “pancake syrup,” which are mostly corn syrup and don’t taste anything like real maple.
Here’s everything you need, with shopping tips for first-timers:
- 1 tablespoon baking powder (check the expiration date—old baking powder won’t create proper rise)
- 2¼ cups all-purpose flour (spooned into measuring cup and leveled off, never scooped directly from the bag)
- 2 tablespoons softened butter (for greasing the pan, plus more if needed)
- 1 cup walnut pieces, coarsely chopped (toasted optional, adds richness; omit entirely if you have a nut allergy)
- ½ cup whole milk (full-fat milk creates a more tender crumb; low-fat works but texture is slightly denser)
- 1½ cups pure maple syrup (look for “100% pure maple syrup” on the label; Grade B has deeper flavor, Grade A is lighter and still delicious)
- 12 tablespoons unsalted butter (1½ sticks, melted and slightly cooled; salted butter changes the flavor balance)
- ¾ cup whole wheat flour (adds subtle nutty flavor and nutrition; all-purpose works if you can’t find whole wheat)
- ½ teaspoon salt (enhances maple flavor; use fine sea salt or table salt)
- 1 large egg plus 1 large egg yolk (room temperature eggs mix more smoothly; use eggs within 3-4 weeks of purchase)
Step-by-Step: Your First Maple Syrup Muffins Recipe
You’re about to make something truly delicious. I’m going to walk through each step with the detail that made me confident in my own kitchen. Read through the entire section once before you start—it takes two minutes and prevents surprises.
Step 1: Preheat Your Oven and Arrange the Rack
Start by positioning one oven rack in the center of your oven—that’s the exact middle, where heat circulates most evenly. Then preheat your oven to 400°F. Yes, 400°F to start. This high initial temperature does something important: it creates quick, aggressive heat that helps the batter rise beautifully and set the structure before the muffins can spread out flat.
While your oven heats, allow at least 5-8 minutes for it to reach true temperature. Many home ovens reach the displayed temperature but aren’t actually ready. If you have an oven thermometer, place it on the center rack while preheating—it shows you the real temperature. If you don’t, just give it a few extra minutes.

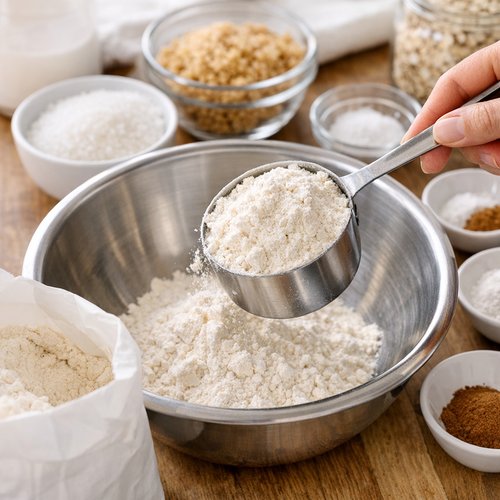
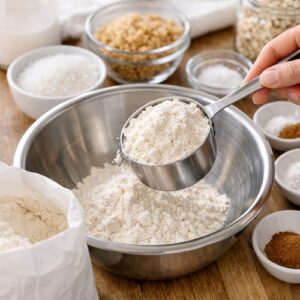
Step 2: Measure and Mix Your Dry Ingredients
Take your large mixing bowl and gather your dry ingredients nearby. Grab a measuring cup and the all-purpose flour. Here’s the critical part: spoon the flour into the measuring cup and level it off with a knife—don’t pack it down, and don’t scoop the measuring cup directly into the flour bag. Scooping packs the flour and adds too much to your recipe, which creates dense, dry muffins. This is the most common measuring mistake I see, and fixing it changes everything.
Measure 2¼ cups of all-purpose flour this way (three ¾-cup measures, or two 1-cup measures plus one ¼-cup measure—whatever works for you). Pour it into the large bowl. Repeat with the whole wheat flour, measuring out ¾ cup.
Add 1 tablespoon of baking powder and ½ teaspoon of salt to the flour mixture. Use a whisk or fork to combine thoroughly, stirring for about 20 seconds. You’ll see the baking powder distribute evenly through the flour. Set this bowl aside.
Step 3: Combine Your Wet Ingredients
Take your medium mixing bowl and pour in 1½ cups of pure maple syrup. If your butter is already melted and has cooled slightly (it should be warm, not hot—if it’s steaming, let it sit for 3-5 minutes), add 12 tablespoons of it to the maple syrup. Why cooled slightly? Hot butter can scramble the egg when you add it next.
Whisk together the maple syrup and melted butter for about 10 seconds until they’re combined. The mixture won’t be completely smooth—a few swirls of butter are fine. Pour in ½ cup of whole milk and whisk for another 5 seconds.
Crack 1 large egg into the bowl and whisk it in completely—you want to see no streaks of egg white. Then crack open another egg, separate out the white (you can eat or discard it), and add just the 1 egg yolk to the bowl. Whisk everything for about 15 seconds until it’s light and uniform. The mixture should look fairly smooth and cohesive.

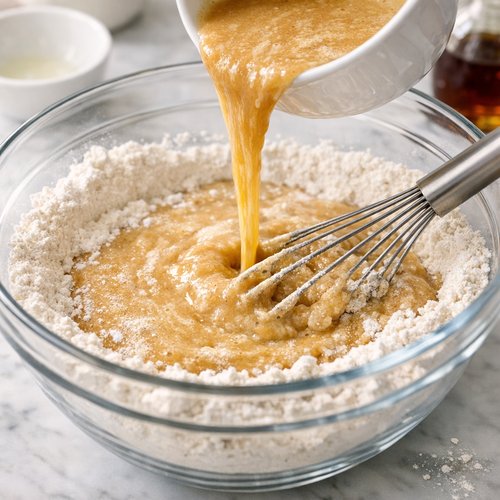
Step 4: Combine Wet and Dry Ingredients
Now comes the gentle part. Pour the wet ingredient mixture into the dry ingredients and whisk everything together until just combined. This takes about 15-20 seconds of gentle whisking. You’ll see the batter come together. Stop as soon as you don’t see streaks of flour anymore—small lumps are completely fine and actually desirable in muffins.
Why gentle mixing? Muffin batter should be lumpy, not smooth. Overmixing develops gluten in the flour, which makes the muffins tough and dense. A few small lumps mean tender, delicate muffins. I know this goes against some instincts, but trust me—lumps are good.
If you’re using walnuts, stir in 1 cup of coarsely chopped walnuts—just fold them in gently with a few turns of your whisk or a wooden spoon. Let the batter rest undisturbed for exactly 5 minutes. During this rest, the flour continues to hydrate and the batter becomes slightly thicker, which helps the muffins rise evenly.
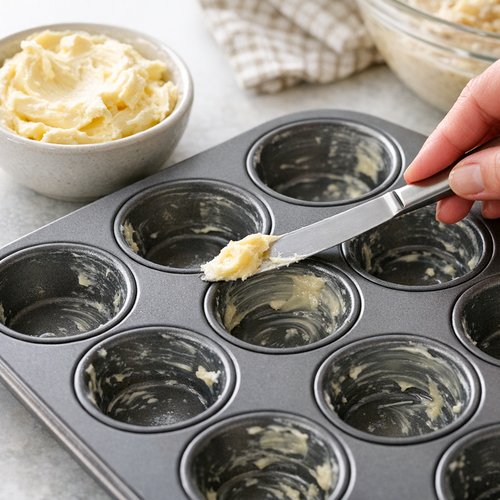
Step 5: Grease Your Muffin Pan
While the batter rests, prepare your muffin tin. Take about 2 tablespoons of softened butter (the kind you can spread easily with a butter knife, not melted). Use a butter wrapper, a small brush, or your fingers to coat the inside of each muffin cup generously. I mean really generously—a thin coat isn’t enough. Maple muffins are rich and stick more readily than plain muffins, so don’t hold back.
Coat the top of the tin too, where the muffin tops will rest. If you don’t have enough butter, use more from your stick. The goal is a visible sheen of butter in every cup. If you prefer, you can use paper liners instead—they work perfectly and actually make cleanup easier, though greasing the tin itself works beautifully.
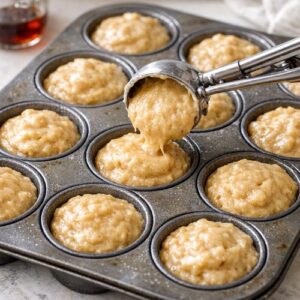
Step 6: Fill the Muffin Cups
Your batter has now rested for 5 minutes and is ready to go. Spoon the batter evenly into each greased muffin cup—aim for filling each one almost to the top. These cups should be nearly full, about ¾ inch from the rim. The batter is thick and won’t overflow when the muffins rise.
I use an ice cream scoop (a ⅓-cup size works perfectly) to fill each cup evenly, which takes the guesswork out and ensures they bake at the same rate. If you don’t have a scoop, two spoons work fine—one to scoop, one to push the batter in.

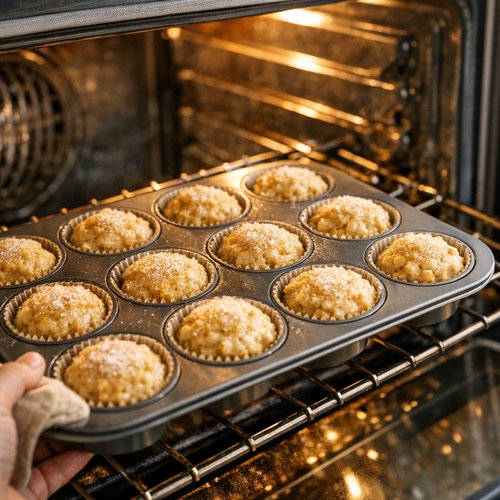
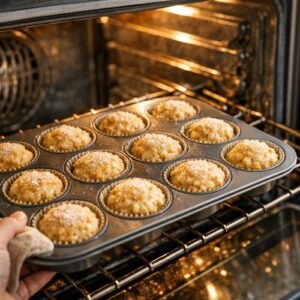
Step 7: The Two-Temperature Bake
Slide the filled muffin tin into the center of your preheated 400°F oven. Bake for exactly 10 minutes at this temperature. Don’t open the door during these 10 minutes—the oven needs to stay hot and undisturbed. At the 10-minute mark, carefully open the oven door and reduce the temperature to 375°F. The muffins will look pale and risen but not fully baked.
Close the door gently and bake for 15 minutes more at 375°F. Around the 20-25 minute mark total, the tops should turn golden brown. Insert a cake tester or toothpick into the center of the largest-looking muffin—it should come out clean or with just a tiny crumb or two, not wet batter. If batter clings to the tester, bake for 2-3 more minutes and test again.
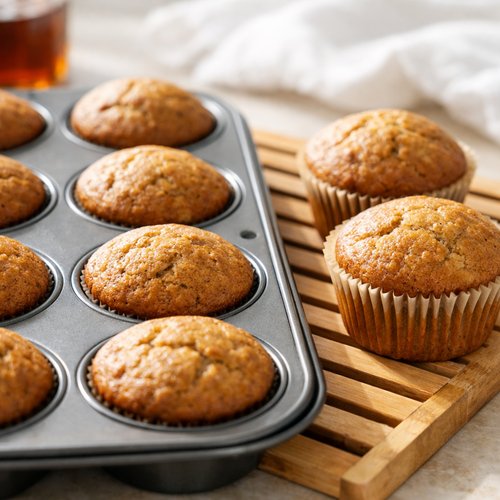
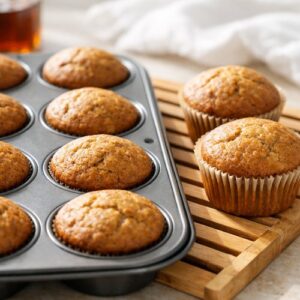
Step 8: Cool and Remove from Pan
When the muffins are done, remove the pan from the oven and let the muffins cool in the pan for exactly 5 minutes. This resting period is crucial—it lets the structure set just enough that they release cleanly without falling apart. Run a thin knife around the edge of each muffin if they seem stuck, then tip them out onto a cooling rack or clean counter.
Serve them warm with softened butter if you like, or let them cool completely and enjoy them at room temperature. The maple flavor actually deepens slightly as they cool.
How to Tell If You Did It Right
Success leaves clear clues. Here’s exactly what to look for at each stage so you know you’re on track:
- Golden-brown tops with a slight dome. The muffin tops should be caramel-colored, not pale yellow or dark brown. They should have a gentle dome shape, not a flat top or an exaggerated peak. If the tops are pale, they needed more time; if they’re dark brown, the oven temperature was likely too high.
- A clean or nearly clean cake tester when inserted in the center. This is your doneness signal. A few moist crumbs clinging to the tester are fine—in fact, they indicate a tender crumb. Wet batter means more time is needed.
- A tender, moist crumb with visible walnut pieces. When you bite into a cooled muffin, it should be moist but not gummy, with a slight resistance before it breaks. The maple flavor should be clear and pronounced. If you added walnuts, they should be distributed throughout and add a pleasant crunch and richness.
- A clean, buttery smell throughout your kitchen. Maple muffins smell absolutely divine while baking. That rich, sweet, buttery aroma is your oven telling you everything is going right.
What Went Wrong? Beginner Fixes
- Muffins are dry or dense. The most common cause is measuring flour by scooping directly from the bag, which packs too much flour in. Remember: spoon and level. The second cause is overmixing the batter—more than 20 seconds of whisking develops gluten and creates a tough crumb. Mix gently until you just see no flour streaks, then stop.
- Muffin tops sunk in the middle or the muffins didn’t rise. This usually means old baking powder that’s lost its leavening power. Baking powder expires—check the expiration date on the box. It should be within two years of opening. If it’s older, buy a fresh box and try again. The flavor from the maple syrup will remind you why it’s worth a second attempt.
- Muffins stuck to the tin and fell apart when you tried to remove them. You didn’t grease the pan enough, or you removed them before the 5-minute cool-down period. Next time, coat every corner generously with butter, and wait the full 5 minutes before releasing them. Run a thin knife around each cup if they seem stuck.
- One or two muffins baked much faster than the others. This usually means those cups were in a hotter part of your oven. Most home ovens have hot spots. Next time, rotate the pan halfway through baking (after the first 10 minutes, when you lower the temperature). This evens out the heat exposure.
Your Next Steps After Mastering This
Once you’ve made these maple muffins successfully, you’ve learned fundamental skills that unlock a whole world of baking. You’ve practiced accurate measuring, understood how wet-to-dry ratios work, and mastered the gentle art of muffin mixing. These skills transfer directly to quick breads, which use nearly identical techniques.
Next, I’d encourage you to try my Krollskorner Pumpkin Bread, which uses the same mixing method but introduces you to spice combinations. From there, you can branch into coffee cakes, banana breads, and even simple sheet cakes—all of which use these same foundational techniques.
You’ve also learned how flavor depth comes from quality ingredients (real maple syrup, not imitation), how resting time matters, and how a two-temperature bake creates better results than single-temperature baking. These insights make you a better baker from this moment forward.
Can I Store Maple Syrup Muffins?
Absolutely, and I have exact timeframes for you. At room temperature, these muffins stay fresh and moist for up to 2 days in an airtight container. The maple syrup keeps them wonderfully tender, actually improving slightly in flavor as the maple distributes throughout the crumb.
In the refrigerator, store them in an airtight container for up to 4 days. Cold muffins taste less sweet and less flavorful than room-temperature ones, so I recommend bringing them to room temperature or warming them briefly before serving.
In the freezer, they’ll keep for up to 2 months in a freezer-safe container or tightly wrapped in plastic wrap and aluminum foil. Thaw them overnight in the refrigerator or at room temperature for 30-45 minutes. If you’re in a hurry, microwave a frozen muffin for 20-30 seconds—it won’t be quite as good as properly thawed, but it works.
I don’t recommend refrigerating them beyond 4 days because the texture becomes noticeably drier, though they’ll still be edible. Room temperature storage for 2 days is genuinely my preferred method—it’s the sweet spot for flavor and texture.
Expert’s Nutritional Tip: Why This Recipe Works
As a registered dietitian, I designed this recipe with nutrition and satisfaction in mind. Here’s what makes it work: the combination of whole wheat flour and all-purpose flour increases fiber and micronutrient content compared to an all-white-flour muffin, while the all-purpose flour keeps the crumb tender (whole wheat alone tends toward dense). The egg yolk contributes choline, important for brain health and often undercounted in home cooking. The walnuts add omega-3 fatty acids and additional fiber, creating more sustained energy.
The maple syrup isn’t just flavor—it contains trace minerals like manganese and zinc, though the amount per muffin is modest. More importantly, real maple syrup triggers slower blood sugar responses than refined sugar would, making these muffins a genuinely satisfying breakfast option rather than an energy spike-and-crash situation. The fat from butter and walnuts also slows carbohydrate absorption, contributing to sustained fullness.
That said, these are indulgent muffins meant to be enjoyed—not health food masquerading as indulgence. They’re delicious partly because they contain real butter and good ingredients, and that’s exactly how they should be.
Make-Ahead Guide: Meal Prep for Busy Weeks
One of my favorite things about this recipe is how beautifully it handles make-ahead preparation. Here’s my strategy for busy families:
Prep the dry ingredients the night before: Mix together the all-purpose flour, whole wheat flour, baking powder, and salt in a large zip-top bag. Label it with the date. This keeps perfectly at room temperature for up to 1 week. When you’re ready to bake, simply pour the mixture into a bowl—it’s one less step in the morning.
Mix the full batter up to 2 hours in advance: Follow steps 3-4 to combine wet and dry ingredients, let it rest for 5 minutes, then cover the bowl with plastic wrap and refrigerate. When you’re ready to bake, remove it from the fridge 10 minutes before baking (cold batter bakes slightly slower), then proceed as normal. This doesn’t affect the final texture at all.
Bake and freeze the finished muffins for up to 2 months: Make a full batch on Sunday and freeze muffins individually wrapped in plastic wrap, then stored in a freezer-safe container. Each morning, thaw one or two at room temperature while you make coffee, or microwave for 20 seconds for immediate gratification.
Seasonal Variations: Adapting the Recipe Year-Round
This recipe is naturally flexible. Here are my favorite seasonal tweaks:
Fall and Winter: Add ½ teaspoon ground cinnamon and ¼ teaspoon ground nutmeg to the dry ingredients. These spices complement maple beautifully and create cozy autumn muffins. You can also swap the walnuts for pecans if you prefer their slightly sweeter flavor.
Spring: Add the zest of 1 lemon to the wet ingredients along with 1 teaspoon vanilla extract. The brightness of lemon cuts through the richness of maple and feels lighter and more seasonal. Lemon and walnut is a classic pairing that feels sophisticated.
Summer: Replace half the walnuts with blueberries (fresh or frozen). Don’t thaw frozen blueberries—add them straight from the freezer so they don’t bleed color into the batter. Maple and blueberry is an underrated combination that tastes like summer pancakes in muffin form.
Year-round alternative: If you can’t find or don’t like walnuts, use chopped pecans, toasted sunflower seeds, or omit them entirely. The muffins are wonderful plain, without any mix-ins.
Nutrition Information
Based on USDA nutrition data, here’s what each muffin contains (recipe makes 12 muffins):
Per muffin (with walnuts): Approximately 285 calories, 12g fat, 40g carbohydrates, 4g protein, 2g fiber, and 24g sugar (primarily from maple syrup). Sodium is 215mg per muffin. These are rich, indulgent muffins meant for occasional enjoyment rather than everyday staples.
The whole wheat flour contributes about 1g additional fiber compared to all-white-flour muffins, which supports digestive health. The walnuts contribute about 2g protein and beneficial polyunsaturated fats. If you omit the walnuts, you’ll reduce calories by about 60 and protein slightly, but the flavor remains excellent.
What Can I Serve With Maple Syrup Muffins?
These muffins shine on their own, but here are beautiful ways to serve them:
- With softened butter and a cup of strong coffee. This is my favorite—the maple sweetness and buttery muffin need nothing else. The coffee’s slight bitterness balances the sweetness perfectly.
- Alongside a simple green salad for brunch. Try pairing them with my my favorite salad for a complete, balanced meal. The sharp, fresh salad and the sweet, rich muffin create a beautiful contrast.
- With a smear of cream cheese. Cream cheese and maple go together beautifully. Spread it on a warm muffin for something almost dessert-like.
- Crumbled over yogurt with a drizzle of additional maple syrup. This creates a parfait-style breakfast that feels indulgent but comes together in 30 seconds.
- On a brunch spread with King’s Hawaiian Rolls, scrambled eggs, and fresh fruit. Maple muffins fit beautifully into a weekend brunch, offering sweetness alongside savory options.
Maple Syrup Muffins Recipe
Equipment
- A standard 12-cup muffin tin. This is essential. Look for sturdy metal, ideally with a non-stick coating—or plan to use paper liners. If you only have a jumbo muffin tin or mini muffin tin, you'll need to adjust baking time significantly (jumbo: add 8-10 minutes; mini: subtract 5-7 minutes). A standard tin is your best bet for following this recipe exactly.
- Two mixing bowls—one large, one medium. Any bowls you have at home work perfectly. Glass, ceramic, metal—it doesn't matter. Just make sure one is noticeably larger than the other so you have room to whisk without splashing batter everywhere.
- A whisk (or fork if that's what you have). A proper whisk incorporates air and combines ingredients more evenly, but I've made these muffins with a fork in a pinch. A whisk just makes it slightly easier and faster.
- Measuring cups and spoons. These are essential for accuracy. Measuring by weight (using a kitchen scale) is even better if you have one, but measuring cups work beautifully—just remember to spoon flour into the cup and level it off rather than scooping directly from the bag, which packs the flour and throws off your measurements.
- A cake tester or toothpick. Optional but genuinely helpful. A thin wooden skewer or even a toothpick works perfectly to test doneness. If you don't have one, a clean knife works fine.
- A cooling rack. Optional. If you don't have one, you can cool the muffins right on the counter or even on a clean kitchen towel.
Ingredients
- 1 tablespoon baking powder (check the expiration date
- 2¼ cup all-purpose flour spooned into measuring cup and leveled off, never scooped directly from the bag
- 2 tablespoon softened butter for greasing the pan, plus more if needed
- 1 cup walnut pieces, coarsely chopped toasted optional, adds richness; omit entirely if you have a nut allergy
- ½ cup whole milk full-fat milk creates a more tender crumb; low-fat works but texture is slightly denser
- 1½ cup pure maple syrup look for "100% pure maple syrup" on the label; Grade B has deeper flavor, Grade A is lighter and still delicious
- 12 tablespoon unsalted butter 1½ sticks, melted and slightly cooled; salted butter changes the flavor balance
- ¾ cup whole wheat flour adds subtle nutty flavor and nutrition; all-purpose works if you can't find whole wheat
- ½ teaspoon salt enhances maple flavor; use fine sea salt or table salt
- 1 large egg plus 1 large egg yolk room temperature eggs mix more smoothly; use eggs within 3-4 weeks of purchase
Instructions
Step 1: Preheat Your Oven and Arrange the Rack
- Start by positioning one oven rack in the center of your oven—that's the exact middle, where heat circulates most evenly. Then preheat your oven to 400°F. Yes, 400°F to start. This high initial temperature does something important: it creates quick, aggressive heat that helps the batter rise beautifully and set the structure before the muffins can spread out flat. While your oven heats, allow at least 5-8 minutes for it to reach true temperature. Many home ovens reach the displayed temperature but aren't actually ready. If you have an oven thermometer, place it on the center rack while preheating—it shows you the real temperature. If you don't, just give it a few extra minutes.

Step 2: Measure and Mix Your Dry Ingredients
- Take your large mixing bowl and gather your dry ingredients nearby. Grab a measuring cup and the all-purpose flour. Here's the critical part: spoon the flour into the measuring cup and level it off with a knife—don't pack it down, and don't scoop the measuring cup directly into the flour bag. Scooping packs the flour and adds too much to your recipe, which creates dense, dry muffins. This is the most common measuring mistake I see, and fixing it changes everything. Measure 2¼ cups of all-purpose flour this way (three ¾-cup measures, or two 1-cup measures plus one ¼-cup measure—whatever works for you). Pour it into the large bowl. Repeat with the whole wheat flour, measuring out ¾ cup. Add 1 tablespoon of baking powder and ½ teaspoon of salt to the flour mixture. Use a whisk or fork to combine thoroughly, stirring for about 20 seconds. You'll see the baking powder distribute evenly through the flour. Set this bowl aside.
Step 3: Combine Your Wet Ingredients
- Take your medium mixing bowl and pour in 1½ cups of pure maple syrup. If your butter is already melted and has cooled slightly (it should be warm, not hot—if it's steaming, let it sit for 3-5 minutes), add 12 tablespoons of it to the maple syrup. Why cooled slightly? Hot butter can scramble the egg when you add it next. Whisk together the maple syrup and melted butter for about 10 seconds until they're combined. The mixture won't be completely smooth—a few swirls of butter are fine. Pour in ½ cup of whole milk and whisk for another 5 seconds. Crack 1 large egg into the bowl and whisk it in completely—you want to see no streaks of egg white. Then crack open another egg, separate out the white (you can eat or discard it), and add just the 1 egg yolk to the bowl. Whisk everything for about 15 seconds until it's light and uniform. The mixture should look fairly smooth and cohesive.

Step 4: Combine Wet and Dry Ingredients
- Now comes the gentle part. Pour the wet ingredient mixture into the dry ingredients and whisk everything together until just combined. This takes about 15-20 seconds of gentle whisking. You'll see the batter come together. Stop as soon as you don't see streaks of flour anymore—small lumps are completely fine and actually desirable in muffins. Why gentle mixing? Muffin batter should be lumpy, not smooth. Overmixing develops gluten in the flour, which makes the muffins tough and dense. A few small lumps mean tender, delicate muffins. I know this goes against some instincts, but trust me—lumps are good. If you're using walnuts, stir in 1 cup of coarsely chopped walnuts—just fold them in gently with a few turns of your whisk or a wooden spoon. Let the batter rest undisturbed for exactly 5 minutes. During this rest, the flour continues to hydrate and the batter becomes slightly thicker, which helps the muffins rise evenly.

Step 5: Grease Your Muffin Pan
- While the batter rests, prepare your muffin tin. Take about 2 tablespoons of softened butter (the kind you can spread easily with a butter knife, not melted). Use a butter wrapper, a small brush, or your fingers to coat the inside of each muffin cup generously. I mean really generously—a thin coat isn't enough. Maple muffins are rich and stick more readily than plain muffins, so don't hold back. Coat the top of the tin too, where the muffin tops will rest. If you don't have enough butter, use more from your stick. The goal is a visible sheen of butter in every cup. If you prefer, you can use paper liners instead—they work perfectly and actually make cleanup easier, though greasing the tin itself works beautifully.

Step 6: Fill the Muffin Cups
- Your batter has now rested for 5 minutes and is ready to go. Spoon the batter evenly into each greased muffin cup—aim for filling each one almost to the top. These cups should be nearly full, about ¾ inch from the rim. The batter is thick and won't overflow when the muffins rise. I use an ice cream scoop (a ⅓-cup size works perfectly) to fill each cup evenly, which takes the guesswork out and ensures they bake at the same rate. If you don't have a scoop, two spoons work fine—one to scoop, one to push the batter in.
Step 7: The Two-Temperature Bake
- Slide the filled muffin tin into the center of your preheated 400°F oven. Bake for exactly 10 minutes at this temperature. Don't open the door during these 10 minutes—the oven needs to stay hot and undisturbed. At the 10-minute mark, carefully open the oven door and reduce the temperature to 375°F. The muffins will look pale and risen but not fully baked. Close the door gently and bake for 15 minutes more at 375°F. Around the 20-25 minute mark total, the tops should turn golden brown. Insert a cake tester or toothpick into the center of the largest-looking muffin—it should come out clean or with just a tiny crumb or two, not wet batter. If batter clings to the tester, bake for 2-3 more minutes and test again.
Step 8: Cool and Remove from Pan
- When the muffins are done, remove the pan from the oven and let the muffins cool in the pan for exactly 5 minutes. This resting period is crucial—it lets the structure set just enough that they release cleanly without falling apart. Run a thin knife around the edge of each muffin if they seem stuck, then tip them out onto a cooling rack or clean counter. Serve them warm with softened butter if you like, or let them cool completely and enjoy them at room temperature. The maple flavor actually deepens slightly as they cool.
Notes
FAQs
Can I make these muffins in a mini or jumbo muffin tin?
You absolutely can, but you’ll need to adjust the baking time. For mini muffins (which are about one-third the size of standard muffins), reduce the total baking time to 12-15 minutes total—bake 5 minutes at 400°F, then reduce heat to 375°F and bake 7-10 minutes more. For jumbo muffins, increase to about 30-35 minutes total—bake 12 minutes at 400°F, then 18-23 minutes at 375°F. Check doneness with a cake tester since oven variables differ. The flavor won’t change, just the number of muffins you get and how quickly they bake.
What if I don’t have whole wheat flour?
You can use all all-purpose flour (3 cups total instead of 2¼ cups all-purpose plus ¾ cup whole wheat). The muffins will be slightly lighter in texture and won’t have the subtle nutty flavor from whole wheat, but they’ll still be delicious. Alternatively, you can substitute the whole wheat flour with rolled oats (ground into flour in a food processor) for a slightly different but equally valid result. I’ve tested both, and both work beautifully.
Can I reduce the sugar (maple syrup)?
I’d recommend keeping the maple syrup at 1½ cups because it’s doing important work beyond just sweetness. The syrup provides the bulk of the moisture, the structure, and the tender crumb. Reducing it below 1¼ cups creates noticeably drier muffins. If you want less sweetness, you have better options: add spices like cinnamon (which taste sweet without adding sugar), or add unsweetened mix-ins like chopped dark chocolate or coffee chips alongside some of the walnuts. These strategies keep the texture intact while reducing the pure sugar impact.
Are these muffins good for people with gluten sensitivity?
No, these muffins contain regular wheat flour and aren’t gluten-free as written. However, you can make a gluten-free version by substituting a 1:1 gluten-free flour blend for the all-purpose and whole wheat flour combined. I recommend King Arthur Baking Company’s Measure for Measure or Bob’s Red Mill 1-to-1 blend, which are formulated to work in traditional recipes. The texture might be very slightly different—potentially crumbier or less tender—but many people report excellent results. I haven’t personally tested this version extensively, so I wanted to be honest about that.
What’s the difference between Grade A and Grade B maple syrup?
Grade B (now called “Dark Color” syrup on newer labels) has been boiled longer, which intensifies the maple flavor and creates a darker color. Grade A (including “Light Amber,” “Medium Amber,” and “Dark Amber” within Grade A) is lighter in color and has a more delicate maple flavor. For these muffins, I prefer Grade B because the bolder maple flavor comes through beautifully in the finished muffin. Grade A works perfectly well—it just yields a slightly lighter maple flavor. Both are 100% pure maple syrup with no additives, so either choice is correct. Avoid any syrup labeled “pancake syrup” or “maple-flavored,” which is mostly corn syrup and completely different.
Can I make these muffins dairy-free?
The recipe as written contains milk and butter, so it’s not dairy-free. You can substitute the whole milk with unsweetened almond milk or oat milk in a 1:1 ratio—the muffins will be slightly less rich but still work. For the butter, you can use an equal amount of coconut oil or dairy-free butter (like Earth Balance). However, I haven’t tested this version extensively, and the texture may be slightly different because dairy butter has specific properties that affect browning and crumb structure. If dairy-free baking is important to you, I’d recommend checking a tested dairy-free muffin recipe specifically developed for that purpose rather than adapting this one.
More Beginner-Friendly Recipes
- Krollskorner Pumpkin Bread – Uses the same gentle mixing technique but introduces warm spices like cinnamon and nutmeg. Perfect for fall.
- this simple cake – If you’re feeling confident in your baking skills and want to try something in the Instant Pot, this takes the stress out of cheesecake b
Author Profile
My name is Lori Walker. I’m a registered dietitian, food blogger and food enthusiast. I share easy healthy, delicious recipes on my blog and review necessary kitchen items. The recipes I share take less… Read more