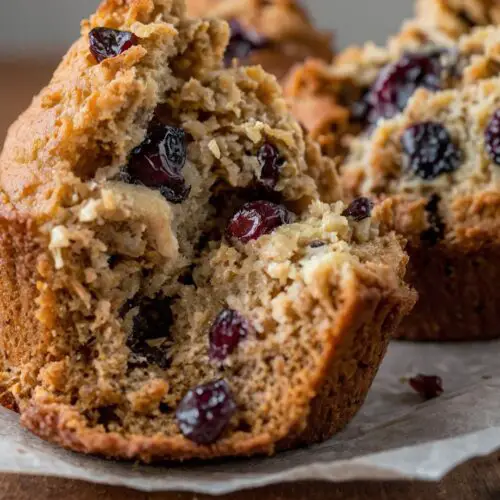
Raisin Bran Muffins
Ah, the joy of waking up to the smell of freshly baked muffins! It’s a simple yet profound pleasure. As I sit here reminiscing about my childhood breakfasts I can’t help but think of the love that goes into making raisin bran muffins
Print
Pin
Rate
Servings: 12
Calories: 186kcal
Equipment
- bowl
Ingredients
- 2 teaspoons baking soda: This helps the muffins rise beautifully. Who doesn’t want a fluffy muffin?
- ½ teaspoon pure vanilla extract: This small addition packs a punch of flavor.
- 2 cups all-purpose flour leveled: Essential for that wonderful muffin structure.
- 1 cup granulated sugar: Because a touch of sweetness makes a world of difference.
- 2 large eggs room temperature: They add moisture and richness.
- 1 teaspoon ground cinnamon: This spices things up and gives warmth.
- 2 cups buttermilk: For moisture and tang. You can substitute with milk and yogurt if needed.
- ½ cup mild-tasting oil: Vegetable or sunflower oil works perfectly.
- 1 teaspoon fine sea salt: Enhances the overall flavors.
- 4 cups Raisin Bran cereal slightly crushed: The star of our show!
Instructions
Step 1: Preheat the Oven
- First things first. Preheat your oven to 375°F (190°C). This ensures that your muffins start baking at the right temperature.
Step 2: Prepare the Muffin Tin
- Grab a standard muffin tin and line it with paper liners or grease it with non-stick spray. I prefer liners for easy cleanup, but the choice is yours!
Step 3: Mix Dry Ingredients
- In a large bowl, combine the flour, baking soda, cinnamon, salt, and sugar. Give it a good stir with a whisk. Mixing these ingredients first helps to distribute the leavening agent evenly and prevents any clumps.
Step 4: Combine Wet Ingredients
- In another bowl, whisk together the eggs, buttermilk, oil, and vanilla extract. Make sure everything is well combined. The oil and buttermilk will contribute to that moist texture we’re looking for.
Step 5: Blend Wet and Dry Ingredients
- Now, pour the wet mixture into the dry ingredients. Mix gently. We don’t want to overwork the batter; a few lumps are perfectly okay!
Step 6: Fold in the Raisin Bran
- Next, add the crushed Raisin Bran cereal to the batter. Fold it in carefully, ensuring even distribution throughout the mixture. At this point, you can feel the excitement building!
Step 7: Fill the Muffin Cups
- Spoon the batter into the prepared muffin tin, filling each cup about two-thirds full. This allows room for the muffins to rise without overflowing.
Step 8: Bake
- Pop the muffin tin into the preheated oven. Bake for about 18-20 minutes. You’ll know they’re done when a toothpick inserted into the center comes out clean or with a few moist crumbs.
Step 9: Cool
- Once they’re out of the oven, let the muffins cool in the tin for about 5 minutes. After that, transfer them to a wire rack to cool completely. The aroma wafting through your kitchen will be irresistible!
Notes
- Check Oven Temperature: Ovens can vary, so it’s a good idea to use an oven thermometer to guarantee accuracy.
- Don’t Overmix: Mix just until combined. Overmixing can lead to dense muffins.
- Use Fresh Ingredients: Old baking soda or flour can hinder your muffins’ ability to rise. Always opt for fresh.
- Experiment with Add-ins: Consider adding nuts, chocolate chips, or even seeds for added texture and flavor.
- Cool Completely: Letting muffins cool before storing them helps maintain their moisture and prevents sogginess.