Nonstick cookware is a staple in many kitchens. They make cooking so much easier, and they are easy to clean. They allow you to cook a variety of dishes with perfection. However, there may come a time when you wonder if your non stick pan is ruined. In this blog post, we will discuss the signs that your non stick pan has seen better days. We will also provide some tips on extending the life of your non stick pan. Keep reading to learn more!

How to Tell if Non Stick Pan is Ruined?
Here, we’ll go through some of the most common signs that your pan is damaged, and it’s time to get a new one.
1. Color Change
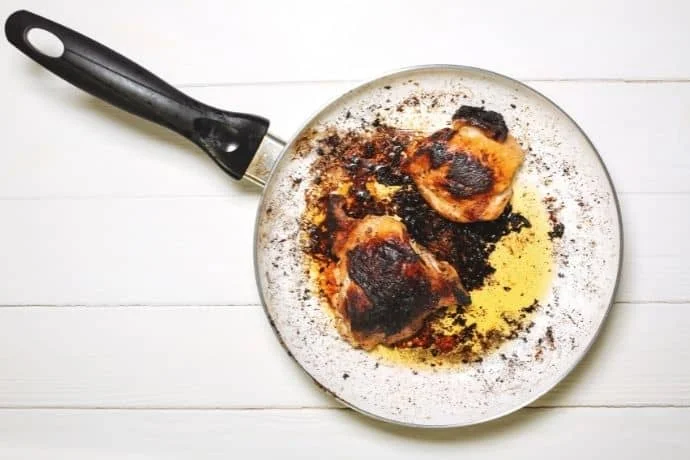
If the colour of your non-stick pan is getting changed and you can spot a dark metallic type colour instead of the smooth surface, then you can pretty much be assured that the pan is already on its way to getting ruined.
Well, a slight discoloration is not a matter of concern. But it’s an alarming sign that the pan may get entirely ruined within a few months.
Cooking at high temperatures plays a vital role in ruining the nonstick coating. You should always maintain the temperature between medium to medium-high.
2. Uneven Surface
Non-stick pans are supposed to be smooth, by which people can make uncracked food. But when the pan loses its non-stickiness, you will no more cook with smooth finishing.
Foods will get stuck on the surface. And the uneven cooking surface won’t also allow you to cook with pleasure. It will only leave you with frustration.
Also read: Non-Stick Pan Coating Coming Off – How To Handle It
3. The non stick coating is peeling off
While enjoying your food, you promptly notice something is on your food that should not be in the food. That is small chips of non stick coating, which is unhealthy to eat.
If you find these non stick flakes in your food, it’s a clear sign that pan has got ruined. And it is the right time to replace it with a brand new one.
4. Slight scratches
Slight scratches are another sign that your non stick pan is going to be damaged soon. Though you don’t need to go to the store immediately while noticing the scratches, it’s an indication that you’ll need to change the pan in the near future.
Slight scratches don’t occur any health issues. But when the scratches get deeper, the metallic portion will get visible, and the food will start sticking at the bottom of the pan.
Non-stick pans are not supposed to last for long. You should change non-stick pans every 3-4 years.
Also read: Can you use scratched non stick pans
Can I Repair My Nonstick Pan?
Nonstick pans are an essential kitchen item now. If they’re scratched or peeling, you need to replace them. But if you feel that it’s too early for you to replace the pan with a new one, you can repair your non stick pan. However, it won’t be as smooth as the new pan, but you can accomplish tasks.
How to repair a non stick pan?

There are several ways of repairing your non stick pan that we’re going to describe below:
1. Use nonstick cookware repair spray
You can use non stick pan repair spray to make your pan non-stick again. You can purchase it online or from any home improvement store.
First, you have to wash the pan thoroughly and ensure there is no food residue on the pan surface. Then, dry up the pan with a paper towel and leave it in the open air for a while. It’s because you have to make sure there is no water remaining in the pan before applying nonstick spray.
Now, spray non stick repair spray on your pan. You should spray an adequate amount of spray, ensuring the coating is thick and even coated on the inside part completely.
Let it dry up for 30 minutes. Then, preheat your oven to 500 temperatures for 10 minutes and put the pan inside the pan for 45 minutes.
At this stage, turn the oven off and allow the pan to cool down inside the oven. No need to open the oven.
Once the pan has cooled down completely, take it out from the oven and wash it with dishwashing soap and a soft sponge.
The pan will be like a new one, and no food will stick to it again.
2. Use baking soda (Bicarbonates Sodium)
Bicarbonate sodium is often called baking soda. It is very familiar to us as an element of baking cakes. You can also use it to repair your non stick pan as well.
Take about two tablespoons of baking soda, add half a cup vinegar, and at last add one cup of water in it. Mix them well. Put the mixture onto the pan, and then let them get boiled for about ten minutes.
After ten minutes, you will see the dispatched part coming out from the pan. Then, get your pan a good wash with cold water using gentle dishwashing soap and a soft sponge. Dry up the pan after washing it.
Then add some vegetable oil onto the pan’s surface to season it.
Now your old pan is ready to use again, and the food will not stick to the bottom of the pan.
3. Putting off The Scratched Portion
If your pan is badly scratched, then first pull off the scratched portion from the pan with the help of a knife. You can also use an angle grinder to remove all the scraps.
Angle grinders are the best for this job. Make sure the pan is clean and dry while doing this procedure.
Clean the pan in a circular motion. Deep cleanse the scraped part. After performing this method for about 20 minutes, you can see the silver color from the bottom is coming out.
And when the pan color becomes completely silver, you’ve completed the task.
You can use some metal polishing paste and brush it well in the pan before ripping off the non stick coating. It’ll make the process easier.
At last, clean the pan well with a gentle dishwasher. Now your pan is back with a smooth non-stick surface.
Note: You should use proper safety equipment in this procedure like hand gloves, goggles, dust protection masks, and so on.
4. Applying Salt
This technique is easier compared to the rest. First, take your pan and make sure the pan is clean and dry.
Take about a tablespoon of salt and put it on the pan’s surface. But before adding salt, make the pan warm enough by putting it on the stove.
When the pan becomes warm enough, put a tablespoon of salt in it and keep this on the stove for about ten minutes.
After ten minutes, remove the salt from the pan. Now, take a kitchen tissue, make it wet and then rub the pan’s surface with the tissue.
Do it for about ten minutes, and then wash the pan with mild soapy water. Now, reseason the pan with some vegetable oil.
Your pan is ready for the next use, and this easy procedure will make your pan non stick again.
5. Use non stick pans in the right way
In today’s busy schedule, we want cooking to get completed in less time. That’s why we use high heat for cooking the food faster. But non stick pans are not for use in high heat.
If you want to use non stick pans and want them to serve you for years, you have to use medium heat.
Plus, you should use silicone or wooden utensils on the non stick pan. Metal utensils will make scratches so easily that they will reduce the lifespan of your pan.
Wrapping Up:
Thanks for reading this blog post. We hope you’ve found this guide helpful and informative. To sum up, we just want to mention that non-stick pans are a staple in most kitchens, but it can be tough to tell if your pan is ruined or not.
The signs we’ve described above will help you realize whether your non stick is still useable or not. And the repair methods we’ve discussed will allow you to use the pan for a long time.
Please share this information with your friends and family so that they can also benefit from this post.
Sharing is caring!
My name is Lori Walker. I’m a registered dietitian, food blogger and food enthusiast. I share easy healthy, delicious recipes on my blog and review necessary kitchen items. The recipes I share take less… Read more
