Have you ever been at a summer barbecue, laughing with friends, when someone brings out a tray of freshly baked brownies? Suddenly, the mood shifts; everyone’s eyes light up. That’s the power of a good brownie!
I can tell you this from experience: whether it’s at a potluck, birthday, or just family movie night, a large batch of brownies sets the stage for joy and celebration. When I whip up this recipe, I know I’ll have a sweet surprise that will evoke those blissful reactions every time.

Large batch brownies feel like a warm hug on a plate. They’re indulgent yet simple, and perfect for sharing. Made with rich chocolate, they’re easy to whip up and are sure to disappear in a flash. This recipe is my go-to for those occasions when I need a quick dessert that caters to a crowd or calls for leftovers that can be stashed away.
After many trial and error sessions in my kitchen, I’m thrilled to share this chocolate fudge goodness with you!
You Might Like These Recipes!
Raisin Sauce For Dessert Recipe
Krollskorner Pumpkin Bread Recipe
What is the flavor profile of this dish?
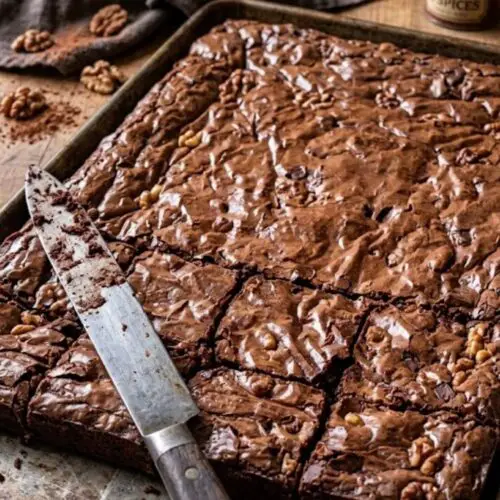
These large batch brownies boast a deep, chocolatey flavor with a slight bitterness to perfectly balance the sweetness from the sugar. A touch of vanilla adds warmth, while the walnuts lend a satisfying crunch. The addition of espresso powder (which I suggest adding as one of your optional ingredients) elevates the chocolate, enhancing its richness and giving these brownies an unexpected depth. They are chewy yet fudgy, perfect for any chocolate lover.
What Makes This Recipe Different From Other Large Batch Brownies?
What sets this recipe apart from typical large batch brownies is the careful balance of ingredients that focus on quality flavor without complexity. Unlike many recipes that rely heavily on processed ingredients, this one keeps it real with quality dark chocolate and smooth butter. Plus, the inclusion of chocolate chips and walnuts offers a delightful texture and adds richness. You could say these brownies embrace decadence while remaining simple to prepare, making them your new favorite classic.
The Ingredients You’ll Need

When it comes to making these large batch brownies, you might be surprised at the simplicity of the ingredients. Let’s gather what you’ll need:
– 195 grams (13 tablespoons) unsalted butter, chopped
– 250 grams (1 and 2/3 cups) dark chocolate (around 60% cocoa), coarsely chopped
– 4 large eggs
– 300 grams (1 and 1/2 cups) granulated sugar
– 2 teaspoons pure vanilla extract
– 105 grams (3/4 cup) all-purpose flour, sifted
– 40 grams (1/2 cup) unsweetened cocoa powder, sifted
– Pinch of salt
– 160 grams (1 cup) chocolate chips
– 100 grams (1 cup) walnuts, roughly chopped
– 1 teaspoon espresso powder (optional for added flavor)
– 50 grams (1/4 cup) brown sugar (for a richer taste)
Feel free to swap in your favorite chocolate or nuts, as this is a versatile recipe that invites a personal touch.
Ingredients From : sweetestmenu.com
How to Make Large Batch Brownies?
Now that you have your ingredients ready, let’s jump into the cooking process. Making brownies might seem deceptively easy, but there are a few tricks and steps to keep in mind. Follow along as I walk you through each stage.
Step-by-Step Directions
Step 1: Preheat and Prepare

Start by preheating your oven to 180°C (350°F), or if you’re using a fan-assisted oven, set it to 160°C (320°F). Grease and line a 9×13 inch baking pan with parchment paper. This ensures your brownies will come out easily without sticking, allowing for neat portions when you cut them.
Step 2: Melt Chocolate and Butter

In a large microwave-safe bowl, combine the chopped butter and dark chocolate. Heat this mixture in the microwave, pausing every 20 seconds to stir. You want it to melt evenly and turn into a smooth blend. Be careful not to scorch it; you’re aiming for a liquid form that smells heavenly!
Step 3: Whisk the Eggs and Sugar

While the chocolate mixture is melting, grab another bowl and whisk together the eggs, granulated sugar, and vanilla extract for about 30 seconds, until the mixture is light and creamy. This will help incorporate air into the batter, giving it a nice rise and fluffy texture.
Step 4: Combine Wet and Dry Ingredients

Next up, gently add your flour, cocoa powder, espresso powder, and salt to the melted chocolate mixture. Pour in the egg and sugar blend, too. Use a spatula to mix everything until you form a thick, even brownie batter. Be careful not to overmix it; just stir until all ingredients are combined.
Step 5: Add Chocolate Chips and Walnuts

Fold in the chocolate chips and chopped walnuts. These won’t just add to the flavor; they’ll also give the brownies an exciting texture. Nobody likes a one-note brownie, right?
Step 6: Pour and Bake

Pour the brownie batter into your prepared pan and use your spatula to smooth it out. Now it’s time to pop this delightful mix into the oven. Bake for about 35-40 minutes, or until the top is glossy and a toothpick inserted into the center comes out with only a few moist crumbs. You don’t want a dry brownie, trust me!
Step 7: Cool and Cut
Allow the brownies to cool completely in the pan. Once cool, lift them out using the parchment paper, and cut them into squares. You can store the brownies at room temperature or in the fridge for a cooler treat. Remember, they also freeze beautifully for times when you need a last-minute dessert.
Tips on Making Large Batch Brownies
– Use Quality Ingredients: The better your chocolate and butter, the richer your brownie will be. You won’t regret splurging a bit here!
– Don’t Overmix: When combining your wet and dry ingredients, mix until just combined to ensure fudginess.
– Let Them Cool: Cooling in the pan allows them to set properly, making them easier to cut.
– Brownies Taste Better Over Time: Allowing brownies to sit overnight enhances their flavor.
– Customize with Toppings: Get adventurous! Top your brownies with sea salt or a drizzle of caramel for a gourmet touch.
Storage Tips
Once your brownies are cooled and cut, keep them stored in an airtight container to retain their freshness. They can last up to a week stored at room temperature. If you want to extend their life, pop them in the fridge for up to two weeks or freeze them for months (just wrap them tightly in foil or plastic wrap).
Serving Suggestions
– With a Scoop of Ice Cream: Pair your warm brownie with a scoop of vanilla or coffee ice cream. Melting chocolate and creamy goodness—they complement one another perfectly.
– Drizzled with Caramel Sauce: A warm caramel drizzle adds additional sweetness and richness that many adore.
– Sprinkle with Sea Salt: A pinch of flaky sea salt can enhance the chocolate flavor—don’t knock it until you try it!
– With Fresh Berries: Lighten the experience with fresh strawberries or raspberries for a refreshing contrast.
– Chocolate Ganache on Top: If you’re feeling extra indulgent, pour a layer of chocolate ganache over the top for an added layer of flavor.
If Some of the Items Are Not Available in Your Kitchen, What Are Some Substitute Options for the Ingredients?
– Dark Chocolate: Substitute with semi-sweet chocolate. It’s slightly sweeter, but still delightful.
– Unsalted Butter: In a pinch, use coconut oil for a dairy-free option. It will give a different but pleasant flavor.
– All-Purpose Flour: If you don’t have all-purpose flour, oat flour can be a gluten-free alternative.
– Walnuts: If nuts aren’t your thing, you can leave them out or replace them with sunflower seeds for crunch.
– Espresso Powder: You can use strong brewed coffee if the powder is missing; it adds a similar flavor depth.
Large Batch Brownies
Equipment
- 9×13 inch Baking pan
- Whisk
- Spatula
- Microwave-safe bowl
- Parchment paper
Ingredients
- When it comes to making these large batch brownies you might be surprised at the simplicity of the ingredients. Let’s gather what you’ll need:
- – 195 grams 13 tablespoons unsalted butter, chopped
- – 250 grams 1 and 2/3 cups dark chocolate (around 60% cocoa), coarsely chopped
- – 4 large eggs
- – 300 grams 1 and 1/2 cups granulated sugar
- – 2 teaspoons pure vanilla extract
- – 105 grams 3/4 cup all-purpose flour, sifted
- – 40 grams 1/2 cup unsweetened cocoa powder, sifted
- – Pinch of salt
- – 160 grams 1 cup chocolate chips
- – 100 grams 1 cup walnuts, roughly chopped
- – 1 teaspoon espresso powder optional for added flavor
- – 50 grams 1/4 cup brown sugar (for a richer taste)
- Feel free to swap in your favorite chocolate or nuts as this is a versatile recipe that invites a personal touch.
Instructions
Step 1: Preheat and Prepare
- Start by preheating your oven to 180°C (350°F), or if you’re using a fan-assisted oven, set it to 160°C (320°F). Grease and line a 9×13 inch baking pan with parchment paper. This ensures your brownies will come out easily without sticking, allowing for neat portions when you cut them.
Step 2: Melt Chocolate and Butter
- In a large microwave-safe bowl, combine the chopped butter and dark chocolate. Heat this mixture in the microwave, pausing every 20 seconds to stir. You want it to melt evenly and turn into a smooth blend. Be careful not to scorch it; you’re aiming for a liquid form that smells heavenly!
Step 3: Whisk the Eggs and Sugar
- While the chocolate mixture is melting, grab another bowl and whisk together the eggs, granulated sugar, and vanilla extract for about 30 seconds, until the mixture is light and creamy. This will help incorporate air into the batter, giving it a nice rise and fluffy texture.
Step 4: Combine Wet and Dry Ingredients
- Next up, gently add your flour, cocoa powder, espresso powder, and salt to the melted chocolate mixture. Pour in the egg and sugar blend, too. Use a spatula to mix everything until you form a thick, even brownie batter. Be careful not to overmix it; just stir until all ingredients are combined.
Step 5: Add Chocolate Chips and Walnuts
- Fold in the chocolate chips and chopped walnuts. These won’t just add to the flavor; they’ll also give the brownies an exciting texture. Nobody likes a one-note brownie, right?
Step 6: Pour and Bake
- Pour the brownie batter into your prepared pan and use your spatula to smooth it out. Now it’s time to pop this delightful mix into the oven. Bake for about 35-40 minutes, or until the top is glossy and a toothpick inserted into the center comes out with only a few moist crumbs. You don’t want a dry brownie, trust me!
Step 7: Cool and Cut
- Allow the brownies to cool completely in the pan. Once cool, lift them out using the parchment paper, and cut them into squares. You can store the brownies at room temperature or in the fridge for a cooler treat. Remember, they also freeze beautifully for times when you need a last-minute dessert.
Notes
FAQs
1. Can you make these brownies ahead of time?
Absolutely! These brownies can be made up to two days in advance. Store them properly in an airtight container to keep them fresh.
2. Can I add other mix-ins?
Sure thing! Feel free to customize with dried fruits like cherries or even candy pieces to add a fun twist.
3. How do I know when the brownies are done?
Watch for a shiny top and a toothpick inserted into the center that comes out with a few moist crumbs, not wet batter.
4. Can I make these brownies gluten-free?
Yes, you can substitute all-purpose flour with a gluten-free flour blend. Make sure the blend is suitable for baking to achieve the best results.
5. What if I don’t have a microwave?
No worries! You can melt the butter and chocolate together in a double boiler over low heat, stirring until smooth.
Conclusion
Now you’ve got a fantastic recipe for large batch brownies that is sure to become a staple in your baking repertoire. Whether you’re celebrating with friends or treating yourself, these brownies have the power to bring a smile to anyone’s face.
Plus, the best part—once you make them, you won’t have leftovers for long! So go ahead, gather those ingredients, and enjoy the sweet success of your kitchen adventure.
You Might Also Like These Latest Recipes!
Krollskorner Pumpkin Bread Recipe

My name is Lori Walker. I’m a registered dietitian, food blogger and food enthusiast. I share easy healthy, delicious recipes on my blog and review necessary kitchen items. The recipes I share take less… Read more