This post contains affiliate links. As an Amazon Associate I earn from qualifying purchases.
I still remember pulling my grandmother’s scone recipe from a yellowed recipe card tucked in an old wooden box. She’d written notes in the margins—”don’t overwork the dough” and “serve warm with jam”—little reminders that baking is about respect for tradition and presence in the kitchen. These cinnamon sugar scones pair beautifully with afternoon tea, brunch spreads, or even a quiet morning with coffee. They’re equally delightful alongside a warm slice of Krollskorner Pumpkin Bread or fresh jam.
The Story Behind My Favorite Scone Recipe
When I started recording family recipes in 2019, this scone recipe was one of the first I tested and retested. My kitchen became my laboratory—I baked batch after batch on my standard sheet pans, measuring everything precisely because I wanted to guarantee that when you made these, they’d turn out just as golden and tender as mine did.
What drew me to perfecting this recipe was realizing how often people told me scones intimidated them. They’d say, “I always make mine too dense” or “I don’t know what I’m doing wrong.” The truth? Scones aren’t complicated. They just need confidence and a light touch. That’s exactly what I’m sharing with you today.
What is a Cinnamon Sugar Scone?
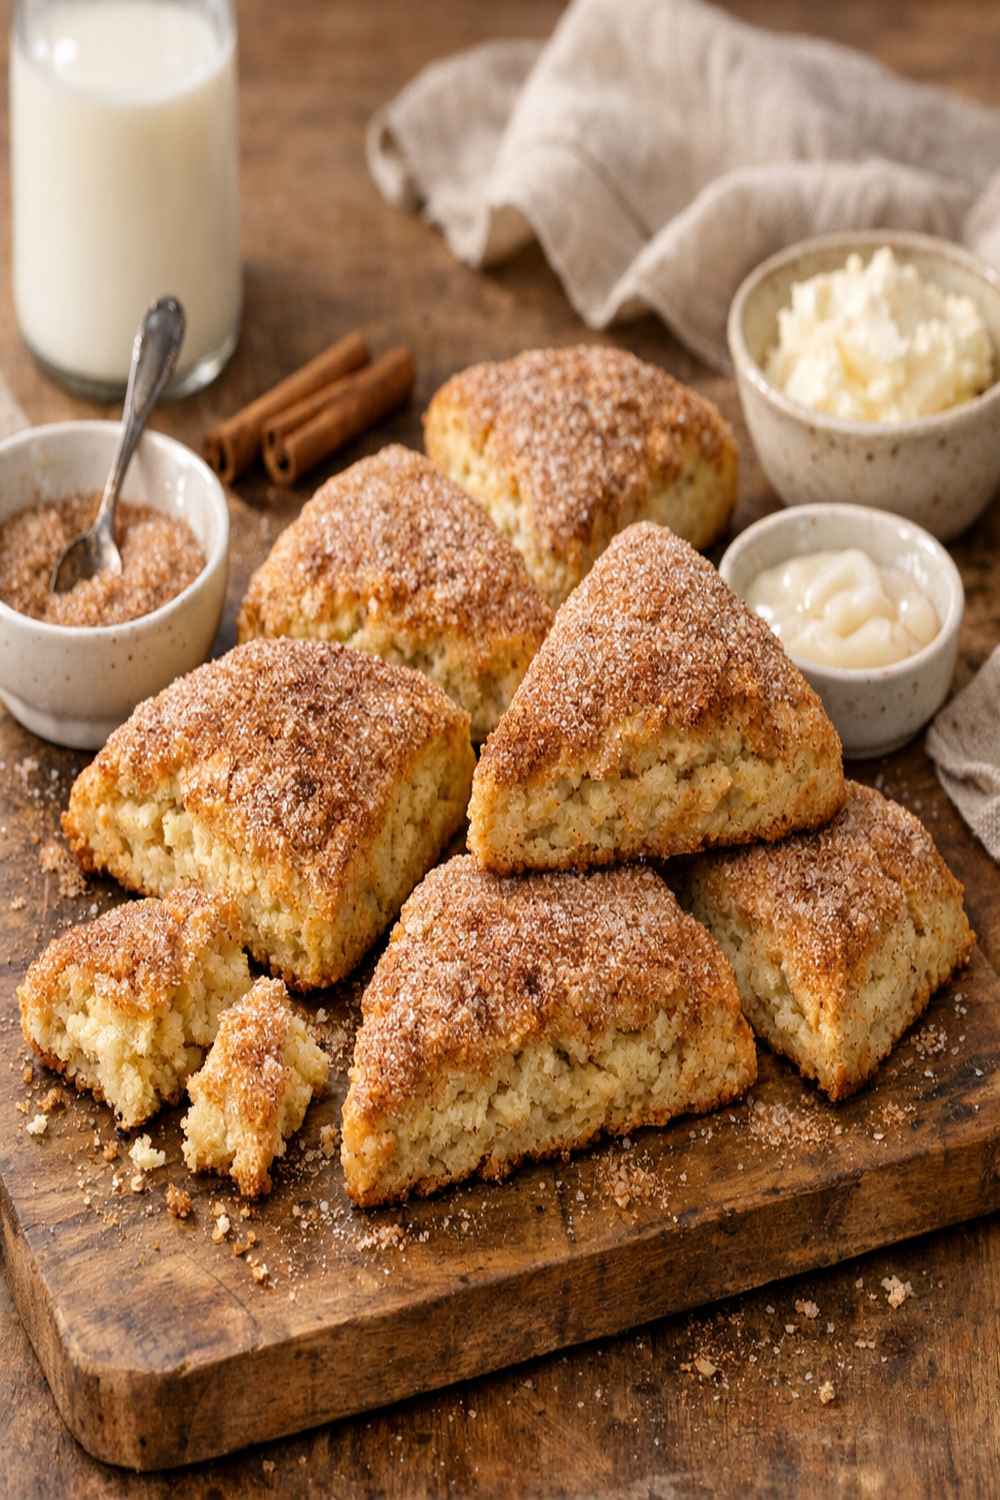
Scones are a British baked good that sits beautifully between bread and cake—crumbly, tender, and meant to be eaten fresh. Cinnamon sugar scones take that classic formula and wrap it in warm spice and gentle sweetness. Unlike dense, cake-like scones you might find in some bakeries, these are light and flaky, with a delicate crumb structure that comes from cold butter worked into the dry ingredients.
The magic happens when you keep everything cold and resist the urge to overwork your dough. The cinnamon and brown sugar create little pockets of warmth and flavor throughout, making each bite comforting and genuinely crave-worthy. These scones are meant to be eaten within hours of baking, making them perfect for weekend entertaining or spontaneous kitchen therapy.
Why You’ll Love This Cinnamon Sugar Scones Recipe
- Ready in 25 minutes – From pantry to warm plate, these scones come together faster than you’d think, making them perfect for unexpected guests or a last-minute breakfast idea
- Only one bowl technique – Well, mostly one bowl. I’ve streamlined this to minimize cleanup while maximizing flavor and texture
- Naturally sweetened – Brown sugar provides subtle molasses notes that complement cinnamon beautifully, without tasting overly sugary or one-dimensional
- Works with standard kitchen tools – No pastry blender? I’ll show you workarounds. No special pans? Your regular baking sheet is perfect
- Tender, flaky crumb – These are light enough to justify eating two, but substantial enough to satisfy real hunger alongside coffee or tea
- Forgiving formula – This recipe builds in grace for small variations, so even first-time bakers succeed consistently
The Ingredients
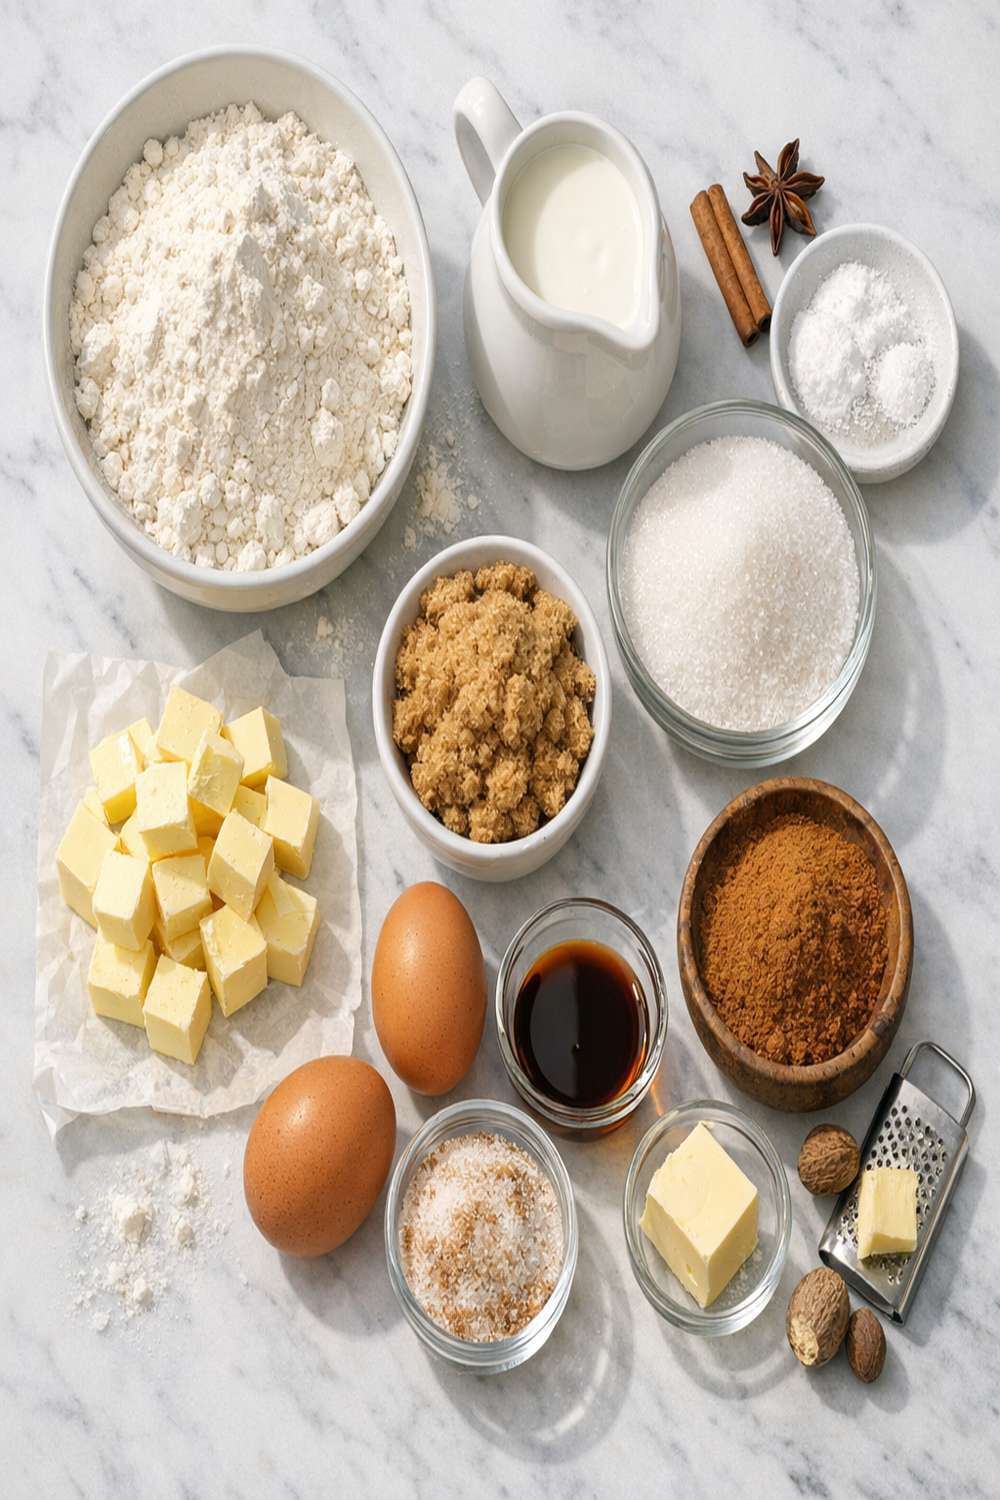
I’ve organized these ingredients by function, so you understand why each one matters. Nothing here is fussy or hard to find—everything lives in a standard grocery store, and most of it likely sits in your kitchen already. This recipe makes 8 beautiful scones, perfect for a small gathering or personal indulgence throughout the week.
- ¾ cup heavy whipping cream (cold, straight from the refrigerator)
- 2 teaspoons pure vanilla extract (not imitation, for clean flavor)
- ¾ teaspoon kosher salt (enhances sweetness and balances cinnamon)
- 2 cups all-purpose flour (spooned and leveled, never packed into the measuring cup)
- 6 tablespoons unsalted butter (cut into small cubes, kept cold until mixing)
- 1 tablespoon baking powder (aluminum-free prevents metallic aftertaste)
- 1 large egg (room temperature works best for binding)
- ½ cup brown sugar (packed lightly, brings molasses undertones)
- 2 teaspoons ground cinnamon (freshly measured from a container less than one year old)
- 1 tablespoon coarse sugar (optional but recommended for the top crust)
How to Make Cinnamon Sugar Scones
I’m going to walk you through each step with the same care I use in my own kitchen. Pay attention to textures and timing—these small details separate mediocre scones from the kind people ask you to make again and again. This is straightforward baking done right.
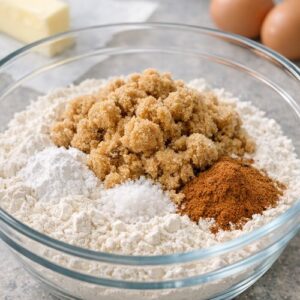
Step 1: Build Your Dry Mixture
Grab a medium mixing bowl and combine your flour, baking powder, kosher salt, brown sugar, and cinnamon. If your brown sugar has any lumps—which it usually does—that’s completely fine. Use a fork or your whisk to gently break them apart as you mix. You’re not trying to pulverize them; just incorporate everything evenly so the cinnamon and leavening distribute throughout the flour.
This step takes about two minutes and matters more than people realize. Uneven cinnamon distribution means some bites taste like pure cinnamon while others taste almost plain. We’re going for consistent warmth in every single scone.

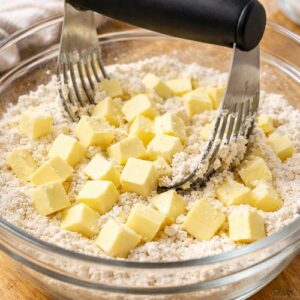
Step 2: Cut in the Cold Butter
This is the critical step that creates tender, flaky scones. Take your cold butter cubes and add them to the flour mixture. Using a pastry blender, two forks, or even your fingertips, work the butter into the flour until the whole mixture looks like coarse breadcrumbs or sand. Pieces of butter should still be visible—this is exactly what we want.
Why? As the scones bake, those little butter pieces create steam pockets, making the crumb tender and layered rather than dense. If you overmix here, you’ll end up with tough scones that taste more like cake. Keep your touch light and your movements quick. If your kitchen is warm, work faster or chill your bowl for five minutes.

Step 3: Combine Your Wet Ingredients
In a separate small bowl, whisk together your cold heavy cream, egg, and vanilla extract. Whisk gently for about 30 seconds until everything is combined and slightly frothy. This mixture serves as your binder, helping the dry ingredients come together without requiring additional liquid that would toughen the dough.
I use cream instead of milk because the fat content creates more tender, delicate scones. It’s a professional baker’s secret that works beautifully for home cooks too.

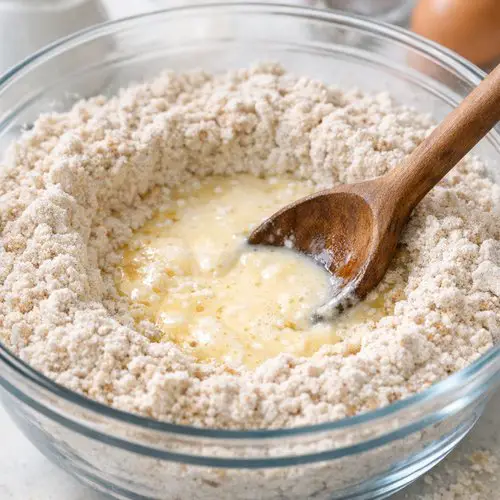
Step 4: Bring the Dough Together
Make a well in the center of your dry mixture—think of it like a little crater. Pour your wet ingredients into that well. Using a wooden spoon, gently stir until just combined. You’re looking for a shaggy dough where no flour streaks remain, but you’re not stirring it into a smooth, unified mass.
This is where patience pays off. Overmixing activates the gluten and creates tough scones. Undermixing leaves dry pockets. Aim for that sweet middle ground—gentle, intentional stirring until everything just comes together. It should take maybe 20-30 seconds of stirring.
Step 5: Form Your Scones
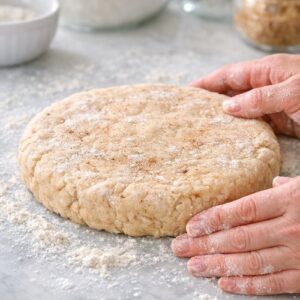
Turn your dough onto a lightly floured surface. With your hands, gently shape it into a disc about one inch tall. Don’t knead it or overwork it. Handle it like it’s delicate, because it is. The dough should feel slightly sticky and tender under your fingertips.
Using a sharp knife, cut your disc into eight equal wedges, like you’re slicing a pizza. I find it helpful to cut the disc in half first, then cut each half in half, then cut each quarter in half. This gives you even pieces that bake uniformly.

Step 6: Prepare for Baking
Place your scone wedges onto an ungreased baking sheet, spacing them about two inches apart. If you have parchment paper or a silicone mat, that’s lovely—it prevents sticking and ensures even browning. Lightly brush the top of each scone with a tiny bit of cream if you’d like (I often skip this), then sprinkle with coarse sugar for a beautiful, crunchy crust.
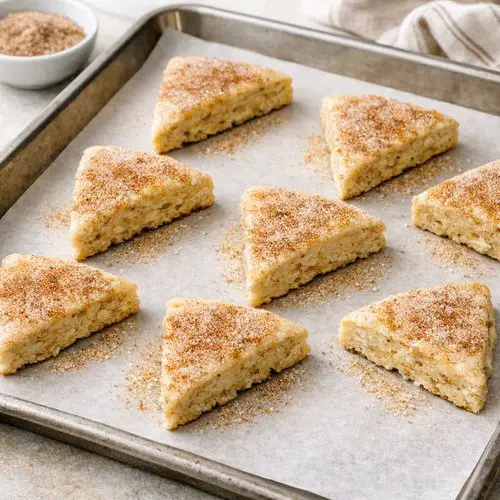
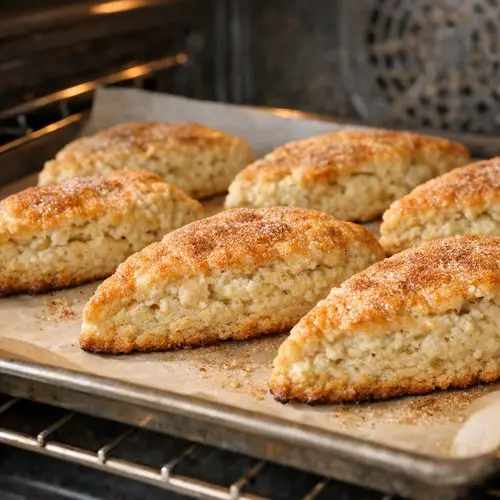
Step 7: Bake Until Golden
Pop your baking sheet into a 350-degree oven for 12 to 14 minutes. You’re looking for the bottoms to turn light golden brown and the tops to look set and barely colored. Don’t overbake—scones are best when they’re still slightly tender inside with just a delicate crust.
Start checking around minute 11. Every oven runs a little differently, and your timing might shift based on your oven’s accuracy and the size of your scones. When they’re done, they should feel slightly firm to the touch but still have a little give.
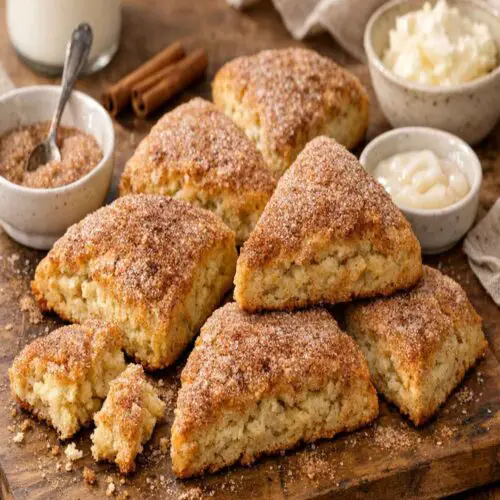
Step 8: Cool Briefly, Then Serve Warm
Remove your scones from the oven and let them rest on the baking sheet for about 5 minutes. They’ll continue cooking slightly from residual heat, which helps set the structure. After five minutes, transfer them to a cooling rack or serving plate.
These scones are absolutely best served warm, within the first hour of baking. The butter is still soft, the crumb is at its most tender, and they’re genuinely comforting to eat. Serve with jam, cream, or simply on their own.

Expert’s Nutritional Tip
As a registered dietitian, I always think about how ingredients serve our bodies, not just our taste buds. The cinnamon in these scones provides more than just flavor—it contains polyphenols, compounds with antioxidant properties. Cinnamon has also been studied for its potential to help moderate blood sugar response, which means pairing these scones with protein (like Greek yogurt, cheese, or eggs) creates a more balanced breakfast or snack.
Brown sugar versus white sugar also matters. The molasses in brown sugar contains minerals like potassium and calcium, plus compounds that research suggests may have anti-inflammatory properties. I choose brown sugar in this recipe not just for flavor, but because it makes nutritional sense too.
Make-Ahead Guide
I love baking these ahead when I’m expecting guests. Here’s exactly how I do it in my own kitchen:
- Prepare dough the night before – Mix everything through Step 4, then cover and refrigerate your dough in an airtight container for up to 24 hours. The cold helps develop flavor and makes shaping easier. Just shape and bake as normal the next morning, adding one to two minutes to baking time since the dough will be cold
- Freeze shaped scones – After cutting your scones, freeze them on a sheet pan uncovered for 30 minutes, then transfer to a freezer bag for up to 3 weeks. Bake directly from frozen, adding 3-4 minutes to the total baking time
- Refresh day-old scones – Wrap completely cooled scones in foil and store at room temperature for one day. The next morning, wrap them again in foil and warm in a 300-degree oven for 8-10 minutes until they taste almost freshly baked
- Freeze fully baked scones – Cool completely, wrap individually, then freeze for up to one month. Thaw at room temperature for one hour or warm gently in the oven for that just-baked texture
Tips and Tricks
- Keep everything cold – Cold butter, cold cream, and a cool work surface all contribute to tender, flaky scones. If your kitchen is warm, chill your mixing bowl and measuring cups before you start
- Don’t skip the vanilla – Pure vanilla extract adds depth that people taste but don’t identify. It rounds out the cinnamon and makes the scones taste intentional rather than one-note
- Use freshly measured cinnamon – Cinnamon loses potency quickly once opened. If your container has been sitting open for a year, buy a fresh one. The difference in flavor is remarkable
- A pastry blender is worth the investment – They’re cheap, they last forever, and they make cutting in butter effortless. If you don’t have one, two forks work perfectly—just takes a little more arm strength
- Cut with a sharp knife – A dull knife compresses the dough as you cut, which makes scones less flaky. A sharp chef’s knife or serrated bread knife cuts cleanly without dragging
- Space them properly on the sheet – Scones need air circulation around them to bake evenly. Cramming them together traps steam and creates uneven browning
Can I Store Cinnamon Sugar Scones?
Yes, though they’re genuinely best eaten fresh. Here’s my honest breakdown:
Room temperature (same day) – Keep cooled scones in an airtight container or wrapped tightly in a clean kitchen towel. They stay fresh for about 8 hours and taste nearly as good as when just baked.
Refrigerator – Store in an airtight container for up to 3 days. The cold will firm them up slightly, so warming them in a 300-degree oven for 5 minutes brings back that fresh-baked quality.
Freezer – Individually wrapped scones keep for up to 1 month. Thaw at room temperature for 1-2 hours, or warm directly in a 300-degree oven for 10-12 minutes from frozen.
I don’t recommend leaving them uncovered at room temperature beyond a few hours, as they dry out quickly. Proper storage in an airtight container makes a real difference in how they taste over time.
Common Mistakes to Avoid
- Overmixing the dough – This is the number one reason scones turn out dense and tough instead of tender and flaky. Stir gently, stop as soon as everything is combined, and trust that the dough will hold together during baking even if it looks a little shaggy
- Using warm or room temperature butter – Soft butter blends into the flour instead of creating those precious steam pockets. Always start with cold butter cut into small cubes, and if your kitchen is warm, chill your mixing bowl first
- Packing the flour into your measuring cup – This is how people accidentally use 2.5 cups of flour instead of 2 cups. Spoon flour into your measuring cup and level it off with a knife. Or, weigh it—4 ounces equals 1 cup of all-purpose flour
- Baking at the wrong temperature – 350 degrees is specific for a reason. At higher temperatures, scones brown too quickly on the outside before the inside bakes through. Invest in an oven thermometer so you know your oven runs true
Nutrition Information
Per scone (out of 8 total): Approximately 250 calories, 12g fat, 32g carbohydrates, 4g protein, and 2g fiber. Based on USDA data for similar baked goods. Values assume all ingredients are fully incorporated and divided evenly. These numbers are estimates and may vary slightly based on specific brands and measuring precision.
What I appreciate about this scone recipe nutritionally is the balance. The cream and egg provide satisfying fat that keeps you full, the whole wheat flour option (if you want to substitute up to 25%) adds fiber, and the moderate sugar means you can actually taste the butter and cinnamon rather than just sweetness.
What Can I Serve With Cinnamon Sugar Scones?
These scones are delightful on their own, but they truly shine with the right accompaniments. I think of them as a canvas for flavors you love. Pair them with preserves, fresh cream, or simply butter and honey for a simple, joyous breakfast or afternoon treat.
- Jam or preserves – Strawberry, raspberry, or apricot jam complements cinnamon beautifully. I especially love serving these alongside homemade Grapelade Recipe for a more sophisticated flavor
- Clotted cream – If you can find it, this thick, rich cream is traditional. A dollop on a warm scone is genuinely luxurious
- Whipped cream with vanilla – Whip heavy cream with a touch of sugar and vanilla, and you have an elegant topping that’s lighter than clotted cream
- Butter and honey – Sometimes simple is perfect. Warm scones with good butter and a drizzle of honey need nothing else
- Cream cheese and cinnamon – Spread cream cheese on a warm scone, sprinkle with a pinch of cinnamon, and you have something almost like a dessert
- Fresh berries – Macerated strawberries or blueberries add freshness and contrast to the warm spice
These scones also pair wonderfully alongside other sweet baked goods. Serve them as part of a brunch spread with Krolls Cookies for variety, or as a lighter option when you’re also serving this simple cake for those who prefer less richness.
Substitutes and Variations
- White sugar instead of brown sugar – Use ½ cup of granulated white sugar. The scones will taste less molasses-forward and slightly more delicate, but they’ll still be delicious. Reduce the salt to ½ teaspoon if using salted butter
- Buttermilk instead of heavy cream – Use ¾ cup buttermilk plus 1 tablespoon melted butter added to the liquid. Buttermilk creates a slightly tangier, more tender scone with a different crumb structure
- Salted butter instead of unsalted – Absolutely fine. Just reduce the kosher salt to ½ teaspoon to account for the salt in the butter
- Add nutmeg or cardamom – Reduce cinnamon to 1.5 teaspoons and add ¼ teaspoon nutmeg and ⅛ teaspoon ground cardamom for a more complex spice profile
- Mix in cinnamon chips – Add ½ cup cinnamon-flavored chocolate chips or white chocolate chips folded in at the very end for extra texture and sweetness
- Make them with all-purpose gluten-free flour blend – This works, though scones will be slightly more delicate. Add 1 teaspoon of xanthan gum to the flour if your blend doesn’t already contain it
Seasonal Variations
Spring – Add ½ teaspoon lemon zest and replace half the cinnamon with ½ teaspoon ground ginger for a brighter, slightly spicy scone. Serve with lemon curd and whipped cream.
Summer – Reduce cinnamon to 1 teaspoon and add 1 teaspoon pure almond extract. Serve with fresh berries and Greek yogurt for a lighter take.
Fall – Keep the recipe as is, but add ¼ teaspoon ground cloves and ¼ teaspoon allspice for deeper, more complex warmth. Serve with pumpkin butter or apple butter.
Winter – Add ½ teaspoon ground ginger, ⅛ teaspoon ground cloves, and zest of one orange. These warm, festive scones feel like holiday breakfast.
Cinnamon Sugar Scones Recipe
Ingredients
- ¾ cup heavy whipping cream cold, straight from the refrigerator
- 2 teaspoon pure vanilla extract not imitation, for clean flavor
- ¾ teaspoon kosher salt enhances sweetness and balances cinnamon
- 2 cup all-purpose flour spooned and leveled, never packed into the measuring cup
- 6 tablespoon unsalted butter cut into small cubes, kept cold until mixing
- 1 tablespoon baking powder aluminum-free prevents metallic aftertaste
- 1 large egg room temperature works best for binding
- ½ cup brown sugar packed lightly, brings molasses undertones
- 2 teaspoon ground cinnamon freshly measured from a container less than one year old
- 1 tablespoon coarse sugar optional but recommended for the top crust
Instructions
Step 1: Build Your Dry Mixture
- Grab a medium mixing bowl and combine your flour, baking powder, kosher salt, brown sugar, and cinnamon. If your brown sugar has any lumps—which it usually does—that's completely fine. Use a fork or your whisk to gently break them apart as you mix. You're not trying to pulverize them; just incorporate everything evenly so the cinnamon and leavening distribute throughout the flour. This step takes about two minutes and matters more than people realize. Uneven cinnamon distribution means some bites taste like pure cinnamon while others taste almost plain. We're going for consistent warmth in every single scone.
Step 2: Cut in the Cold Butter
- This is the critical step that creates tender, flaky scones. Take your cold butter cubes and add them to the flour mixture. Using a pastry blender, two forks, or even your fingertips, work the butter into the flour until the whole mixture looks like coarse breadcrumbs or sand. Pieces of butter should still be visible—this is exactly what we want. Why? As the scones bake, those little butter pieces create steam pockets, making the crumb tender and layered rather than dense. If you overmix here, you'll end up with tough scones that taste more like cake. Keep your touch light and your movements quick. If your kitchen is warm, work faster or chill your bowl for five minutes.
Step 3: Combine Your Wet Ingredients
- In a separate small bowl, whisk together your cold heavy cream, egg, and vanilla extract. Whisk gently for about 30 seconds until everything is combined and slightly frothy. This mixture serves as your binder, helping the dry ingredients come together without requiring additional liquid that would toughen the dough. I use cream instead of milk because the fat content creates more tender, delicate scones. It's a professional baker's secret that works beautifully for home cooks too.

Step 4: Bring the Dough Together
- Make a well in the center of your dry mixture—think of it like a little crater. Pour your wet ingredients into that well. Using a wooden spoon, gently stir until just combined. You're looking for a shaggy dough where no flour streaks remain, but you're not stirring it into a smooth, unified mass. This is where patience pays off. Overmixing activates the gluten and creates tough scones. Undermixing leaves dry pockets. Aim for that sweet middle ground—gentle, intentional stirring until everything just comes together. It should take maybe 20-30 seconds of stirring.

Step 5: Form Your Scones
- Turn your dough onto a lightly floured surface. With your hands, gently shape it into a disc about one inch tall. Don't knead it or overwork it. Handle it like it's delicate, because it is. The dough should feel slightly sticky and tender under your fingertips. Using a sharp knife, cut your disc into eight equal wedges, like you're slicing a pizza. I find it helpful to cut the disc in half first, then cut each half in half, then cut each quarter in half. This gives you even pieces that bake uniformly.
Step 6: Prepare for Baking
- Place your scone wedges onto an ungreased baking sheet, spacing them about two inches apart. If you have parchment paper or a silicone mat, that's lovely—it prevents sticking and ensures even browning. Lightly brush the top of each scone with a tiny bit of cream if you'd like (I often skip this), then sprinkle with coarse sugar for a beautiful, crunchy crust.

Step 7: Bake Until Golden
- Pop your baking sheet into a 350-degree oven for 12 to 14 minutes. You're looking for the bottoms to turn light golden brown and the tops to look set and barely colored. Don't overbake—scones are best when they're still slightly tender inside with just a delicate crust. Start checking around minute 11. Every oven runs a little differently, and your timing might shift based on your oven's accuracy and the size of your scones. When they're done, they should feel slightly firm to the touch but still have a little give.

Step 8: Cool Briefly, Then Serve Warm
- Remove your scones from the oven and let them rest on the baking sheet for about 5 minutes. They'll continue cooking slightly from residual heat, which helps set the structure. After five minutes, transfer them to a cooling rack or serving plate. These scones are absolutely best served warm, within the first hour of baking. The butter is still soft, the crumb is at its most tender, and they're genuinely comforting to eat. Serve with jam, cream, or simply on their own.

Notes
FAQs
Why did my scones turn out dense and cake-like?
The most common cause is overmixing the dough. When you stir the wet and dry ingredients together, you’re activating gluten, which makes the structure tighter and tougher. Mix only until the flour is fully incorporated and no streaks remain—it should take maybe 20-30 seconds of gentle stirring. The second cause is using warm or room temperature butter instead of cold butter. Cold butter creates steam pockets as it melts during baking, which makes scones flaky. Always start with cold butter cut into small cubes.
Can I make these scones without cream? What can I substitute?
You can use whole milk mixed with 1 tablespoon of melted butter, or buttermilk on its own. The texture will be slightly different—a bit less tender and a bit more crumbly—but they’ll still be good. Avoid using water or low-fat milk, as these don’t contain enough fat to create the tender crumb we’re going for. Heavy cream is worth buying specifically for this recipe because it makes a real difference in the final texture.
My scones are dry inside even though the outside looks cooked. What went wrong?
This usually means your oven is running hot or you’ve baked them slightly too long. Check your oven temperature with a standalone thermometer—many ovens are inaccurate. Start checking scones at 11 minutes instead of waiting until 14 minutes. The bottoms should be just barely golden brown, not deeply browned. Also, if you’re opening the oven door frequently, close it and leave it shut until the final two minutes. Opening the door releases heat and can cause uneven baking.
Can I double this recipe?
Absolutely. Double all ingredients and you’ll end up with 16 scones. Mix everything the same way—don’t change the technique just because you’re making more. You might need to divide the dough into two batches for shaping if your work surface is small. Baking time should stay the same, though you might need two baking sheets. If both sheets are in the oven simultaneously, rotate them halfway through baking so they brown evenly.
Do I have to serve these scones warm, or can I serve them at room temperature?
They’re absolutely best eaten warm, within the first hour of baking, when the butter is still soft and the crumb is most tender. That said, they’re still delicious at room temperature throughout the rest of the day. If you have leftovers, wrap them in foil and warm them in a 300-degree oven for 5-8 minutes to bring back some of that fresh-baked quality. This trick works remarkably well and makes day-old scones taste almost new.
More Recipes You’ll Love
- Krollskorner Pumpkin Bread – A moist, spiced quick bread that bakes in the same oven and shares cinnamon’s warm flavor profile
- Key Lime Pie With Biscoff Crust – For when you want something more elegant to serve alongside these scones at brunch
- Large Batch Brownies – Perfect for feeding a crowd at the same gathering where you’re serving scones
Making these cinnamon sugar scones for the first time, or the hundredth time, is an act of care. You’re taking basic ingredients and transforming them into something warm, tender, and genuinely nourishing. That’s what cooking is really about—creating moments of joy and comfort in an otherwise busy day. Whether you’re baking these for yourself on a quiet Saturday morning or pulling them from the oven as guests arrive, remember that they don’t have to be perfect to be wonderful. Good food is a good mood!
- Fluffy Sugar Cookies Recipe
- Cinnamon Sugar Apple Cake Recipe
- Cheesecake Bites Recipe
- Biscoff Mini Cheesecake Recipe

My name is Lori Walker. I’m a registered dietitian, food blogger and food enthusiast. I share easy healthy, delicious recipes on my blog and review necessary kitchen items. The recipes I share take less… Read more