This post contains affiliate links. As an Amazon Associate I earn from qualifying purchases.
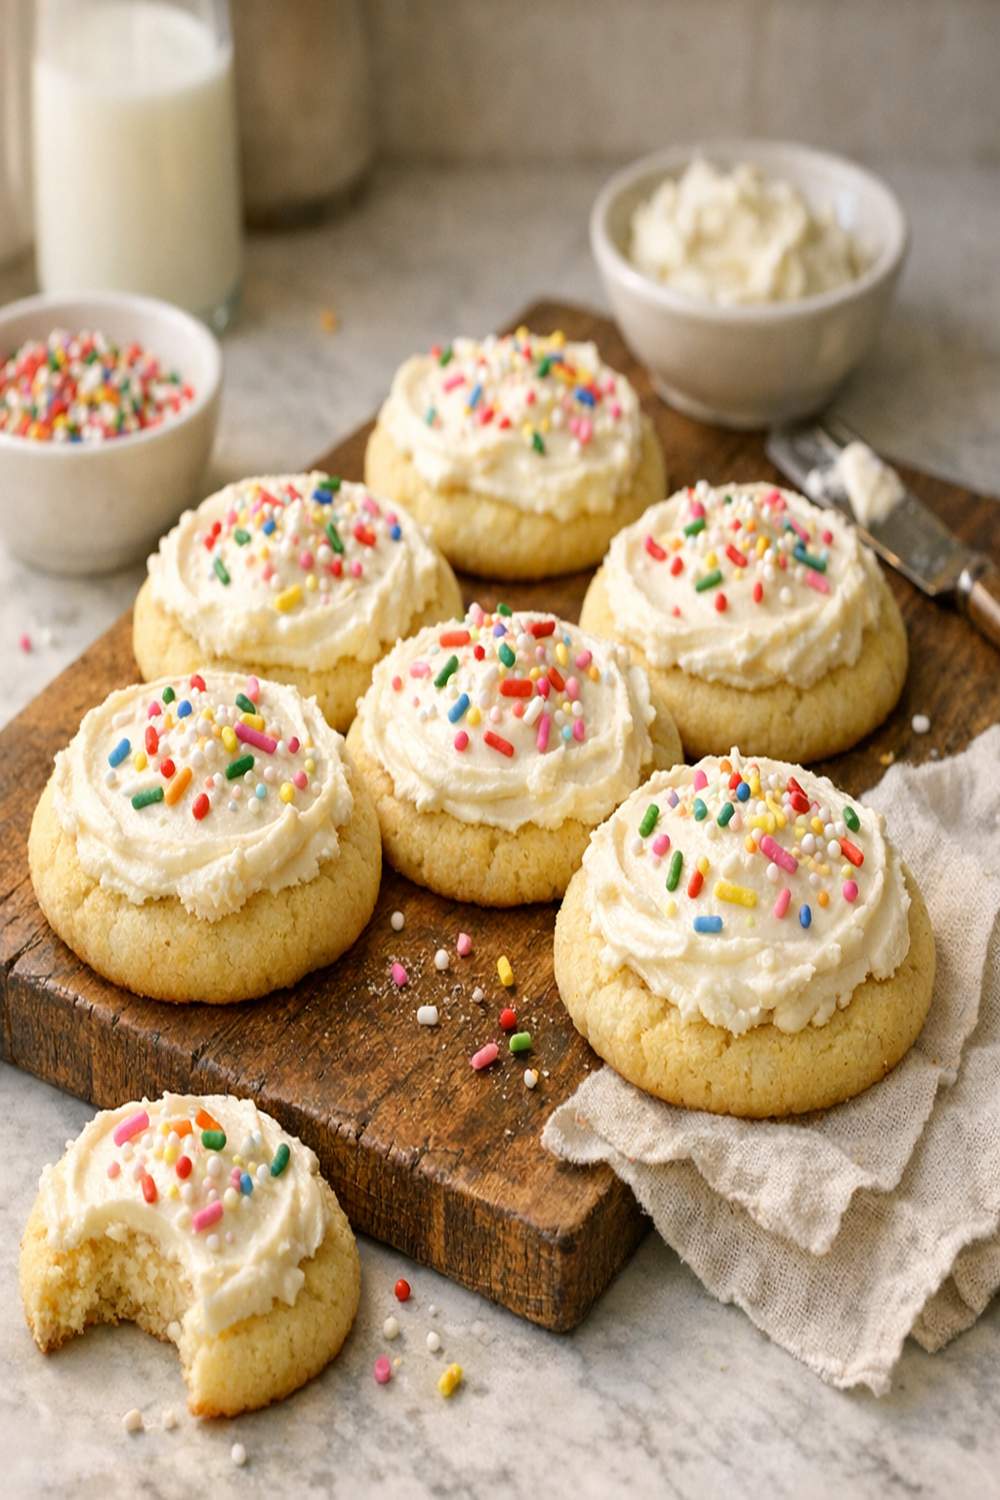
There’s something magical about pulling a tray of golden, cloud-like sugar cookies from the oven. Whether you’re dunking them into cold milk with the kids, stacking them on a dessert table, or tucking them into lunchboxes, these cookies deliver pure joy. I love serving them alongside a warm cup of tea or pairing them with large batch brownies for a complete cookie box that’ll have everyone asking for your secret.
How a Family Recipe Became My Favorite Kitchen Ritual
I still remember the first time my grandmother let me help with her sugar cookies. I was maybe seven years old, standing on a kitchen stool in her tiny farmhouse kitchen, watching her cream butter and sugar together until it looked like fluffy clouds. She’d let me press my small fingers into the dough to test if it was ready—a silly thing, but I felt like a real baker that day.
When I started recording cherished family recipes back in 2019, her sugar cookies were at the top of my list. I tested that recipe dozens of times on my standard home equipment, tweaking it until I understood exactly why hers were so tender and fluffy compared to the dense, cakey versions I’d made before. That’s what I’m sharing with you today—the real version that’s been loved across generations and now tested through modern nutrition science.
What Makes These Fluffy Sugar Cookies So Special?
A truly fluffy sugar cookie starts with understanding the science of creaming. When you beat room-temperature butter with sugar for those crucial two to three minutes, you’re incorporating thousands of tiny air bubbles that create lift in the oven. This isn’t a fancy technique—it’s just patience and a good mixer.
The magic ingredient here is the combination of baking powder and the specific ratio of egg to dough. One whole egg plus one yolk gives you richness and structure without making the cookies cake-like. The baking powder—not baking soda—provides that gentle, sustained rise that creates that signature tender crumb and soft edges.
These cookies are also beautifully versatile. You can enjoy them plain, frost them with buttercream, or decorate them for special occasions. They stay soft for days when stored properly, making them perfect for meal prep or gifting to friends and family.
Why You’ll Love This Fluffy Sugar Cookies Recipe
- Tender, melt-in-your-mouth texture – The creaming method and balanced egg ratio create cookies that are fluffy on the inside with just a hint of crispness on the edges, not dense or cakey like many homemade versions
- Makes about three dozen cookies – One batch feeds a small army or provides you with grab-and-go treats throughout the week without taking all day to bake
- Bakes in just 10-12 minutes – These cookies come together faster than most desserts, making them perfect for after-school snacks or last-minute entertaining
- Works with standard kitchen equipment – No special mixer or tools needed; I’ve tested these with basic hand mixers and stand mixers, and both produce equally fluffy results
- Stays soft for three days – Unlike cookies that get hard overnight, these maintain that wonderful tender quality, making them ideal for cookie swaps and bake sales
- Pairs beautifully with simple embellishments – The neutral flavor is a blank canvas for colored sugars, sprinkles, or homemade frostings without competing flavors
The Ingredients

I’ve tested this recipe with various ingredient qualities, and I can tell you that the small details truly matter. Room-temperature butter, fresh eggs, and good vanilla extract make the difference between good cookies and extraordinary ones. These measurements are designed to yield approximately 36 cookies, perfect for sharing or storing.
- 1 teaspoon pure vanilla extract (not imitation, makes a noticeable difference)
- 2 sticks unsalted butter (226 grams, at cool room temperature, not soft)
- 1 tablespoon granulated sugar (extra, for sprinkling on tops if desired)
- ¾ teaspoon fine sea salt (enhances sweetness and flavor depth)
- 2 teaspoons baking powder (aluminum-free works beautifully)
- 2½ cups all-purpose flour (318 grams, spooned and leveled, never packed)
- 1 large egg plus 1 egg yolk (use room temperature eggs for better incorporation)
- 1¼ cups granulated sugar (250 grams, plus ¼ cup additional for rolling)
How to Make Fluffy Sugar Cookies
I’ve broken this into clear steps that take you from pantry to plate. The entire process takes about 30 minutes active time, plus cooling. You’ll need a mixing bowl, an electric mixer, measuring cups and spoons, baking sheets, and parchment paper. Let me walk you through my tested method.
Step 1: Preheat Your Oven and Prepare Your Workspace
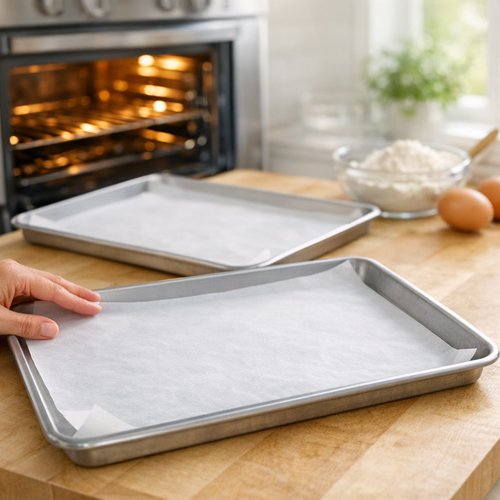
Start by preheating your oven to 350°F. While it’s warming, line your baking sheets with parchment paper—this is non-negotiable for even baking and easy cleanup. I typically use two standard 18-by-13-inch sheets, which gives me plenty of room to space the cookies properly.
Step 2: Combine Your Dry Ingredients
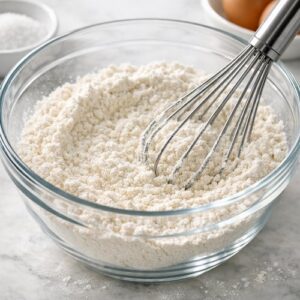
In a medium-sized mixing bowl, whisk together the flour, baking powder, and salt. I like to whisk this combination for about 30 seconds to break up any small clumps and distribute the baking powder evenly throughout the flour. This ensures every cookie rises uniformly. Set this bowl aside—you’ll add it to your wet ingredients in just a moment.

Step 3: Cream the Butter and Sugar Until Fluffy
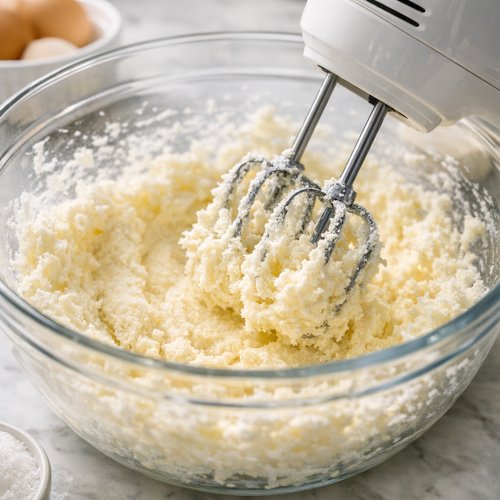
This step is where the magic happens. In your large mixing bowl, combine the cool room-temperature butter and 1¼ cups sugar. Using an electric mixer fitted with a paddle attachment on medium-high speed, beat this mixture for 2 to 3 minutes. You’re looking for a transformation—the mixture should go from grainy and dense to pale, light, and noticeably fluffy, almost like fluffy clouds. This is the creaming process, and it’s what gives these cookies their signature tender texture.
Stop the mixer halfway through to scrape down the sides and bottom of the bowl with a rubber spatula. This ensures all the sugar gets fully incorporated into the butter.
Step 4: Add Your Eggs and Vanilla
Once your butter-sugar mixture looks light and fluffy, add the whole egg and the single egg yolk. Beat on medium speed for about 30 seconds until the eggs are fully incorporated. Add the vanilla extract and beat for another 15-20 seconds. The mixture should be smooth and slightly pale. Again, scrape down the sides of the bowl to make sure everything is evenly combined.
Here’s a pro tip from my kitchen testing: if the mixture looks slightly separated or curdled at this point, don’t panic. This sometimes happens, especially in cooler kitchens. It will come together beautifully once you add the flour.

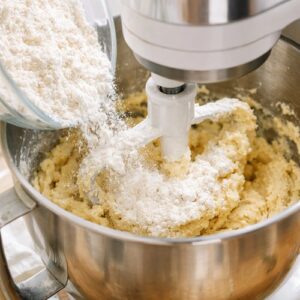
Step 5: Incorporate Your Flour Mixture
Reduce your mixer speed to low or medium-low. Slowly pour in your flour mixture while the mixer is running. Beat just until combined—this should take about 30-45 seconds. You’re looking for a dough that just comes together without any visible streaks of flour. Don’t overmix at this point, as that can develop the gluten and make your cookies less tender.
The dough should be soft but not sticky, and it should hold together when you squeeze a small piece in your hand.

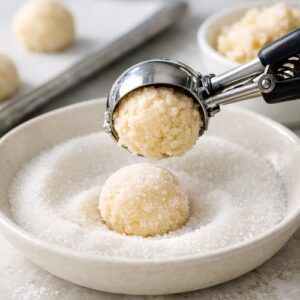
Step 6: Scoop and Roll in Sugar
Pour the remaining ¼ cup sugar into a shallow dish—a small bowl or plate works perfectly. Using a large spring-loaded cookie scoop (about 3 tablespoons each), divide your dough into balls. Working with one ball at a time, roll it in the sugar until it’s evenly coated on all sides. This creates a beautiful crystallized exterior and adds pleasant texture contrast.
Place each sugared ball on your prepared baking sheet, spacing them about 2 inches apart. They’ll spread slightly as they bake, so don’t crowd them. Using the bottom of a measuring cup, gently flatten each ball slightly—you want them about ½ inch thick before baking.

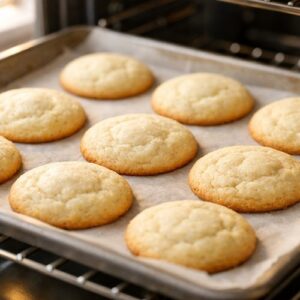
Step 7: Bake Until Golden and Set
Bake your cookies for 10 to 12 minutes, until they’re set and just beginning to develop light golden-brown color around the edges. The centers will still look slightly underbaked—this is exactly what you want. The cookies continue cooking on the hot baking sheet after you remove them from the oven.
Let the cookies cool on the baking sheet for exactly 5 minutes. This resting time allows them to firm up enough to transfer without breaking but not so long that they harden completely. Then transfer them to a wire cooling rack and let them cool completely before storing.

Expert’s Nutritional Tip
As a registered dietitian, I appreciate that these cookies provide a small amount of protein from the eggs and some structure from quality butter. However, the real nutrient story is in moderation and enjoyment. A single cookie contains approximately 120 calories, and the simplicity of these ingredients means no mysterious additives or preservatives. One cookie paired with a glass of milk or herbal tea creates a satisfying treat that doesn’t derail your day. The key to good nutrition is choosing foods you genuinely enjoy and eating them mindfully—and these cookies fit that philosophy perfectly.
Tips and Tricks from My Kitchen
- Room temperature matters – Butter that’s too cold won’t cream properly, and butter that’s too soft will create a greasy dough. Aim for butter that’s cool to the touch but yields slightly when you press it with your finger
- Don’t skip the scoop – Using a consistent cookie scoop ensures all your cookies bake at the same rate. This prevents burnt edges and undercooked centers in the same batch
- Test one batch first – Every oven bakes differently. Bake one cookie or a small batch at 10 minutes to see how your specific oven performs, then adjust the remaining batches accordingly
- Cool completely before storing – Even residual warmth will create steam in your storage container, which makes the cookies soggy. Give them at least 30 minutes on the cooling rack
- Use aluminum-free baking powder – This prevents any metallic aftertaste that some people notice in baked goods, keeping the vanilla flavor pure and bright
- Keep your mixer on low during final mixing – This prevents overdeveloping gluten, which can make cookies tougher. You’re looking for just-combined, not fully homogenous
- Flatten the dough slightly before baking – Flat cookies bake more evenly than tall balls. Just press each one gently with the bottom of a measuring cup for consistent results
Make-Ahead Guide for Smart Meal Prep
Dough Preparation: You can make this dough up to 24 hours ahead. After combining all ingredients and reaching the soft dough stage, wrap it tightly in plastic wrap and refrigerate. Cold dough is actually easier to scoop and handle. When you’re ready to bake, let it sit at room temperature for 10 minutes to soften slightly before scooping.
Scooped and Frozen: This is my favorite make-ahead method. After scooping and rolling in sugar, place the balls on a parchment-lined baking sheet in your freezer for 2 hours until solid. Then transfer to a freezer bag and freeze for up to 3 months. Bake directly from frozen, adding 1-2 minutes to the baking time.
Baked Cookie Storage: Once completely cooled, store in an airtight container at room temperature for up to 3 days. Place parchment paper between layers to prevent sticking. You can also freeze baked cookies in an airtight container for up to 2 months. Thaw at room temperature for about 15 minutes before serving.
Can I Store Fluffy Sugar Cookies?
Yes, and they actually improve slightly as they sit! Store baked cookies in an airtight container at room temperature for up to 3 days. The cookies will soften slightly and become even more tender as they sit—this is a wonderful characteristic. If you want them fresher or live in a humid climate, store them in the refrigerator in an airtight container for up to 5 days.
For longer storage, freeze your baked cookies in an airtight container with parchment between layers for up to 2 months. Thaw at room temperature for about 15 minutes before serving. Alternatively, freeze the scooped, uncooked dough balls for up to 3 months and bake from frozen, adding 1-2 minutes to the baking time.
Nutrition Information
Based on USDA nutrition data, each cookie (approximately 32 grams) contains roughly 120 calories, 6 grams of fat, 16 grams of carbohydrates, 1 gram of protein, and 0.3 grams of fiber. These cookies are primarily a source of carbohydrates and a small amount of protein from the eggs. They contain no added sodium beyond what’s naturally in the ingredients, making them a relatively clean treat compared to many commercial versions.
The sugar content comes entirely from the granulated sugar in the recipe—approximately 13 grams per cookie. For context, that’s similar to about one tablespoon of sugar, making these a reasonable treat when enjoyed as part of a balanced diet.
What Can I Serve With Fluffy Sugar Cookies?
These versatile cookies pair beautifully with so many beverages and desserts. I love serving them with cold milk, hot tea, or coffee for a simple afternoon break. For a more elaborate dessert spread, consider pairing them with Krolls cookies for a cookie assortment box, or alongside key lime pie with Biscoff crust for a complete dessert party.
- Frosting and decoration – Pipe on buttercream frosting, add royal icing for special occasions, or simply dust with additional granulated sugar for a classic look
- Flavored milk bar – Serve alongside glasses of chocolate milk, strawberry milk, or classic cold milk for dunking
- Tea service – Include these in an afternoon tea spread with finger sandwiches and fresh fruit for an elegant gathering
- Gift packaging – Layer in clear bags tied with ribbon for a simple, homemade gift that always impresses
- Ice cream sandwich base – Cool the cookies completely and sandwich with your favorite ice cream for an elegant dessert
- Breakfast treat – Yes, one cookie with breakfast coffee and fruit is a perfectly balanced start to your day
Common Mistakes to Avoid
- Using softened butter instead of cool room temperature – Over-softened butter won’t trap air during creaming, and you’ll end up with dense, flat cookies instead of fluffy ones. Always let your butter sit out for 20-30 minutes, not longer
- Overmixing the final dough – Once you add the flour, resist the urge to keep mixing. Extra mixing develops gluten and makes cookies tough and cakey. Mix just until combined, even if you see a tiny bit of flour streaks
- Baking too long – The most common mistake is waiting until the cookies look completely set and brown. They should still look slightly underbaked in the center. They’ll finish cooking on the hot baking sheet and become perfectly tender. Overbaking makes them hard and crispy
- Not cooling on the baking sheet – Removing cookies immediately from the pan will cause them to break apart. That 5-minute rest on the hot sheet is essential for proper structure
Seasonal Variations
- Spring Lemon Cookies – Replace ½ teaspoon of vanilla with ½ teaspoon lemon extract and add 1 tablespoon fresh lemon zest to the butter-sugar mixture. Roll in sugar mixed with a pinch of lemon zest before baking
- Summer Berry Cookies – Fold ½ cup freeze-dried berries (finely crushed) into the dough after adding flour. The tart flavor complements the sweetness beautifully
- Fall Spice Cookies – Add ½ teaspoon cinnamon, ¼ teaspoon nutmeg, and ¼ teaspoon ground ginger to your dry ingredients. Roll in cinnamon sugar instead of plain sugar before baking
- Winter Peppermint Cookies – Add ¼ teaspoon peppermint extract along with the vanilla, and fold ¼ cup crushed candy canes into the dough. Roll in peppermint sugar for a festive finish
- Year-Round Almond Cookies – Replace ¼ teaspoon vanilla with ¼ teaspoon pure almond extract for a subtle, sophisticated flavor variation
Substitutes and Variations
- Salted butter instead of unsalted – If using salted butter, reduce the salt in the recipe to ¼ teaspoon. Salted butter varies by brand, so this prevents over-salting
- All-purpose flour alternatives – You can substitute up to ½ cup of the all-purpose flour with cake flour for an even more tender cookie, or use up to ¼ cup cornstarch for additional tenderness
- Vanilla extract substitutes – Use equal amounts of almond extract, lemon extract, or peppermint extract for different flavor profiles. Or use 1 teaspoon of vanilla bean paste for extra vanilla flavor intensity
- Egg substitutes – For binding without eggs, you can use 1 tablespoon applesauce plus 1 tablespoon water, though the cookies will be slightly less fluffy
- Reduced sugar version – You can reduce the sugar by up to ¼ cup, though the cookies will be less sweet and slightly less fluffy. Don’t reduce more than this, as sugar contributes to structure

Fluffy Sugar Cookies Recipe
Ingredients
- 1 teaspoon pure vanilla extract not imitation, makes a noticeable difference
- 2 stick unsalted butter 226 grams, at cool room temperature, not soft
- 1 tablespoon granulated sugar extra, for sprinkling on tops if desired
- ¾ teaspoon fine sea salt enhances sweetness and flavor depth
- 2 teaspoon baking powder aluminum-free works beautifully
- 2½ cup all-purpose flour 318 grams, spooned and leveled, never packed
- 1 large egg plus 1 egg yolk use room temperature eggs for better incorporation
- 1¼ cup granulated sugar 250 grams, plus ¼ cup additional for rolling
Instructions
Step 1: Preheat Your Oven and Prepare Your Workspace
- Start by preheating your oven to 350°F. While it's warming, line your baking sheets with parchment paper—this is non-negotiable for even baking and easy cleanup. I typically use two standard 18-by-13-inch sheets, which gives me plenty of room to space the cookies properly.

Step 2: Combine Your Dry Ingredients
- In a medium-sized mixing bowl, whisk together the flour, baking powder, and salt. I like to whisk this combination for about 30 seconds to break up any small clumps and distribute the baking powder evenly throughout the flour. This ensures every cookie rises uniformly. Set this bowl aside—you'll add it to your wet ingredients in just a moment.
Step 3: Cream the Butter and Sugar Until Fluffy
- This step is where the magic happens. In your large mixing bowl, combine the cool room-temperature butter and 1¼ cups sugar. Using an electric mixer fitted with a paddle attachment on medium-high speed, beat this mixture for 2 to 3 minutes. You're looking for a transformation—the mixture should go from grainy and dense to pale, light, and noticeably fluffy, almost like fluffy clouds. This is the creaming process, and it's what gives these cookies their signature tender texture. Stop the mixer halfway through to scrape down the sides and bottom of the bowl with a rubber spatula. This ensures all the sugar gets fully incorporated into the butter.

Step 4: Add Your Eggs and Vanilla
- Once your butter-sugar mixture looks light and fluffy, add the whole egg and the single egg yolk. Beat on medium speed for about 30 seconds until the eggs are fully incorporated. Add the vanilla extract and beat for another 15-20 seconds. The mixture should be smooth and slightly pale. Again, scrape down the sides of the bowl to make sure everything is evenly combined. Here's a pro tip from my kitchen testing: if the mixture looks slightly separated or curdled at this point, don't panic. This sometimes happens, especially in cooler kitchens. It will come together beautifully once you add the flour.

Step 5: Incorporate Your Flour Mixture
- Reduce your mixer speed to low or medium-low. Slowly pour in your flour mixture while the mixer is running. Beat just until combined—this should take about 30-45 seconds. You're looking for a dough that just comes together without any visible streaks of flour. Don't overmix at this point, as that can develop the gluten and make your cookies less tender. The dough should be soft but not sticky, and it should hold together when you squeeze a small piece in your hand.
Step 6: Scoop and Roll in Sugar
- Pour the remaining ¼ cup sugar into a shallow dish—a small bowl or plate works perfectly. Using a large spring-loaded cookie scoop (about 3 tablespoons each), divide your dough into balls. Working with one ball at a time, roll it in the sugar until it's evenly coated on all sides. This creates a beautiful crystallized exterior and adds pleasant texture contrast. Place each sugared ball on your prepared baking sheet, spacing them about 2 inches apart. They'll spread slightly as they bake, so don't crowd them. Using the bottom of a measuring cup, gently flatten each ball slightly—you want them about ½ inch thick before baking.
Step 7: Bake Until Golden and Set
- Bake your cookies for 10 to 12 minutes, until they're set and just beginning to develop light golden-brown color around the edges. The centers will still look slightly underbaked—this is exactly what you want. The cookies continue cooking on the hot baking sheet after you remove them from the oven. Let the cookies cool on the baking sheet for exactly 5 minutes. This resting time allows them to firm up enough to transfer without breaking but not so long that they harden completely. Then transfer them to a wire cooling rack and let them cool completely before storing.
Notes
FAQs
Why are my cookies spreading too much during baking?
Over-spreading usually indicates one of two things: either your butter was too soft during creaming, or your oven temperature is running low. Make sure your butter is truly cool room temperature, not soft or melted. Use an oven thermometer to verify your oven temperature is actually 350°F—many home ovens run 10-25 degrees off from what they display. If spreading is still an issue, refrigerate your scooped dough for 15 minutes before baking to firm them up
Can I make these cookies without a mixer?
Absolutely! You’ll need a bit more arm strength and patience. Cream the butter and sugar together using a hand mixer or even a wooden spoon and elbow grease for 4-5 minutes until pale and fluffy. This takes longer but produces equally good results. I’ve made these successfully with just a hand mixer, and the results are identical to stand mixer versions
Why are my cookies cakey instead of tender?
This usually happens from overmixing after adding the flour, or from too much baking powder. Make sure you’re measuring your baking powder accurately—spoon it into the measuring spoon and level with a straight edge, don’t scoop directly from the container. Also, stop mixing your dough as soon as the flour is incorporated. Overworking develops gluten, which creates a cakey structure
How do I know when the cookies are done baking?
The edges should be set and just beginning to turn light golden brown, usually at 10-12 minutes. The centers should still look slightly underbaked—almost soft to the touch. This is key! They continue cooking on the hot baking sheet, so pulling them out slightly early is better than overbaking. If you wait until the centers look set and brown, you’ll have hard, crispy cookies instead of fluffy ones
Can I decorate these cookies?
Yes! Once cooled completely, you can pipe on buttercream frosting, paint with egg wash and edible glitter, add royal icing in designs, or simply dust with powdered sugar. If decorating with wet toppings like icing, let the cookies dry completely before storing to prevent the icing from getting sticky. These cookies are a blank canvas for your creativity
More Recipes You’ll Love
- Krolls Cookies – A fun twist on classic cookies with its own cherished history and delicious flavor profile
- Large Batch Brownies – Perfect for pairing with these sugar cookies when you’re feeding a crowd or stocking your dessert box
- Key Lime Pie With Biscoff Crust – An elegant dessert that complements these simple cookies beautifully on a dessert board
- Krollskorner Pumpkin Bread – A seasonal variation on this baking theme with warmth and spice
These fluffy sugar cookies are more than just a recipe—they’re a way to create memories, one batch at a time. I think about my grandmother every time I make them, and I love knowing that you’ll think about the people you bake them for. There’s something deeply satisfying about pulling warm, golden cookies from the oven and knowing you made them with your own hands. Whether you’re baking for a special occasion, a school bake sale, or just because a Thursday afternoon needs something sweet, these cookies deliver tenderness, simplicity, and pure joy. Good food is a good mood!

My name is Lori Walker. I’m a registered dietitian, food blogger and food enthusiast. I share easy healthy, delicious recipes on my blog and review necessary kitchen items. The recipes I share take less… Read more