This post contains affiliate links. As an Amazon Associate I earn from qualifying purchases.
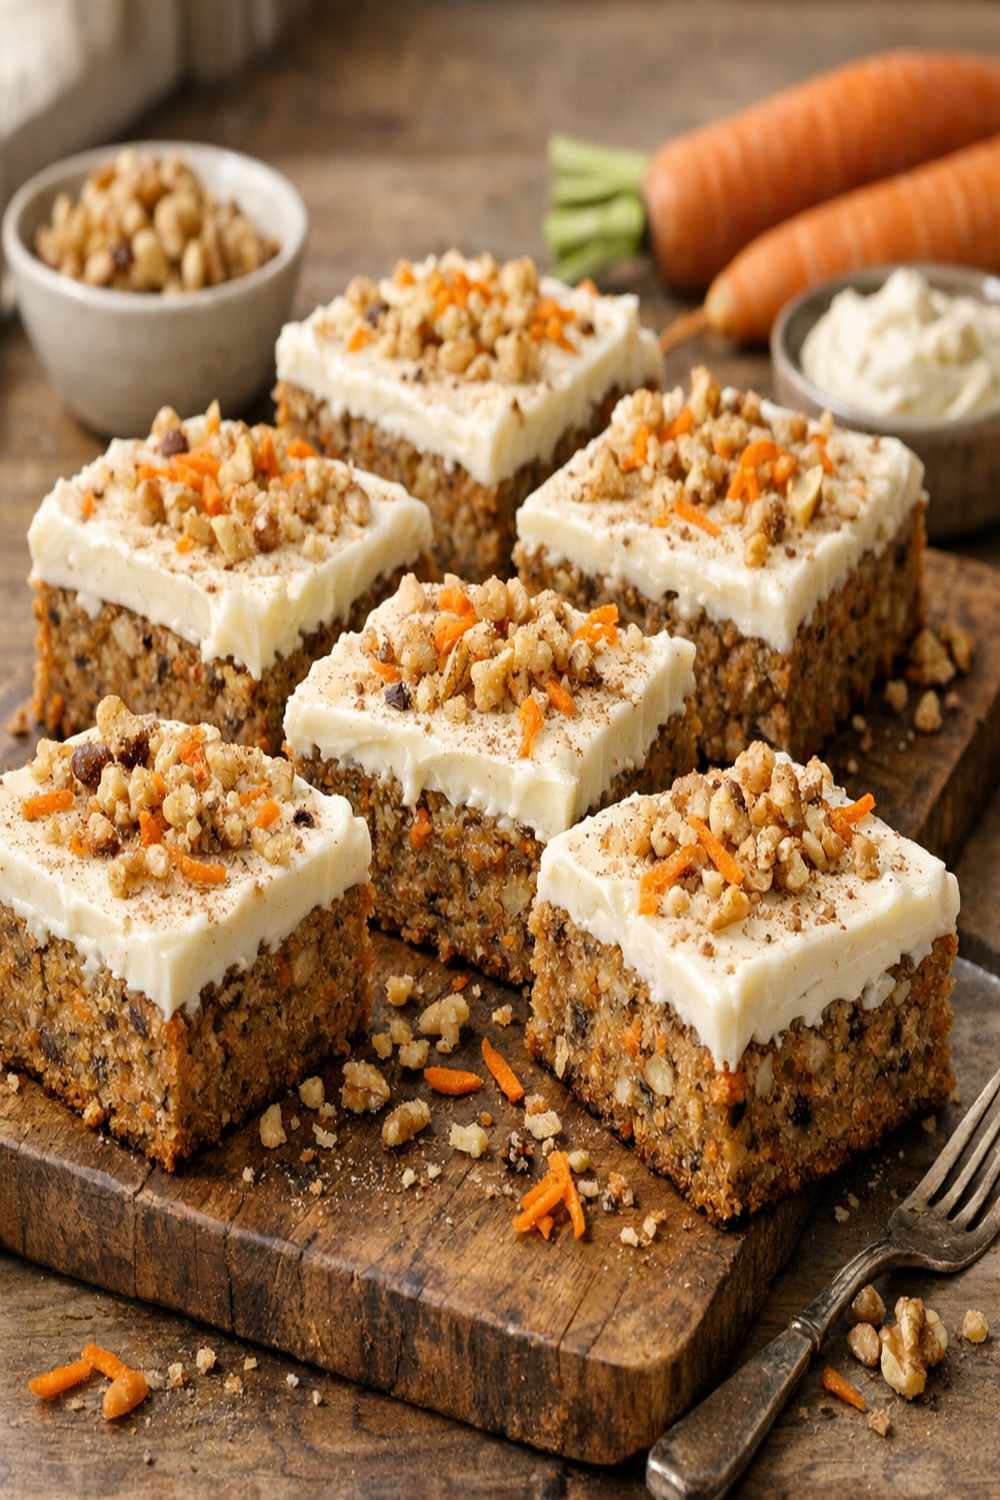
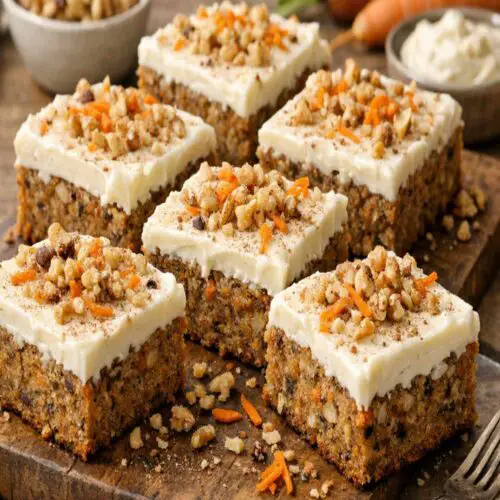
These carrot cake bars are pure comfort in square form—soft, naturally spiced cake layers topped with tangy cream cheese frosting. I love pairing these with a strong cup of coffee in the morning or alongside a my favorite salad for a lighter dessert option that feels a little less indulgent. They’re also perfect alongside afternoon tea or as a portable dessert for potlucks and gatherings.
The Recipe My Grandmother Taught Me to Love
I still remember standing on a wooden stool in my grandmother’s kitchen in 2019 when she first made these carrot cake bars for my birthday. She wouldn’t let me read the recipe card—she wanted me to watch her hands, smell the cinnamon, feel the carrots release their moisture into the batter. That’s when I started recording family recipes, understanding that food is really about presence and memory.
This version I’ve developed combines her warmth with modern nutrition science, using real carrots and simple ingredients I can find at any grocery store. No fancy equipment needed, just a standard 8×8 pan and your willingness to create something meaningful.
What is Carrot Cake Bars Recipe?
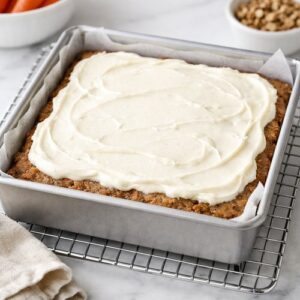
Carrot cake bars are a rustic, simplified version of traditional layered carrot cake, designed for home cooks who want impressive results without the complexity. Instead of frosting a tall cake and worrying about crumbs, you bake a moist carrot-studded cake right in a square pan, then top it with a silky cream cheese frosting spread directly on top.
What makes this recipe special is the balance between the naturally sweet carrots (which add moisture and fiber), warm spices like cinnamon, and a tangy frosting that cuts through the richness. The result is a bar cookie that tastes homemade, feels elegant, and comes together faster than you’d expect.
From a nutritional standpoint, carrots bring beta-carotene and natural sweetness, which means you can use less refined sugar while still achieving that classic carrot cake flavor profile. I’ve tested this recipe on standard home ovens across multiple seasons, and it performs consistently every time.
Why You’ll Love This Carrot Cake Bars Recipe
- One-Bowl Cake Batter – No electric mixer required. Everything comes together in under five minutes with a whisk and a bowl. Your kitchen stays cleaner, and you spend more time enjoying the process.
- Naturally Moist and Tender – The shredded carrots release moisture into the cake as it bakes, creating an incredibly tender crumb that stays fresh for days without becoming dry.
- Accessible Ingredients – I use items you already have at home: butter, eggs, all-purpose flour, brown sugar, and fresh carrots. No specialty ingredients or hard-to-find spices.
- Makes a Perfect Crowd Size – This recipe yields 16 bars from one 8×8 pan, making it ideal for small families, potlucks, or freezing half for later.
- Stress-Free Frosting – The cream cheese topping is forgiving. It doesn’t require whipping peaks or precise temperatures—just mix and spread.
- Tastes Even Better the Next Day – The flavors deepen overnight, and the cake becomes even more moist. Perfect for meal-prepping ahead of busy weeks.
The Ingredients
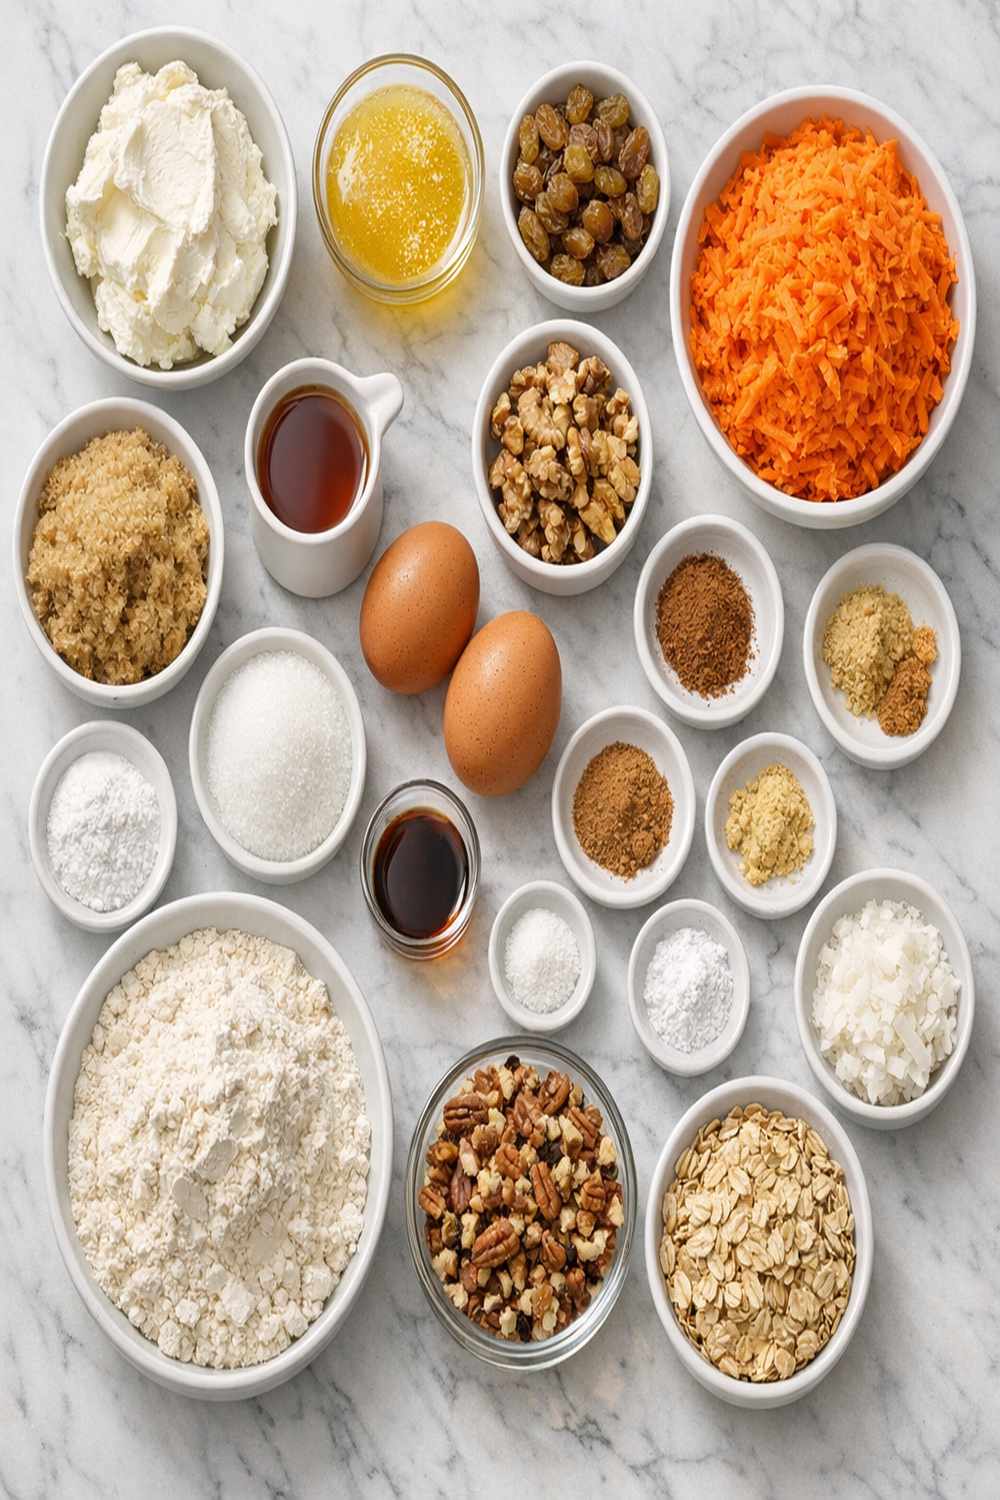
Here’s what you’ll need to create these bars. I’ve organized them by cake and frosting so you can gather everything at once and avoid mid-recipe searches. This recipe yields 16 bars (one 8×8-inch pan).
For the Cake
- 1 cup all-purpose flour (spooned and leveled, never packed into the measuring cup)
- 1 cup shredded carrots (about 2 medium carrots, loosely packed and not squeezed dry)
- ½ cup unsalted butter (melted and slightly cooled to prevent cooking the egg)
- 1 large egg (room temperature for better mixing)
- 1 teaspoon ground cinnamon (freshly measured from a container purchased within the last 6 months)
- ¼ teaspoon baking powder (ensures gentle rise without overmixing)
- 1 cup light brown sugar (packed firmly to measure accurately)
- ¾ teaspoon pure vanilla extract (not imitation, as it provides better flavor depth)
- ½ teaspoon ground nutmeg (optional but recommended for warmth and depth)
- ¼ teaspoon fine sea salt (balances sweetness and enhances spice flavors)
For the Frosting
- ¼ cup granulated sugar (dissolved into the cream cheese for smooth texture)
- ½ teaspoon pure vanilla extract (complements the tangy cream cheese perfectly)
- 4 ounces cream cheese (left at room temperature for 15-20 minutes, cut into small pieces)
- 1 large egg yolk (adds richness and helps create a stable frosting layer)
How to Make Carrot Cake Bars Recipe?
I’ve broken this into clear, manageable steps that take about 40 minutes from start to finish. Read through once before you begin—it helps you feel confident and prevents surprises.
Step 1: Prepare Your Pan and Preheat the Oven
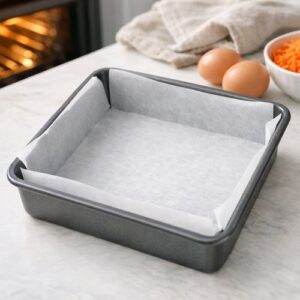
Start by preheating your oven to 350 degrees Fahrenheit. While it warms up, grab your 8×8-inch baking pan. I recommend lining it with parchment paper (letting the edges hang over the sides), then giving it a light spray of nonstick cooking spray. This two-step approach makes removal incredibly easy—you’ll lift the entire cake out in one piece when cooled.
If you don’t have parchment paper, simply spray the pan generously with nonstick spray. The parchment just makes cleanup easier and prevents any sticking around the edges.

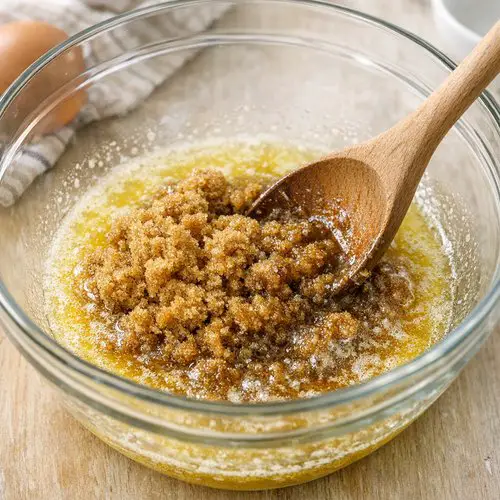
Step 2: Combine Wet Ingredients for the Cake
Pour the melted butter into a medium mixing bowl. Add the packed brown sugar directly to the warm butter. Stir these together until the sugar dissolves and the mixture becomes smooth, about 1 minute. This ensures even sweetness throughout the cake.
Crack your egg into a small cup first (to avoid shell pieces), then add it to the butter-sugar mixture. Pour in the vanilla extract. Whisk everything together vigorously for about 30 seconds until the mixture becomes pale and slightly fluffy. You should see tiny bubbles forming—this incorporates air and creates a lighter cake.
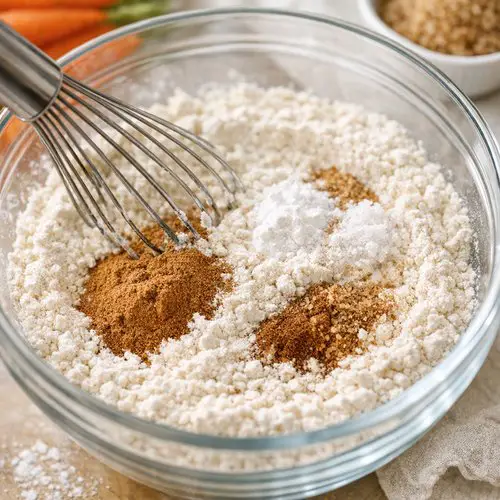
Step 3: Mix the Dry Ingredients Together
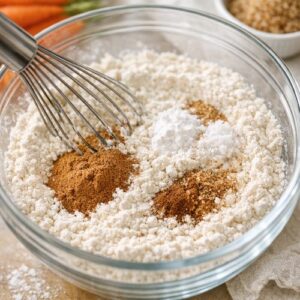
In a separate bowl, whisk together the flour, cinnamon, baking powder, salt, and nutmeg. This step is important because it distributes the leavening agent and spices evenly without overmixing the batter later. Whisk for about 15-20 seconds until everything looks combined and you don’t see any streaks of flour.
This dry blend is what gives carrot cake its signature warmth—the cinnamon and nutmeg are non-negotiable if you want that classic flavor.
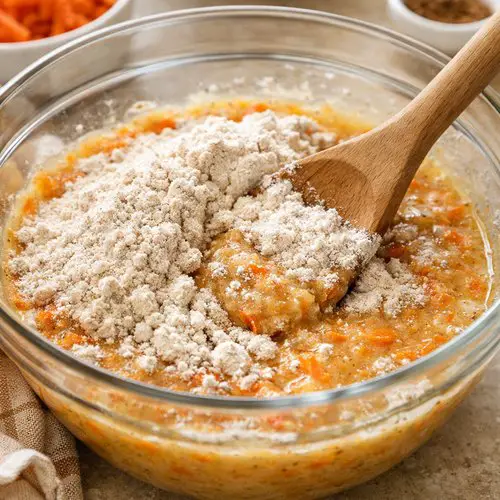
Step 4: Create the Cake Batter
Pour the dry ingredient mixture into the wet ingredients. Using a rubber spatula or wooden spoon, fold together with about 12-15 gentle strokes until just combined. You want to see no more flour streaks, but don’t overmix—a few small lumps are perfectly fine and create a more tender crumb.
Overmixing develops gluten, which makes the cake tough rather than tender. This is the most common mistake I see home bakers make with bar recipes.
Now fold in the shredded carrots with another 3-4 gentle strokes. The carrots should be distributed throughout, but don’t squeeze or compress them. They’ll release their moisture during baking, keeping everything moist.
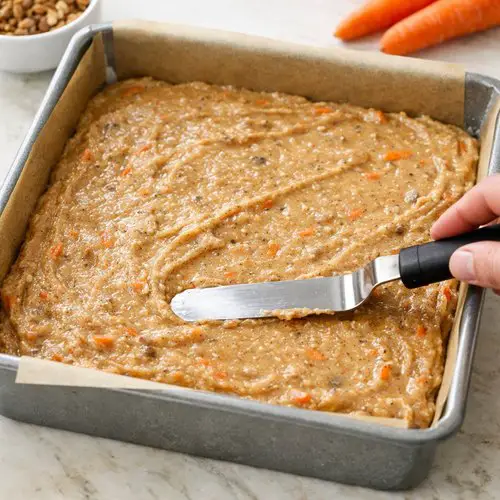
Step 5: Spread the Cake Batter
Pour the batter into your prepared 8×8 pan. Using an offset spatula or the back of a spoon, spread it evenly into the corners. The batter should reach about ½-inch thickness and look relatively level. This ensures even baking.
Tap the pan gently on the counter a few times to release any air bubbles trapped in the batter. This prevents large holes from forming while baking.
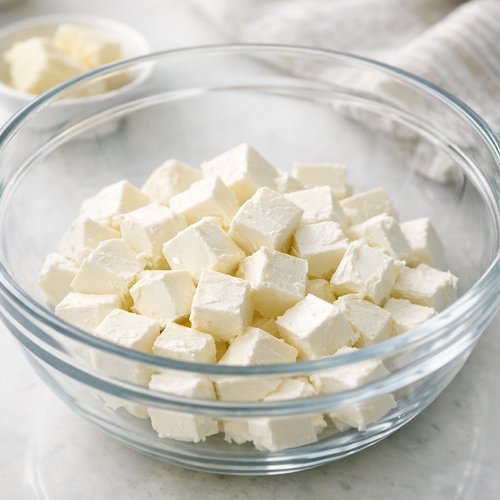
Step 6: Prepare the Frosting
While the cake bakes, make the frosting. Cut your room-temperature cream cheese into small pieces (about ½-inch cubes). Add them to a clean bowl along with the granulated sugar. Using a whisk or electric mixer on low speed, beat together for 1-2 minutes until the mixture becomes smooth and the sugar dissolves.
The cream cheese should look like soft pudding at this point—it’s easier to incorporate the egg yolk when it’s this consistency. If your cream cheese was too cold, you’ll see small lumps; let the mixture sit for 5 minutes and try again.
Add the egg yolk and vanilla extract. Whisk gently for about 30 seconds until fully incorporated. The frosting should look pale, smooth, and slightly fluffy. Don’t overmix here either—you want to avoid incorporating too much air, which can cause cracking.
Step 7: Bake the Cake Layer
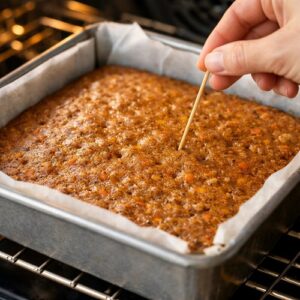
Place the pan in your preheated oven. Bake for 18-22 minutes. The cake is done when a toothpick inserted into the center comes out with just a few moist crumbs attached (not wet batter). The edges should look set and slightly pulled away from the pan sides, while the center still looks slightly underbaked—it continues cooking from residual heat.
Your kitchen will smell absolutely incredible during this time. This is the good part of baking.

Step 8: Spread the Frosting and Bake Again
Remove the pan from the oven and let it cool for just 2-3 minutes—it should still feel warm to the touch, but not hot. Using an offset spatula or butter knife, spread the frosting in an even layer over the warm cake. The warmth from the cake helps the frosting spread smoothly, and it’ll set as everything cools.
Return the pan to the oven and bake for another 8-10 minutes until the frosting is set but still slightly soft in the center. The frosting should look pale and set around the edges, but the very center can still have a tiny bit of jiggle—this keeps it creamy rather than rubbery.

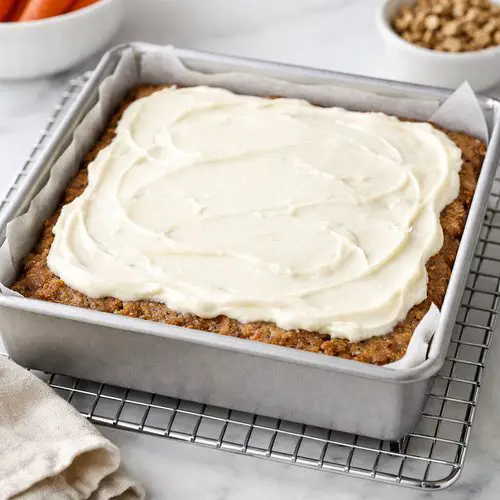
Step 9: Cool Completely Before Cutting
Remove the pan from the oven and set it on a cooling rack or folded kitchen towel. Let it cool at room temperature for at least 30 minutes, but ideally 1-2 hours. This cooling time is crucial—it allows the frosting to fully set so you get clean cuts instead of smeared frosting.
For even cleaner cuts, refrigerate the cooled pan for at least 1 hour before slicing. A sharp knife dipped in hot water (then wiped dry) helps cut through the frosting cleanly too.
Once cooled, use your parchment paper overhang to lift the entire cake out of the pan onto a cutting board. Cut into 16 bars (4 rows by 4 columns). Store any leftovers in an airtight container.
Tips and Tricks
- Shred Fresh Carrots Right Before Baking – If you shred carrots ahead of time, they oxidize and lose some nutrients and moisture. Shred them just before mixing the batter for maximum freshness and texture.
- Don’t Squeeze the Shredded Carrots – This is a critical step. The moisture in carrots is what keeps this cake tender. Let them sit loosely in your measuring cup.
- Room Temperature Cream Cheese is Non-Negotiable – Cold cream cheese creates lumps and won’t spread smoothly. Remove it from the fridge 15-20 minutes before you start the frosting. Your kitchen temperature matters too—if it’s very cold, let it sit even longer.
- Use an Offset Spatula for Easy Frosting Spread – These angled spatulas cost about five dollars and make frosting spread infinitely easier. It’s one of my favorite small kitchen investments.
- Invest in Quality Cinnamon – Stale cinnamon tastes dusty and flat. Buy it from a store with good turnover (not that dusty container from three years ago), and replace it every 6 months for the best flavor.
- Dip Your Knife in Hot Water Between Cuts – This prevents the frosting from sticking to your knife. Keep a tall glass of hot water nearby, dip your knife, wipe it dry with a clean towel, then cut. Repeat for each cut.
- Cut Into 16 Bars or 9 Larger Pieces – Standard bar recipes cut into 16 (perfect for parties and variety), but if you want more decadent portions, cut into 9 larger bars instead.
Expert’s Nutritional Tip
As a registered dietitian, I want to highlight something important here: carrots bring both soluble and insoluble fiber, plus beta-carotene (which your body converts to vitamin A). This means each bar provides meaningful nutrition alongside the indulgence. The brown sugar I use contains more minerals like calcium and potassium than refined white sugar, and the egg yolk in the frosting adds choline, which supports brain health.
These bars aren’t “health food,” but they’re a better-for-you version of traditional carrot cake because we’re using whole carrots (not carrot juice or concentrate) and keeping added sugars moderate. One bar contains roughly 180 calories with 2 grams of fiber—that’s real nutrition wrapped in deliciousness.
Common Mistakes to Avoid
- Overmixing the Batter – This creates a tough, dense cake instead of the tender crumb we want. Fold gently until you see no flour streaks, then stop. A few small lumps are your friends.
- Using Cold Cream Cheese for the Frosting – Cold cream cheese won’t blend smoothly and creates a lumpy, unpleasant texture. Always bring it to room temperature first, and use an electric mixer or vigorous whisking.
- Skipping the Second Bake – Some bakers think they’re done after the cake bakes. The frosting needs to set in the oven for that creamy, stable texture. Don’t skip this step or spread frosting on completely cooled cake (it won’t set properly).
- Cutting Before the Cake is Fully Cool – Warm cake falls apart and the frosting smears everywhere. Patience here pays off. Wait at least 30 minutes, and ideally refrigerate for an hour before cutting.
- Measuring Flour Incorrectly – Packing flour into your measuring cup (instead of spooning and leveling) adds too much flour, creating a dry cake. Always spoon flour into the cup and level with a knife.
Make-Ahead Guide
Bake the Cake Layer Only (1-2 Days Ahead) – Prepare and bake just the carrot cake layer. Cool completely, wrap tightly in plastic wrap, and store at room temperature. Prepare the frosting fresh the day you plan to serve.
Fully Assembled Bars (2-3 Days Ahead) – Complete the entire recipe and store in an airtight container at room temperature or in the refrigerator. These actually taste better on day two as flavors meld. If stored in the fridge, let them sit at room temperature for 15 minutes before serving for the best frosting texture.
Freeze for Up to 3 Months – Wrap cooled, fully assembled bars individually in plastic wrap, then place in a freezer-safe container. Thaw at room temperature for about 1 hour before serving. The texture stays perfect—freezing doesn’t damage these bars at all.
Freeze Just the Cake Layer – If you want to make the cake ahead but add fresh frosting later, this works beautifully. Wrap the cooled cake layer in plastic wrap and foil, then freeze. Thaw and add fresh frosting when you’re ready to serve.
Seasonal Variations
- Spring Version (March-May) – Add ¼ teaspoon cardamom to the dry ingredients and swap half the brown sugar for white sugar for a lighter flavor. This version pairs beautifully with springtime afternoon tea.
- Summer Version (June-August) – Add ½ teaspoon fresh ginger (minced fine) to the wet ingredients for brightness. Reduce cinnamon to ¾ teaspoon so it doesn’t feel heavy in warm weather.
- Fall/Winter Version (September-February) – Increase cinnamon to 1½ teaspoons and add ¼ teaspoon clove powder for deeper spice. This is the most warming version and pairs perfectly with hot apple cider.
- Year-Round Enhancement – Add 2 tablespoons of finely chopped walnuts or pecans to the batter for extra texture and nutrition. Toast them lightly first for better flavor development.
Can I Store Carrot Cake Bars Recipe?
Absolutely—these bars actually improve with storage. Cover them with plastic wrap or store in an airtight container at room temperature for up to 2 days, in the refrigerator for up to 4 days, or frozen for up to 3 months.
The cool thing about these bars is that the carrots release moisture slowly over time, making the cake even more tender on day two than day one. If you’re storing them in the fridge, let them sit at room temperature for 15 minutes before serving so the frosting softens slightly and tastes creamy rather than cold and firm.
For freezing, wrap each bar individually in plastic wrap and store in a freezer-safe container. Thaw at room temperature for about 1 hour and they taste exactly like freshly baked bars. This is my favorite make-ahead strategy for busy weeks when I want a reliable dessert on hand.
Nutrition Information
Per bar (based on 16 servings): 180 calories, 9g fat, 24g carbohydrates, 2g fiber, 18g sugar, 2g protein. This data is based on standard USDA nutrition databases and accounts for the ingredients listed.
The 2 grams of fiber per bar comes from the shredded carrots, which contain both soluble and insoluble fiber. The beta-carotene (which becomes vitamin A in your body) supports eye health, immune function, and skin health. One bar provides roughly 15% of your daily vitamin A needs.
The cream cheese frosting adds 9 grams of fat per bar, primarily from saturated fat, but also contributes important fat-soluble vitamins and a satisfying texture that prevents overeating. The egg yolk in the frosting adds choline, which supports brain development and cognitive function—something I always mention to parents making these for their families.
What Can I Serve With Carrot Cake Bars Recipe?
These bars are surprisingly versatile. Serve them with afternoon coffee or tea for a classic pairing, or try them alongside fresh fruit for balance. I also love pairing them with this cozy soup as a dessert after a light lunch.
Here are my favorite serving combinations:
- With Whipped Cream and Fresh Berries – A dollop of whipped cream and fresh raspberries or blueberries on top creates an elegant dessert that feels fancy but requires zero extra work.
- Alongside Hot Beverages – These bars are perfect with hot coffee, tea, hot chocolate, or even chai tea. The warmth of the beverage contrasts beautifully with the cool, creamy frosting.
- With a Glass of Cold Milk – This is how my grandmother served them, and it’s still my favorite. The cold milk tempers the sweetness and makes you savor the cake slowly.
- As a Lunch Box Surprise – Wrap one bar individually and pack it in a lunch box or give it to a friend. The portability and staying power make them perfect for that.
- At Room Temperature for Potlucks – These travel well and taste excellent at room temperature, making them ideal for outdoor gatherings, picnics, or office parties.
Substitutes
- All-Purpose Flour Alternative – You can substitute up to ¼ cup of all-purpose flour with whole wheat pastry flour for added fiber and nuttiness. Don’t use regular whole wheat flour—it creates a too-dense crumb in bars. Pastry wheat flour is milled fine enough for tender results.
- Brown Sugar Swap – If you’re out of light brown sugar, use white granulated sugar (use the same amount) or dark brown sugar (which adds deeper molasses flavor). The texture and rise stay the same, though dark brown sugar makes a more intense spice-cake flavor.
- Butter Alternative – You can use the same amount of coconut oil, ghee, or other neutral oils instead of butter. Coconut oil creates slightly denser bars but with lovely flavor. Ghee adds richness. Never use light or diet butter—the water content throws off the balance.
- Cream Cheese Frosting Alternative – If you can’t eat dairy, use dairy-free cream cheese (brands like Kite Hill or Miyoko’s work beautifully). The frosting sets the same way and tastes equally delicious, though you may need to let it chill slightly longer.
- Fresh Carrots to Frozen – You can use frozen shredded carrots (thawed and drained of excess moisture). They work perfectly—just squeeze them gently to remove water so they don’t make the cake too moist.
- Egg Yolk Swap in Frosting – If you have concerns about raw egg yolks, use pasteurized eggs (labeled as such at your grocery store) or use 1 tablespoon of aquafaba (liquid from canned chickpeas) for a vegan frosting that sets beautifully.
Carrot Cake Bars Recipe
Ingredients
For the Cake
- 1 cup all-purpose flour spooned and leveled, never packed into the measuring cup
- 1 cup shredded carrots about 2 medium carrots, loosely packed and not squeezed dry
- ½ cup unsalted butter melted and slightly cooled to prevent cooking the egg
- 1 large egg room temperature for better mixing
- 1 teaspoon ground cinnamon freshly measured from a container purchased within the last 6 months
- ¼ teaspoon baking powder ensures gentle rise without overmixing
- 1 cup light brown sugar packed firmly to measure accurately
- ¾ teaspoon pure vanilla extract not imitation, as it provides better flavor depth
- ½ teaspoon ground nutmeg optional but recommended for warmth and depth
- ¼ teaspoon fine sea salt balances sweetness and enhances spice flavors
For the Frosting
- ¼ cup granulated sugar dissolved into the cream cheese for smooth texture
- ½ teaspoon pure vanilla extract complements the tangy cream cheese perfectly
- 4 ounce cream cheese left at room temperature for 15-20 minutes, cut into small pieces
- 1 large egg yolk adds richness and helps create a stable frosting layer
Instructions
Step 1: Prepare Your Pan and Preheat the Oven
- Start by preheating your oven to 350 degrees Fahrenheit. While it warms up, grab your 8x8-inch baking pan. I recommend lining it with parchment paper (letting the edges hang over the sides), then giving it a light spray of nonstick cooking spray. This two-step approach makes removal incredibly easy—you'll lift the entire cake out in one piece when cooled. If you don't have parchment paper, simply spray the pan generously with nonstick spray. The parchment just makes cleanup easier and prevents any sticking around the edges.
Step 2: Combine Wet Ingredients for the Cake
- Pour the melted butter into a medium mixing bowl. Add the packed brown sugar directly to the warm butter. Stir these together until the sugar dissolves and the mixture becomes smooth, about 1 minute. This ensures even sweetness throughout the cake. Crack your egg into a small cup first (to avoid shell pieces), then add it to the butter-sugar mixture. Pour in the vanilla extract. Whisk everything together vigorously for about 30 seconds until the mixture becomes pale and slightly fluffy. You should see tiny bubbles forming—this incorporates air and creates a lighter cake.

Step 3: Mix the Dry Ingredients Together
- In a separate bowl, whisk together the flour, cinnamon, baking powder, salt, and nutmeg. This step is important because it distributes the leavening agent and spices evenly without overmixing the batter later. Whisk for about 15-20 seconds until everything looks combined and you don't see any streaks of flour. This dry blend is what gives carrot cake its signature warmth—the cinnamon and nutmeg are non-negotiable if you want that classic flavor.
Step 4: Create the Cake Batter
- Pour the dry ingredient mixture into the wet ingredients. Using a rubber spatula or wooden spoon, fold together with about 12-15 gentle strokes until just combined. You want to see no more flour streaks, but don't overmix—a few small lumps are perfectly fine and create a more tender crumb. Overmixing develops gluten, which makes the cake tough rather than tender. This is the most common mistake I see home bakers make with bar recipes. Now fold in the shredded carrots with another 3-4 gentle strokes. The carrots should be distributed throughout, but don't squeeze or compress them. They'll release their moisture during baking, keeping everything moist.

Step 5: Spread the Cake Batter
- Pour the batter into your prepared 8x8 pan. Using an offset spatula or the back of a spoon, spread it evenly into the corners. The batter should reach about ½-inch thickness and look relatively level. This ensures even baking. Tap the pan gently on the counter a few times to release any air bubbles trapped in the batter. This prevents large holes from forming while baking.

Step 6: Prepare the Frosting
- While the cake bakes, make the frosting. Cut your room-temperature cream cheese into small pieces (about ½-inch cubes). Add them to a clean bowl along with the granulated sugar. Using a whisk or electric mixer on low speed, beat together for 1-2 minutes until the mixture becomes smooth and the sugar dissolves. The cream cheese should look like soft pudding at this point—it's easier to incorporate the egg yolk when it's this consistency. If your cream cheese was too cold, you'll see small lumps; let the mixture sit for 5 minutes and try again. Add the egg yolk and vanilla extract. Whisk gently for about 30 seconds until fully incorporated. The frosting should look pale, smooth, and slightly fluffy. Don't overmix here either—you want to avoid incorporating too much air, which can cause cracking.

Step 7: Bake the Cake Layer
- Place the pan in your preheated oven. Bake for 18-22 minutes. The cake is done when a toothpick inserted into the center comes out with just a few moist crumbs attached (not wet batter). The edges should look set and slightly pulled away from the pan sides, while the center still looks slightly underbaked—it continues cooking from residual heat. Your kitchen will smell absolutely incredible during this time. This is the good part of baking.
Step 8: Spread the Frosting and Bake Again
- Remove the pan from the oven and let it cool for just 2-3 minutes—it should still feel warm to the touch, but not hot. Using an offset spatula or butter knife, spread the frosting in an even layer over the warm cake. The warmth from the cake helps the frosting spread smoothly, and it'll set as everything cools. Return the pan to the oven and bake for another 8-10 minutes until the frosting is set but still slightly soft in the center. The frosting should look pale and set around the edges, but the very center can still have a tiny bit of jiggle—this keeps it creamy rather than rubbery.

Step 9: Cool Completely Before Cutting
- Remove the pan from the oven and set it on a cooling rack or folded kitchen towel. Let it cool at room temperature for at least 30 minutes, but ideally 1-2 hours. This cooling time is crucial—it allows the frosting to fully set so you get clean cuts instead of smeared frosting. For even cleaner cuts, refrigerate the cooled pan for at least 1 hour before slicing. A sharp knife dipped in hot water (then wiped dry) helps cut through the frosting cleanly too. Once cooled, use your parchment paper overhang to lift the entire cake out of the pan onto a cutting board. Cut into 16 bars (4 rows by 4 columns). Store any leftovers in an airtight container.
Notes
FAQs
Can I Make These Bars Gluten-Free?
Yes! Replace the all-purpose flour with a 1:1 gluten-free baking flour blend (brands like Bob’s Red Mill or King Arthur work well). The texture will be slightly denser but still tender, and the bars will hold together beautifully. I recommend adding ¼ teaspoon of xanthan gum to the dry ingredients if your blend doesn’t already contain it—this helps with binding.
Why Did My Bars Come Out Dry?
Three common culprits: (1) You packed the flour too much when measuring—always spoon and level. (2) You squeezed or pressed the shredded carrots, removing their moisture. (3) You overbaked them. Check for doneness at 18 minutes with a toothpick. If it comes out completely clean (zero crumbs), you’ve baked too long. A few moist crumbs are perfect.
Can I Use a Different Pan Size?
This recipe is specifically designed for an 8×8-inch pan, which creates the perfect thickness. If you use a 9×9 pan, the cake will be thinner and may overbake. If you use a 9×13 pan, it’ll be thicker and may underbake in the center. Stick with 8×8 for best results.
How Do I Know When the Frosting is Done Baking?
The frosting should look set and pale around the edges, with just a tiny bit of jiggle in the very center when you gently shake the pan. It should not look wet or runny anywhere. It’ll continue to set as it cools, so don’t overbake or it becomes rubbery. The second bake is only 8-10 minutes—watch it closely after 8 minutes.
Can I Make This Without Eggs?
This recipe is tricky to convert without eggs because you need the moisture and structure they provide (one whole egg in the cake, one yolk in the frosting). For a vegan version, use a flax egg (1 tablespoon ground flaxseed mixed with 3 tablespoons water) in place of the whole egg, and use aquafaba in place of the egg yolk. The texture changes slightly but it’s workable. I’d recommend testing this variation at least once before serving at a gathering.
More Recipes You’ll Love
- Krolls Cookies – Another classic recipe perfect for family gatherings and holidays. These hold up beautifully during transport and stay soft for days.
- Instant Pot Teriyaki Chicken and Rice – For when you want something savory after these sweet bars, this one-pot dinner is stress-free and comes together in minutes.
- Kings Hawaiian Buffalo Chicken Sliders – Another crowd-pleasing recipe that makes entertaining simple and keeps guests happy.
- This Creamy Cheesecake Recipe – Worth adding to your recipe collection.
- My Favorite Lemon Dish – Worth adding to your recipe collection.
- These Crowd-Pleasing Cookies – Worth adding to your recipe collection.
There’s something deeply joyful about pulling a pan of warm carrot cake bars from the oven and knowing you’ve just created something that tastes like home, like care, like love. These bars are proof that good food doesn’t need to be complicated—it just needs intention and quality ingredients.
I hope you make these for someone you care about, or for yourself on a day when you need comfort. I hope your kitchen smells like cinnamon and possibility. I hope these bars become part of your family story the way they became part of mine.
Good food is a good mood!
- Golden Corral Carrot Cake Recipe
- Costco Carrot Cake Recipe
- Carrot Cake with Pecans
- Brenda Gantt Fruit Cake Recipe

My name is Lori Walker. I’m a registered dietitian, food blogger and food enthusiast. I share easy healthy, delicious recipes on my blog and review necessary kitchen items. The recipes I share take less… Read more