This post contains affiliate links. As an Amazon Associate I earn from qualifying purchases.
Olga’s Snackers is a delicious and easy to make snack that combines the goodness of bread, honey and herbs.This dish is crunchy golden-brown bites that are perfect for snacking.
Olga’s snackers are a great accompaniment to any meal and can also be served as an appetizer or snack. The best part is, you can easily make it at home with simple ingredients that are probably already in your pantry.
Read on to learn how to make this delicious treat!

What are Olga’s snackers?
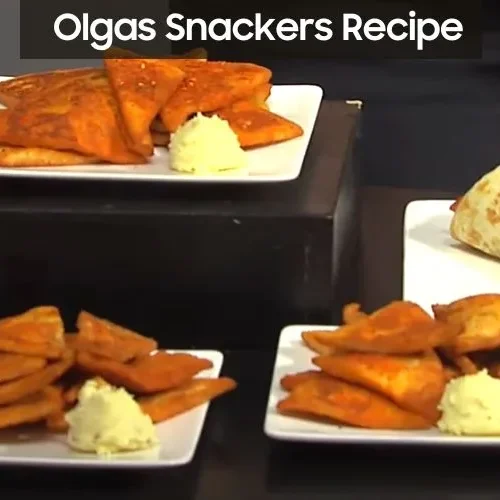
Olga’s Snackers are a popular snack made with bread, a secret recipe created by Olga Loizon. The snackers are bite-sized wedges of the bread that are seasoned with garlic and herbs, and often served with cheese dip.
The copycat recipe we’ve shared here will give you a delicious version of Olga’s snackers that tastes just like the original. So, you can enjoy this delicious snack without sacrificing flavor.
What does it taste like?
Olga’s snackers have a sweet and savory flavour, thanks to the honey and herbs in the seasoning blend. The dough is light and fluffy, and the crunchy exterior creates an amazing texture combination that will have you reaching for more!
How did I first get introduced to the olga’s snackers?
I visited Olga’s Kitchen for the first time when I was visiting my friends in Michigan. It was love at first bite and I knew I had to try making my own Olga’s snackers. After many attempts, I finally found the perfect recipe that gave me the same delicious flavor as Olga’s.
How to make Olga’s snackers?
Making Olga’s Snackers is easier than you think! All you need are some basic ingredients, and have to follow our recipe.

Ingredients
For Bread
- 1 tablespoon Kosher salt
- 4 tablespoon Honey
- 1 cup vitamin D milk
- 4 tablespoon Margarine
- 1 large-sized egg
- 1/4 cup warm water
- 1 tablespoon Olive Oil
- 1 tablespoon granulated sugar
- 4 cups all-purpose flour
- 1 tablespoon rising yeast
For Olga’s Snackers Seasoning
- 3 pinches cayenne pepper
- 2 tablespoon salt
- 6 tablespoons grated Milano’s Romano Cheese
- 3/4 tablespoon celery seeds
- 4 1/2 tablespoons sesame seeds
- 3/4 tablespoon garlic powder
- 3 tablespoon paprika
- 3/4 tablespoon grounded black pepper
- 1 1/2 tablespoons poppy seeds
Instructions
For making Olga’s bread
Step 1:
In 1 cup of milk, add the yeast and stir well. Set it aside.
Step 2:
In a large bowl, add 4 cups of flour and mix in the honey, sugar, salt and olive oil.
Step 3:
Add the yeast mixture and 1/4 cup warm water to the bowl and mix everything together. Knead well until it forms a soft dough.
Step 4:
Cover with a cloth or plastic wrap and let it rise in a warm place for 45 minutes.
Step 5:
After 45 minutes, knead the dough again before cutting into small pieces – enough to make 16 snackers. Arrange them on a lightly greased baking sheet or pan lined with parchment paper. Let them rest in a warm place for 15 minutes.
Step 6:
Preheat your oven to 350°F (175°C). Bake your snackers for about 15 minutes or until golden brown.
For Olga’s Snackers Seasoning
Step 1:
Mix all the seasoning ingredients in a bowl and coat each snacker with the mixture.
Step 2:
Serve Olga’s snackers on a plate with your favorite cheese dip.
Tips
• Make sure that all of the ingredients used are fresh for the best tasting results.
• Let the dough rise in a warm place for optimal rising.
• If you want an extra crunchy snacker, brush each piece with some melted butter before baking.
• Add some dried herbs to the Olga’s Snacker seasoning mix for more flavour variation.
Olgas Snackers Recipe
Equipment
- bowl
- plate
- knife
- cloth, baking sheet
Ingredients
- 2 tablespoons of honey providing a natural sweetness that complements other ingredients.
- 3/4 tablespoon of poppy seeds offering a slight nuttiness and delightful visual contrast in the dish.
- 3/8 tablespoon of ground black pepper approximately 1 1/8 teaspoons, adding a bold and peppery kick.
- 1/2 large-sized egg you can beat the egg and use half of it, lending a moist and tender consistency.
- 1/8 tablespoon of warm water helping to activate the yeast and promote proper dough rising.
- 1/2 tablespoon of olive oil infusing a subtle fruity flavor and contributing to a soft texture.
- 1/2 tablespoon of granulated sugar providing a touch of sweetness and aiding in yeast activation.
- 2 cups of all-purpose flour giving structure and volume to the final product.
- 1/2 tablespoon of rising yeast essential for leavening the dough and creating a light and fluffy result.
- 1 1/2 pinches of cayenne pepper adding a hint of spiciness and a pleasant kick to the dish.
- 1 tablespoon of salt enhancing the overall flavor profile and seasoning the dough.
- 1/2 tablespoon of Kosher salt adding a savory and well-balanced flavor to the dish.
- 3 tablespoons of grated Milano’s Romano Cheese imparting a rich and savory taste to the recipe.
- 3/8 tablespoon of celery seeds approximately 1 1/8 teaspoons, providing a subtle herbal and aromatic note.
- 2 1/4 tablespoons of sesame seeds offering a nutty and crunchy texture to the finished dish.
- 1 1/2 tablespoons of paprika lending a vibrant color and a mild smoky taste.
- 2 tablespoons of margarine adding richness and a smooth mouthfeel to the recipe.
- 1/2 cup of vitamin D milk creating a creamy and indulgent texture.
- 3/8 tablespoon of garlic powder approximately 1 1/8 teaspoons, infusing a delicious garlicky flavor.
Instructions
- In 1 cup of milk, add the yeast and stir well. Set it aside.
- In a large bowl, add 4 cups of flour and mix in the honey, sugar, salt and olive oil.
- Add the yeast mixture and 1/4 cup warm water to the bowl and mix everything together. Knead well until it forms a soft dough.
- Cover with a cloth or plastic wrap and let it rise in a warm place for 45 minutes.
- After 45 minutes, knead the dough again before cutting into small pieces – enough to make 16 snackers. Arrange them on a lightly greased baking sheet or pan lined with parchment paper. Let them rest in a warm place for 15 minutes.
- Step 6:
- Preheat your oven to 350°F (175°C). Bake your snackers for about 15 minutes or until golden brown.
- Mix all the seasoning ingredients in a bowl and coat each snacker with the mixture.
- Serve Olga’s snackers on a plate with your favorite cheese dip.
Notes
Nutrition Information
One serving of Olga’s Snackers contains approximately 200 calories, 8g fat, 24g carbohydrates and 6g protein.
What to serve with olga’s snacks?
Olga’s Snackers can be served as a delicious appetizers or side dish. Serve them with a variety of dips such as hummus, tzatziki or guacamole. They are also great served with a fresh salad or soup.
How to store leftover olga’s snackers?
You can store leftover Olga’s snackers in an airtight container for up to 3 days. Reheat them in the oven before serving.
Can pregnant women eat this?
Yes, Olga’s Snackers are safe to eat during pregnancy. However, pregnant women should consult with their healthcare provider before consuming any new food.
FAQS
Write faqs that have not been discussed above
Is this recipe gluten free?
Unfortunately no, as the all-purpose flour contains gluten. To make Olga’s snackers gluten free you would need to substitute the all-purpose flour for gluten free flour.
Can I make Olga’s Snackers without yeast?
Yes, you can prepare the snackers without yeast by using baking powder instead. However, the texture of your snackers will not be as light and fluffy as when using yeast.
Can I freeze Olga’s Snackers?
Yes, you can freeze Olga’s Snackers for up to 3 months. Thaw them overnight in the refrigerator before reheating in the oven or microwave.
What is the best way to reheat Olga’s Snackers?
The best way to reheat Olga’s Snackers is in the oven. Preheat your oven to 350°F (175°C) and bake them for 5-7 minutes until heated through. Alternatively, you can also reheat them in the microwave on medium power.
Wrapping Up
Olga’s snacks are a delicious and easy to make savory snack that is sure to be a hit with everyone in the family. The seasoning mix used to flavor the dough adds an extra layer of flavor and makes these snackers truly unique.
Serve them as appetizers or side dishes, or simply enjoy them as a quick snack on their own! With just a few simple ingredients, you can make delicious Olga’s snacks that are sure to be a hit!
Please share this guide with your friends and family, so they too can learn how to make Olga’s Snackers!
Sharing is Caring!
You Might Also Like These Recipes!
- EASY OVEN-READY LASAGNA
- Copycat Cava Falafel Recipe
- Authentic Santiago’s Green Chili Recipe With Pork

My name is Lori Walker. I’m a registered dietitian, food blogger and food enthusiast. I share easy healthy, delicious recipes on my blog and review necessary kitchen items. The recipes I share take less… Read more