This post contains affiliate links. As an Amazon Associate I earn from qualifying purchases.
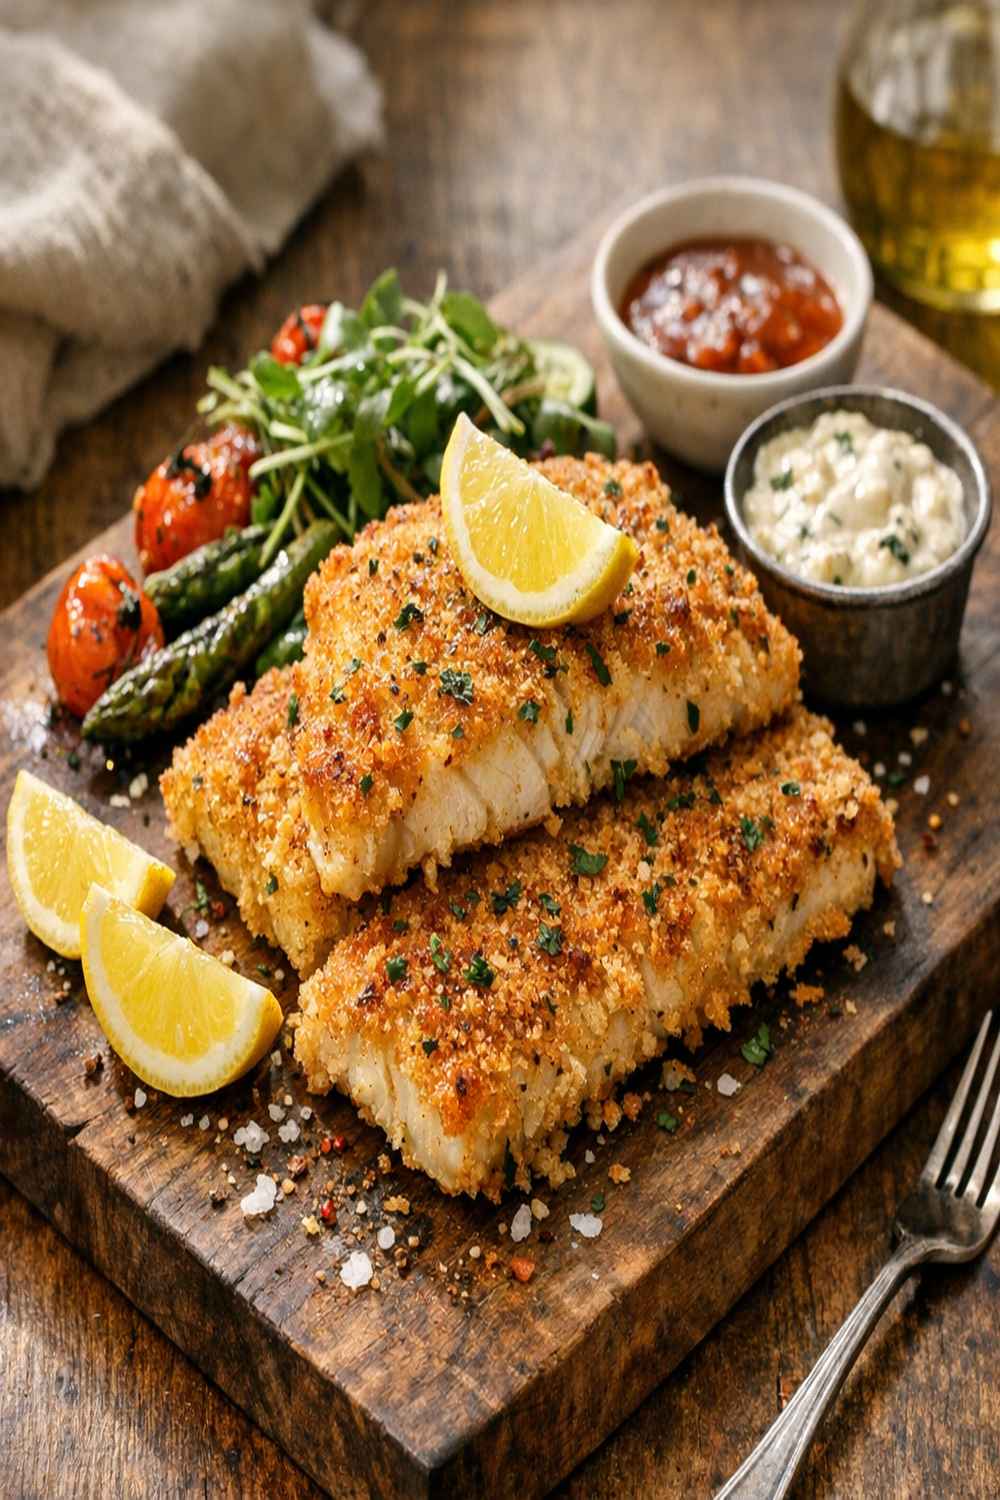
There’s something magical about serving a dish that looks and tastes like you’ve been cooking all day when you’ve really only spent minutes in the kitchen. Crispy breaded mahi mahi is exactly that kind of recipe—elegant enough for company, simple enough for a weeknight win. I love pairing this with fresh sides like roasted vegetables or a bright salad, and if you’re in the mood for something indulgent, even a homemade honey butter biscuit on the side makes this meal feel extra special.
The Day My Mom Taught Me the Three-Bowl Method
I still remember standing on a step stool in my mom’s kitchen, watching her breaded fish for Friday night dinner. She lined up three shallow bowls like a little assembly line and explained that the flour-egg-crumb coating was the secret to restaurant-quality texture at home. I was maybe seven years old, but I understood something important that day: good cooking isn’t about fancy equipment or complicated techniques. It’s about understanding why each step matters.
Fast forward to 2019 when I started recording family recipes, and this breaded mahi mahi was one of the first dishes I documented. My kids now ask for it weekly, and I’ve tweaked it just enough to share my favorite version with you. The beauty of this recipe is how accessible it is—you probably have everything in your pantry right now.
What is Breaded Mahi Mahi?
Mahi mahi is a mild white fish native to warm ocean waters, and it’s prized by home cooks because it holds up beautifully to breading. Unlike delicate white fish that can fall apart, mahi mahi has enough structure to handle the coating process without becoming mushy.
Breading is a three-layer coating system: a flour base that helps everything stick, an egg wash that acts as the glue, and a crumb topping that creates that signature golden crunch. When you bake it instead of fry it, you get all the crispy texture with less oil and a lighter feeling meal.
This cooking method originated in Italian cuisine as “al forno” (oven-baked), but the three-bowl breading technique became popular in American home kitchens because it’s so foolproof. The fish cooks in about 20 minutes and emerges with a beautiful golden exterior and moist, tender flesh inside.
Why You’ll Love This Breaded Mahi Mahi Recipe
- Ready in under 30 minutes – Preheat the oven while you prep, and dinner is on the table before you know it. No waiting, no stress.
- Works on standard kitchen equipment – I tested this on a regular home oven with a basic rimmed baking sheet. No special pans or gadgets required.
- Protein-packed and nutritionally balanced – As a registered dietitian, I love that mahi mahi provides lean protein and omega-3 fatty acids without excess calories.
- Kid-friendly and crowd-pleasing – The mild flavor appeals to picky eaters, while the crispy coating satisfies everyone who loves texture.
- Budget-friendly compared to dining out – Four fillets cost less than one restaurant entree, and you control the ingredients.
- Versatile for different occasions – Serve it for casual family dinners or elegant entertaining. The presentation always looks polished.
The Ingredients
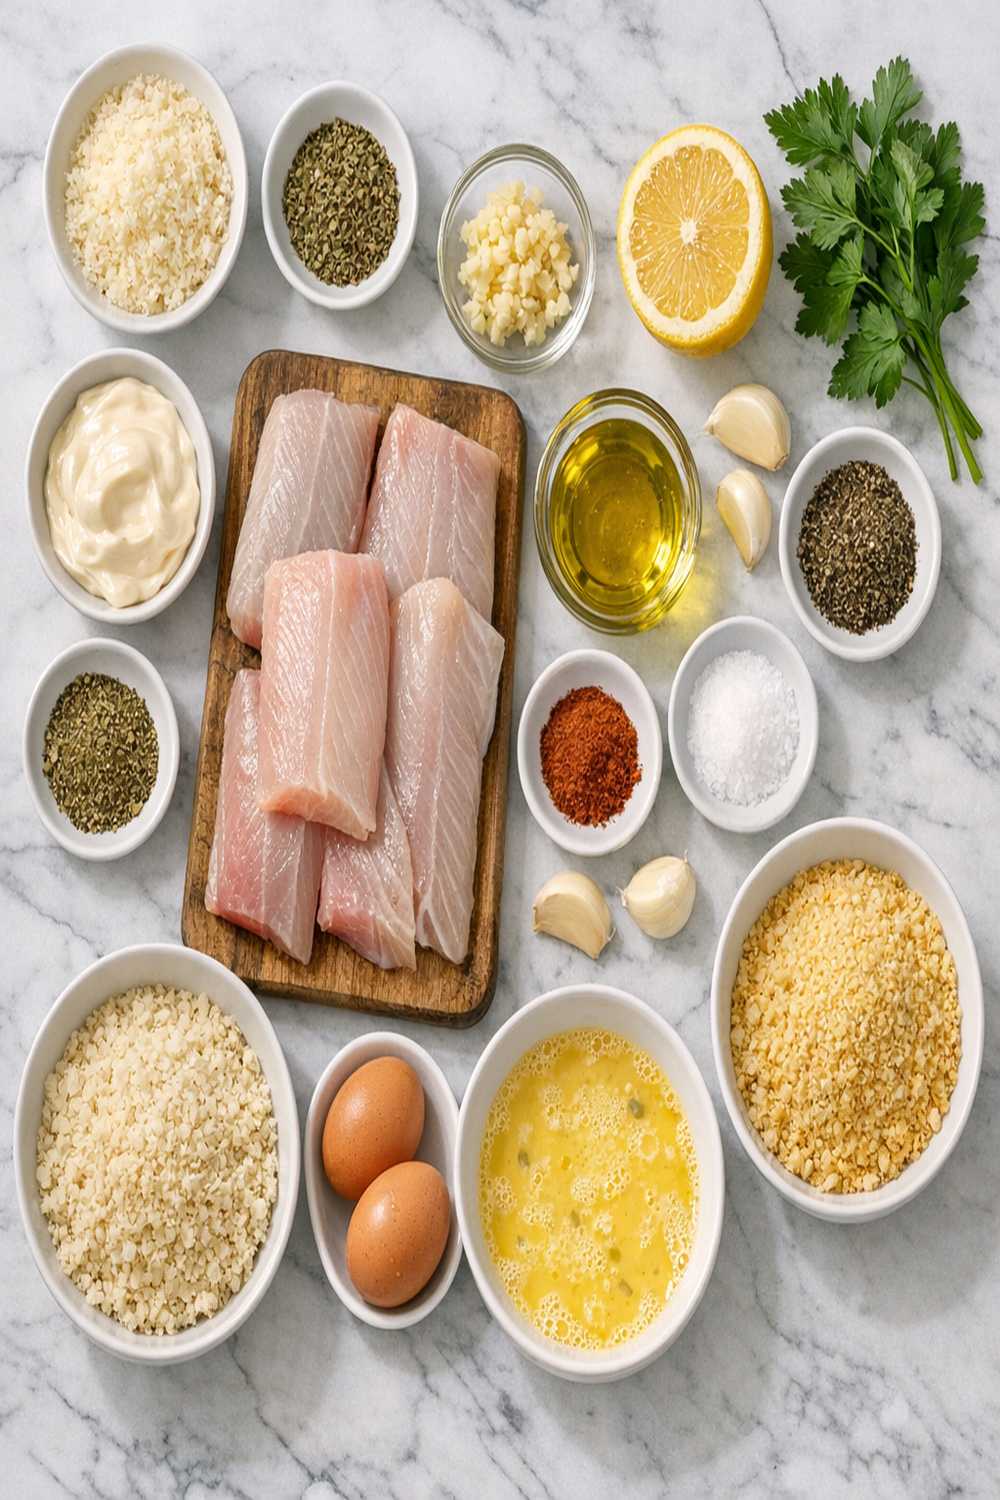
I’ve organized these ingredients by category to make shopping and prepping easier. Everything you need is pantry-friendly or available at any grocery store. This recipe makes 4 servings—perfect for a family dinner or two people with excellent leftovers.
For the Fish and Base Coating
- ½ teaspoon salt (divided between components)
- ⅓ cup all-purpose flour (spooned and leveled, not packed)
- 20-24 ounces mahi mahi fillets (4 pieces, approximately 5-6 ounces each)
- 2 tablespoons grated Parmesan cheese (the sharper the better)
- ½ teaspoon garlic powder (freshly ground if possible)
For the Egg Wash and Crispy Coating
- ½ cup grated Parmesan cheese (freshly grated is worth the extra minute)
- Freshly cracked black pepper (to taste, about ¼ teaspoon)
- ½ cup panko bread crumbs (coarser crumbs create maximum crunch)
- 2 large eggs (room temperature works best)
- ½ teaspoon garlic powder (same as above)
- 1 tablespoon fresh flat-leaf parsley (finely minced, or 1 teaspoon dried)
For Baking
- 1 tablespoon olive oil (for light misting, optional but improves crispiness)
- Parchment paper or aluminum foil (for the baking sheet)
How to Make Breaded Mahi Mahi?
I’m going to walk you through this step-by-step. The key is setting up your workspace first—something I call the “mise en place moment”—so you’re not scrambling once you start breading. Think of it like a little assembly line where everything flows smoothly.
Step 1: Prepare Your Oven and Workspace
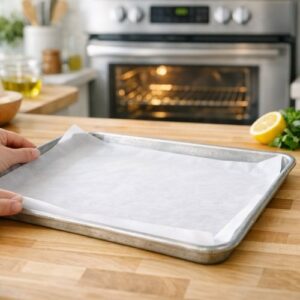
Heat your oven to 425°F and position the rack to the center. While it preheats, line a rimmed baking sheet with parchment paper or aluminum foil—this prevents sticking and makes cleanup effortless. Pat your mahi mahi fillets completely dry with paper towels. This is critical: any excess moisture prevents proper coating adhesion.

Step 2: Create Your Three-Bowl Breading Station
Arrange three wide, shallow bowls in front of you from left to right. In the first bowl, combine the all-purpose flour, salt, and garlic powder. Mix gently with a fork to combine and break up any clumps. In the second bowl, crack the eggs and whisk with a pinch of salt and freshly cracked pepper until completely combined and slightly frothy. In the third bowl, mix the panko bread crumbs, Parmesan cheese, minced parsley, garlic powder, salt, and pepper. Stir thoroughly so the seasonings distribute evenly throughout the crumbs.

Pro tip: Use a fork for the egg wash so you don’t splash yourself, and use your non-dominant hand to stay relatively clean while coating multiple fillets.
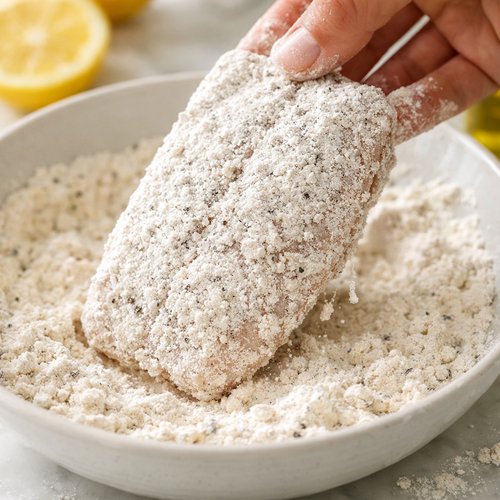
Step 3: Coat Each Fillet Completely
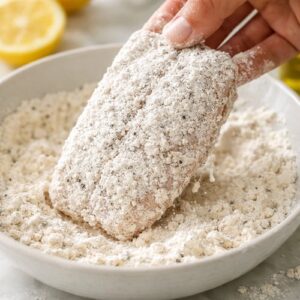
Working with one fillet at a time, dredge it in the flour mixture, coating both sides and edges. Shake off any excess flour back into the bowl. Next, place the floury fillet into the egg wash and turn it to coat completely. Finally, transfer it to the panko mixture and gently but firmly press the crumbs onto both surfaces. Make sure you’re covering every inch—gaps will cook unevenly and won’t be as crispy.
Place each breaded fillet on your prepared baking sheet, skin-side down if the fillets still have skin. Arrange them so they don’t touch each other. If you want extra-crispy coating (and honestly, who doesn’t?), lightly mist the top of each fillet with a tiny bit of olive oil from a spray bottle.
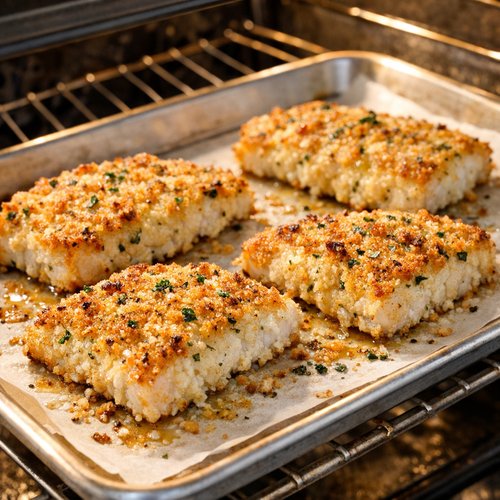
Step 4: Bake Until Golden and Cooked Through
Slide the baking sheet into your preheated oven and set a timer for 18-22 minutes. Baking time depends on the thickness of your fillets—thinner ones closer to 18 minutes, thicker ones closer to 22. You’ll know it’s done when the coating is golden-brown and crispy and the fish flakes easily with a fork.
Don’t open the oven door before 18 minutes, as this releases heat and can extend cooking time. When you do check, look for the fish to turn opaque white and the coating to have that beautiful golden color. The internal temperature should reach 145°F according to USDA guidelines for seafood.
Step 5: Rest and Serve Immediately
Remove the baking sheet from the oven and let the fillets rest for 2-3 minutes. This allows the coating to set completely so it stays crispy when you plate it. Serve immediately while the crispiness is at its peak. The contrast between the crunchy coating and the tender, flaky fish inside is what makes this dish special.

Tips and Tricks
- Pat your fish completely dry – Moisture is the enemy of crispy coatings. I use paper towels and really press the fillets to remove every bit of water.
- Don’t skip the Parmesan in both coatings – The cheese adds flavor and helps the coating brown beautifully. It’s what makes this restaurant-quality.
- Use panko, not regular bread crumbs – Panko crumbs are larger and coarser, which creates a crunchier texture. Regular bread crumbs get dense and soggy by comparison.
- Keep one hand wet and one hand dry – Use your dominant hand for the dry ingredients and your non-dominant hand for the egg wash. This prevents a bread-crumb-covered, sticky mess.
- Don’t overcrowd the baking sheet – Space the fillets at least one inch apart so hot air circulates evenly. If they touch, they’ll steam instead of bake.
- Invest in an instant-read thermometer – Takes the guesswork out of doneness. Fish is perfectly cooked at 145°F, no more, no less.
- Fresh garlic powder matters – Old spices lose potency. If your garlic powder has been in the cabinet for a year, it’s time for a refresh. The flavor difference is noticeable.
Expert’s Nutritional Insight
As a registered dietitian, I get excited about mahi mahi because it’s one of the most nutrient-dense fish available. One 6-ounce serving provides approximately 35 grams of complete protein with only about 150 calories. The fish is also rich in selenium, a mineral most people don’t get enough of, and contains anti-inflammatory omega-3 fatty acids.
What makes this baked preparation so much better than fried versions? You’re using minimal oil—just a light mist—instead of deep-frying, which saves about 200 calories and 15 grams of fat per serving. The panko coating still delivers that satisfying crunch your brain craves, but you’re actually supporting your health goals. That’s what I call a win-win.
Can I Store Breaded Mahi Mahi?
Refrigerator storage: Store leftover breaded mahi mahi in an airtight container for up to 3 days. The coating will soften slightly, but it’s still delicious cold or reheated. To restore crispiness, reheat in a 375°F oven for 8-10 minutes instead of the microwave.
Freezer storage: You can freeze breaded mahi mahi before baking for up to 3 months. Place the breaded fillets on a parchment-lined baking sheet, freeze until solid (about 2 hours), then transfer to a freezer bag. When ready to cook, add 5-7 extra minutes to the baking time—no need to thaw.
Do not freeze after baking, as the texture becomes grainy when thawed. The coating also loses its crispiness.
Make-Ahead Guide
I love recipes that work with real life, and this one does. Here’s how to prep ahead:
Up to 24 hours before: Prep your three bowls with the flour mixture, egg wash, and panko mixture. Cover them with plastic wrap and refrigerate. This saves 10 minutes on cooking day.
Up to 4 hours before: Bread your fillets and arrange them on the prepared baking sheet, covering with plastic wrap. Refrigerate until baking time. The cold fish actually benefits from the wait—it helps the coating stick better.
Just before serving: Bake directly from the refrigerator, adding just 2-3 extra minutes to the baking time. Everything else stays the same.
Nutrition Information
Per serving (one 6-ounce fillet): 280 calories, 35 grams protein, 8 grams fat, 12 grams carbohydrates, 2 grams fiber, 0 grams added sugar. Based on USDA food composition data for cooked mahi mahi and standard bread crumb nutrition.
The fiber comes from the whole grain panko option if you use it, and the carbohydrates are primarily from the coating. This is a lean, protein-forward meal that fits beautifully into various eating styles—whether you’re following a Mediterranean diet, watching your weight, or simply seeking nutrient-dense meals. Pair it with vegetables and whole grains to round out the nutrition profile.
What Can I Serve With Breaded Mahi Mahi?
The beauty of this dish is its versatility. The mild, delicate fish works with so many flavor profiles. Here are my go-to pairings that I’ve tested extensively with my family:
- Roasted asparagus with lemon – Trim fresh asparagus, toss with olive oil and minced garlic, roast at 400°F for 12 minutes. A squeeze of fresh lemon at the end brightens everything.
- Creamy coleslaw – A crispy fish pairs beautifully with cool, creamy coleslaw. The contrast is texture gold.
- Cilantro lime rice – Cook white rice, then stir in fresh cilantro, lime juice, and a pinch of salt. It’s fresh and complements the breading perfectly.
- Roasted baby potatoes – Toss with olive oil, rosemary, and sea salt. Roast until golden while the fish is baking.
- Simple green salad with vinaigrette – A light salad with mixed greens, cucumber, and a basic vinaigrette keeps the meal feeling balanced and fresh.
- Steamed broccoli with garlic – Cut broccoli into florets, steam for 4-5 minutes, then toss with minced garlic and a touch of olive oil.
If you want something fun that your kids will actually eat, consider serving this as a fish sandwich with all the toppings, or alongside some simple chicken bites for variety.
Substitutes
- Cod or halibut – These white fish have similar mild flavors and firm texture. They’ll cook in about the same time, though you might need to adjust by 2-3 minutes depending on thickness.
- Tilapia – A budget-friendly alternative with a milder flavor. It’s thinner than mahi mahi, so reduce baking time to 14-16 minutes.
- Panko bread crumbs replacement – If you don’t have panko, you can use regular bread crumbs, though the texture won’t be quite as crispy. Crush them slightly to increase their size.
- Parmesan cheese alternative – Use pecorino Romano for a sharper flavor, or try grated cheddar for a different taste profile.
- Fresh parsley alternative – Dried herbs work fine (reduce to 1 teaspoon). You can also try fresh dill, chives, or Italian seasoning.
- Egg wash alternative – If you’re avoiding eggs, use 2 tablespoons of milk mixed with 1 tablespoon of cornstarch. It’s not quite the same adhesive power, but it works.
Common Mistakes to Avoid
Mistake #1: Skipping the drying step. I see this all the time with home cooks. Wet fish means the coating won’t adhere properly and you’ll end up with bald spots or coating that falls off. Always pat your fillets completely dry before breading. This is non-negotiable.
Mistake #2: Using old spices. Garlic powder that’s been sitting in your cabinet for two years has lost its punch. The fish will taste bland even though the rest is cooked perfectly. Go ahead and replace your spices annually. Your food will taste noticeably better.
Mistake #3: Overcrowding the baking sheet. I understand the temptation to fit everything in one batch, but when fillets touch, they steam instead of bake. You lose that crispy exterior. Use two baking sheets if needed—your results will be infinitely better.
Mistake #4: Opening the oven door repeatedly. Every time you open it, you release heat and extend cooking time. Check at 18 minutes, then close the door immediately. Peeking is understandable, but minimize it.
Seasonal Variations
Spring variation: Add fresh dill to the panko mixture and serve with steamed asparagus and fresh lemon sauce. Fresh spring herbs brighten everything.
Summer variation: Increase the parsley and add fresh basil to the coating. Serve with a bright tomato salad and cilantro lime rice. Pair with a crisp white wine for elegant entertaining.
Fall variation: Add smoked paprika to the panko coating for depth. Serve with roasted root vegetables and brown rice. The warmth of the spice works beautifully as temperatures cool.
Winter variation: Use Italian seasoning blend and serve with creamy coleslaw and roasted potatoes. The hearty sides help you feel more satisfied as days get shorter.

Mahi Mahi Breaded Recipe
Ingredients
For the Fish and Base Coating
- ½ teaspoon salt divided between components
- ⅓ cup all-purpose flour spooned and leveled, not packed
- 20-24 ounce mahi mahi fillets 4 pieces, approximately 5-6 ounces each
- 2 tablespoon grated Parmesan cheese the sharper the better
- ½ teaspoon garlic powder freshly ground if possible
For the Egg Wash and Crispy Coating
- ½ cup grated Parmesan cheese freshly grated is worth the extra minute
- Freshly cracked black pepper to taste, about ¼ teaspoon
- ½ cup panko bread crumbs coarser crumbs create maximum crunch
- 2 large eggs room temperature works best
- ½ teaspoon garlic powder same as above
- 1 tablespoon fresh flat-leaf parsley finely minced, or 1 teaspoon dried
For Baking
- 1 tablespoon olive oil for light misting, optional but improves crispiness
- Parchment paper or aluminum foil for the baking sheet
Instructions
Step 1: Prepare Your Oven and Workspace
- Heat your oven to 425°F and position the rack to the center. While it preheats, line a rimmed baking sheet with parchment paper or aluminum foil—this prevents sticking and makes cleanup effortless. Pat your mahi mahi fillets completely dry with paper towels. This is critical: any excess moisture prevents proper coating adhesion.
Step 2: Create Your Three-Bowl Breading Station
- Arrange three wide, shallow bowls in front of you from left to right. In the first bowl, combine the all-purpose flour, salt, and garlic powder. Mix gently with a fork to combine and break up any clumps. In the second bowl, crack the eggs and whisk with a pinch of salt and freshly cracked pepper until completely combined and slightly frothy. In the third bowl, mix the panko bread crumbs, Parmesan cheese, minced parsley, garlic powder, salt, and pepper. Stir thoroughly so the seasonings distribute evenly throughout the crumbs. Pro tip: Use a fork for the egg wash so you don't splash yourself, and use your non-dominant hand to stay relatively clean while coating multiple fillets.

Step 3: Coat Each Fillet Completely
- Working with one fillet at a time, dredge it in the flour mixture, coating both sides and edges. Shake off any excess flour back into the bowl. Next, place the floury fillet into the egg wash and turn it to coat completely. Finally, transfer it to the panko mixture and gently but firmly press the crumbs onto both surfaces. Make sure you're covering every inch—gaps will cook unevenly and won't be as crispy. Place each breaded fillet on your prepared baking sheet, skin-side down if the fillets still have skin. Arrange them so they don't touch each other. If you want extra-crispy coating (and honestly, who doesn't?), lightly mist the top of each fillet with a tiny bit of olive oil from a spray bottle.
Step 4: Bake Until Golden and Cooked Through
- Slide the baking sheet into your preheated oven and set a timer for 18-22 minutes. Baking time depends on the thickness of your fillets—thinner ones closer to 18 minutes, thicker ones closer to 22. You'll know it's done when the coating is golden-brown and crispy and the fish flakes easily with a fork. Don't open the oven door before 18 minutes, as this releases heat and can extend cooking time. When you do check, look for the fish to turn opaque white and the coating to have that beautiful golden color. The internal temperature should reach 145°F according to USDA guidelines for seafood.

Step 5: Rest and Serve Immediately
- Remove the baking sheet from the oven and let the fillets rest for 2-3 minutes. This allows the coating to set completely so it stays crispy when you plate it. Serve immediately while the crispiness is at its peak. The contrast between the crunchy coating and the tender, flaky fish inside is what makes this dish special.

Notes
FAQs
Can I fry this recipe instead of baking it?
You absolutely can. Heat ½ inch of neutral oil (vegetable or canola) to 350°F in a shallow skillet. Carefully place each breaded fillet into the hot oil and cook for 3-4 minutes per side until golden brown. Drain on paper towels. It’ll be crispier than baking, but you’re adding significantly more fat and calories. I prefer the baked version because it’s lighter and still delivers the crunch your brain wants.
How do I know when the fish is cooked through?
The most reliable method is an instant-read thermometer inserted into the thickest part of the fillet. Fish is safely cooked at 145°F according to USDA guidelines. Without a thermometer, look for the flesh to turn from translucent to opaque white. Pierce the thickest part with a fork—it should flake easily. The fish should never look wet or glassy.
Can I prepare the breaded fillets ahead and bake them later?
Yes, up to 24 hours ahead! Bread your fillets, arrange them on the baking sheet, cover with plastic wrap, and refrigerate. When ready to bake, add just 2-3 minutes to the baking time. This is one of my favorite make-ahead tricks for busy weeknights.
What’s the best way to reheat leftovers?
Reheat in a 375°F oven for 8-10 minutes to restore crispiness. The microwave will make the coating soggy, and we’re not doing that to our beautiful fish. If you’re in a time crunch, the microwave still works, but you’ll notice a textural difference.
Why is my coating falling off the fish?
This usually happens for three reasons: the fish wasn’t dry enough before breading, you didn’t press the coating firmly enough, or the fillets are too thin. Make sure your mahi mahi pieces are at least ¾ inch thick, pat them completely dry, and really press that panko mixture on firmly.
More Recipes You’ll Love
- Whataburger Fish Sandwich Recipe – Use your leftover breaded fish to create a fun sandwich night with crispy fillets and all your favorite toppings.
- Whataburger Spicy Chicken Sandwich Recipe – Love the breading technique? Try this spicy version with chicken breasts for variety.
- Whataburger Honey Butter Biscuit Recipe – A perfect side to serve alongside your mahi mahi for a complete meal.
- Botw Salmon Manure Recipe – Another delicious seafood option if you’re looking to switch things up from mahi mahi.
I genuinely hope you love this breaded mahi mahi as much as my family does. The first time you pull it out of the oven golden, crispy, and perfectly cooked, you’re going to feel like a real cook. Because here’s the truth: you are. Good food really is a good mood. Happy cooking!
—Lori

My name is Lori Walker. I’m a registered dietitian, food blogger and food enthusiast. I share easy healthy, delicious recipes on my blog and review necessary kitchen items. The recipes I share take less… Read more