This post contains affiliate links. As an Amazon Associate I earn from qualifying purchases.
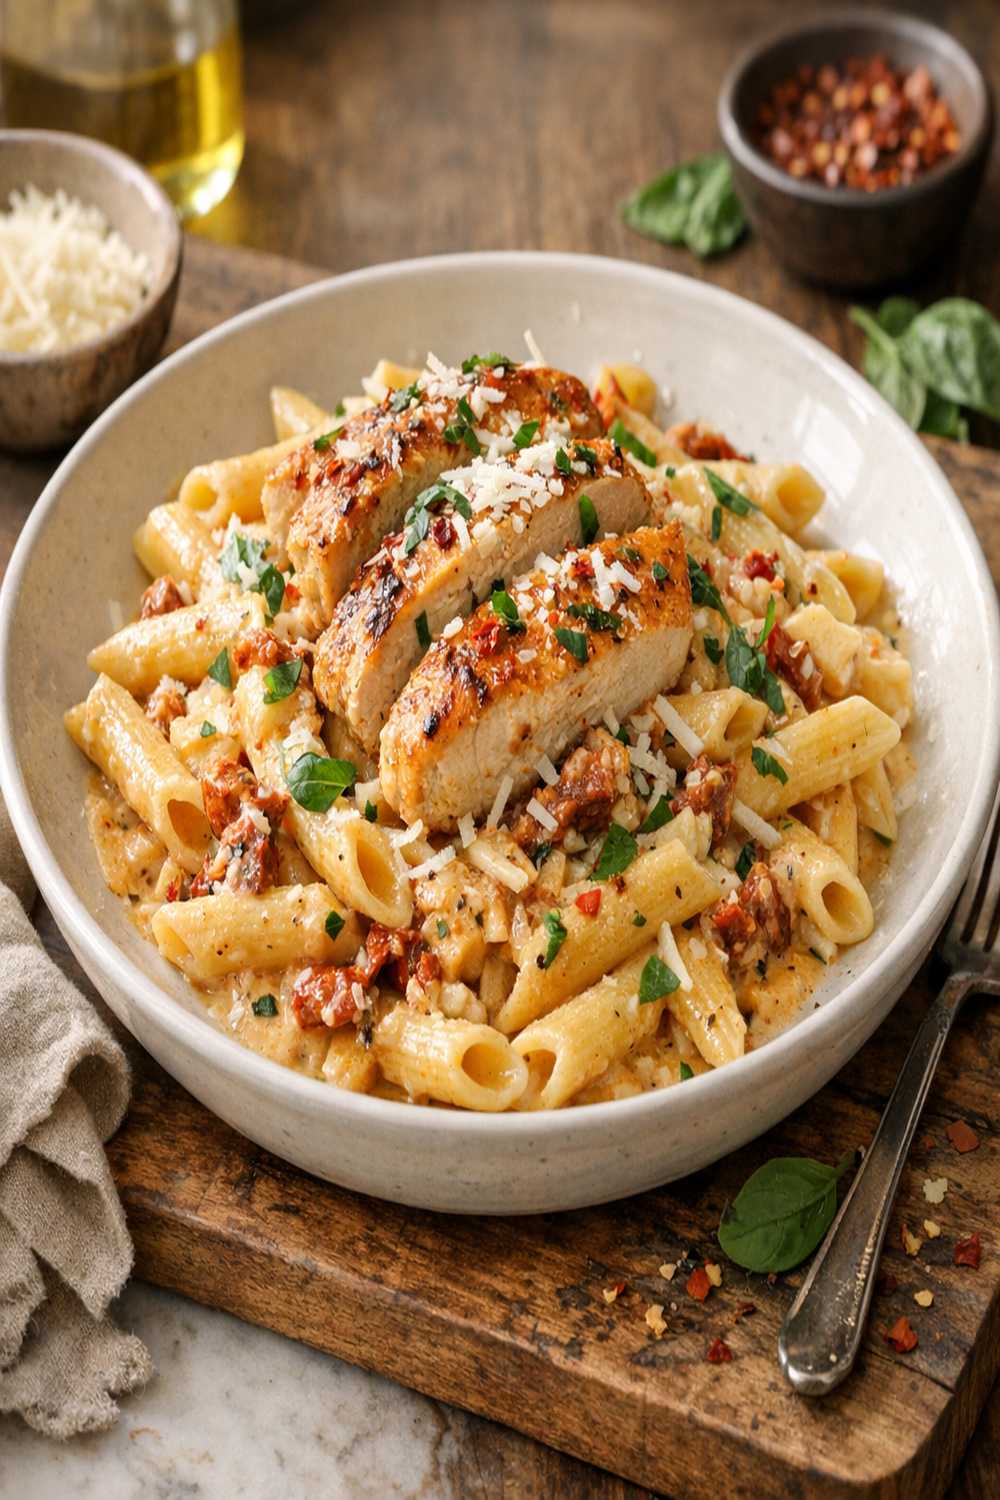
Learning to make Marry Me Chicken Pasta Instant Pot Recipe isn’t just about this dish—it’s about mastering a technique that unlocks dozens of other recipes. I discovered this truth in 2019 when I was recording my grandmother’s stories in the kitchen. She showed me how building flavor in stages, rather than all at once, transforms ordinary ingredients into something memorable. That’s the real magic here. This one-pot wonder teaches you how to layer flavors and create silky sauces that feel restaurant-quality but come together on your weeknight schedule.
Master the Technique Behind Marry Me Chicken Pasta Instant Pot Recipe (And Never Struggle in the Kitchen Again)
I’ll never forget the afternoon my aunt made this dish at a family gathering in 2020. The kitchen smelled incredible—garlicky, tomatoey, absolutely irresistible. But what stuck with me wasn’t just the aroma. It was watching her work: the way she browned the chicken first, built a golden base with shallots and garlic, then let the pressure cooker do the heavy lifting. She explained that every step served a purpose. The browning created depth. The aromatic vegetables added complexity. The pressure cooking melded everything together while keeping the chicken tender. That moment, I realized I’d been overthinking pasta dishes my entire career as a dietitian. This technique—building flavor layers before pressure cooking—changed how I approached one-pot meals forever.
The Core Technique Explained
The heart of this recipe is called flavor-building through multi-stage cooking. Here’s the science: when you sauté chicken, butter, shallots, and garlic in sequence, each component browns or releases aromatics at slightly different temperatures. This creates something called the Maillard reaction—a chemical transformation that produces hundreds of new flavor compounds. Your taste buds don’t just experience “chicken” or “garlic.” They experience rich, complex, deeply savory notes that single-step cooking never produces.
Then pressure cooking enters the picture. High heat and steam force flavors into the pasta, the liquid, and every ingredient present. The acidic sun-dried tomatoes brighten everything. The cream cheese at the end adds silk and balances the brightness. This isn’t random. This is intentional flavor architecture. Once you understand this layering principle, you can apply it to braised vegetables, risottos, stews, and so much more.
What This Technique Unlocks
Mastering this flavor-building, pressure-cooking approach opens doors to a whole world of one-pot dinners. Here are just some of the dishes you’ll tackle with confidence:
- Instant Pot Teriyaki Chicken and Rice – uses the same browning-first, pressure-cook-second method to develop deep savory flavors
- Italian Sausage, Peppers, and Pasta – applies the same aromatics-building technique with different proteins and vegetables
- Creamy mushroom pasta – layers flavors with sautéing, then finishes with dairy to create silky sauces
- Beef stroganoff – browns the protein first, builds aromatics, then uses pressure to tenderize tougher cuts
- Tomato-based risotto – uses the same multi-stage approach to coax creaminess from grain without constant stirring
The Ingredients—Chosen to Teach the Technique
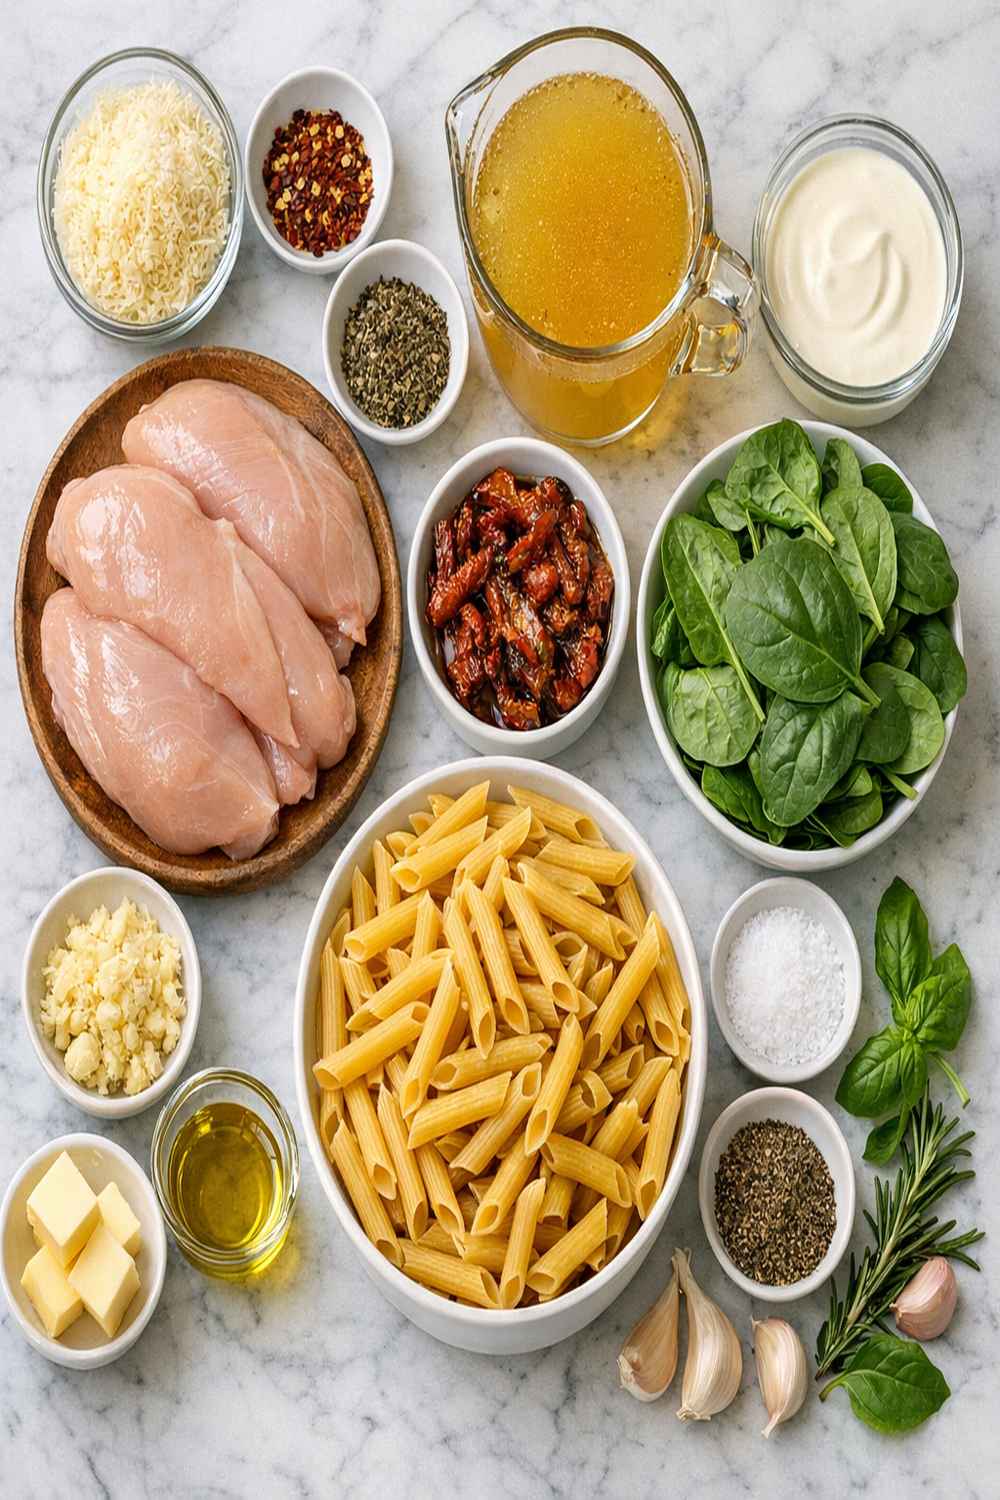
I selected each ingredient specifically because it teaches you something critical about flavor building and technique mastery. You’ll notice this recipe uses more ingredients than a typical weeknight pasta—that’s intentional. Every single one plays a role in demonstrating how to construct depth.
For the Protein and Base
- 1½ pounds boneless, skinless chicken breasts or thighs, cut into bite-size cubes (thighs stay more tender under pressure)
- 1 shallot, finely minced (sweeter and more delicate than onion, teaches you texture matters)
- 2 teaspoons reserved oil from the sun-dried tomato jar (teaches fat infusion with flavor)
- 2 tablespoons unsalted butter (the fat medium for your initial sauté, critical for browning)
- 4 cloves garlic, minced or pressed (demonstrates how garlic releases different compounds at different temperatures)
For the Seasoning Blend
- 2 teaspoons Italian seasoning (dried herbs that bloom when heated)
- freshly ground black pepper (freshly ground tastes sharper, more alive)
- pinch of red chili flakes (demonstrates how heat balances richness)
- 2 teaspoons kosher salt (precise seasoning is non-negotiable)
- ¼ teaspoon paprika (adds color and subtle depth)
For the Pressure Cooking
- 5 cups chicken broth plus 1 cup water (the liquid ratio teaches you pressure-cooking physics)
- 7 to 8 ounces sun-dried tomatoes, julienned (teaches how acidic ingredients brighten heavy dishes)
- 1 pound mezzi rigatoni pasta (the shape’s ridges teach you how pasta traps sauce)
For the Finish
- 5 ounces fresh baby spinach, roughly chopped (wilts into the sauce, demonstrates how greens add nutrition without effort)
- fresh basil, additional chili flakes, and more Parmesan for serving (garnishes teach presentation and flavor reinforcement)
- 2 tablespoons freshly squeezed lemon juice (teaches acid balance—the finishing touch that makes people say “what is that amazing flavor?”)
- 1 heaping cup finely shredded Parmesan cheese (teaches emulsification—how dairy coats pasta)
- 8 ounces full-fat cream cheese, softened to room temperature (the binding agent that creates creaminess without heavy cream)
The Masterclass: How to Make Marry Me Chicken Pasta Instant Pot Recipe
This is where the teaching happens. I’m not just giving you steps—I’m walking you through the reasoning behind each one so you understand why we do things in this specific order. Pay attention to the sensory details. Your senses tell you more than any timer ever could.
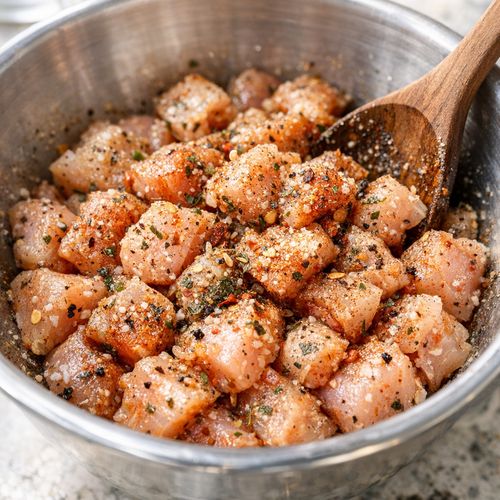
Step 1: Season Your Protein Strategically
In a medium mixing bowl, combine your cubed chicken with the Italian seasoning, kosher salt, paprika, chili flakes, and black pepper. Toss everything together until each piece is evenly coated. This step is crucial because seasoning the protein before cooking distributes flavor throughout, not just on the surface. Set the bowl aside. This isn’t laziness—this is giving the seasonings time to begin adhering to the chicken. You’re teaching the salt to start breaking down the muscle fibers, which helps lock in moisture.
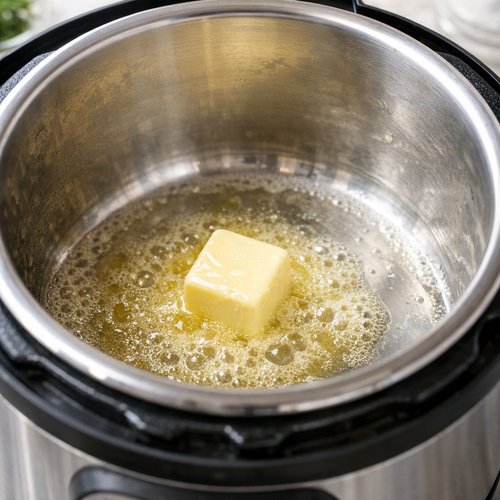
Step 2: Build Your Aromatic Base
Turn your Instant Pot to sauté mode on high heat. Once it displays “hot,” add the unsalted butter and let it melt completely—this takes about 30 seconds. You’re waiting for the butter to stop foaming, which signals the water has evaporated and the fat is now ready to brown things. Add your minced shallot and sauté for approximately 2 minutes, stirring occasionally. You want the shallot to soften and become fragrant, but not brown—this is about sweetness, not caramelization.
Next, add your pressed or minced garlic and stir constantly for 30 seconds to 1 minute. This brief window teaches you timing—garlic burns quickly, and burnt garlic tastes bitter and harsh. You’re looking for the moment when the garlic becomes fragrant but still pale. Trust your nose here. That aroma is your signal.
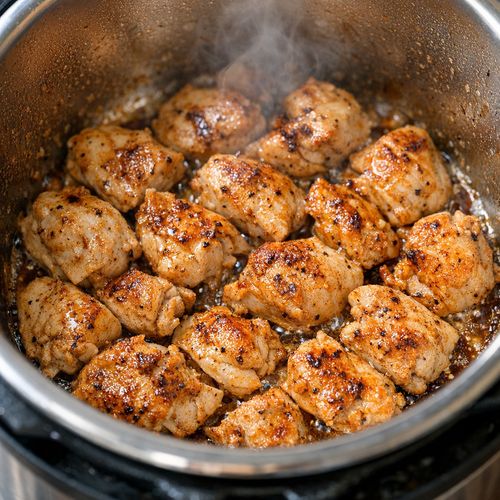
Step 3: Brown the Chicken—The Foundation of Everything
Add the reserved oil from your sun-dried tomato jar to the pot, then add all the seasoned chicken pieces. This is where the Maillard reaction begins—don’t stir constantly. Let the chicken sit undisturbed for about 2 minutes so the bottom surface can brown. Then stir and let it brown on another side for another 2 to 3 minutes. You’re aiming for light golden browning on multiple sides, not a full sear. The chicken won’t cook through—that happens under pressure—but those brown bits are pure flavor gold.
Total browning time is about 5 minutes. The brown bits stuck to the bottom of the pot aren’t burnt—they’re called fond, and they’re liquid gold in cooking. We’re going to dissolve them in the next step, which adds incredible depth to your sauce.
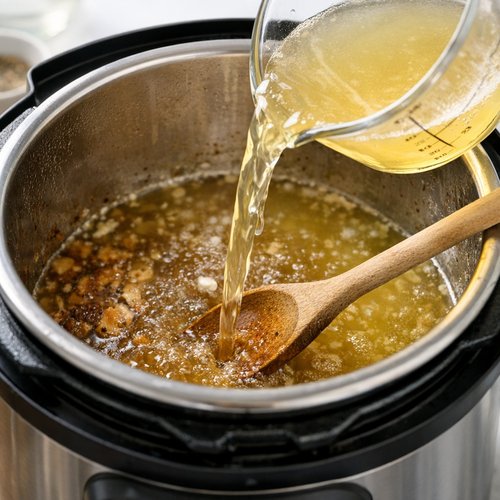
Step 4: Deglaze and Add Your Liquid
Press the cancel button to turn off the sauté function. Pour in your 5 cups of chicken broth and 1 cup of water. Use a wooden spoon to scrape the bottom of the pot, loosening all those caramelized bits. This is deglazing—you’re dissolving concentrated flavor into the liquid, which then becomes the base of your sauce. This is a technique used in restaurants everywhere, and now you’re using it at home.
Add the sun-dried tomatoes and stir gently. The tomatoes will hydrate during cooking and release their bright, tangy flavor into the broth.
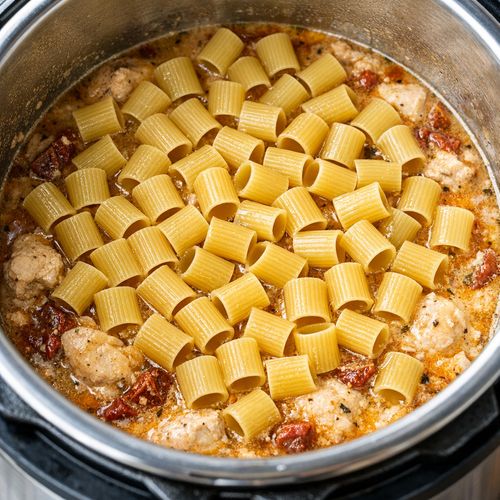
Step 5: Add Pasta Without Stirring—This Is Critical
Sprinkle the mezzi rigatoni over the top of the liquid, but do not stir. Press the pasta gently so most of it is submerged, but don’t combine it with the other ingredients. Stirring at this point can create a starchy paste instead of individual, separated pasta. The pasta will cook evenly under pressure without stirring, and you’ll understand why once you taste the perfect al dente texture.
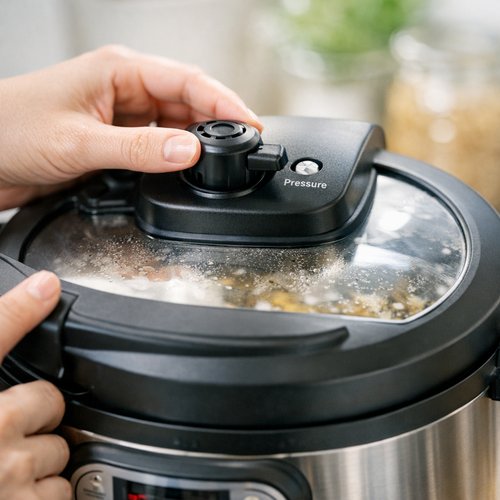
Step 6: Pressure Cook with Precision
Place the lid on your Instant Pot, making absolutely sure the pressure valve is set to sealing (not venting). Set the cooker to high pressure for 5 minutes—this is the magic timing. Not longer. At 5 minutes, the pasta will be tender but not mushy, and the chicken will be cooked through but still moist.
Once the Instant Pot beeps (usually after 10-15 minutes of preheating and cooking), perform the quick release function. This means carefully moving the pressure release valve to venting. Steam will rush out—stand back and let it escape. Once you see the pin drop and stay down, it’s safe to open the lid.
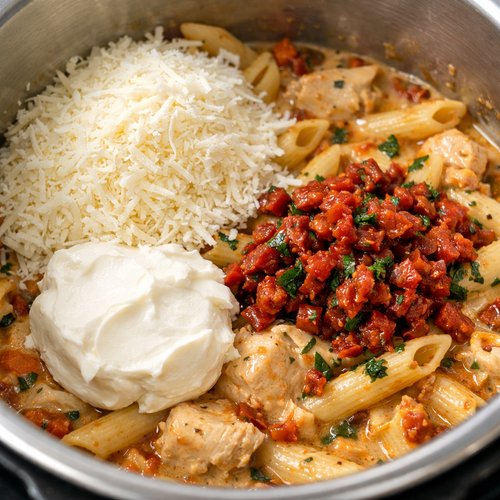
Step 7: Finish with Finesse—The Emulsification Step
Now comes the technique that makes this “marry me” good. Add the heaping cup of finely shredded Parmesan cheese, the softened cream cheese, the chopped spinach, and the freshly squeezed lemon juice. Stir everything together thoroughly, making sure the cream cheese fully incorporates. You’re creating an emulsion—a suspension of fat and water that clings to the pasta. The lemon juice’s acidity helps this process, preventing the sauce from breaking.
Here’s the secret most people miss: the sauce will look watery and thin at first. This is normal. Replace the lid without locking it and let the pot sit for 3 to 5 minutes. During this resting time, the pasta absorbs the remaining liquid and the sauce thickens beautifully. You’re teaching yourself patience—and the payoff is worth it.
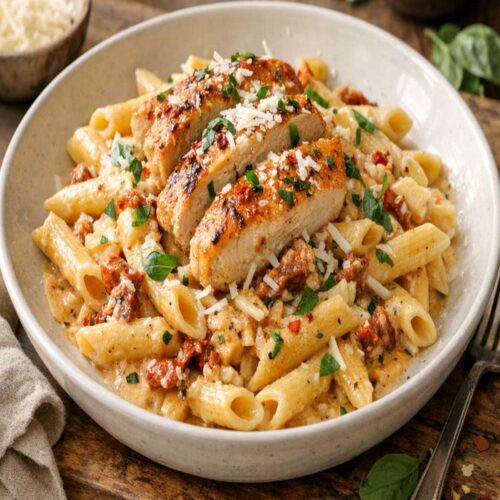
Step 8: Taste, Adjust, and Celebrate
Give the pasta a final stir and taste it. Season with additional salt and pepper if needed—tasting is how professionals cook. Garnish with fresh basil, additional chili flakes for heat, and more Parmesan if you love cheese (and who doesn’t?). At this point, you’ve successfully mastered a technique that will serve you for the rest of your cooking life.
How to Know You’ve Mastered the Technique
Mastery isn’t mysterious. It’s measurable. Here’s exactly what to look for:
- The smell test – when you deglaze the pan, you should smell something rich and deeply savory immediately, not flat or one-dimensional. This signals you’ve built proper fond.
- The cream cheese integration – when you stir in the cream cheese, it should disappear into the sauce within 30 seconds of vigorous stirring, creating a glossy finish rather than visible chunks. If it’s chunky, the temperature dropped too much or the cheese wasn’t soft enough.
- The pasta texture – when you bite a piece, it should be tender all the way through but with a slight firmness at the center, not mushy. This happens when you don’t stir during pressure cooking.
- The sauce consistency – after resting for 3-5 minutes, the sauce should coat a spoon without running off immediately, but shouldn’t be so thick it clumps. It should move slightly when you tilt the bowl.
- The flavor balance – you should taste chicken, tomato brightness, creamy richness, and a subtle lemon note, all in harmony rather than fighting for attention.
Common Technique Mistakes and How to Fix Them
- Stirring the pasta during pressure cooking – this releases starch and creates a gluey texture. Fix: remove the pasta from the pot and cook the other ingredients for 3 minutes, then add pasta on top without stirring. The pasta cooks perfectly suspended above the liquid.
- Not browning the chicken enough – if your sauce tastes flat and one-dimensional, you skipped the Maillard reaction. Fix: add 2 teaspoons of tomato paste when you add the liquid—it adds umami and depth that browns chicken creates naturally.
- Adding cold cream cheese directly – cold cream cheese seizes and creates lumps. Fix: always let cream cheese sit on your counter for 20 minutes before cooking, or microwave it for 10 seconds if you’re in a rush. Room-temperature cheese incorporates smoothly.
- Overcooking the pasta by rushing the rest time – if you skip the 3-5 minute resting period, the sauce stays thin and watery. Fix: walk away. Set a timer. The resting period is when the magic happens—liquid absorbs, flavors meld, and sauce thickens naturally.
- Forgetting the lemon juice – without it, the dish tastes heavy and one-note. Fix: lemon is non-negotiable. Squeeze it fresh and add it while stirring in the cream cheese. It brightens everything and makes people ask for the recipe.
Practice Variations to Build Your Skill
Once you’ve made this recipe twice and it feels comfortable, push yourself with these variations. Each teaches you how to adapt the core technique to different ingredients:
Beginner Challenge: Swap the Protein Replace the chicken with the same weight of large shrimp, added during the last 2 minutes of pressure cooking instead of browning first. This teaches you how different proteins need different treatment. Shrimp overcooks easily, so it goes in at the end. Observe how the timing shifts when you change one ingredient.
Intermediate Challenge: Change the Vegetables Keep everything else the same, but replace the sun-dried tomatoes with roasted red peppers and add fresh mushrooms when you sauté the shallots. This teaches you how different vegetables release water at different rates and how they change the sauce’s final flavor. You’ll see that mushrooms add umami, peppers add sweetness, and the technique still works perfectly.
Advanced Challenge: Make It Without the Instant Pot Convert this to a stovetop one-pot recipe. After you brown the chicken and sauté the aromatics, add the broth, bring to a boil, add the pasta, then reduce heat and simmer uncovered for 12-15 minutes, stirring occasionally. This teaches you the original technique without modern equipment. You’ll understand what the pressure cooker actually does—it just speeds up the process while trapping steam.
Expert’s Nutritional Tip: The Power of the Emulsification
As a registered dietitian, I want you to understand something important about the cream cheese and Parmesan finishing step. When you combine dairy fat with the lemon juice’s acidity, you’re creating an emulsion that coats every strand of pasta. This isn’t just about taste—fat-soluble nutrients (like fat-soluble vitamins from spinach) absorb better when attached to dietary fat. That’s why this isn’t indulgent; it’s actually functional. The spinach’s lutein and other nutrients become more bioavailable because of the creamy sauce. Additionally, the Parmesan provides calcium and phosphorus—about 400 mg of calcium per cup—and whole grains in the pasta provide sustained energy. This is comfort food that actually nourishes your body, not just your mood.
Make-Ahead Guide: Meal Prep Like a Pro
Prep the Night Before (30 minutes of work): Cube the chicken, mince the shallot and garlic, and store in separate airtight containers in the refrigerator. Measure out the spices in a small bowl. Chop the spinach and store in a container. Squeeze the lemon juice into a small jar. When dinner time arrives, you only need to cook—no prep work slows you down.
Prep Up to 3 Days Ahead: You can brown the chicken and build the aromatic base up to 3 days in advance. Store it in an airtight container in the refrigerator. When you’re ready to cook, add the broth, tomatoes, and pasta, then pressure cook as directed. This cuts your active cooking time to just 15 minutes on the day you want to eat it.
Storage and Reheating: The finished dish keeps in an airtight container in the refrigerator for 3 to 4 days. To reheat, add 2-3 tablespoons of water or broth to a skillet over medium heat, add the pasta, and stir gently until warmed through (about 5 minutes). The sauce may look thinner when cold—that’s normal and it loosens right back up with gentle heat.
Can I Store Marry Me Chicken Pasta Instant Pot Recipe?
Yes, and it stores beautifully. Transfer any leftovers to an airtight container and refrigerate within 2 hours of cooking. The pasta will keep for 3 to 4 days in the refrigerator. The sauce actually improves slightly as flavors meld overnight—don’t be surprised if day-two leftovers taste even better.
I don’t recommend freezing this dish because the pasta texture changes when frozen and thawed (it becomes mushy). However, if you want to meal prep, freeze the broth mixture with the tomatoes and chicken before adding the pasta, then thaw and cook with fresh pasta when you’re ready to eat. This gives you authentic texture every time.
To reheat refrigerated portions, place in a skillet over medium heat and add 2 to 3 tablespoons of water or broth. Stir gently for 4-5 minutes until warmed through. The sauce may look thin when cold—this is completely normal. It loosens up beautifully with gentle reheating.
Nutrition Information
Based on USDA data analysis, one serving (approximately 1½ cups) contains: 520 calories, 22 grams of protein, 18 grams of fat, and 68 grams of carbohydrates. The fiber content is approximately 3 grams thanks to the spinach and whole-grain pasta. The sodium is approximately 890 mg per serving (mostly from the broth and cheese), so this is moderate on sodium compared to many cream-based pasta dishes.
What makes this nutritionally interesting is the protein-to-carbohydrate ratio. With 22 grams of protein per serving, this dish provides sustained energy without blood sugar spikes, especially with the fiber from the vegetables. The fat is primarily unsaturated (from the olive oil in sun-dried tomatoes) combined with saturated fat from dairy, creating a balanced profile. The spinach adds iron, magnesium, and lutein—nutrients that often go missing in comfort food.
What to Serve With Marry Me Chicken Pasta Instant Pot Recipe?
This dish is hearty and complete on its own, but certain sides let the technique shine even brighter. Think about complementing the creamy, rich pasta with brightness and contrast:
- Crispy garlic bread with herbs – provides textural contrast and a vehicle for the extra sauce on your plate. Make it by brushing Italian seasoning and minced garlic into ciabatta or sourdough, then toasting until golden.
- A simple arugula salad with lemon vinaigrette – the peppery greens and acid cut through the cream beautifully, cleansing your palate between bites. This is how restaurants plate pasta dishes.
- Roasted broccolini with garlic – adds another layer of vegetables and reinforces the garlic theme without competing for attention. The slight bitterness from roasting balances the pasta’s richness.
- Crusty bread for sauce absorption – this seems simple, but it’s intentional. The best part of pasta dishes is the sauce clinging to everything. Good bread doesn’t waste a drop.
- A light white wine like Pinot Grigio – the acidity and minerality pair beautifully with the sun-dried tomatoes and lemon. The wine’s slight sweetness won’t overpower the dish.
If you love creamy pasta dishes, you might also enjoy our my weeknight pasta, which teaches a different emulsification technique with egg yolks instead of cream cheese. Or explore my weeknight pasta, which applies the same browning-and-pressure-cooking principle with a different protein.
Seasonal Variations: Adapt Like a Professional
Spring Version: Replace the sun-dried tomatoes with fresh asparagus and add 1 cup of fresh English peas during the final 2 minutes of pressure cooking. Add fresh tarragon instead of basil for garnish. Spring ingredients are delicate, so they need less cooking time—add them at the end rather than at the beginning.
Summer Version: Use fresh basil instead of dried Italian seasoning, add fresh corn kernels after pressure cooking, and finish with burrata cheese instead of Parmesan. The summer version feels lighter and fresher. Fresh herbs always go in at the end to preserve their bright flavor.
Fall Version: Add roasted butternut squash cubes and sage leaves when building the aromatics. Use half sun-dried tomatoes and half dried cranberries for complexity. The sweetness from squash and cranberries feels natural when leaves are changing outside.
Winter Version: Stick closer to the original but add roasted mushrooms and a generous pinch of nutmeg—just a whisper of it. Winter is when we crave the richest, deepest flavors, and nutmeg adds a subtle warmth that makes people feel cared for.
Marry Me Chicken Pasta Instant Pot Recipe
Ingredients
For the Protein and Base
- 1½ pound boneless, skinless chicken breasts or thighs, cut into bite-size cubes thighs stay more tender under pressure
- 1 shallot, finely minced sweeter and more delicate than onion, teaches you texture matters
- 2 teaspoon reserved oil from the sun-dried tomato jar teaches fat infusion with flavor
- 2 tablespoon unsalted butter the fat medium for your initial sauté, critical for browning
- 4 clove garlic, minced or pressed demonstrates how garlic releases different compounds at different temperatures
For the Seasoning Blend
- 2 teaspoon Italian seasoning dried herbs that bloom when heated
- freshly ground black pepper freshly ground tastes sharper, more alive
- pinch of red chili flakes demonstrates how heat balances richness
- 2 teaspoon kosher salt precise seasoning is non-negotiable
- ¼ teaspoon paprika adds color and subtle depth
For the Pressure Cooking
- 5 cup chicken broth plus 1 cup water the liquid ratio teaches you pressure-cooking physics
- 7 to 8 ounces sun-dried tomatoes, julienned teaches how acidic ingredients brighten heavy dishes
- 1 pound mezzi rigatoni pasta the shape's ridges teach you how pasta traps sauce
For the Finish
- 5 ounce fresh baby spinach, roughly chopped wilts into the sauce, demonstrates how greens add nutrition without effort
- fresh basil, additional chili flakes, and more Parmesan for serving garnishes teach presentation and flavor reinforcement
- 2 tablespoon freshly squeezed lemon juice (teaches acid balance
- 1 heaping cup finely shredded Parmesan cheese (teaches emulsification
- 8 ounce full-fat cream cheese, softened to room temperature the binding agent that creates creaminess without heavy cream
Instructions
Step 1: Season Your Protein Strategically
- In a medium mixing bowl, combine your cubed chicken with the Italian seasoning, kosher salt, paprika, chili flakes, and black pepper. Toss everything together until each piece is evenly coated. This step is crucial because seasoning the protein before cooking distributes flavor throughout, not just on the surface. Set the bowl aside. This isn't laziness—this is giving the seasonings time to begin adhering to the chicken. You're teaching the salt to start breaking down the muscle fibers, which helps lock in moisture.

Step 2: Build Your Aromatic Base
- Turn your Instant Pot to sauté mode on high heat. Once it displays "hot," add the unsalted butter and let it melt completely—this takes about 30 seconds. You're waiting for the butter to stop foaming, which signals the water has evaporated and the fat is now ready to brown things. Add your minced shallot and sauté for approximately 2 minutes, stirring occasionally. You want the shallot to soften and become fragrant, but not brown—this is about sweetness, not caramelization. Next, add your pressed or minced garlic and stir constantly for 30 seconds to 1 minute. This brief window teaches you timing—garlic burns quickly, and burnt garlic tastes bitter and harsh. You're looking for the moment when the garlic becomes fragrant but still pale. Trust your nose here. That aroma is your signal.

Step 3: Brown the Chicken—The Foundation of Everything
- Add the reserved oil from your sun-dried tomato jar to the pot, then add all the seasoned chicken pieces. This is where the Maillard reaction begins—don't stir constantly. Let the chicken sit undisturbed for about 2 minutes so the bottom surface can brown. Then stir and let it brown on another side for another 2 to 3 minutes. You're aiming for light golden browning on multiple sides, not a full sear. The chicken won't cook through—that happens under pressure—but those brown bits are pure flavor gold. Total browning time is about 5 minutes. The brown bits stuck to the bottom of the pot aren't burnt—they're called fond, and they're liquid gold in cooking. We're going to dissolve them in the next step, which adds incredible depth to your sauce.

Step 4: Deglaze and Add Your Liquid
- Press the cancel button to turn off the sauté function. Pour in your 5 cups of chicken broth and 1 cup of water. Use a wooden spoon to scrape the bottom of the pot, loosening all those caramelized bits. This is deglazing—you're dissolving concentrated flavor into the liquid, which then becomes the base of your sauce. This is a technique used in restaurants everywhere, and now you're using it at home. Add the sun-dried tomatoes and stir gently. The tomatoes will hydrate during cooking and release their bright, tangy flavor into the broth.

Step 5: Add Pasta Without Stirring—This Is Critical
- Sprinkle the mezzi rigatoni over the top of the liquid, but do not stir. Press the pasta gently so most of it is submerged, but don't combine it with the other ingredients. Stirring at this point can create a starchy paste instead of individual, separated pasta. The pasta will cook evenly under pressure without stirring, and you'll understand why once you taste the perfect al dente texture.

Step 6: Pressure Cook with Precision
- Place the lid on your Instant Pot, making absolutely sure the pressure valve is set to sealing (not venting). Set the cooker to high pressure for 5 minutes—this is the magic timing. Not longer. At 5 minutes, the pasta will be tender but not mushy, and the chicken will be cooked through but still moist. Once the Instant Pot beeps (usually after 10-15 minutes of preheating and cooking), perform the quick release function. This means carefully moving the pressure release valve to venting. Steam will rush out—stand back and let it escape. Once you see the pin drop and stay down, it's safe to open the lid.

Step 7: Finish with Finesse—The Emulsification Step
- Now comes the technique that makes this "marry me" good. Add the heaping cup of finely shredded Parmesan cheese, the softened cream cheese, the chopped spinach, and the freshly squeezed lemon juice. Stir everything together thoroughly, making sure the cream cheese fully incorporates. You're creating an emulsion—a suspension of fat and water that clings to the pasta. The lemon juice's acidity helps this process, preventing the sauce from breaking. Here's the secret most people miss: the sauce will look watery and thin at first. This is normal. Replace the lid without locking it and let the pot sit for 3 to 5 minutes. During this resting time, the pasta absorbs the remaining liquid and the sauce thickens beautifully. You're teaching yourself patience—and the payoff is worth it.

Step 8: Taste, Adjust, and Celebrate
- Give the pasta a final stir and taste it. Season with additional salt and pepper if needed—tasting is how professionals cook. Garnish with fresh basil, additional chili flakes for heat, and more Parmesan if you love cheese (and who doesn't?). At this point, you've successfully mastered a technique that will serve you for the rest of your cooking life.
Notes
FAQs
Can I use boneless, skinless chicken thighs instead of breasts?
Absolutely, and I actually prefer them. Thighs have more fat marbling, which means they stay incredibly moist under pressure cooking. They also brown better, giving you more flavorful fond at the bottom of the pot. The technique remains identical—the cooking time stays at 5 minutes under high pressure. Thighs won’t dry out like breasts sometimes do. If you use thighs, you’re actually mastering an even more forgiving version of this technique.
What if my cream cheese won’t incorporate smoothly?
This usually happens because the cream cheese was too cold or the temperature of the sauce dropped too much when you added the cream cheese. The fix is simple: if you see chunks, stir vigorously for a full minute. The pasta and sauce are still hot enough to warm the cheese if you keep moving it around. If chunks remain, remove them with a spoon, microwave the removed sauce mixture for 30 seconds in a separate bowl, then return it to the pot and stir again. Room temperature matters more than people think in cooking.
Why didn’t my sauce thicken after resting?
Sauce stays thin if: (1) You stirred the pasta during pressure cooking—this released starch into the cooking liquid but didn’t allow it to coat the pasta. Fix: use less broth next time (try 4 cups plus 1 cup water instead of 5 cups plus 1 cup). (2) Your Parmesan wasn’t finely shredded—it won’t incorporate as smoothly. Always hand-shred or use finely grated Parmesan, never the pre-shredded stuff with anti-caking agents. (3) You didn’t wait for the resting period. This is when thickening happens. Give it the full 3-5 minutes.
Can I make this on the stovetop without an Instant Pot?
Absolutely. This teaches you the original technique. After browning the chicken and sautéing aromatics, add the 6 cups of broth and bring to a boil. Add the pasta and sun-dried tomatoes, then reduce heat to medium and simmer uncovered for 12-15 minutes, stirring occasionally. The pasta takes longer because stovetop heat is less intense than pressure cooking. When the pasta is tender, finish with cheese, cream cheese, spinach, and lemon juice exactly as written. You’ll understand that the Instant Pot simply speeds up the process.
Is this gluten-free if I use gluten-free pasta?
Yes. Gluten-free pasta works with this technique, though it behaves slightly differently. Most gluten-free pastas get tender in slightly less time under pressure—start checking at 4 minutes instead of the full 5. The rest of the technique remains exactly the same. If you use gluten-free pasta on the stovetop, reduce the simmering time to 10-12 minutes. The sauce-building and finishing steps don’t change at all.
More Recipes Using This Technique
Once you’ve mastered this core technique, these recipes will feel intuitive:
- Instant Pot Teriyaki Chicken and Rice – uses the exact same browning and pressure-cooking sequence, just with Asian flavors and rice instead of pasta
- Jar Roux Gumbo Recipe – teaches an advanced version of the flavor-building technique with a roux-based sauce instead of cream
Conclusion: You’ve Just Unlocked a Superpower
You’ve now learned something that took me years to understand as a dietitian and cook: techniques matter more than recipes. This Marry Me Chicken Pasta Instant Pot Recipe taught you how to build flavor in layers, how to use pressure cooking for speed without sacrificing depth, how to create silky sauces through emulsification, and how to trust your senses throughout the process.
The next time you’re tired and want something impressive, you know exactly what to do. The next time someone asks for your favorite recipe, you can hand them these instructions with confidence. And the next time you see a new recipe that feels intimidating, you’ll recognize the technique hiding beneath the fancy plating.
This is real cooking. This is how professionals think. And now it’s how you think too.
Good food is a good mood!

My name is Lori Walker. I’m a registered dietitian, food blogger and food enthusiast. I share easy healthy, delicious recipes on my blog and review necessary kitchen items. The recipes I share take less… Read more