This post contains affiliate links. As an Amazon Associate I earn from qualifying purchases.
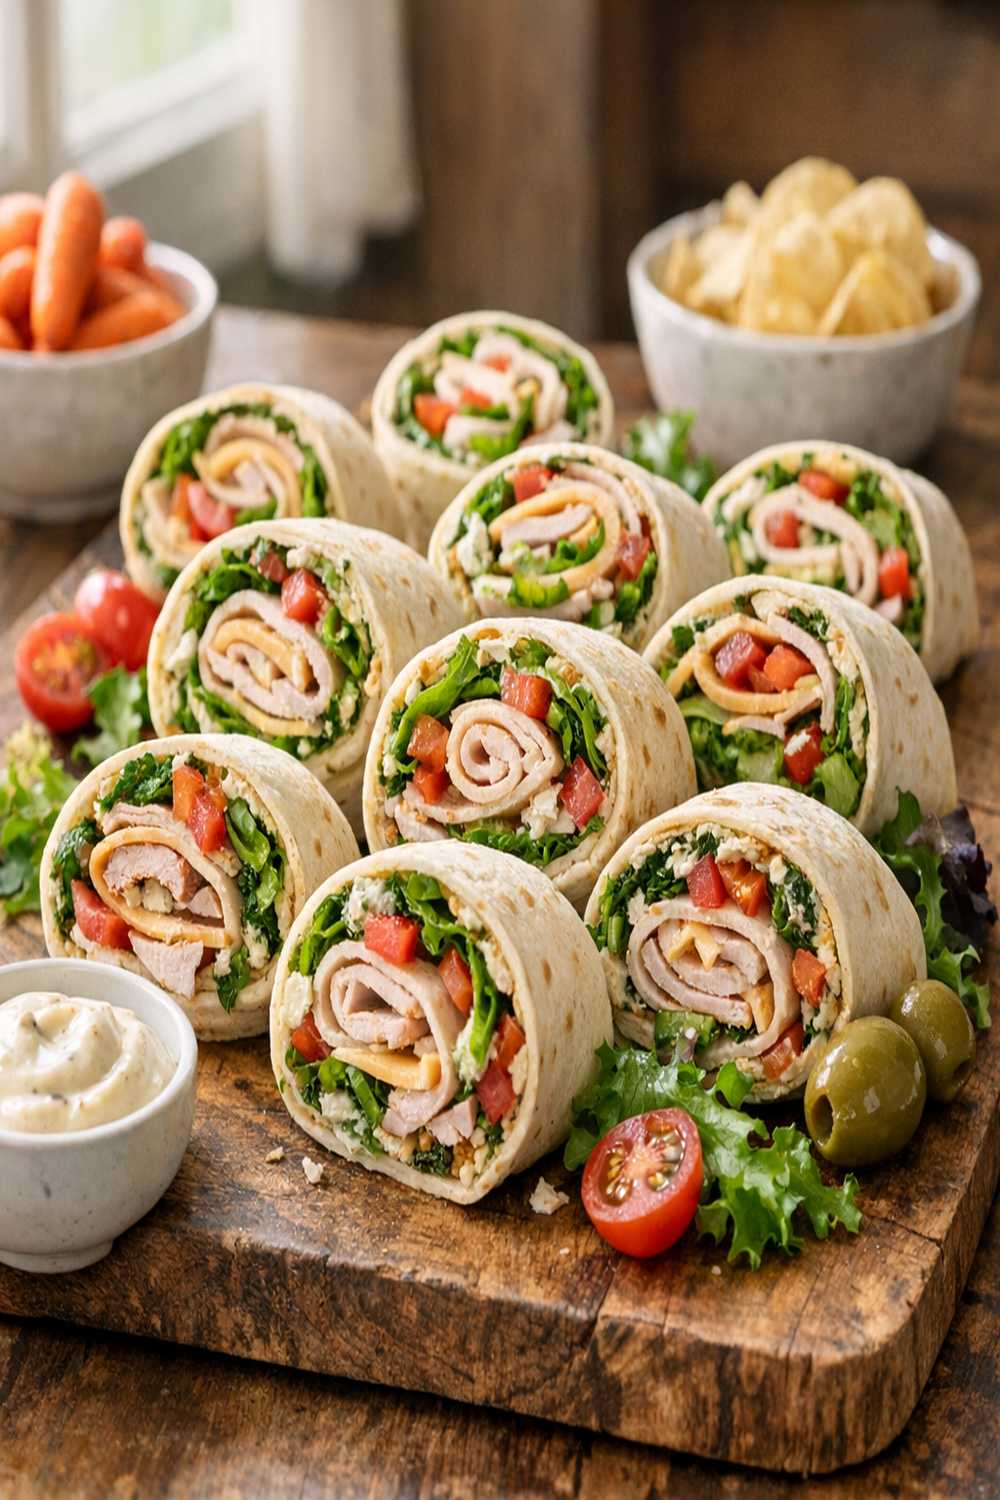
I’m always hunting for recipes that bridge the gap between looks fancy and tastes incredible—without stealing my whole afternoon. These lunch pinwheels do exactly that. They pair beautifully with a bright kale blueberry salad for a complete meal, or stand proudly on their own at potlucks and lunchboxes. Good food is a good mood, and these spirals deliver both.
The Story Behind My Favorite No-Fuss Lunch Spiral
I still remember my daughter asking me to pack something “fancy” for her school potluck in 2021. I was knee-deep in meal prep testing when inspiration struck—why not roll up all those deli flavors she loved into something that looked restaurant-quality? I grabbed flour tortillas, cream cheese, and whatever cured meats I had on hand, spread, layered, rolled, and sliced.
The moment she came home and told me her classmates asked for the recipe, I knew I’d stumbled onto something special. Since then, these pinwheels have shown up at family gatherings, packed lunches, and even quick weeknight dinners. They’re foolproof, adaptable, and honestly? They taste even better the next day.
Let me show you how to make them.
What Are Lunch Pinwheels?
Pinwheels are soft flour tortillas wrapped tightly around layers of seasoned cream cheese and savory fillings, then sliced into bite-sized spirals. This particular version celebrates Italian deli flavors—think salami, pepperoni, and fresh peppers all held together by a creamy, herbaceous base.
The magic happens when you spread, layer, and roll with intention. What looks simple is actually quite clever: the cream cheese acts as both a flavor builder and a binding agent that keeps everything intact when you slice. No mess, no stress, just clean spirals that look like you spent hours in the kitchen.
Why You’ll Love This Lunch Pinwheels Recipe
- Ready in under 20 minutes – From fridge to plate, these come together faster than most lunch ideas. Perfect for busy mornings or last-minute gatherings.
- Make-ahead friendly – Slice them the night before and store in an airtight container. They actually taste better after the flavors meld overnight.
- Endlessly customizable – Don’t like pepperoni? Swap it. Prefer roast beef? Go for it. This formula works with virtually any deli meat combination.
- No special equipment needed – A cutting board, a knife, and a regular spoon are all you need. I’ve tested these in countless home kitchens.
- Portion control without thinking – Each pinwheel is a natural serving size. Pack three for a light lunch or six for a heartier meal.
- Genuinely impressive – They look far fancier than the effort required. Your guests won’t believe how simple they are.
The Ingredients
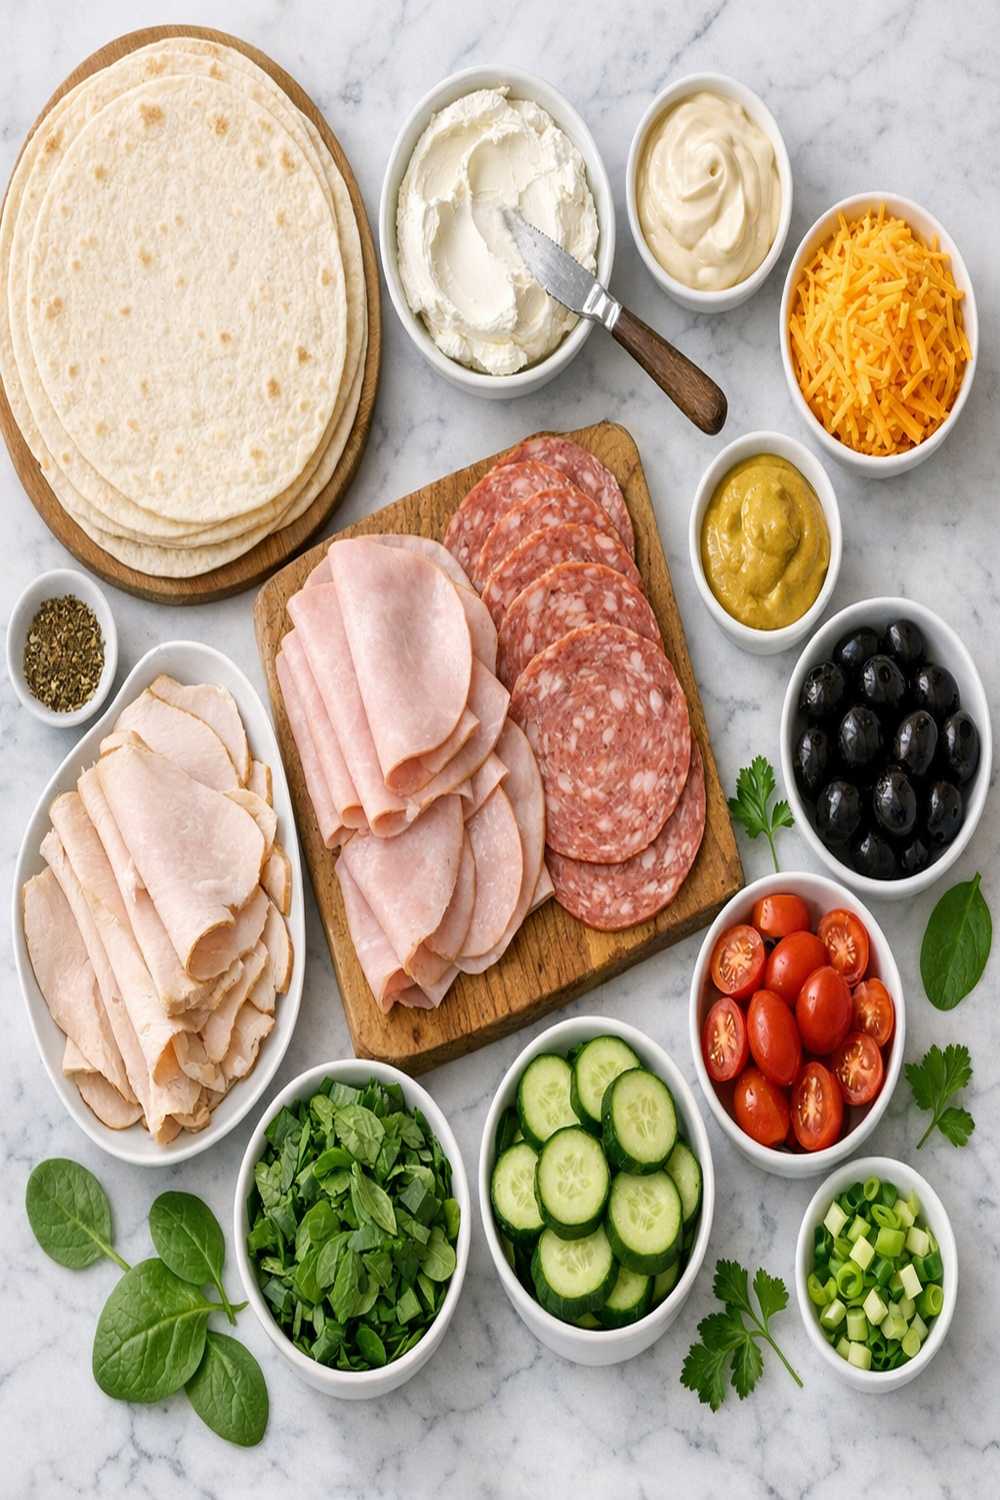
I’ve built these pinwheels on a foundation of three simple ingredients: cream cheese, tortillas, and deli meats. But it’s the seasoning and accents that transform them from basic to beautiful. Everything you see below is designed to work together seamlessly—no weird flavor clashes, just complementary layers that taste intentional.
- 15 slices salami (approximately 5 to 6 slices per tortilla, roughly ⅛-inch thickness)
- 6 slices deli ham (about 2 slices per tortilla, adds richness without overpowering)
- ½ teaspoon garlic powder (not garlic salt—we control the salt separately)
- 15 slices pepperoni (approximately 5 to 6 slices per tortilla, standard deli counter size)
- 3 large flour tortillas (burrito-size works best; smaller tortillas need fewer fillings)
- 8 oz cream cheese (softened to room temperature for easy spreading)
- 1 tablespoon Italian seasoning (dried blend of oregano, basil, and thyme)
- 1 tablespoon Italian dressing (adds tang and moisture to the cream cheese)
- 3 leaves green leaf lettuce (one per tortilla, provides fresh crunch and prevents sogginess)
- ½ cup roasted red bell peppers (chopped small, any brand works fine)
- 2 tablespoons fresh basil (optional but recommended, chopped fine for brightness)
- ¼ teaspoon salt and pepper (adjust to your taste preference)
- 6 slices provolone cheese (about 2 slices per tortilla, mild and melts slightly from warmth)
- ½ cup pepperoncini peppers (chopped small, drained well to avoid sogginess)
Yield: Makes approximately 18 to 24 pinwheel slices (6 to 8 pieces per tortilla), depending on how thick you slice them. Plan on 4 to 6 pieces per person as a lunch serving.
How to Make Lunch Pinwheels?
I’m going to walk you through this step-by-step. The process is straightforward, but a few small details make the difference between pinwheels that hold together beautifully and ones that fall apart. Let’s build something delicious.
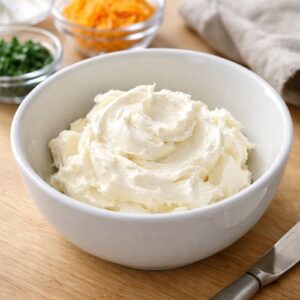
Step 1: Prepare Your Cream Cheese Base
Place your softened cream cheese in a medium bowl. If you forgot to soften it, microwave it in 10-second bursts until it’s spreadable—this typically takes 20 to 30 seconds for 8 oz. Add the Italian seasoning, Italian dressing, garlic powder, salt, and pepper.
Using a wooden spoon or rubber spatula, stir until the mixture is completely smooth and creamy. You’re looking for a texture similar to frosting—no lumps, no dry streaks. Now fold in your chopped pepperoncini peppers and roasted red bell peppers until they’re evenly distributed throughout. Taste a tiny spoonful and adjust seasoning if needed. This is your canvas, and you control the flavor intensity.

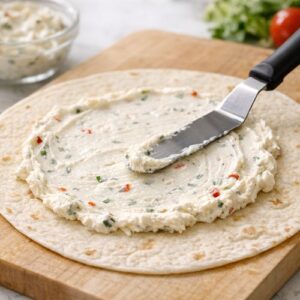
Step 2: Spread the Cream Cheese Mixture
Lay one tortilla flat on a clean cutting board. Using an offset spatula or regular butter knife, spread approximately ¼ cup of your cream cheese mixture across the entire tortilla surface. You want an even, thin layer—not so thick that it oozes out when you roll, but thick enough to taste in every bite. Leave about a ½-inch border around the edges; this helps when you roll without creating too much pressure.
Here’s a pro tip from my testing: if your spread feels uneven, dip your knife in warm water and smooth it out. The warmth helps the cream cheese cooperate without tearing the tortilla.

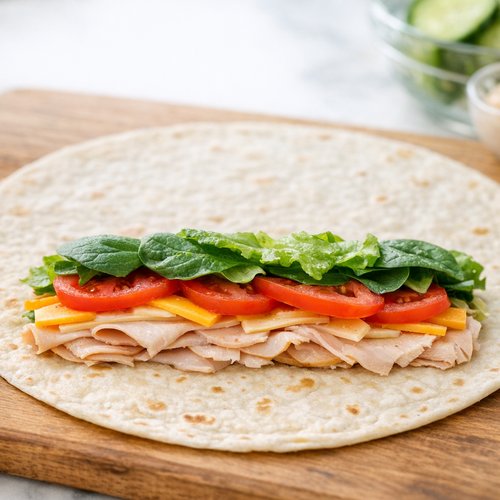
Step 3: Layer Your Fillings Slightly Off-Center
This is where precision matters. Starting about 1 inch from one edge of the tortilla (this becomes your roll’s starting point), create a horizontal line of fillings. Lay down your salami slices slightly overlapping—you’ll use about 5 to 6 slices per tortilla. Then layer your pepperoni directly on top, followed by ham, then provolone cheese.
The “slightly off-center” placement is intentional. You’re leaving more tortilla on one side so you have enough material to wrap around and seal the spiral. Place one leaf of green leaf lettuce on top of the cheese—this acts as an internal barrier that absorbs any moisture and keeps your pinwheels from getting soggy.
If you’re using fresh basil, sprinkle a small amount now for brightness that comes through in every bite.
Step 4: Roll Tightly Into a Spiral
Using both hands, fold the tortilla edge closest to your fillings up and over the pile. Roll it tightly but gently—you’re not wrestling it, just applying steady pressure. The key is keeping the roll snug so the fillings don’t shift around inside. Roll toward the far edge, tucking as you go, until you’ve created one complete spiral.
Your finished roll should be firm and compact, about the thickness of a hockey puck if you set it upright. If your first one feels loose, don’t worry—this is a skill that improves with the second and third tortilla.

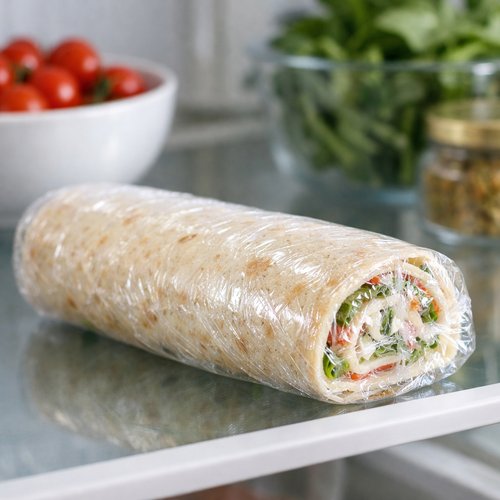
Step 5: Chill Before Slicing (Optional but Recommended)
If you have time, wrap your rolled tortilla in plastic wrap and refrigerate for at least 15 to 30 minutes. This allows the cream cheese to firm up, which makes slicing cleaner and prevents the fillings from sliding out. If you’re in a rush, you can slice immediately, but you’ll get slightly messier pieces.
When you’re ready to slice, use a sharp serrated knife and cut at a slight angle for prettier presentation. Each pinwheel should be roughly 1 inch thick—this is the perfect size for eating in one or two bites. Wipe your knife clean between cuts for neat edges.
Step 6: Repeat With Remaining Tortillas
Follow steps 1 through 5 with your remaining two tortillas. Arrange all your pinwheels on a serving platter, cut-side up so people can see those beautiful spirals. Serve immediately or cover with plastic wrap and refrigerate until you’re ready.

Expert’s Nutritional Tip
As a registered dietitian, I’m always thinking about what my recipes deliver nutritionally. These pinwheels provide quality protein from the deli meats and cheese—approximately 8 to 10 grams of protein per 2-pinwheel serving. But here’s what excites me: the pepperoncini peppers and roasted red peppers add vitamin C and antioxidants with virtually zero calories.
The cream cheese base gets a bad reputation, but 8 oz divided among 18 to 24 pieces means each pinwheel contains less than a tablespoon of cream cheese. This is not a fat bomb—it’s a strategic flavor and texture vehicle. The real nutritional win? You’re getting satisfying, nutrient-dense fillings in a controlled portion that doesn’t require constant willpower to stop eating.
Tips and Tricks
- Soften your cream cheese properly – This is non-negotiable. Cold cream cheese tears tortillas and spreads unevenly. Leave it on the counter for 30 minutes, or use the microwave method I mentioned. This single step determines your success.
- Don’t overstuff – I know the instinct is to pile it high, but restraint creates better pinwheels. Your fillings should form a thin, even layer that rolls smoothly without creating lumps or pressure points.
- Use a serrated knife for slicing – A dull or straight knife will squish your pinwheels. A sharp serrated knife glides through cleanly, keeping your spirals intact and beautiful. I keep one knife specifically for this task.
- Drain your peppers well – Excess moisture from the pepperoncini and roasted red peppers will make your cream cheese weepy and your tortillas soggy. Pat them dry with a paper towel before chopping.
- Let chilled pinwheels sit at room temperature for 5 minutes before serving – This brings out the flavors and makes them taste fresher. Cold straight from the fridge tastes a bit muted.
- Make these the night before – Refrigeration helps the flavors marry and the cream cheese to set. They’re actually better on day two than day one, making them perfect for meal prep.
Make-Ahead Guide
I’ve tested these pinwheels across multiple scenarios, and I’m confident saying they’re one of the best make-ahead lunch options. Here’s my professional approach:
Option 1: Prepare and Chill the Rolled Tortillas – After rolling but before slicing, wrap each tortilla tightly in plastic wrap. Refrigerate for up to 3 days. When you’re ready to serve, slice and arrange on a platter. This approach keeps your pinwheels fresher and allows you to slice them right before eating.
Option 2: Slice, Store, and Pack – Slice all your pinwheels and arrange them in a single layer in an airtight container. Refrigerate for up to 4 days. This works beautifully for lunchbox packing or quick snacking. The pieces stay moist because they’re stacked together, and you can grab exactly how many you need.
Option 3: Freeze for Later – Yes, you can freeze these. Arrange sliced pinwheels in a single layer on a baking sheet, freeze for 2 hours, then transfer to a freezer-safe container. They’ll keep for up to 2 months. Thaw in the refrigerator for 2 hours before serving, or eat them partially frozen for a fun texture variation.
Common Mistakes to Avoid
- Using cold cream cheese – This is the number-one reason pinwheels fail. Cold cream cheese tears tortillas, spreads unevenly, and creates lumps in your filling. Plan 30 minutes ahead for softening, or microwave in short bursts. Your future self will thank you.
- Slicing too soon – If you slice immediately after rolling (before chilling), the cream cheese is still soft and everything shifts. The pinwheels look messy and fall apart. Patience here pays off—even 15 minutes makes a difference.
- Rolling too loosely – A loose roll means your fillings shift around inside, and you get uneven flavor distribution when you bite. Apply gentle but steady pressure as you roll. Think “snug hug,” not “wrestling match.”
- Overloading the fillings – More is not more here. Too much deli meat and cheese creates bulk that’s hard to roll and makes each pinwheel taste heavy. Stick to the layering guide—you’ll get better results with less.
Can I Store Lunch Pinwheels?
Absolutely. I’ve stored these in nearly every way possible, and here’s what I’ve learned:
Refrigerator Storage: Place sliced pinwheels in an airtight container with parchment paper between layers to prevent sticking. They’ll stay fresh and delicious for up to 5 days. Before eating, let them sit at room temperature for 5 minutes to bring out the flavors.
Rolled but Unsliced Storage: Wrap the entire rolled tortilla in plastic wrap and refrigerate for up to 3 days. This keeps them slightly fresher because you’re not exposing the cut surfaces to air. Slice right before serving for the best texture.
Freezer Storage: Arrange sliced pinwheels on a baking sheet, freeze solid for 2 hours, then transfer to a freezer-safe zip-top bag or container. They’ll keep for up to 2 months. Thaw in the refrigerator overnight before serving, or eat them partially frozen for an interesting texture contrast.
Pro note: Don’t store these with the lettuce if you’re planning to keep them longer than 24 hours. The lettuce releases moisture and makes the pinwheels soggy. Add fresh lettuce when you pack lunchboxes, or use just a thin layer and eat within 24 hours.
Nutrition Information
Based on USDA nutritional databases, each pinwheel (assuming 2-inch pieces from the 18-24 piece yield) contains approximately:
- Calories: 95 to 110
- Protein: 8 to 10 grams
- Total Fat: 5 to 6 grams
- Saturated Fat: 2 to 3 grams
- Carbohydrates: 6 to 7 grams
- Fiber: less than 1 gram
- Sodium: 280 to 320 mg
These pinwheels are protein-forward, making them satisfying as a snack or lunch component. They’re not low-calorie, but they’re portion-controlled—the spiral format naturally prevents overeating. Pair them with vegetables or a salad to add fiber and volume without adding guilt.
What Can I Serve With Lunch Pinwheels?
Pinwheels are versatile enough to star at potlucks, lunches, or casual dinners. Here’s how I like to build a complete meal around them:
For a light lunch, I serve them alongside a crisp salad or raw vegetables. A kale blueberry salad provides a beautiful contrast—the tart berries and bitter greens balance the rich, savory pinwheels perfectly. If you’re feeding a crowd, consider adding a warm element like a jalapeno corn chowder for cooler months.
- Vegetable Platter – Cherry tomatoes, cucumber slices, bell pepper strips, and baby carrots offer fresh crunch and color contrast. Serve with a simple ranch dip made from Greek yogurt and ranch seasoning.
- Fresh Fruit – Grapes, melon, berries, or orange slices lighten the meal and provide natural sweetness that complements the salty deli flavors.
- Cheese and Charcuterie Additions – Though the pinwheels contain cured meats and cheese, adding a small charcuterie board with olives, nuts, and bread extends the spread and gives guests options.
- Soups – Creamy soups like tomato bisque or vegetable minestrone pair beautifully. The warm, comforting broth complements the room-temperature pinwheels.
- Roasted Vegetables – Zucchini, bell peppers, or asparagus roasted with olive oil and garlic provide substance and nutrition without competing for attention.
- Bread and Spreads – Crusty bread, crackers, or soft rolls offer texture variety. Pair with mustard, pesto, or roasted garlic spread for dipping or spreading.
Seasonal Variations
I love adapting recipes to match what’s fresh and available. These pinwheels work year-round, but here’s how I adjust them by season:
Spring: Add fresh basil and sun-dried tomatoes to the cream cheese mixture. Use thinner ham and include fresh baby spinach instead of green leaf lettuce. The lighter flavors match spring’s energy.
Summer: Incorporate fresh dill into your cream cheese base and add crispy bacon. Use roasted zucchini instead of red peppers for a garden-fresh twist. These feel bright and energetic at summer picnics.
Fall: Switch to smoked turkey or roast beef. Add crispy bacon and a touch of apple butter to the cream cheese for subtle sweetness. Use toasted pumpkin seeds if you want autumn crunch.
Winter: Stick with the classic Italian version I’ve shared, but add crispy prosciutto and fontina cheese for richness. The heavier flavors feel cozy during cold months. Make a double batch for holiday gatherings.
Substitutes
- Different Deli Meats – This formula works with turkey, roast beef, capicola, or any sliced cured meat you enjoy. Mix and match to your taste, or use whatever’s on sale. No two batches need to be identical.
- Cheese Options – Swap provolone for Swiss, cheddar, or smoked gouda. Each brings different flavor. Just avoid very soft cheeses like fresh mozzarella—they don’t hold the spiral structure well.
- Herb Variations – If you don’t have Italian seasoning, substitute dried oregano (½ teaspoon) plus dried basil (½ teaspoon). Or use fresh herbs if you have them—increase amounts slightly since fresh is milder.
- Pepper Swaps – Don’t like pepperoncini? Use sun-dried tomatoes, artichoke hearts, or caramelized onions. Roasted red peppers can be replaced with raw red peppers, pickled jalapeños, or fresh tomato.
- Tortilla Alternatives – Whole wheat tortillas work fine, though the flavor is earthier. Spinach or tomato-flavored tortillas add visual interest. Just ensure they’re large enough to accommodate fillings.
- No Green Leaf Lettuce? – Arugula, spinach, or romaine work beautifully. You need something with structure and water content—iceberg lettuce is too crispy and doesn’t absorb moisture well.

Lunch Pinwheels Recipe
Ingredients
- 15 slice salami approximately 5 to 6 slices per tortilla, roughly ⅛-inch thickness
- 6 slice deli ham about 2 slices per tortilla, adds richness without overpowering
- ½ teaspoon garlic powder (not garlic salt
- 15 slice pepperoni approximately 5 to 6 slices per tortilla, standard deli counter size
- 3 large flour tortillas burrito-size works best; smaller tortillas need fewer fillings
- 8 oz cream cheese softened to room temperature for easy spreading
- 1 tablespoon Italian seasoning dried blend of oregano, basil, and thyme
- 1 tablespoon Italian dressing adds tang and moisture to the cream cheese
- 3 leaves green leaf lettuce one per tortilla, provides fresh crunch and prevents sogginess
- ½ cup roasted red bell peppers chopped small, any brand works fine
- 2 tablespoon fresh basil optional but recommended, chopped fine for brightness
- ¼ teaspoon salt and pepper adjust to your taste preference
- 6 slice provolone cheese about 2 slices per tortilla, mild and melts slightly from warmth
- ½ cup pepperoncini peppers chopped small, drained well to avoid sogginess
Instructions
Step 1: Prepare Your Cream Cheese Base
- Place your softened cream cheese in a medium bowl. If you forgot to soften it, microwave it in 10-second bursts until it's spreadable—this typically takes 20 to 30 seconds for 8 oz. Add the Italian seasoning, Italian dressing, garlic powder, salt, and pepper. Using a wooden spoon or rubber spatula, stir until the mixture is completely smooth and creamy. You're looking for a texture similar to frosting—no lumps, no dry streaks. Now fold in your chopped pepperoncini peppers and roasted red bell peppers until they're evenly distributed throughout. Taste a tiny spoonful and adjust seasoning if needed. This is your canvas, and you control the flavor intensity.
Step 2: Spread the Cream Cheese Mixture
- Lay one tortilla flat on a clean cutting board. Using an offset spatula or regular butter knife, spread approximately ¼ cup of your cream cheese mixture across the entire tortilla surface. You want an even, thin layer—not so thick that it oozes out when you roll, but thick enough to taste in every bite. Leave about a ½-inch border around the edges; this helps when you roll without creating too much pressure. Here's a pro tip from my testing: if your spread feels uneven, dip your knife in warm water and smooth it out. The warmth helps the cream cheese cooperate without tearing the tortilla.
Step 3: Layer Your Fillings Slightly Off-Center
- This is where precision matters. Starting about 1 inch from one edge of the tortilla (this becomes your roll's starting point), create a horizontal line of fillings. Lay down your salami slices slightly overlapping—you'll use about 5 to 6 slices per tortilla. Then layer your pepperoni directly on top, followed by ham, then provolone cheese. The "slightly off-center" placement is intentional. You're leaving more tortilla on one side so you have enough material to wrap around and seal the spiral. Place one leaf of green leaf lettuce on top of the cheese—this acts as an internal barrier that absorbs any moisture and keeps your pinwheels from getting soggy. If you're using fresh basil, sprinkle a small amount now for brightness that comes through in every bite.

Step 4: Roll Tightly Into a Spiral
- Using both hands, fold the tortilla edge closest to your fillings up and over the pile. Roll it tightly but gently—you're not wrestling it, just applying steady pressure. The key is keeping the roll snug so the fillings don't shift around inside. Roll toward the far edge, tucking as you go, until you've created one complete spiral. Your finished roll should be firm and compact, about the thickness of a hockey puck if you set it upright. If your first one feels loose, don't worry—this is a skill that improves with the second and third tortilla.

Step 5: Chill Before Slicing (Optional but Recommended)
- If you have time, wrap your rolled tortilla in plastic wrap and refrigerate for at least 15 to 30 minutes. This allows the cream cheese to firm up, which makes slicing cleaner and prevents the fillings from sliding out. If you're in a rush, you can slice immediately, but you'll get slightly messier pieces. When you're ready to slice, use a sharp serrated knife and cut at a slight angle for prettier presentation. Each pinwheel should be roughly 1 inch thick—this is the perfect size for eating in one or two bites. Wipe your knife clean between cuts for neat edges.

Step 6: Repeat With Remaining Tortillas
- Follow steps 1 through 5 with your remaining two tortillas. Arrange all your pinwheels on a serving platter, cut-side up so people can see those beautiful spirals. Serve immediately or cover with plastic wrap and refrigerate until you're ready.

Notes
FAQs
Can I make pinwheels without cream cheese?
Technically yes, but you’ll lose the binding agent that holds everything together. Hummus, ricotta, or mascarpone can work as substitutes, though each creates a different texture and flavor profile. Hummus makes them more Mediterranean, while ricotta offers tanginess. I haven’t found a perfect 1:1 replacement for cream cheese’s functional role, so if you’re dairy-free, ricotta is your closest match. The pinwheels won’t hold together quite as perfectly, but they’ll still taste good.
How do I prevent my pinwheels from getting soggy?
Soggy pinwheels usually result from three things: excess moisture in your pepper fillings, room-temperature storage, or preparing them too far ahead. Solution: pat your chopped peppers dry with paper towels before mixing. Store in the refrigerator, not on the counter. Don’t assemble more than 24 hours before eating. And here’s a secret—don’t add the lettuce until you’re ready to slice and serve. This acts as your moisture barrier and works best when fresh.
Can I make these with kids?
Absolutely—this is a wonderful recipe for family cooking. Kids can help soften the cream cheese, mix the filling, and layer ingredients. The rolling requires gentle hands and patience, so older kids (8+) handle this well. Younger kids might need guidance. Everyone can help slice (with supervision for sharp knives). It’s a multi-step recipe that teaches food preparation without being overwhelming.
Do pinwheels need to be served cold?
They can be served cold, room temperature, or even slightly warm. Cold pinwheels (straight from the fridge) are crisp and refreshing, though flavors are muted. Room temperature brings out the herb and meat flavors. If you want to warm them, wrap in damp paper towels and microwave for 20 to 30 seconds—just long enough to take the chill off. Don’t heat too much or the cream cheese gets weepy.
What’s the best way to transport these to a party?
Transport sliced pinwheels in a flat, airtight container with parchment paper between layers. This prevents sliding and sticking. Keep them refrigerated until 15 minutes before serving, then let them reach room temperature. If you’re traveling a long distance, keep an ice pack in the cooler but don’t let the container sit directly on ice. Alternatively, transport the rolled, unsliced tortillas and slice them at the destination for maximum freshness.
More Recipes You’ll Love
- Italian Sandwich Pinwheels – A heartier variation that feels more like a sandwich experience with extra bread components and bolder flavors.
- Spicy Chicken Sweet Potato Meal Prep Magic – If you love the make-ahead convenience of pinwheels, this meal prep strategy offers warm, filling options for the week.
- Kings Hawaiian Buffalo Chicken Sliders – Another handheld lunch option that delivers restaurant-quality flavor in a simple format.
These lunch pinwheels have been in my regular rotation for years, and I’m so excited to share them with you. They’re proof that impressive food doesn’t require impressive effort. Spread, layer, roll, slice, and you’ve got a lunch that’s going to make your day better. Whether you’re packing them for a busy week, bringing them to a potluck, or just craving something satisfying and special, these spirals deliver.
I’d love to know what variations you create or what you serve alongside them. Your kitchen wins are what inspire my next recipes. Happy cooking, and remember—good food is a good mood!
Warmly,
Lori
- Italian Style Pinwheels
- Costco Pinwheels Recipe
- Subway Seafood Sensation Recipe
- Lettuce Wrap Turkey Tacos Recipe

My name is Lori Walker. I’m a registered dietitian, food blogger and food enthusiast. I share easy healthy, delicious recipes on my blog and review necessary kitchen items. The recipes I share take less… Read more