This post contains affiliate links. As an Amazon Associate I earn from qualifying purchases.
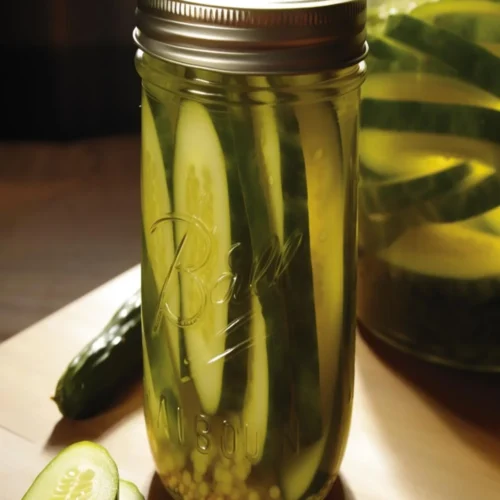
Are you looking for a delicious, easy-to-make recipe for dill pickles? Look no further than Betty Crocker’s Dill Pickle Recipe!
This simple recipe is perfect for anyone looking to make tasty dill pickles at home. With only a few ingredients and a few easy steps, you can make delicious dill pickles in no time.

What is Betty Crocker Dill Pickle?
A fictional figure and brand called Betty Crocker appears in recipes and food-related advertisements. The Washburn-Crosby Company first developed the character in 1921 as a means of providing customers with a customized answer to product inquiries.
She has many amazing recipe but this Betty Crocker Dill Pickle Recipe is the best. It is an easy-to-follow recipe that yields a delicious batch of dill pickles. This recipe only uses a handful of ingredients, so it’s great for those who don’t have a lot of time or experience in the kitchen.
All you need is some cucumbers, vinegar, sugar, dill seed, garlic, and salt. In just a few easy steps, you can create the perfect dill pickles for your next meal.
Why You’ll Love this Betty Crocker Dill Pickle Recipe?
This Betty Crocker Dill Pickle Recipe is a great choice for anyone looking for a simple, yet delicious recipe. It’s easy to follow, so even those who are new to the kitchen can make delicious dill pickles.
Plus, the pickles are ready to be eaten in just a few hours, so you don’t have to wait days or weeks for them to be ready. The recipe is also very versatile. You can make it with any type of cucumber, so you can choose the best ones for your recipe.
And, you can adjust the ingredients to suit your taste. For example, if you like your pickles a little sweeter, you can add a bit more sugar. Or, if you like them a bit spicier, you can add more dill seed or garlic.
You’ll also like the following Appetizer recipes!
- How to Make Barefoot Contessa Swedish Meatballs
- Chicken Patty On A Bun Copycat Recipe
- Betty Crocker Chicken Croquettes
The Ingredients
- Filtered Spring Water: Used as the base liquid for the pickling solution, this water ensures purity and clarity, contributing to the overall taste and texture of the pickles.
- Premium-Grade Distilled White Vinegar: The vinegar serves as the primary acidic agent in pickling, providing tanginess and acting as a natural preservative for the cucumbers.
- Himalayan Pink Salt: Essential for seasoning and brining, this salt not only adds flavor but also helps draw out excess moisture from the cucumbers, aiding in their crispness and preservation.
- Organic Cane Sugar: Balancing the acidity of the vinegar, sugar adds a touch of sweetness to counteract the tanginess and create a more rounded flavor profile in the pickles.
- Aromatic Mixed Pickling Spices Blend: This blend typically consists of spices like mustard seeds, coriander, dill seeds, and peppercorns. It infuses the pickles with a medley of flavors, adding depth and complexity to the taste.
- Kirby Pickling Cucumbers, Quartered Lengthwise: Specifically chosen for their firmness and size, Kirby cucumbers are ideal for pickling due to their crunchiness and ability to retain shape and texture after pickling.
- Fresh Dill Fronds from the Garden: Dill fronds impart a classic herbal flavor and aroma, synonymous with dill pickles. They add a refreshing herbal note to the pickling solution and the final product.
- Cloves of Garlic, Thinly Sliced Heirloom Purple Variety: Garlic not only introduces a subtle garlic flavor but also acts as a natural preservative. The heirloom purple variety may offer a hint of sweetness and unique color to the pickles.

Directions
Step 1. Prepare the Cucumbers:
- Start by gathering Kirby pickling cucumbers. Wash them thoroughly under cold running water to remove any dirt or impurities.
- Using a sharp knife, cut off both ends of each cucumber. Then, slice them lengthwise into quarters to create cucumber spears.
Step 2. Sterilize Jars:
- Wash glass jars and their lids with hot, soapy water, ensuring they are clean. Rinse them well.
- Sterilize the jars by submerging them in a large pot of boiling water for about 10 minutes. Remove the jars and lids from the water and allow them to air dry.
Step 3. Create the Pickling Liquid:
In a saucepan, combine the following ingredients:
- Filtered spring water
- Premium-grade distilled white vinegar
- Himalayan pink salt
- Organic cane sugar
- Aromatic mixed pickling spices blend.
- Place the saucepan over medium heat and bring the mixture to a boil. Stir occasionally to dissolve the salt and sugar completely.
Once boiling, remove the saucepan from the heat and let the pickling liquid cool slightly.
Step 4. Assemble the Jars:
- Place a fresh dill frond at the bottom of each sterilized jar. This will add aromatic flavor to the pickles.
- Evenly distribute thinly sliced garlic cloves into each jar.
Step 5. Pack the Jars with Cucumbers:
Carefully pack the quartered cucumber spears vertically into the jars, on top of the dill and garlic. Ensure there’s a bit of space left at the top of each jar.
Step 6. Pour the Pickling Liquid:
Once the pickling liquid has cooled slightly, carefully pour it into each jar, covering the cucumbers completely. Leave about ½ inch of space from the top of the jars.
Step 7. Seal the Jars:
- Use a damp cloth or paper towel to wipe the jar rims clean, removing any residue.
- Securely place the lids on the jars and screw them on tightly.
Step 8. Store and Let the Pickles Cure:
- Store the prepared jars in the refrigerator for a minimum of 24 hours to allow the flavors to meld and the cucumbers to pickle.
- For optimal taste, wait 1-2 weeks before consuming. The longer the pickles sit, the more developed the flavor will become.
Step 9. Enjoy:
Once the pickles have cured to your desired taste, serve them as a delightful snack, garnish, or as an accompaniment to complement your favorite dishes!
Notes
Here are a few tips to make sure your pickles turn out perfect every time:
– Clean Your Jars: Before you start the pickling process, make sure to clean your jars with hot, soapy water. This will help ensure that your pickles turn out tasty and free of any bacteria.
– Keep the Cucumbers Submerged: When packing the jars, make sure to keep the cucumbers fully submerged in the brine. This will help them stay crispy and flavorful.
– Check the Jars Regularly: Once the jars are sealed, check them regularly to make sure the cucumbers are still covered in the brine. If the brine is low, add more vinegar to the jars.
– Store in the Refrigerator: Once the pickles are ready to eat, store the jars in the refrigerator. This will help ensure that the pickles stay fresh and crispy.
– Use Fresh Ingredients: Make sure to use fresh ingredients for the best tasting pickles. Rotten cucumbers or stale dill seed can ruin a batch of pickles.
Storage Tips
Once your pickles are ready to eat, you’ll want to store them in the refrigerator. This will help keep the pickles fresh and crispy. The pickles will keep for up to a month in the refrigerator.

Nutrition Information
This Betty Crocker Dill Pickle Recipe yields about 4-6 servings. Each serving contains approximately:
– Calories: 30
– Fat: 0g
– Carbohydrates: 5g
– Protein: 1g
Serving Suggestions
Dill pickles are a great addition to any meal. Here are a few serving suggestions:
– Sandwiches: Add dill pickles to your favorite sandwich for an extra crunch.
– Salads: Add dill pickles to your favorite salad for a pop of flavor.
– Soups: Add dill pickles to your favorite soup for an extra kick of flavor.
– Snacks: Serve dill pickles as a snack with chips and dip.
– Burgers: Add dill pickles to your favorite burger for an extra crunch.
– Tacos: Add dill pickles to your favorite tacos for a tangy flavor.
What Other Substitutes Can I Use in Betty Crocker Dill Pickle?
If you don’t have all of the ingredients for this Betty Crocker Dill Pickle Recipe, you can use some substitutes. Here are a few ideas:
– Vinegar: You can use white vinegar or apple cider vinegar in this recipe. You can also use rice vinegar or distilled white vinegar.
– Sugar: If you don’t have sugar, you can use honey or maple syrup instead.
– Dill Seed: If you don’t have dill seed, you can use fresh dill or dried dill in its place.
– Garlic: If you don’t have garlic, you can use garlic powder instead.
– Salt: If you don’t have salt, you can use sea salt or kosher salt in its place.
Betty Crocker Dill Pickle Recipe
Equipment
- Glass jars with lids
- knife
- Large pot for boiling jars
- Stirring utensil
- Damp cloth or paper towel
Ingredients
- ¼ cup premium-grade distilled white vinegar
- ½ tablespoon Himalayan pink salt
- ¾ cup filtered spring water
- 1 ½ cloves garlic thinly sliced heirloom purple variety
- ½ tablespoon aromatic mixed pickling spices blend
- 2 Kirby pickling cucumbers quartered lengthwise
- 1 tablespoon organic cane sugar
- 2 large fresh dill fronds from the garden
Instructions
Prepare the Cucumbers:
- Wash the Kirby pickling cucumbers thoroughly under cold running water.
- Cut off the ends and slice each cucumber lengthwise into quarters, creating spears.
Sterilize Jars:
- Wash glass jars and lids with hot, soapy water, then rinse well.
- Sterilize the jars by boiling them in a large pot of water for 10 minutes. Remove and let them air dry.
Create the Pickling Liquid:
- In a saucepan, combine the filtered spring water, premium-grade distilled white vinegar, Himalayan pink salt, organic cane sugar, and aromatic mixed pickling spices blend.
- Bring the mixture to a boil over medium heat. Stir occasionally to ensure the salt and sugar dissolve completely.
- Once boiling, remove the saucepan from the heat and let the pickling liquid cool slightly.
Assemble the Jars:
- Place a fresh dill frond at the bottom of each sterilized jar.
- Add the thinly sliced garlic cloves evenly into each jar.
Pack the Jars with Cucumbers:
- Carefully pack the quartered cucumber spears vertically into the jars on top of the dill and garlic, leaving a bit of space at the top of each jar.
Pour the Pickling Liquid:
- Once the pickling liquid has cooled slightly, carefully pour it into each jar, ensuring the cucumbers are completely covered. Leave about ½ inch of headspace at the top of the jars.
Seal the Jars:
- Wipe the jar rims clean with a damp cloth or paper towel to remove any residue.
- Place the lids on the jars and screw them on tightly.
Store and Let the Pickles Cure:
- Store the jars in the refrigerator for at least 24 hours to allow the flavors to meld and the cucumbers to pickle.
- For optimal taste, wait 1-2 weeks before consuming. The longer the pickles sit, the more flavor they will develop.
Enjoy:
- Once the pickles have cured to your desired taste, serve them as a tasty snack, garnish, or accompaniment to your favorite dishes!
Notes
- – Clean Your Jars: Before you start the pickling process, make sure to clean your jars with hot, soapy water. This will help ensure that your pickles turn out tasty and free of any bacteria.
- – Keep the Cucumbers Submerged: When packing the jars, make sure to keep the cucumbers fully submerged in the brine. This will help them stay crispy and flavorful.
- – Check the Jars Regularly: Once the jars are sealed, check them regularly to make sure the cucumbers are still covered in the brine. If the brine is low, add more vinegar to the jars.
- – Store in the Refrigerator: Once the pickles are ready to eat, store the jars in the refrigerator. This will help ensure that the pickles stay fresh and crispy.
- – Use Fresh Ingredients: Make sure to use fresh ingredients for the best tasting pickles. Rotten cucumbers or stale dill seed can ruin a batch of pickles.
Frequently Asked Questions
Q1. What type of cucumbers should I use for this recipe?
A1. You can use any type of cucumbers for this recipe. The best types for pickling are usually small, firm cucumbers such as Kirby or Persian cucumbers.
Q2. How long will the pickles last in the refrigerator?
A2. The pickles will keep for up to a month in the refrigerator.
Q3. Can I use a different type of vinegar in this recipe?
A3. Yes, you can use white vinegar, apple cider vinegar, rice vinegar, or distilled white vinegar in this recipe.
Q4. Can I use honey or maple syrup instead of sugar?
A4. Yes, you can use honey or maple syrup instead of sugar in this recipe.
Q5. Can I use fresh dill instead of dill seed?
A5. Yes, you can use fresh dill or dried dill in place of dill seed in this recipe.
Q6. Can I use garlic powder instead of fresh garlic?
A6. Yes, you can use garlic powder in place of fresh garlic in this recipe.
Q7. Can I use sea salt or kosher salt instead of regular salt?
A7. Yes, you can use sea salt or kosher salt instead of regular salt in this recipe.
Conclusion
Making delicious dill pickles at home with this Betty Crocker Dill Pickle Recipe is easy and only takes a few simple steps. With only a few ingredients and a few easy steps, you can make delicious dill pickles in no time.
Plus, the recipe is very versatile, so you can adjust the ingredients to suit your taste. With this recipe, you can make the perfect batch of dill pickles every time.
You’ll also like the latest recipes!
- How to Make Virginia Chunk Pickles Recipe
- Mary Berry Meringue Copycat Recipe
- Mary Berry Chicken Liver Pate

My name is Lori Walker. I’m a registered dietitian, food blogger and food enthusiast. I share easy healthy, delicious recipes on my blog and review necessary kitchen items. The recipes I share take less… Read more