This post contains affiliate links. As an Amazon Associate I earn from qualifying purchases.
These little golden biscuits pack a punch of bright citrus joy in every bite, and they’re the perfect companion to afternoon tea or as a light finish after dinner. I love serving them alongside a warm cup of chamomile or pairing them with these homemade cookies for a citrus-forward dessert spread that feels fancy but tastes homemade.
Why Lemon Curd Biscuits Became My Kitchen Obsession
I still remember the first time my grandmother pressed her thumb into warm shortbread dough and filled the indent with homemade lemon curd. I was maybe seven, standing on a step stool in her kitchen, and the buttery aroma mixed with that tart-sweet lemon filling felt like pure magic. Fast forward to 2019 when I started documenting family recipes, and this one was at the very top of my list.
The magic of these biscuits isn’t complicated—it’s the marriage of three things done right: tender, melt-in-your-mouth dough, that perfect press of your thumb, and a generous spoonful of tangy-sweet lemon curd. Over the years of testing them in my own kitchen, I’ve refined the technique to guarantee success every single time, whether you’re using a stand mixer or mixing by hand.

What Are Lemon Curd Biscuits?
Lemon curd biscuits are a beloved British treat that sits somewhere between a shortbread cookie and a thumbprint biscuit. The base is a buttery, tender dough made with just a handful of pantry staples—no eggs needed. The real star is the lemon curd that fills the center, giving you that moment of bright citrus flavor when you bite through the crispy edges into the soft, custardy center.
The beauty of this recipe comes from its origins in traditional British afternoon tea culture. Biscuits (what Americans call cookies) were meant to be simple, elegant, and paired with tea. Adding lemon curd takes them from basic shortbread to something that feels special enough for guests, yet approachable enough for weeknight baking. I love that this recipe celebrates both simplicity and sophistication at once.
Why You’ll Love This Lemon Curd Biscuits Recipe
- Uses Pantry Staples You Likely Already Have – No specialty equipment or hard-to-find ingredients. Just butter, sugar, flour, and lemon curd (which you can buy or make ahead).
- Ready in Under 30 Minutes from Start to Finish – These bake for just 10 minutes, making them perfect for unexpected guests or an afternoon craving. The speed means you can have fresh cookies on the table before tea gets cold.
- No Eggs Required – This makes them naturally tender and also great for anyone avoiding eggs. The cornstarch creates that signature melt-in-your-mouth texture instead.
- Make-Ahead Friendly – You can prepare the dough balls and freeze them for up to 3 months, then bake as needed. This is my go-to strategy when I want the smell of fresh baking but don’t have time to mix.
- Perfectly Portioned – Using a cookie scoop ensures every biscuit is the same size, so they bake evenly and look bakery-quality on your plate.
- Naturally Elegant Presentation – The little golden dome with the jewel of lemon curd peeking through looks far more impressive than the effort required to make it.
The Ingredients
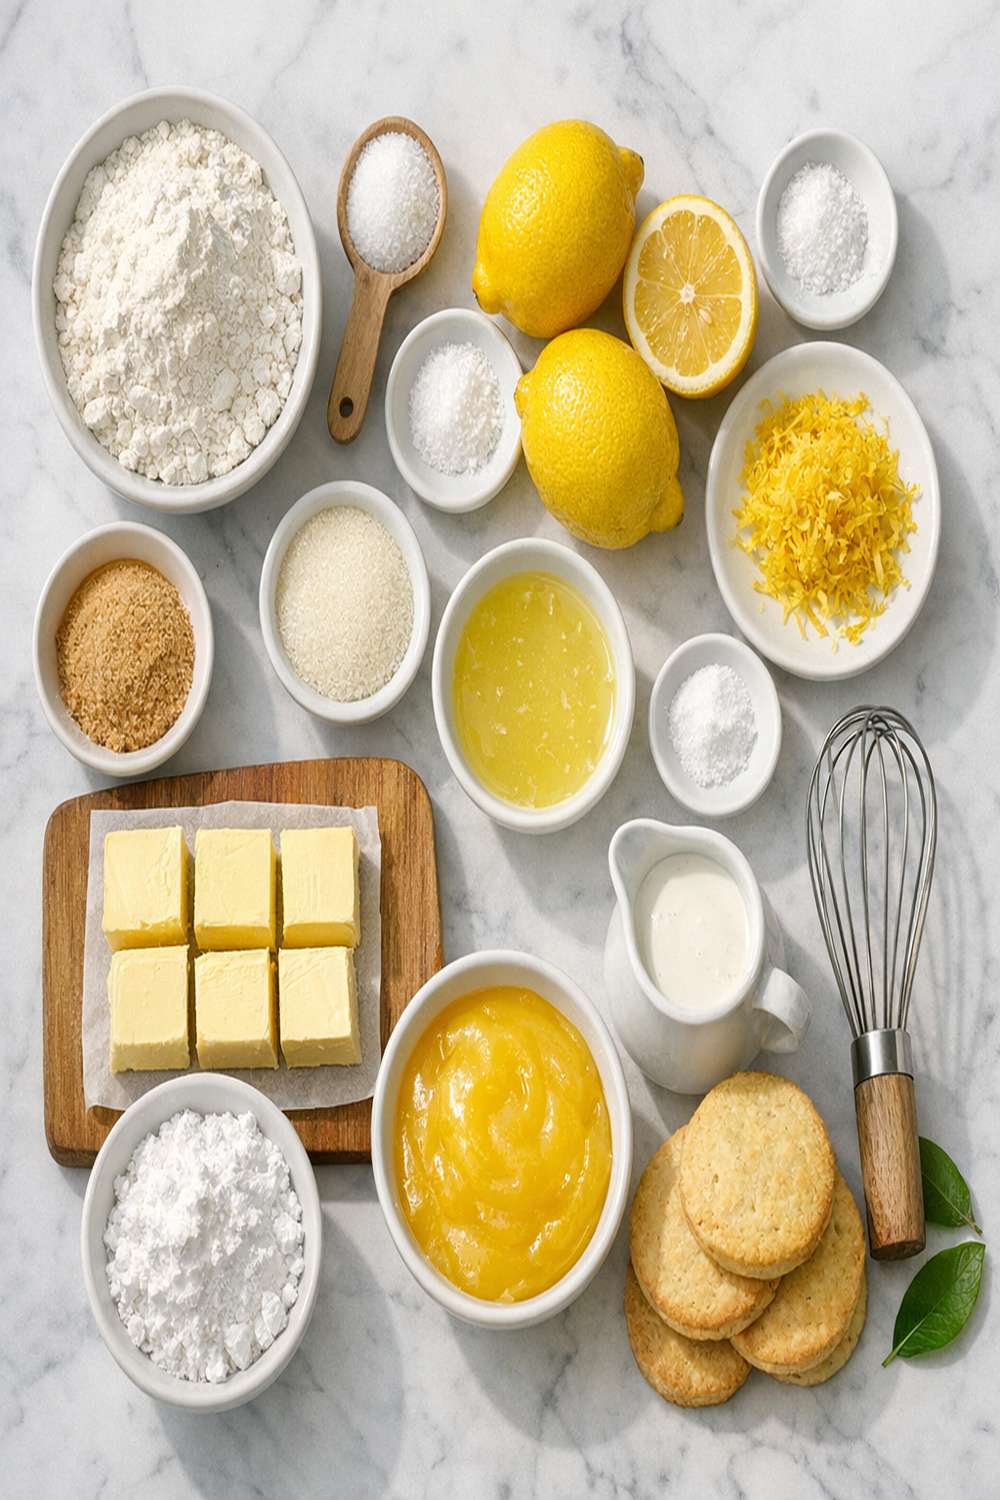
I’ve designed this ingredient list to be forgiving and straightforward. Everything here serves a specific purpose—the butter creates tenderness, the cornstarch adds that delicate crumb, and the lemon curd is your moment of pure joy. This recipe makes approximately 24 biscuits, which means you’ll have enough for a proper tea service with some left over for the cookie jar.
- ⅓ cup lemon curd (store-bought or homemade, about 3 ounces)
- 70 g powdered sugar (not granulated, about ½ cup or 2½ ounces)
- 45 g cornstarch (about ⅓ cup or 1.6 ounces—this is what makes them tender)
- 225 g all-purpose flour (spooned and leveled, about 1¾ cups or 8 ounces)
- 2 tablespoons granulated sugar (for rolling, optional but recommended for sparkle)
- 1 tablespoon fresh lemon zest (optional garnish for extra brightness)
- 200 g unsalted butter (softened to room temperature, about 7 ounces or 1¾ sticks)
- 1 teaspoon pure vanilla extract (not imitation, for flavor depth)
- ¼ teaspoon fine sea salt (balances the sweetness)
How to Make Lemon Curd Biscuits?
I’ve tested this recipe on standard home equipment—an electric handheld mixer and a stand mixer—and both work beautifully. The key is not overworking the dough once you add the flour. Think gentle mixing, not vigorous beating. Let me walk you through each step exactly as I do it in my own kitchen.
Step 1: Prepare Your Workspace
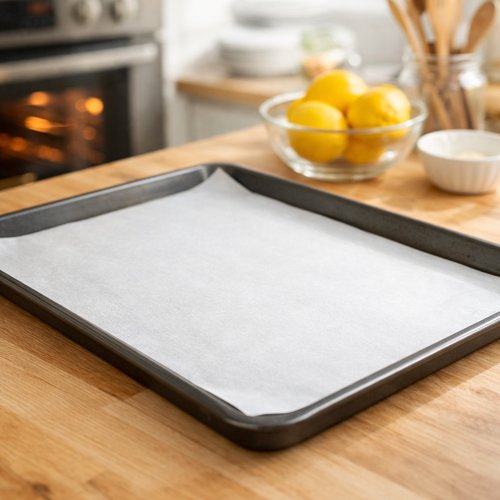
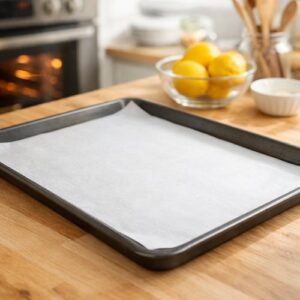
Preheat your oven to 350°F (180°C, or 160°C on a fan-forced setting). Line a large baking sheet with parchment paper—I use this instead of greasing because it prevents the bottoms from browning too quickly. This simple step takes 2 minutes and saves cleanup.
Step 2: Cream Butter and Sugar Together
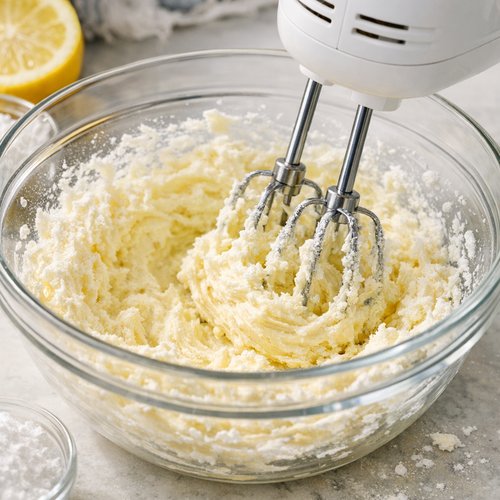
In a medium mixing bowl, combine your softened butter and powdered sugar. Using an electric handheld mixer on medium speed, beat them together for about 2 to 3 minutes until the mixture is pale, fluffy, and noticeably lighter in color than when you started. If you’re using a stand mixer with the paddle attachment, this takes about the same time. You’ll notice the mixture goes from a compact ball to something almost mousse-like—that’s exactly what you want. The air you’re incorporating into the butter is what creates that tender crumb.
Step 3: Incorporate Vanilla
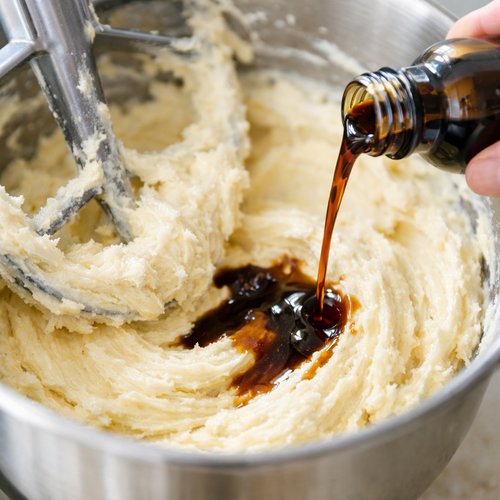
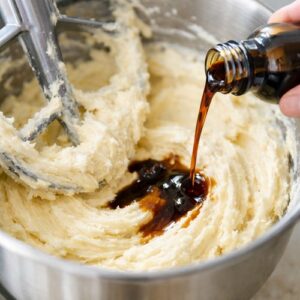
Pour in your vanilla extract and mix on medium speed for about 30 seconds until it’s completely incorporated and the mixture looks smooth and even. Don’t skip this step—vanilla adds a subtle depth that keeps people from guessing exactly what makes these biscuits so good.
Step 4: Combine Your Dry Ingredients
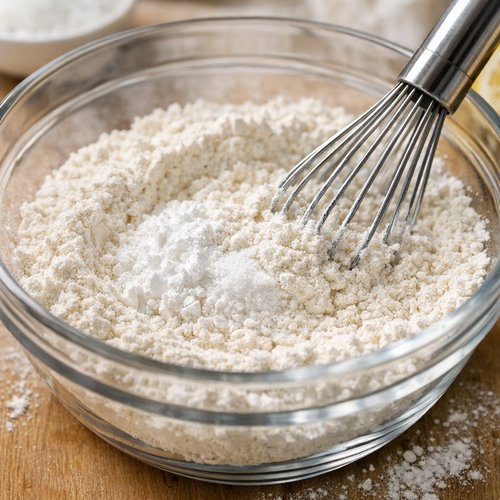
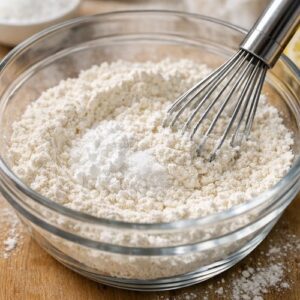
In a separate bowl, whisk together the all-purpose flour, cornstarch, and salt. Whisking them together ensures the cornstarch is evenly distributed (this prevents clumpy texture) and the salt is mixed throughout so you don’t get salty pockets. This takes just 1 minute, but it matters for consistent results.
Step 5: Gently Bring It Together
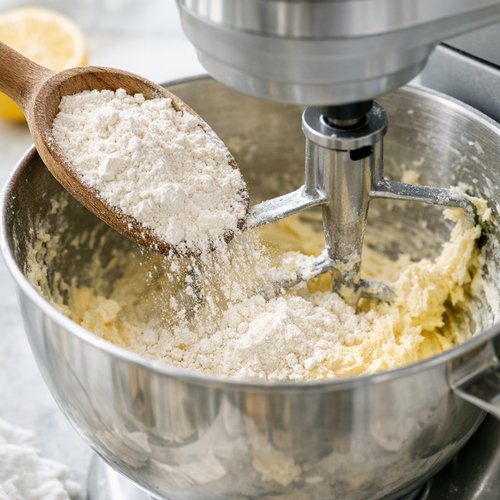
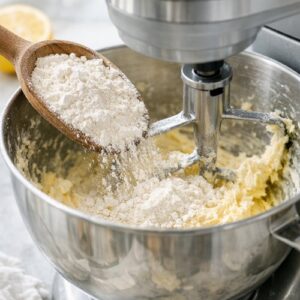
Here’s where I want you to slow down and be gentle. Add the dry ingredients to your butter mixture in three separate additions, mixing on low speed (or with a wooden spoon if mixing by hand) for just 15 to 20 seconds after each addition. Stop mixing the moment you don’t see streaks of flour anymore. Overworking the dough makes tough biscuits instead of tender ones. After the third addition, the dough should come together in a soft, cohesive ball.
Step 6: Shape and Prepare for Filling
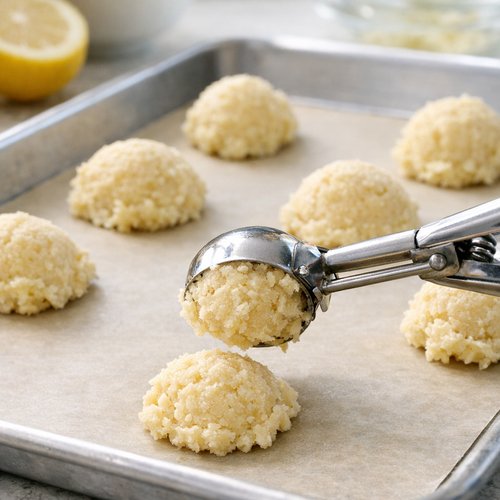
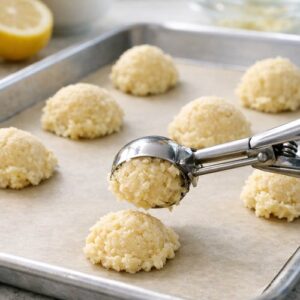
Using a cookie scoop (about 1 tablespoon size), scoop balls of dough directly onto your prepared baking sheet, spacing them about 2 inches apart. If you like a sparkly finish (and honestly, who doesn’t?), gently roll each ball in granulated sugar before placing it on the sheet. This step takes about 5 minutes for the whole batch and adds such a pretty touch.
Step 7: Create the Lemon Curd Wells
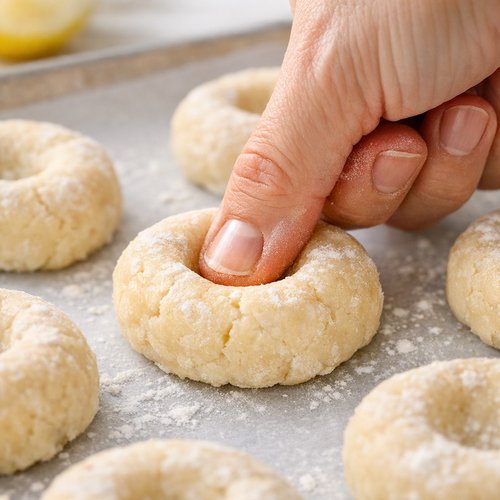
Using your thumb (and only your thumb—it creates the perfect-sized indent), slowly press into the center of each dough ball, pushing down about halfway through to create a well. Be gentle and deliberate here; you’re not stabbing, you’re gently nestling your thumb into the dough. The goal is a deep pocket that won’t disappear during baking but that still leaves borders so the curd doesn’t leak out.
Step 8: Fill with Lemon Curd
Spoon about ½ teaspoon of lemon curd into each well. If your lemon curd is very thick, you can thin it slightly with a few drops of water to make it easier to spoon. Don’t overfill—the curd will stay put better with a modest amount, and the flavor will still shine.

Step 9: Bake to Golden Perfection
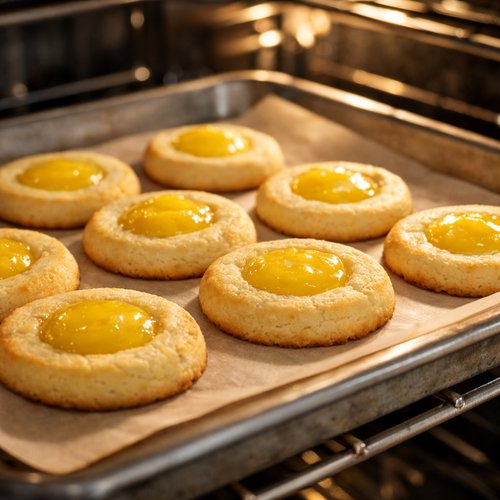
Slide your baking sheet into the preheated oven and bake for 10 minutes, or until the edges are just barely starting to turn golden brown. The centers will still look quite pale—this is correct. Overbaking will make them hard instead of tender. At exactly 10 minutes, pull the sheet from the oven. They’ll still feel quite soft, which is perfect.
Step 10: Cool and Enjoy
Leave the biscuits on the baking sheet for 10 minutes to set slightly and firm up. This resting period is crucial—it lets the structure develop so they won’t fall apart when you move them. After 10 minutes, transfer them to a wire cooling rack to cool completely, about 15 to 20 minutes. Once cooled, the lemon curd will have set and the biscuits will have that perfect tender-but-not-fragile texture.

Tips and Tricks
- Soften Your Butter Correctly – Soft doesn’t mean melted. Your butter should be soft enough that your finger leaves a slight indent, but not greasy or glossy. Leave it on the counter for 20 to 30 minutes. Cold butter won’t cream properly; melted butter won’t create air pockets.
- Measure Flour by Spooning and Leveling – Scooping flour directly into the measuring cup compacts it and adds more flour than the recipe calls for. Instead, lightly spoon flour into the cup and level it with a knife. This is a professional baker’s habit that guarantees success.
- Don’t Skip the Cornstarch – This ingredient is what transforms a basic shortbread into a biscuit with that delicate, melt-in-your-mouth quality. You cannot substitute it with more flour without changing the texture completely.
- Make the Indents Right Before Baking – If you make your indents more than 10 minutes before baking, they’ll partially seal back up as the dough relaxes. Fill and bake immediately for the best presentation.
- Invest in a Cookie Scoop – This one tool ensures every biscuit is the same size, so they bake evenly. I use a 1-tablespoon scoop and have owned the same one for five years. It costs about $5 and eliminates guesswork.
- Use Quality Lemon Curd – The filling is half the experience. If you have time, I recommend making your own lemon curd—it’s just butter, sugar, eggs, and lemon juice. Store-bought is absolutely fine, but homemade tastes noticeably brighter and more luxurious.
- Room Temperature Ingredients Are Your Friend – Bring butter and eggs (if you’re making curd) to room temperature before starting. Cold ingredients don’t combine smoothly, which affects texture.
Expert’s Nutritional Tip
As a registered dietitian, I want to share something important: while these biscuits are definitely a treat food meant to be enjoyed in moderation, the lemon adds real nutritional value. Fresh lemon is rich in vitamin C and compounds called limonoids that have antioxidant properties. The butter provides fat-soluble vitamins like vitamin A, which supports skin and eye health. One biscuit delivers about 120 calories and 2 grams of protein from the flour. The key to healthy eating isn’t eliminating treats—it’s enjoying them mindfully as part of a balanced diet. These biscuits are small, so a serving of 2 to 3 with tea is satisfying without overdoing it.
Make-Ahead Guide
One of my favorite things about this recipe is how beautifully it freezes. Here’s my professional make-ahead strategy:
- Freeze Unbaked Dough Balls – After scooping your dough onto the baking sheet, open-freeze the unbaked balls for 2 hours until solid, then transfer them to a freezer bag. They’ll keep for up to 3 months. When you’re ready to bake, press your thumb indent, fill with lemon curd, and bake directly from frozen for 12 to 13 minutes instead of 10.
- Prepare Dough in Advance – Make the full dough, wrap it tightly in plastic wrap, and refrigerate for up to 2 days. Let it come to room temperature for 15 minutes before scooping and baking.
- Store Baked Biscuits Properly – In an airtight container at room temperature, baked biscuits keep for 4 to 5 days. The first and second days they taste best. After that, you can refresh them in a 300°F oven for 5 minutes to restore crispness.
- Make Lemon Curd Ahead – Homemade lemon curd keeps refrigerated for 3 weeks in an airtight jar. Making it on a Sunday means you can bake biscuits throughout the week whenever you want.
Can I Store Lemon Curd Biscuits?
Yes, and they store beautifully. Keep your baked biscuits in an airtight container at room temperature for up to 5 days, though they taste absolutely best in the first 48 hours when the butter flavor is most pronounced and the texture is most tender. I love storing them in a decorative tin—they make a lovely gift for neighbors or friends.
If you have unbaked dough balls in your freezer, they’re good for up to 3 months. This is honestly my favorite way to keep them on hand. When I want fresh-baked biscuits, I pull out a few frozen balls, add the lemon curd indent, and bake. The aroma of fresh biscuits takes just 13 minutes from freezer to cooling rack.
Don’t refrigerate baked biscuits—the cold actually makes them stale faster by speeding up starch recrystallization. Room temperature in an airtight container is always your best bet. If they do get a bit firm after a few days, warm them in a 300°F oven for 5 minutes to restore softness.
Nutrition Information
Based on USDA data for standard ingredients, each biscuit (using homemade lemon curd) contains approximately 120 calories, 6 grams of fat (mostly from butter), 15 grams of carbohydrates, 2 grams of protein, and 0 grams of fiber. These are treat foods, so the carbohydrate and fat content is naturally higher than, say, a vegetable side dish. What matters is enjoying them as part of a balanced day—a biscuit or two with tea and perhaps a piece of fruit makes a lovely afternoon snack. The portion is naturally controlled because they’re small and rich.
Common Mistakes to Avoid
- Overmixing After Adding Flour – This is the number-one reason biscuits come out tough instead of tender. Once you add flour, mix minimally. It’s totally okay to see a few streaks of flour disappear—it’s not okay to mix until it’s completely smooth. Think “just combined,” not “well blended.”
- Using Cold Butter – Cold butter won’t cream properly, which means your biscuits won’t be as light and fluffy. It takes 20 to 30 minutes for butter to reach the perfect softness on the counter.
- Overfilling the Lemon Curd – A generous spoonful looks good, but it often leaks out during baking and burns on the sheet pan. Stick to about ½ teaspoon per biscuit. Your biscuits will look neater and the curd will stay where it belongs.
- Baking Too Long – The moment the edges start turning golden is the moment to pull them out. Baking for 12 or 13 minutes makes them hard. Ten minutes is precise, and these biscuits are forgiving enough that they’ll still be perfect at 10 minutes.
Seasonal Variations
One of the beautiful things about this recipe is that it adapts to what’s in season and what you’re craving:
- Spring & Summer – Stick with lemon curd or try a bright raspberry jam. You could also make a lime curd using the same technique as lemon curd but with fresh limes for a tropical twist.
- Fall – Switch to a spiced pumpkin butter or apple cider reduction. The warm spices pair beautifully with the buttery dough and create that cozy autumn feeling.
- Winter – Use a cranberry preserve or blackberry jam. Or make an orange curd using the same method as lemon curd but with fresh orange juice and zest for a holiday-ready version.
- Year-Round Option – A simple vanilla bean jam or salted caramel is always appropriate. I sometimes mix in a tiny pinch of cardamom to the dough itself for an unexpected flavor note.
What Can I Serve With Lemon Curd Biscuits?
These biscuits are essentially a tea biscuit, so they shine when served as part of an afternoon spread. I love pairing them with a warm cup of Earl Grey, English breakfast tea, or even a delicate chamomile. For a more substantial afternoon gathering, you might build a little board around them:
- Classic Afternoon Tea – Serve with hot tea, perhaps a small cake like you’d find in a British tea room, and a few finger sandwiches. These biscuits are small enough that they won’t overwhelm your guests.
- Dessert Finale – After dinner, serve 2 or 3 of these with coffee as a lighter dessert than cake. They’re elegant but not heavy, and the bright lemon cleanses the palate beautifully after a rich meal.
- Citrus Dessert Spread – Arrange these alongside other citrus-forward treats like Key Lime Cookie Bars for a coordinated flavor theme. Different textures and forms of the same flavor profile make for a visually interesting plate.
- Gift Box Companions – Package them with a small jar of homemade jam or lemon curd to give as gifts. They stay fresh for several days and feel so much more personal than store-bought treats.
- Brunch Addition – These work beautifully on a brunch table alongside fresh fruit, yogurt, and Soft Scrambled Eggs Recipe. The sweetness balances savory items perfectly.
Substitutes
- For Cornstarch – You can use arrowroot powder in a 1:1 substitution for a slightly different (but still delicate) texture. Don’t substitute with more flour—it will make the biscuits tough and dense instead of tender.
- For Powdered Sugar – If you only have granulated sugar, use the same weight and pulse it in a food processor for 1 to 2 minutes until it’s finer. It won’t be quite as fine as powdered sugar, but it works in a pinch.
- For Vanilla Extract – Almond extract adds a delightful nod, though it changes the flavor profile. Use the same amount (1 teaspoon). You could also omit it entirely—the biscuits will still be delicious, just slightly less complex.
- For Lemon Curd – Any fruit preserve works beautifully. Raspberry jam, strawberry jam, or even a good-quality honey work as 1:1 substitutes. You could also make your own curd using limes, oranges, or passion fruit.
- For Butter – Use a high-quality European-style butter if you can find it—the higher fat content (about 86% versus standard 80%) creates even more tender biscuits. Regular unsalted butter works perfectly fine, though.

Lemon Curd Biscuits Recipe
Ingredients
- ⅓ cup lemon curd store-bought or homemade, about 3 ounces
- 70 g powdered sugar not granulated, about ½ cup or 2½ ounces
- 45 g cornstarch (about ⅓ cup or 1.6 ounces
- 225 g all-purpose flour spooned and leveled, about 1¾ cups or 8 ounces
- 2 tablespoon granulated sugar for rolling, optional but recommended for sparkle
- 1 tablespoon fresh lemon zest optional garnish for extra brightness
- 200 g unsalted butter softened to room temperature, about 7 ounces or 1¾ sticks
- 1 teaspoon pure vanilla extract not imitation, for flavor depth
- ¼ teaspoon fine sea salt balances the sweetness
Instructions
Step 1: Prepare Your Workspace
- Preheat your oven to 350°F (180°C, or 160°C on a fan-forced setting). Line a large baking sheet with parchment paper—I use this instead of greasing because it prevents the bottoms from browning too quickly. This simple step takes 2 minutes and saves cleanup.
Step 2: Cream Butter and Sugar Together
- In a medium mixing bowl, combine your softened butter and powdered sugar. Using an electric handheld mixer on medium speed, beat them together for about 2 to 3 minutes until the mixture is pale, fluffy, and noticeably lighter in color than when you started. If you're using a stand mixer with the paddle attachment, this takes about the same time. You'll notice the mixture goes from a compact ball to something almost mousse-like—that's exactly what you want. The air you're incorporating into the butter is what creates that tender crumb.

Step 3: Incorporate Vanilla
- Pour in your vanilla extract and mix on medium speed for about 30 seconds until it's completely incorporated and the mixture looks smooth and even. Don't skip this step—vanilla adds a subtle depth that keeps people from guessing exactly what makes these biscuits so good.
Step 4: Combine Your Dry Ingredients
- In a separate bowl, whisk together the all-purpose flour, cornstarch, and salt. Whisking them together ensures the cornstarch is evenly distributed (this prevents clumpy texture) and the salt is mixed throughout so you don't get salty pockets. This takes just 1 minute, but it matters for consistent results.
Step 5: Gently Bring It Together
- Here's where I want you to slow down and be gentle. Add the dry ingredients to your butter mixture in three separate additions, mixing on low speed (or with a wooden spoon if mixing by hand) for just 15 to 20 seconds after each addition. Stop mixing the moment you don't see streaks of flour anymore. Overworking the dough makes tough biscuits instead of tender ones. After the third addition, the dough should come together in a soft, cohesive ball.
Step 6: Shape and Prepare for Filling
- Using a cookie scoop (about 1 tablespoon size), scoop balls of dough directly onto your prepared baking sheet, spacing them about 2 inches apart. If you like a sparkly finish (and honestly, who doesn't?), gently roll each ball in granulated sugar before placing it on the sheet. This step takes about 5 minutes for the whole batch and adds such a pretty touch.
Step 7: Create the Lemon Curd Wells
- Using your thumb (and only your thumb—it creates the perfect-sized indent), slowly press into the center of each dough ball, pushing down about halfway through to create a well. Be gentle and deliberate here; you're not stabbing, you're gently nestling your thumb into the dough. The goal is a deep pocket that won't disappear during baking but that still leaves borders so the curd doesn't leak out.

Step 8: Fill with Lemon Curd
- Spoon about ½ teaspoon of lemon curd into each well. If your lemon curd is very thick, you can thin it slightly with a few drops of water to make it easier to spoon. Don't overfill—the curd will stay put better with a modest amount, and the flavor will still shine.

Step 9: Bake to Golden Perfection
- Slide your baking sheet into the preheated oven and bake for 10 minutes, or until the edges are just barely starting to turn golden brown. The centers will still look quite pale—this is correct. Overbaking will make them hard instead of tender. At exactly 10 minutes, pull the sheet from the oven. They'll still feel quite soft, which is perfect.

Step 10: Cool and Enjoy
- Leave the biscuits on the baking sheet for 10 minutes to set slightly and firm up. This resting period is crucial—it lets the structure develop so they won't fall apart when you move them. After 10 minutes, transfer them to a wire cooling rack to cool completely, about 15 to 20 minutes. Once cooled, the lemon curd will have set and the biscuits will have that perfect tender-but-not-fragile texture.

Notes
FAQs
Can I Make These Without a Mixer?
Absolutely. You can beat the butter and sugar together using a wooden spoon and some elbow grease, which will take about 5 to 7 minutes but is totally doable. The mixture won’t look quite as fluffy as with a mixer, but you’ll still get good results. Once you add the flour, stirring by hand with a wooden spoon is actually preferable because it’s harder to overmix.
What If My Lemon Curd Leaks Out During Baking?
This usually means you overfilled the indent or the indent wasn’t pressed deeply enough. For your next batch, press slightly deeper into each ball (about three-quarters of the way through) and use only about ½ teaspoon of curd. If curd does leak, it’s not a disaster—the biscuit will still taste delicious, just look slightly less neat. You can also line your baking sheet with parchment, which means any escaped curd doesn’t burn onto the pan.
Can I Make These into Different Shapes?
The thumbprint method is traditional and creates that beautiful jewel-like presentation, but you could also make them as sandwich biscuits. Bake half without filling, cool them, then sandwich two biscuits together with a small dollop of lemon curd between them. Or press the dough into a small tart mold for individual lemon curd tartlets, though you’d need to watch baking time closely (they might need just 8 to 9 minutes depending on depth).
How Do I Make Homemade Lemon Curd?
Combine 3 large egg yolks, ½ cup sugar, ½ cup fresh lemon juice, and the zest of 2 lemons in a heavy-bottomed saucepan. Add 4 tablespoons of unsalted butter cut into cubes. Cook over medium heat, stirring constantly, for about 8 to 10 minutes until it thickens enough to coat the back of a spoon. Strain through a fine-mesh sieve and cool completely before using. It keeps in the fridge for 3 weeks.
Why Did My Biscuits Come Out Cakey Instead of Tender?
This usually means either the flour was packed too tightly when measured (always spoon and level), or the dough was overmixed after adding flour. The cornstarch is essential for that tender texture—without it, the gluten in the flour is more likely to develop, creating a cakier crumb. Make sure you’re using the exact amount of cornstarch and stopping mixing the moment you don’t see flour streaks.
More Recipes You’ll Love
- Key Lime Cookie Bars – These bars have that same bright citrus joy but with a chewy texture and require just one pan.
- Soft Scrambled Eggs Recipe – If you’re making homemade lemon curd, use your extra egg whites in this silky breakfast classic.
- Kroll’s Corner Cheeseburger Sliders – Perfect for a casual gathering alongside these sweet biscuits for contrast.
- this cozy soup – A cozy main course that pairs beautifully with these biscuits served on the side instead of bread.
I absolutely hope you’ll make these lemon curd biscuits soon—whether it’s for a proper afternoon tea, to surprise someone you love, or simply because you deserve something bright and buttery in your life. These little cookies have been part of my family’s celebrations for years, and now they can be part of yours. Please take a moment to leave a comment and rating when you make them. Your feedback means everything to me and helps other home cooks feel confident trying new recipes. Good food is a good mood—and these biscuits absolutely deliver both.
With joy and butter-dusted fingers,
Lori
- Lemon Curd Cookies Recipe
- Lemon Pepper Pretzels Recipe
- Chicken And Biscuits Cheesecake Factory Recipe
- Lemon Yogurt Chicken Recipe

My name is Lori Walker. I’m a registered dietitian, food blogger and food enthusiast. I share easy healthy, delicious recipes on my blog and review necessary kitchen items. The recipes I share take less… Read more