This post contains affiliate links. As an Amazon Associate I earn from qualifying purchases.
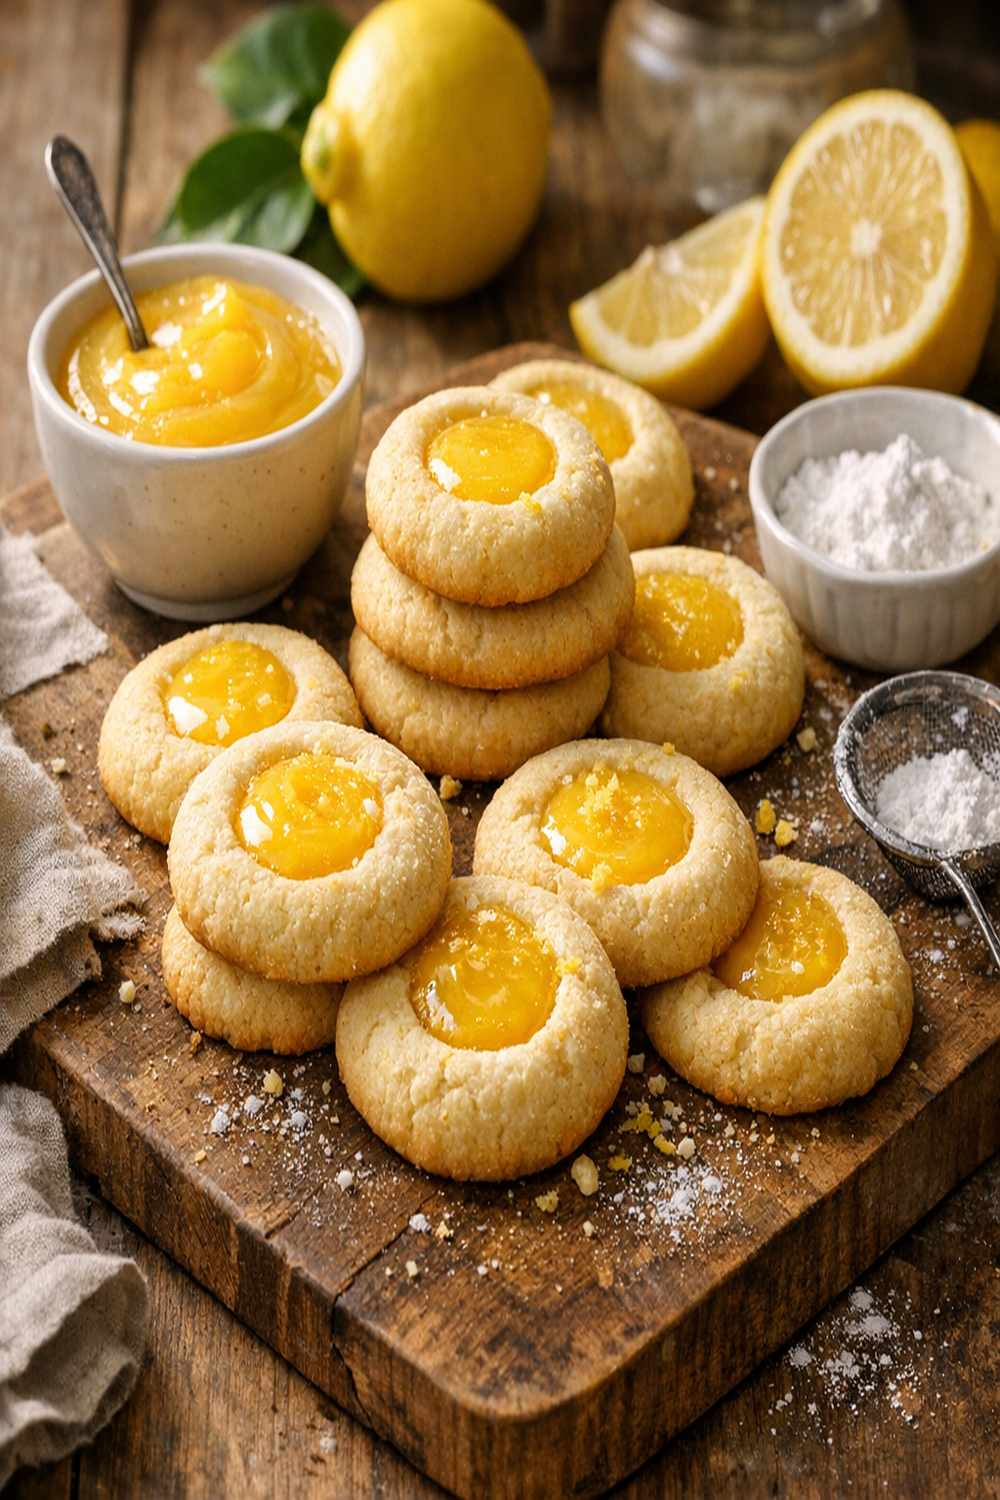
These bright, buttery lemon curd cookies are the perfect way to bring springtime joy to your kitchen year-round. Tender shortbread-style cookies filled with tangy-sweet lemon curd create a flavor combination that pairs beautifully with afternoon tea, coffee, or as a delightful finish after a hearty dinner. If you love citrus desserts, you’ll also adore our these homemade cookies, which offer a similar bright, tropical twist on classic cookies.
How These Golden Cookies Changed My Holiday Traditions
I’ll never forget the moment my grandmother pressed her thumb into a warm cookie dough and showed me exactly how deep to make the indent. I was eight years old, standing on a step stool in her kitchen, and she was teaching me the “Lori way”—which meant doing things carefully and with intention. She filled each little thumbprint with homemade lemon curd from her pantry, and when those cookies came out of the oven, the whole house smelled like pure sunshine.
Fast forward to 2019, when I started recording our family recipes. That lemon curd cookie recipe was one of the first ones I documented. Since then, I’ve tested it dozens of times on standard home equipment, refined the technique, and shared it with thousands of home cooks. What I love most? This recipe works beautifully whether you’re baking at sea level or high altitude, and the cookies stay fresh for days—which means you can make them ahead for busy weeks.
What Are Lemon Curd Cookies?
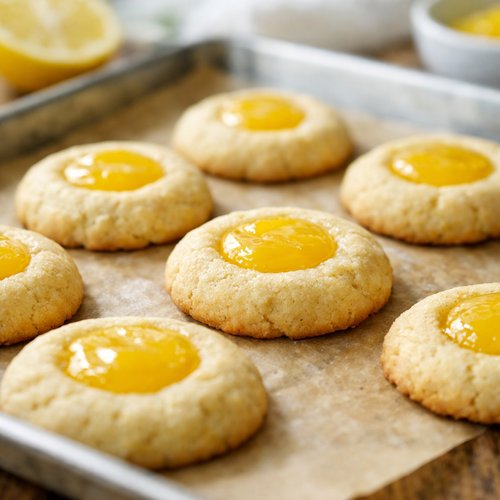
Lemon curd cookies are a beloved British-inspired treat that combines a tender, buttery shortbread-style base with a tangy-sweet lemon curd filling. The contrast between the rich, crumbly cookie dough and the bright, creamy filling creates a flavor profile that’s both comforting and exciting.
Traditionally, thumbprint cookies (the category these fall into) were made by pressing an indentation into cookie dough before baking, then filling the indent with jam, chocolate, or curd. What makes this version special is the balance of sweetness—the lemon zest in the dough itself provides a subtle citrus note, while the lemon curd filling delivers bold, concentrated flavor without overwhelming your palate.
The beauty of this recipe lies in its simplicity. You’re working with pantry staples, and the technique requires nothing more than a mixing bowl, a wooden spoon, and your own two hands. As a registered dietitian, I appreciate that you can control exactly what goes into each batch—no mysterious additives or preservatives.
Why You’ll Love This Lemon Curd Cookie Recipe
- Make-Ahead Friendly – Dough chills twice, which means you can prepare everything the night before baking. I often freeze the filled, unbaked cookies and bake them straight from the freezer, adding just 2–3 minutes to the baking time.
- Uses Simple, Quality Ingredients – No complicated techniques or specialty equipment needed. This recipe respects your time and your kitchen.
- Naturally Bright and Joyful – The lemon flavor comes from real zest and real curd, not artificial citrus flavoring. Every bite tastes like springtime.
- Perfect Portion Control – Each cookie is a single, satisfying serving. The recipe yields about 24 cookies, making it ideal for small gatherings or keeping on hand for the week.
- Impressive Yet Approachable – These cookies look fancy enough to serve at bridal showers or book clubs, but they’re genuinely easy enough for a first-time baker to nail.
- Adaptable to Dietary Needs – Because the base recipe is straightforward, you can experiment with ingredient swaps (which I’ll cover in the substitutes section).
The Ingredients
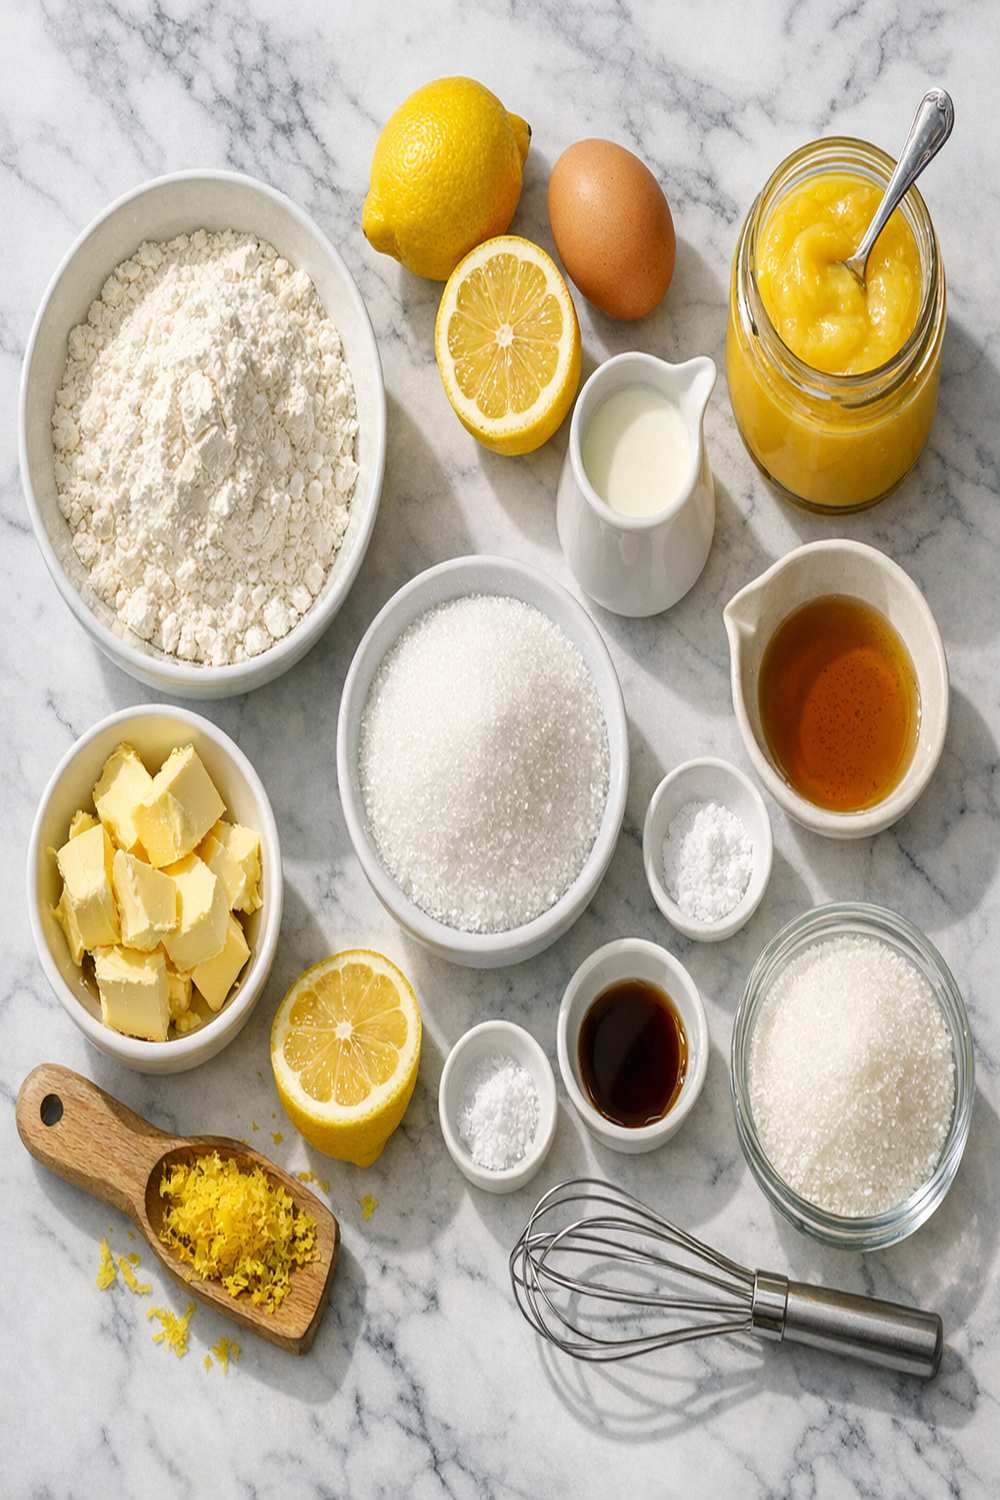
I’ve chosen each ingredient thoughtfully to deliver maximum flavor with minimum fuss. The beauty of this recipe is that every component serves a purpose. Below, I’ve arranged them in the order you’ll use them, which makes the baking process feel intuitive and organized.
This recipe makes approximately 24 cookies, depending on your scooping size. Each cookie has a generous filling and enough surface area to truly taste the lemon flavor.
- 1 teaspoon lemon zest (freshly grated from organic lemons for brightest flavor)
- ½ cup lemon curd (store-bought or homemade, chilled before using)
- 1 cup salted butter (softened to room temperature, about 65–70°F)
- ½ teaspoon pure vanilla extract (not imitation, which tastes chemical)
- 1 tablespoon fresh lemon juice (added to the dough for subtle tartness)
- 2 ¼ cups all-purpose flour (spooned and leveled, never packed into the measuring cup)
- 2 tablespoons turbinado sugar (for sprinkling on top before baking)
- 1 cup powdered sugar (sifted to prevent lumps in the dough)
How to Make Lemon Curd Cookies?
I’m going to walk you through this step-by-step. The process feels longer when you read it, but in real time, you’re looking at about 15 minutes of hands-on work spread across two days (with chilling time in between). The payoff is cookies that look and taste like you spent hours in the kitchen.
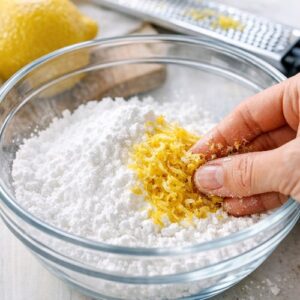
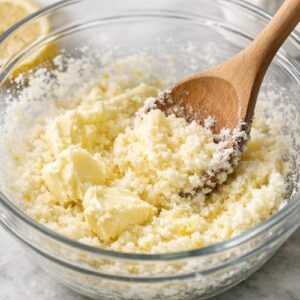
Step 1: Release the Lemon Oils
Pour your powdered sugar into a medium mixing bowl. Add the freshly grated lemon zest—and here’s the key technique my grandmother taught me: using the back of a wooden spoon, gently press and twist the zest against the side of the bowl for about 30 seconds. You’ll see the sugar begin to dampen slightly as the lemon oils release.
This step is non-negotiable if you want true lemon flavor throughout the entire cookie. If you skip it and simply mix the zest in later, you’ll end up with tiny flecks of zest that don’t distribute evenly. By pressing the oils out now, you’re infusing the sugar itself, which means every single bite tastes lemony.

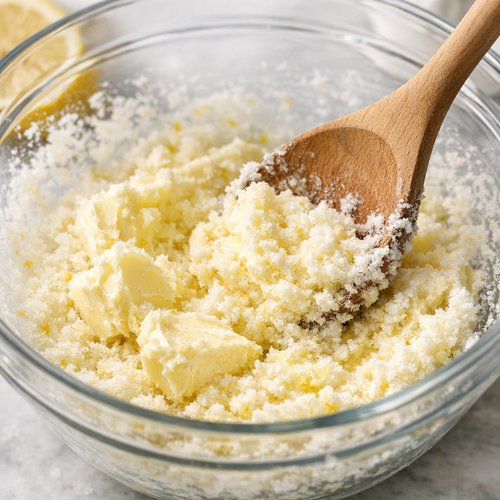
Step 2: Cream Butter and Sugar
Add your softened butter to the bowl with the zest-infused sugar. Using your wooden spoon (or an electric mixer on medium speed), beat the two together for 3–5 minutes, until the mixture is pale, fluffy, and nearly doubled in volume. This is called the “creaming” method, and it’s essential for creating tender, delicate cookies.
How do you know when it’s ready? The mixture should look like fluffy clouds and feel light when you touch it. If it still looks dense and grainy, keep mixing. The air bubbles you’re incorporating will create structure in the final cookie.
Pour in the vanilla extract and fresh lemon juice. Mix for another 30 seconds until fully combined.
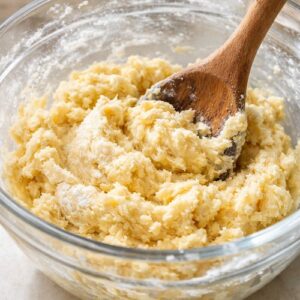
Step 3: Bring the Dough Together
Gently add your flour, about ½ cup at a time, mixing on low speed (or with your wooden spoon) until you don’t see any white streaks of flour. Stop mixing the moment the dough comes together—do not overmix. Overmixing develops gluten, which makes cookies tough instead of tender.
Your dough should feel soft, smooth, and slightly sticky to the touch. If it feels too wet, refrigerate it for 15 minutes before proceeding to the next step.

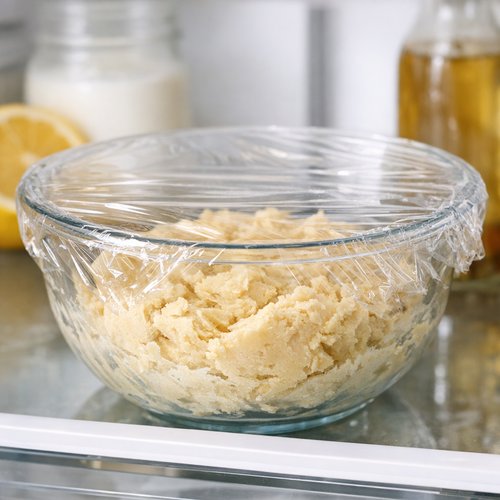
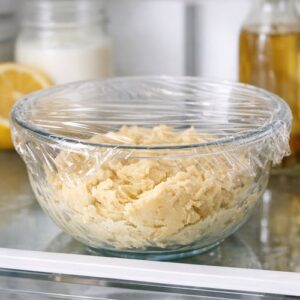
Step 4: First Chill (This Matters!)
Cover your bowl with plastic wrap and place it in the refrigerator for at least 1 hour, though overnight is even better. This chill time allows the gluten to relax and the flavors to meld. I often prepare this step in the evening, then scoop and fill the cookies the next morning.
If your dough has been chilling overnight and feels too firm to scoop, let it sit on the counter for 5–10 minutes to soften slightly.
Step 5: Scoop and Shape
Line a large baking sheet with parchment paper or a silicone liner. Using a cookie scoop or two teaspoons, portion out dough into 1-inch balls and place them 2 inches apart on the prepared sheet. The spacing matters because these cookies will spread slightly during baking.
If you have extra dough, place it back in the refrigerator and repeat with a fresh baking sheet.
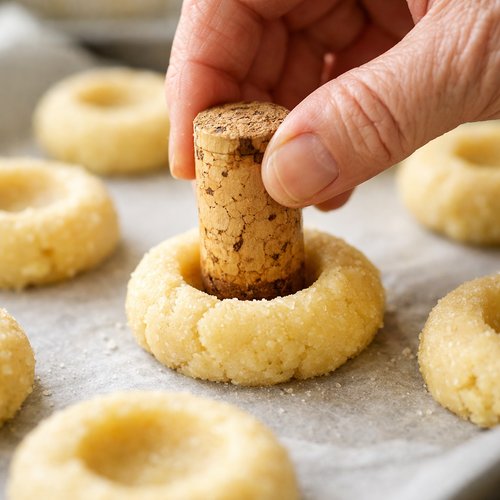
Step 6: Create the Indents
Using your thumb, the handle end of a wooden spoon, or even a wine cork (which is my grandmother’s preferred tool), gently press a shallow indent into the center of each dough ball. The indent should be about ¼-inch deep—deep enough to hold the filling without breaking through to the bottom of the cookie.
This is where patience matters. Press slowly and deliberately. Rush this step, and you’ll either press too deep and create a hole, or not deep enough and the filling will fall off during baking.
Step 7: Fill With Lemon Curd
Using a small spoon or a pastry bag fitted with a round tip, fill each indent with about ½ teaspoon of chilled lemon curd. Don’t overfill—the curd will warm and spread slightly during baking, and you don’t want it spilling over the edges.
If desired, sprinkle each cookie with a tiny pinch of turbinado sugar. This adds a subtle crunch and catches the light beautifully when the cookies cool.
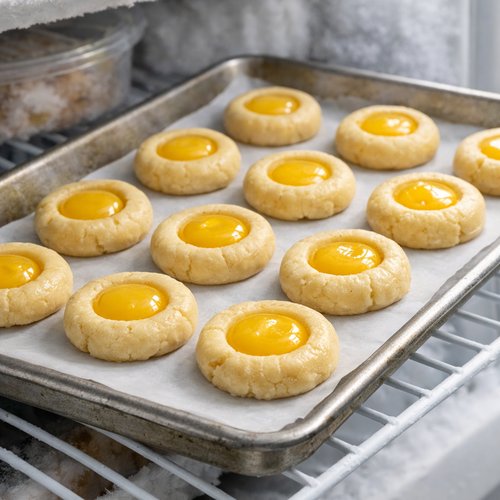
Step 8: Second Chill (Essential for Success)
Place the filled, unbaked cookies in the freezer for at least 15 minutes while you preheat your oven to 350°F. This second chill ensures the cookies won’t spread too much during baking and helps the filling set slightly, preventing it from oozing out.
This is the perfect time to read a recipe, check your email, or take a breath. You’re almost done!
Step 9: Bake Until Golden
Transfer your chilled baking sheet directly from the freezer to the preheated 350°F oven. Bake for 13 minutes, or until the bottoms of the cookies are lightly golden brown and the edges are just barely set. The centers should still feel slightly soft to the touch when you remove them from the oven—they’ll continue to cook slightly as they cool.
Don’t overbake! Lemon curd cookies are best when they’re tender and a bit chewy in the middle. Overbaked cookies taste dry and stale.
Step 10: Cool With Intention
Remove the baking sheet from the oven and let the cookies cool on the pan for 10 minutes. During this time, the cookies firm up just enough to handle without falling apart. After 10 minutes, transfer each cookie carefully to a wire rack and allow them to cool completely—about 30 minutes total.
The cooling time is when the cookie structure sets and becomes shelf-stable. Resist the urge to eat one right away (I know, I know—it’s hard!), but if you do, be prepared for the lemon curd to be very hot.
Expert’s Nutritional Tip
As a registered dietitian, I’m always thinking about how real foods work in the body. Lemon zest is pure plant magic—it contains zero calories and zero sugar, yet delivers concentrated flavor and beneficial compounds called flavonoids, which have antioxidant properties according to USDA nutritional databases.
When you zest a lemon, you’re capturing the aromatic oils from the peel, which is where most of the lemon’s nutritional power lives. This means you can add bold citrus flavor to treats like these cookies without adding calories, sugar, or sodium. It’s one of my favorite dietitian “hacks” for making real, whole-food recipes taste restaurant-quality without relying on artificial flavors or excessive sweeteners.
Make-Ahead Guide
One of my favorite things about this recipe is how flexible it is for busy weeks. Here’s exactly how I manage my time:
- Day 1 Evening: Mix dough, cover, and refrigerate overnight. This actually improves flavor as the lemon zest infuses the sugar and butter.
- Day 2 Morning: Scoop dough, create indents, fill with lemon curd, and freeze the unbaked cookies on a flat tray. Once frozen solid (about 2 hours), transfer them to a freezer bag or airtight container.
- Baking Day (up to 2 weeks later): Preheat oven, place frozen cookies directly on a lined baking sheet, and bake for 15 minutes (adding 2 minutes since they’re frozen). No thawing needed!
- Storage: Baked cookies keep fresh in an airtight container at room temperature for 5 days, or refrigerated for 7 days. You can also freeze baked cookies for up to 3 months—just thaw them on the counter for 20 minutes before serving.
Tips and Tricks
- Use Room Temperature Butter – Cold butter won’t cream properly, and your cookies will be dense. Leave butter on the counter for about 30 minutes, or cut it into small cubes and it’ll soften faster.
- Sift Your Powdered Sugar – This prevents lumps and ensures even mixing. If you don’t have a sifter, place sugar in a fine-mesh strainer and tap it gently over your bowl.
- Chill Your Lemon Curd – Cold curd holds its shape better in the indent and won’t leak out during baking. If your curd is warm or room temperature, pop it in the freezer for 10 minutes before filling.
- Don’t Skip the Second Chill – I know you’re eager to bake, but this 15-minute freeze is the difference between perfectly shaped cookies and spread-out discs. It’s worth the wait.
- Invest in Parchment Paper – It prevents sticking and creates an even, golden bottom on your cookies. Silicone liners work beautifully too.
- Use Fresh Lemon Zest – Bottled zest has lost most of its essential oils. A microplane grater makes zesting quick and easy, and you’ll notice the flavor difference immediately.
Common Mistakes to Avoid
- Overmixing the Dough – This is the #1 mistake I see. Mix until the flour just disappears, then stop. Overmixing develops gluten and creates tough, chewy cookies instead of tender ones.
- Using Cold Butter – Cold butter won’t incorporate air, which means your cookies won’t be fluffy. Always cream softened butter and sugar until pale and voluminous (about 3–5 minutes).
- Filling Too Generously – More curd isn’t better! Too much filling will overflow during baking, creating a mess on your baking sheet. Stick to ½ teaspoon per cookie.
- Skipping the Second Chill – This chill prevents excessive spreading and helps the cookies bake evenly. Impatience here creates flat, thin cookies instead of thick, tender ones.
Seasonal Variations
While this recipe shines year-round, here are ways to adapt it by season:
- Spring/Summer: Stick with lemon curd, but add ½ teaspoon of fresh lavender (culinary grade) to the dough for an elegant garden-party version.
- Fall/Winter: Swap half the lemon curd with homemade or store-bought cranberry sauce for a tart, festive twist. The ruby-red filling looks beautiful on holiday platters.
- Year-Round Alternative: Use passion fruit curd, blood orange curd, or even lime curd in the filling for different citrus notes.
- Holiday Version: Add ¼ teaspoon of almond extract to the dough and use a white chocolate ganache mixed with lemon zest as the filling.
Can I Store Lemon Curd Cookies?
Yes! These cookies are wonderfully stable and actually taste better the next day as the flavors settle. Here’s how I store mine:
Room Temperature: Place cooled cookies in an airtight container with parchment paper between layers. They’ll stay fresh and tender for 5 days. This works beautifully for daily snacking or lunch boxes.
Refrigerator: Store in an airtight container for 7 days. The cool temperature keeps the lemon curd stable, and the cookies actually taste a bit more lemony when chilled.
Freezer: Freeze baked cookies in a single layer on a flat tray, then transfer to a freezer bag for up to 3 months. Thaw at room temperature for about 20 minutes. The lemon curd stays creamy and delicious, and there’s zero quality loss.
Unbaked Dough: Scoop dough into balls, fill with curd, and freeze on a tray. Transfer to a freezer bag for up to 2 weeks. Bake directly from frozen, adding 2 minutes to the baking time.
Nutrition Information
Based on USDA nutritional databases, here’s what you can expect per cookie (this recipe yields 24 cookies). Each serving includes the cookie base plus lemon curd filling:
Calories: approximately 145 per cookie | Protein: 1.5g | Carbohydrates: 18g | Dietary Fiber: 0.2g | Sugars: 11g | Fat: 7g | Saturated Fat: 4.5g | Sodium: 95mg
From a nutritional standpoint, these are indulgent treats—think of them as an occasional pleasure rather than an everyday food. The lemon zest contributes antioxidants without adding calories, and the small portion size (one cookie) makes them feel satisfying without encouraging overeating. Pair them with herbal tea or coffee to enhance the citrus flavor and slow down your eating pace naturally.
What Can I Serve With Lemon Curd Cookies?
These cookies shine in so many settings. Here are my favorite pairing ideas:
- Afternoon Tea: Serve with hot Earl Grey or chamomile tea. The citrus notes complement floral and herbal teas beautifully.
- Coffee Pairings: The brightness of lemon cuts through rich espresso and cappuccino perfectly. These are ideal for morning coffee or an afternoon pick-me-up.
- Dessert Buffets: Include them alongside other treats like brownies and fudge. The bright flavor provides necessary contrast on a sweets table.
- Brunch Spreads: Serve alongside Soft Scrambled Eggs and fresh fruit for an elegant morning gathering. The cookies satisfy a sweet craving without being too heavy.
- Gift Giving: Package them in pretty boxes or tins tied with ribbon. They’re thoughtful, homemade gifts that show real effort and care.
Substitutes
- Curd Flavor Swap: Use passion fruit curd, blood orange curd, lime curd, or even raspberry curd instead of lemon. Each creates a completely different flavor profile while maintaining the same baking technique.
- Jam Instead of Curd: If you don’t have curd on hand, seedless jam works beautifully. Lemon jam, marmalade, or even apricot jam creates a different but equally delicious cookie.
- Butter Substitute: Use unsalted butter if you prefer to control sodium, though you may want to add ¼ teaspoon of salt to the dough. For dairy-free baking, try a high-quality plant-based butter (look for ones with a lower water content).
- Citrus Zest Variations: Replace lemon zest with orange zest, lime zest, or even grapefruit zest for different bright flavors. Use the same amount and pressing technique.
- Sugar Type: For less refined sweetness, you can use coconut sugar in place of powdered sugar, though this slightly changes the texture and color. Mixing half powdered sugar and half organic cane sugar also works well.

Lemon Curd Cookies Recipe
Ingredients
- 1 teaspoon lemon zest freshly grated from organic lemons for brightest flavor
- ½ cup lemon curd store-bought or homemade, chilled before using
- 1 cup salted butter (softened to room temperature, about 65
- ½ teaspoon pure vanilla extract not imitation, which tastes chemical
- 1 tablespoon fresh lemon juice added to the dough for subtle tartness
- 2 ¼ cup all-purpose flour spooned and leveled, never packed into the measuring cup
- 2 tablespoon turbinado sugar for sprinkling on top before baking
- 1 cup powdered sugar sifted to prevent lumps in the dough
Instructions
Step 1: Release the Lemon Oils
- Pour your powdered sugar into a medium mixing bowl. Add the freshly grated lemon zest—and here's the key technique my grandmother taught me: using the back of a wooden spoon, gently press and twist the zest against the side of the bowl for about 30 seconds. You'll see the sugar begin to dampen slightly as the lemon oils release. This step is non-negotiable if you want true lemon flavor throughout the entire cookie. If you skip it and simply mix the zest in later, you'll end up with tiny flecks of zest that don't distribute evenly. By pressing the oils out now, you're infusing the sugar itself, which means every single bite tastes lemony.
Step 2: Cream Butter and Sugar
- Add your softened butter to the bowl with the zest-infused sugar. Using your wooden spoon (or an electric mixer on medium speed), beat the two together for 3–5 minutes, until the mixture is pale, fluffy, and nearly doubled in volume. This is called the "creaming" method, and it's essential for creating tender, delicate cookies. How do you know when it's ready? The mixture should look like fluffy clouds and feel light when you touch it. If it still looks dense and grainy, keep mixing. The air bubbles you're incorporating will create structure in the final cookie. Pour in the vanilla extract and fresh lemon juice. Mix for another 30 seconds until fully combined.
Step 3: Bring the Dough Together
- Gently add your flour, about ½ cup at a time, mixing on low speed (or with your wooden spoon) until you don't see any white streaks of flour. Stop mixing the moment the dough comes together—do not overmix. Overmixing develops gluten, which makes cookies tough instead of tender. Your dough should feel soft, smooth, and slightly sticky to the touch. If it feels too wet, refrigerate it for 15 minutes before proceeding to the next step.
Step 4: First Chill (This Matters!)
- Cover your bowl with plastic wrap and place it in the refrigerator for at least 1 hour, though overnight is even better. This chill time allows the gluten to relax and the flavors to meld. I often prepare this step in the evening, then scoop and fill the cookies the next morning. If your dough has been chilling overnight and feels too firm to scoop, let it sit on the counter for 5–10 minutes to soften slightly.
Step 5: Scoop and Shape
- Line a large baking sheet with parchment paper or a silicone liner. Using a cookie scoop or two teaspoons, portion out dough into 1-inch balls and place them 2 inches apart on the prepared sheet. The spacing matters because these cookies will spread slightly during baking. If you have extra dough, place it back in the refrigerator and repeat with a fresh baking sheet.
Step 6: Create the Indents
- Using your thumb, the handle end of a wooden spoon, or even a wine cork (which is my grandmother's preferred tool), gently press a shallow indent into the center of each dough ball. The indent should be about ¼-inch deep—deep enough to hold the filling without breaking through to the bottom of the cookie. This is where patience matters. Press slowly and deliberately. Rush this step, and you'll either press too deep and create a hole, or not deep enough and the filling will fall off during baking.
Step 7: Fill With Lemon Curd
- Using a small spoon or a pastry bag fitted with a round tip, fill each indent with about ½ teaspoon of chilled lemon curd. Don't overfill—the curd will warm and spread slightly during baking, and you don't want it spilling over the edges. If desired, sprinkle each cookie with a tiny pinch of turbinado sugar. This adds a subtle crunch and catches the light beautifully when the cookies cool.

Step 8: Second Chill (Essential for Success)
- Place the filled, unbaked cookies in the freezer for at least 15 minutes while you preheat your oven to 350°F. This second chill ensures the cookies won't spread too much during baking and helps the filling set slightly, preventing it from oozing out. This is the perfect time to read a recipe, check your email, or take a breath. You're almost done!
Step 9: Bake Until Golden
- Transfer your chilled baking sheet directly from the freezer to the preheated 350°F oven. Bake for 13 minutes, or until the bottoms of the cookies are lightly golden brown and the edges are just barely set. The centers should still feel slightly soft to the touch when you remove them from the oven—they'll continue to cook slightly as they cool. Don't overbake! Lemon curd cookies are best when they're tender and a bit chewy in the middle. Overbaked cookies taste dry and stale.

Step 10: Cool With Intention
- Remove the baking sheet from the oven and let the cookies cool on the pan for 10 minutes. During this time, the cookies firm up just enough to handle without falling apart. After 10 minutes, transfer each cookie carefully to a wire rack and allow them to cool completely—about 30 minutes total. The cooling time is when the cookie structure sets and becomes shelf-stable. Resist the urge to eat one right away (I know, I know—it's hard!), but if you do, be prepared for the lemon curd to be very hot.

Notes
FAQs
Can I make these cookies without chilling the dough?
I wouldn’t recommend it. The two chill periods serve important purposes: the first allows gluten to relax and flavors to meld, while the second prevents excessive spreading during baking. If you skip these steps, you’ll likely end up with flat, thin cookies instead of thick, tender ones. However, if you’re short on time, you can reduce the first chill to 30 minutes and the second chill to 10 minutes and still achieve good results.
What if my lemon curd is too thick or too thin?
Ideal lemon curd has the consistency of jam—thick enough to hold its shape but soft enough to fill the indent without cracking the cookie. If store-bought curd is too thick, whisk in a teaspoon of lemon juice to thin it slightly. If it’s too thin (more like a sauce), refrigerate it for 30 minutes before filling. Homemade curd can always be thickened by cooking it slightly longer before cooling.
Can I use margarine instead of butter?
I strongly recommend using real butter. Margarine contains water and additives that affect the flavor, texture, and browning of cookies. Real butter creates that rich, buttery flavor that makes these cookies special. If you’re dairy-free, use a high-quality plant-based butter (the kind with minimal water content), though the flavor won’t be quite the same.
Why did my cookies spread too much during baking?
This usually happens because the dough wasn’t cold enough when it went into the oven, or the room was very warm when you were working. Ensure your second chill is a full 15 minutes, and consider placing your baking sheet in the freezer while the oven preheats. Also, check that your oven temperature is accurate with an oven thermometer—sometimes ovens run hot, causing faster spreading.
Can I double this recipe?
Absolutely! Simply double all the ingredients. The process remains exactly the same—cream butter and sugar for 3–5 minutes, add flour gradually, chill, scoop, fill, chill again, and bake. You’ll have a nice-sized batch to keep on hand. Because cookies freeze beautifully, making a double batch is a smart meal-prep strategy.
More Recipes You’ll Love
- Key Lime Cookie Bars – A no-mess, no-thumbprint-required citrus cookie that’s equally bright and delicious.
- Jalapeño Corn Chowder Recipe – For when you want something savory and warming with similar seasonal appeal.
- this cozy soup – A comforting meal that pairs wonderfully with these cookies for dessert afterward.
Making these lemon curd cookies brings me back to that kitchen with my grandmother every single time. I love that I get to share her wisdom with you now—the patience she taught me, the intention she brought to every step, and the joy she found in feeding people she loved.
These cookies are simple, but they’re not plain. They require a little time and a little attention, but the payoff is worth every minute. Whether you’re baking for yourself, sharing with family, or preparing gifts for friends, I promise that good food creates good moods. That’s not just a nice saying—that’s nutrition science meeting real life in the most delicious way possible.
Happy baking, and I can’t wait to hear how yours turn out!
Warmly,
Lori Walker, MS, RD
- Lemon Curd Biscuits Recipe
- Funfetti Cookies Recipe
- Fluffy Sugar Cookies Recipe
- Jar Cookies For Christmas

My name is Lori Walker. I’m a registered dietitian, food blogger and food enthusiast. I share easy healthy, delicious recipes on my blog and review necessary kitchen items. The recipes I share take less… Read more