This post contains affiliate links. As an Amazon Associate I earn from qualifying purchases.
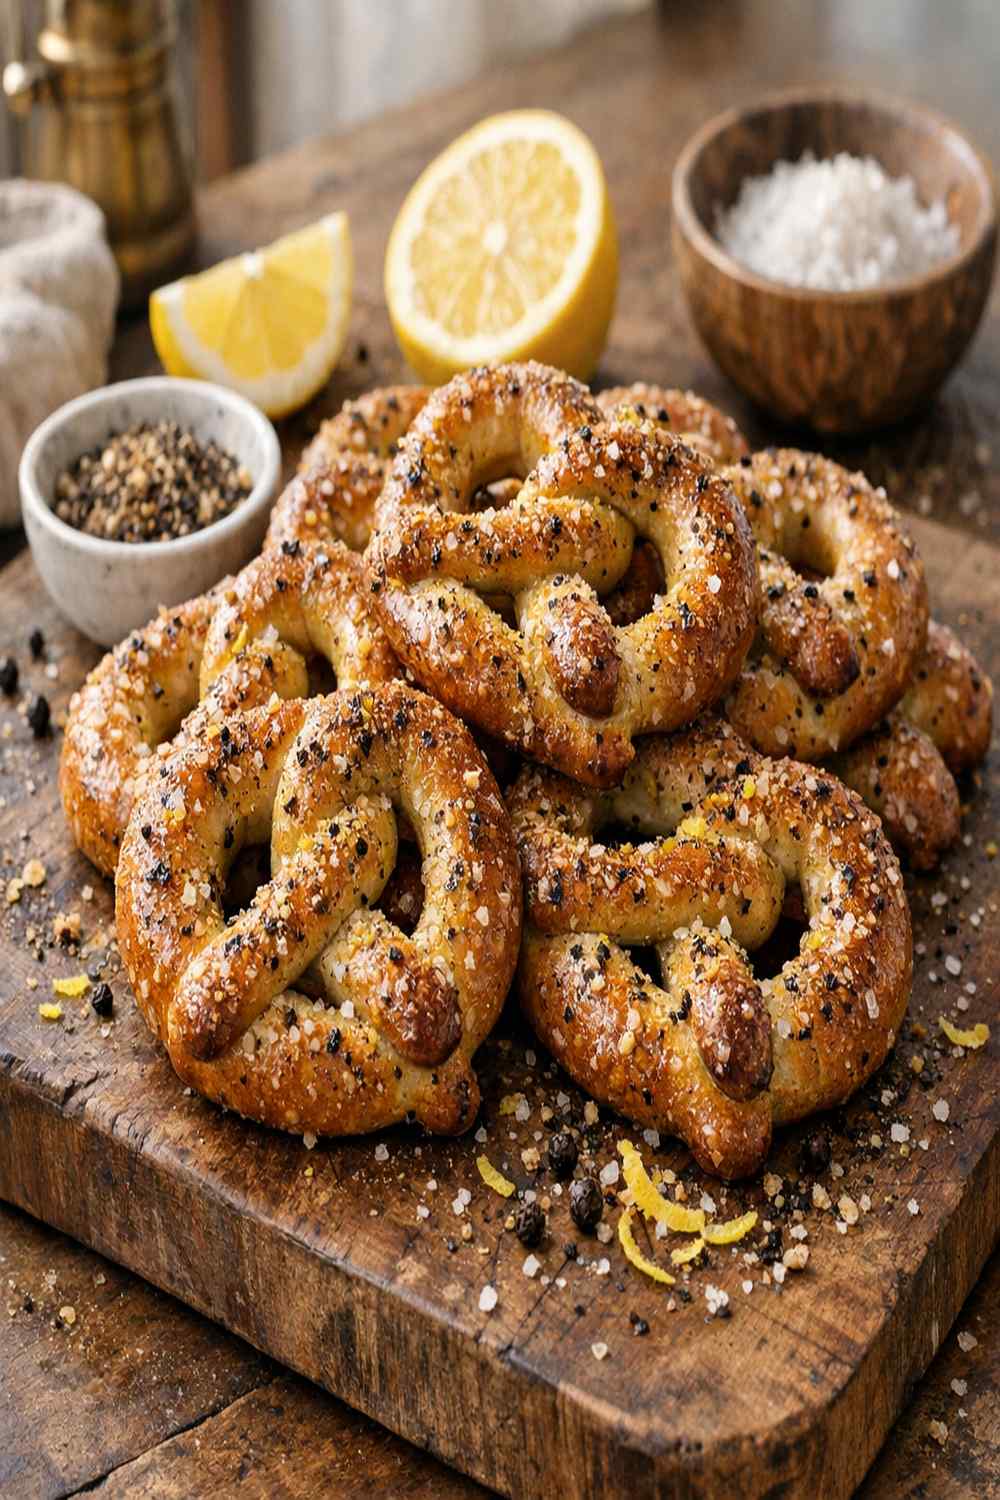
When you need a snack that’s easy, impressive, and disappears within minutes, lemon pepper pretzels are your answer. These tangy, savory bites pair beautifully with everything from game night spreads to afternoon tea. They’re also the perfect complement to heartier dishes—I often make a batch when I’m serving my weeknight pasta, since the bright citrus cuts through the richness perfectly.
The Day My Family Discovered Golden Snacking Magic
I’ll never forget the afternoon in 2021 when my sister called me in a kitchen panic. She was hosting a book club for twelve people and had exactly one hour to prepare snacks. I asked what she had on hand, and she listed off some basics: a bag of hard pretzels, oil, and a few spice jars gathering dust in her cabinet. That’s when I remembered my grandmother’s trick—a simple coating method that transforms ordinary pretzels into something extraordinary.
I walked her through it step-by-step over the phone. Forty minutes later, she texted me a photo of golden, glistening pretzels cooling on her kitchen counter. Her book club devoured them. But here’s what really moved me: she called back the next week asking for the recipe because one of her friends specifically requested she make them again for the next meeting.
That’s when I realized this wasn’t just a recipe—it was a moment maker. Good food truly is a good mood.
What Are Lemon Pepper Pretzels?
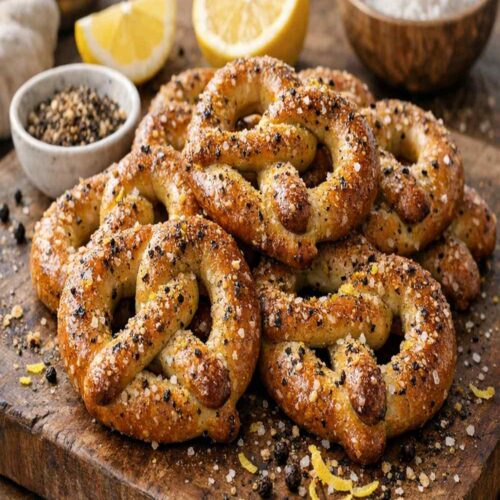
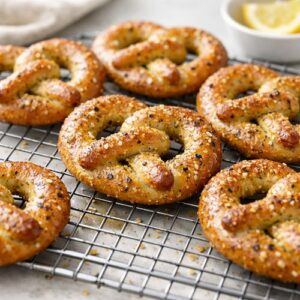
Lemon pepper pretzels are a homemade snack created by coating hard pretzels with seasoned oil and then baking them slowly until they’re perfectly crunchy. The magic comes from the combination of bright lemon, cracked pepper, garlic, and fresh dill—a flavor profile that tastes far more complex than the minimal effort required.
This snack has roots in the savory snack tradition of coating shelf-stable crackers and breads with seasonings and fat. What makes this version special is the low-and-slow baking method. Rather than a quick toast, I bake these at a gentle temperature with frequent stirring. This approach prevents burning while allowing the flavors to infuse deeply into every twisted bite.
Unlike store-bought varieties loaded with preservatives, these are made with real ingredients you can pronounce and measure. They’re naturally gluten-free if you source certified pretzels, and they’re free from artificial flavoring or coloring.
Why You’ll Love This Lemon Pepper Pretzels Recipe
- Five minutes of active prep work – This is a true set-it-and-forget-it recipe. Once you toss the pretzels with the seasoning mixture, you’re mostly hands-off while the oven does the work.
- Uses pantry staples you likely already have – No special shopping trips required. Most home cooks have oil, garlic powder, and dried dill on hand, plus a bag of pretzels takes permanent residence in many kitchens.
- Impressively sophisticated flavor profile – Guests always ask if you made these professionally. The combination of lemon, pepper, and fresh dill creates a flavor complexity that belies the simplicity of preparation.
- Perfect for meal prep and entertaining – Make a double batch on Sunday and enjoy snacks all week. They’re also ideal for potlucks, parties, and gift-giving in pretty jars.
- Customizable to your taste preferences – Love heat? Add cayenne. Prefer Italian flavors? Swap the dill for basil and oregano. This recipe is your canvas.
- Shelf-stable for up to three weeks – Unlike fresh baked goods, these actually improve slightly as flavors meld. Store them in an airtight container and enjoy them at your leisure.
The Ingredients
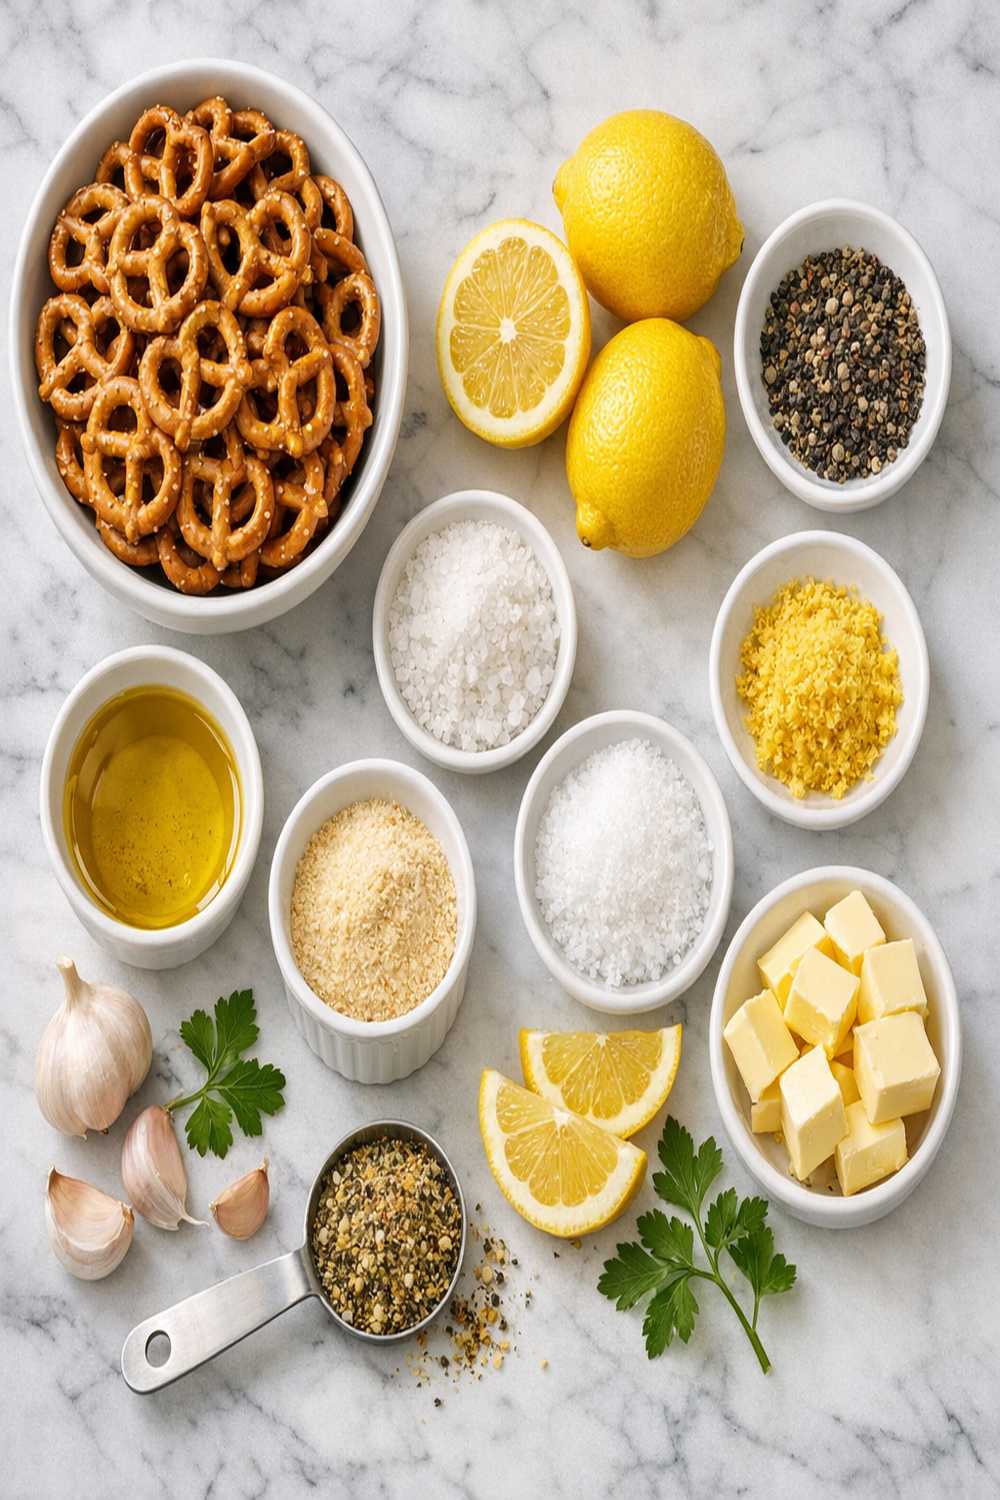
I’ve kept this ingredient list intentionally short and accessible. You’ll notice I’m using a combination of oils and seasonings that work together to create depth without overpowering the pretzel’s natural salty crunch. The lemon pepper seasoning is the star here—it provides the backbone of flavor, while garlic and dill add supportive notes that make each bite interesting.
This recipe yields approximately 4 to 5 cups of finished pretzels, which translates to roughly 8 to 10 servings as a snack.
- ½ teaspoon fine sea salt (optional—taste before adding, as pretzels are naturally salty)
- ¼ teaspoon red pepper flakes (optional—adds gentle heat if you enjoy spiced snacks)
- 2 teaspoons dried dill weed (provides herbal freshness that balances citrus)
- ¾ cup vegetable or light olive oil (neutral oil works best to let the seasonings shine)
- 2 teaspoons garlic powder (not garlic salt, which would add extra sodium)
- 12 to 16 ounces hard pretzels (any shape works—twists, rods, or knots are all excellent choices)
- 1½ tablespoons lemon pepper seasoning (the primary flavor driver—use quality seasoning for better results)
How to Make Lemon Pepper Pretzels?
This recipe requires minimal equipment and straightforward technique. I recommend using a large zipped-top bag for tossing (cleanup is practically nonexistent), but a large mixing bowl works equally well. The key is ensuring every single pretzel piece gets coated with the seasoned oil mixture.
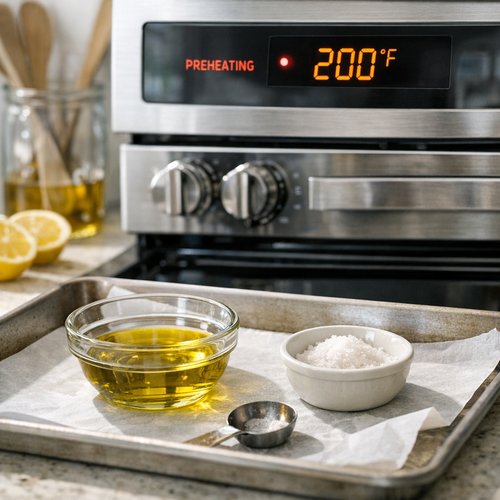
Step 1: Prepare Your Oven and Baking Station
Begin by setting your oven to 200°F (93°C). This gentle temperature is intentional—it prevents the oil from smoking while slowly crisping the pretzels. While the oven preheats, line one or two large baking sheets with parchment paper or silicone baking mats. This step matters because it prevents sticking and ensures even browning on the bottom of your pretzels.
Step 2: Mix Your Seasoning Blend
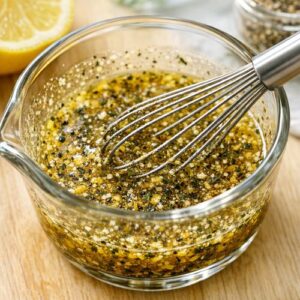
In a small bowl or liquid measuring cup, combine the oil with all the seasonings. Whisk them together thoroughly until everything is evenly distributed and no clumps of powder remain. This step takes less than a minute but ensures that every piece of pretzel receives the same balanced seasoning. You should see a fragrant, smooth oil with visible specks of seasoning throughout.

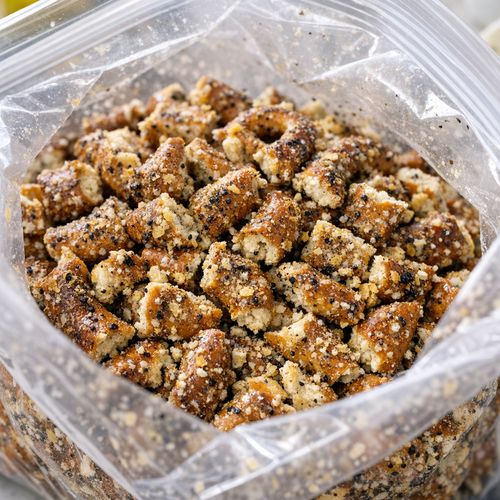
Step 3: Coat Your Pretzels Completely
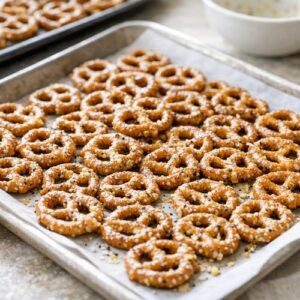
Break your pretzels into bite-sized pieces—about the size of your thumb or slightly smaller. Transfer them to a large zipped-top bag or large mixing bowl. Pour the entire seasoned oil mixture over the pretzels and seal the bag. Now shake vigorously for a full minute, rotating the bag and squeezing it to ensure every single piece gets thoroughly coated. This is the most important step in the entire recipe. Don’t rush it. When you open the bag, every pretzel should glisten with oil and be visibly seasoned.
Step 4: Spread and Bake
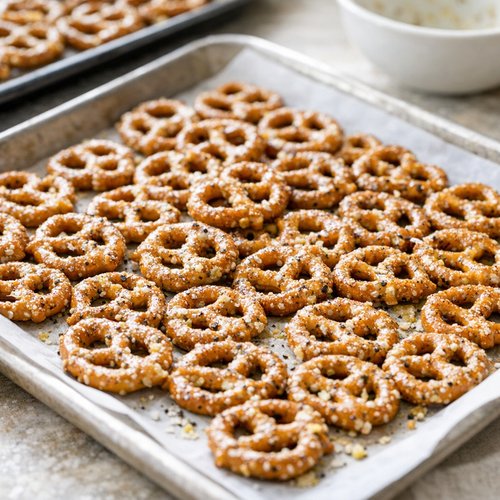
Pour the coated pretzels onto your prepared baking sheets in a single layer. If they don’t all fit on one sheet, use two sheets—crowding them prevents proper crisping. Place them in your preheated oven and bake for 50 to 60 minutes. Here’s the crucial part: stir them every 15 minutes. This prevents burning on the bottom and ensures even cooking throughout.
As they bake, you’ll notice the kitchen filling with an increasingly wonderful aroma—bright, garlicky, and herbaceous. This is the seasoning caramelizing slightly and infusing into the pretzels.
Step 5: Cool Completely Before Storing
When the pretzels are golden brown and noticeably crispy to the touch, remove them from the oven. They’ll seem slightly soft at first—this is completely normal. Spread them on a clean baking sheet or paper towels and let them cool completely at room temperature. As they cool, they’ll firm up and develop their final crunch. This cooling stage typically takes 30 to 45 minutes. Resist the urge to eat them warm (though I understand the temptation!).

Expert’s Nutritional Tip
As a registered dietitian, I want to share something important about the oil used in this recipe. While these are seasoned snacks (and meant to be enjoyed in moderate portions), the oil serves a nutritional purpose beyond just flavor delivery. The fat helps with the absorption of fat-soluble vitamins and creates satisfaction, which often means you eat fewer pieces overall. One-quarter cup of this snack provides approximately 150 calories and satisfies cravings that might otherwise lead to seeking out less nutritious options.
I recommend portioning these into small bowls or bags rather than eating directly from the container. This simple strategy helps with portion control while still allowing you to enjoy them throughout the week.
Tips and Tricks
- Stir every 15 minutes without fail – This is what separates perfectly crunchy pretzels from burnt disappointment. Set a kitchen timer and don’t skip this step.
- Make a double batch and store properly – Since these keep for weeks, I usually make a full double batch on Sunday. Store in airtight glass containers (not plastic, which can absorb oil flavors) at room temperature.
- Ensure your pretzels are truly hard, not soft – Soft pretzel “rods” won’t work. You need the sturdy, shelf-stable kind that come in bags at any grocery store. Check the aisle where snack crackers live.
- Use quality lemon pepper seasoning – This is your main flavor driver. I prefer seasoning blends without added salt, since pretzels are already quite salty. Check your label.
- Customize with your favorite seasonings – After the base seasoning is mixed, feel free to add everything bagel seasoning, Italian herb blend, or even a small amount of curry powder. Just keep the total amount around ¼ cup of seasonings per ¾ cup of oil.
- Keep them in the pantry, not the refrigerator – Cold temperatures can make them slightly soft. Room temperature storage maintains their crispy texture perfectly.
Make-Ahead Guide
These pretzels are an ideal make-ahead snack for busy weeks. Here’s my professional approach to maximum freshness and convenience.
Sunday Preparation Method: Make a double batch on Sunday afternoon. While they cool, prepare 4 to 5 small mason jars (half-pint size is perfect) or resealable containers. Once completely cooled, portion the pretzels evenly among containers. Store these in your pantry at room temperature. Each container then becomes a grab-and-go snack for the week ahead.
Storage Duration: These maintain peak crunchiness for 10 to 14 days in properly sealed containers. After two weeks, they begin to soften slightly as they absorb ambient humidity, but they’re still delicious—perfect for crushing over salads or serving alongside The Best Easy Peanut Butter Pie for added textural contrast.
Gift-Giving Preparation: If you’re giving these as gifts, prepare them 2 to 3 days before gifting. Package in pretty glass jars with twine or in decorative paper bags. They’ll be at peak freshness when your recipient opens them, and the thoughtfulness of homemade snacks is always appreciated.
Can I Store Lemon Pepper Pretzels?
Yes, and this is one of my favorite aspects of this recipe. Once completely cooled, transfer your pretzels to an airtight container and store them at room temperature in your pantry or kitchen cabinet. They’ll maintain their crunch and peak flavor for up to three weeks, though honestly, they rarely last that long in my house.
The key word is “completely cooled”—storing them while still warm can trap steam inside the container, softening them. Wait until they’ve reached room temperature and feel crispy throughout before sealing them away.
I don’t recommend refrigerating these, as the cold temperature and humidity of the fridge can soften them faster. Similarly, freezing isn’t necessary given their long shelf life, though they do freeze well if you’ve somehow made an enormous batch.
Common Mistakes to Avoid
- Skipping the frequent stirring step – I’ve seen countless batches ruined by impatient cooks who only stirred once or twice. The bottom pieces will burn while the top pieces remain pale. Set your timer and commit to stirring every 15 minutes. This single habit determines success or failure.
- Using soft pretzels instead of hard pretzels – Soft pretzels contain moisture that prevents proper crisping. You’ll end up with a chewy, oily mess. Always use hard, shelf-stable pretzels from the snack aisle.
- Storing in containers before completely cooling – This traps steam and causes your beautiful crispy pretzels to become soft and chewy. I wait at least 45 minutes after removing them from the oven before sealing any containers.
- Using too much seasoning at once – The recipes provided gives exact measurements. Doubling or tripling the seasonings without adjusting oil creates clumpy, overly salty results. Stick to the proportions.
Seasonal Variations
Spring/Summer Version: Replace the lemon pepper seasoning with Italian seasoning (2 tablespoons), add 1 teaspoon lemon zest, and increase the dill to 1 tablespoon. This lighter version pairs beautifully with spring entertaining and outdoor gatherings.
Fall/Winter Version: Swap the lemon pepper for everything bagel seasoning and add ½ teaspoon smoked paprika. Include 1 teaspoon of dried chives. This warmer, smokier version feels more autumnal and pairs wonderfully alongside soup or stew.
Spicy Version (Year-Round): Keep the base recipe but add ¾ teaspoon cayenne pepper and ½ teaspoon red pepper flakes. This version is perfect for watching movies or serving alongside Lamb Meatballs Harissa for an entertaining spread with varied heat levels.
Mediterranean Version: Use 2 tablespoons dried oregano, 1 tablespoon dried basil, 2 teaspoons garlic powder, and 1 teaspoon lemon zest mixed with your oil. This version evokes vacation vibes and pairs wonderfully with hummus for dipping.
Nutrition Information
Per serving (approximately ½ cup or 1 ounce), these pretzels contain approximately 150 calories, 9 grams of fat, 15 grams of carbohydrates, and less than 1 gram of protein. They’re naturally high in sodium—one serving contains roughly 380 to 420 milligrams of sodium, which comes primarily from the pretzels themselves.
According to USDA guidelines, these are best enjoyed as an occasional snack rather than a daily staple. However, they’re an excellent alternative to many commercial snack options that contain artificial preservatives, colors, and flavors. If you’re managing sodium intake, you can reduce the amount of pretzels or pair them with fresh vegetables and unsalted nuts to create a more balanced snack board.
The oil provides beneficial monounsaturated fats that support heart health when consumed in appropriate portions. This is why I emphasize portioning rather than eliminating—a quarter cup of these seasoned pretzels can absolutely fit into a healthy eating pattern.
What Can I Serve With Lemon Pepper Pretzels?
These versatile pretzels work beautifully as a standalone snack, but they’re equally wonderful when served alongside complementary foods. I love creating snack boards that include these pretzels, fresh fruit, cheese, and nuts. For entertaining, they pair particularly well with dips and spreads, or alongside heartier fare.
Think of these as your flavor anchor—the bright, savory element that brings other snacks into focus. I’ve served them before these homemade cookies at garden parties, and the palate-cleansing brightness works surprisingly well.
- Hummus or tzatziki dips – The cool creaminess contrasts beautifully with the crispy, seasoned pretzels. The dill in these pretzels actually complements tzatziki perfectly.
- Cheese boards with sharp aged cheddar or crumbly feta – The tang and intensity of these cheeses balance the lemon-forward seasoning. Add some sliced apples or pears for sweetness.
- Fresh vegetable platter with ranch dip – These pretzels add satisfying crunch to vegetable snack platters while contributing interesting flavor that plain crackers can’t match.
- Charcuterie boards with cured meats and olives – The Mediterranean flavors work wonderfully in upscale entertaining situations. Your guests will be impressed by the homemade element.
- Alongside soup or stew – These provide textural contrast and are less heavy than bread. I particularly love them served alongside creamy soups where they maintain their crunch.
- As a cocktail snack – The savory, citrusy profile pairs beautifully with gin and tonic, aperol spritz, or crisp white wine. They’re sophisticated enough for adult entertaining.
Substitutes
- Bagel chips instead of hard pretzels – Cut bagels into thin slices, toast them lightly, then coat with the seasoned oil mixture. These create a slightly different texture but similar flavor profile. Bake at the same temperature and check frequently after 40 minutes since bagels may cook faster.
- Olive oil instead of vegetable oil – Use a light or pure olive oil rather than extra virgin, which can become bitter at these temperatures. The flavor will be slightly different but equally delicious, with more robust olive notes.
- Dukkah spice blend instead of lemon pepper – This Egyptian spice blend includes nuts, seeds, and various spices. Use the same amount (1½ tablespoons) and follow the recipe identically. It creates a more textural, deeply savory result.
- Everything bagel seasoning with lemon zest – If you don’t have lemon pepper seasoning specifically, combine 2 tablespoons everything bagel seasoning with 1 teaspoon lemon zest powder or grated fresh zest. Let the zest dry slightly before mixing with oil.
- Fresh herbs instead of dried dill – Use 2 tablespoons freshly chopped dill (or parsley, or a combination of both). Toss with slightly cooled oil so the herbs don’t wilt, then proceed as written.
Lemon Pepper Pretzels Recipe
Ingredients
- ½ teaspoon fine sea salt (optional
- ¼ teaspoon red pepper flakes (optional
- 2 teaspoon dried dill weed provides herbal freshness that balances citrus
- ¾ cup vegetable or light olive oil neutral oil works best to let the seasonings shine
- 2 teaspoon garlic powder not garlic salt, which would add extra sodium
- 12 to 16 ounces hard pretzels (any shape works
- 1½ tablespoon lemon pepper seasoning (the primary flavor driver
Instructions
Step 1: Prepare Your Oven and Baking Station
- Begin by setting your oven to 200°F (93°C). This gentle temperature is intentional—it prevents the oil from smoking while slowly crisping the pretzels. While the oven preheats, line one or two large baking sheets with parchment paper or silicone baking mats. This step matters because it prevents sticking and ensures even browning on the bottom of your pretzels.

Step 2: Mix Your Seasoning Blend
- In a small bowl or liquid measuring cup, combine the oil with all the seasonings. Whisk them together thoroughly until everything is evenly distributed and no clumps of powder remain. This step takes less than a minute but ensures that every piece of pretzel receives the same balanced seasoning. You should see a fragrant, smooth oil with visible specks of seasoning throughout.
Step 3: Coat Your Pretzels Completely
- Break your pretzels into bite-sized pieces—about the size of your thumb or slightly smaller. Transfer them to a large zipped-top bag or large mixing bowl. Pour the entire seasoned oil mixture over the pretzels and seal the bag. Now shake vigorously for a full minute, rotating the bag and squeezing it to ensure every single piece gets thoroughly coated. This is the most important step in the entire recipe. Don't rush it. When you open the bag, every pretzel should glisten with oil and be visibly seasoned.

Step 4: Spread and Bake
- Pour the coated pretzels onto your prepared baking sheets in a single layer. If they don't all fit on one sheet, use two sheets—crowding them prevents proper crisping. Place them in your preheated oven and bake for 50 to 60 minutes. Here's the crucial part: stir them every 15 minutes. This prevents burning on the bottom and ensures even cooking throughout. As they bake, you'll notice the kitchen filling with an increasingly wonderful aroma—bright, garlicky, and herbaceous. This is the seasoning caramelizing slightly and infusing into the pretzels.
Step 5: Cool Completely Before Storing
- When the pretzels are golden brown and noticeably crispy to the touch, remove them from the oven. They'll seem slightly soft at first—this is completely normal. Spread them on a clean baking sheet or paper towels and let them cool completely at room temperature. As they cool, they'll firm up and develop their final crunch. This cooling stage typically takes 30 to 45 minutes. Resist the urge to eat them warm (though I understand the temptation!).
Notes
FAQs
Can I make these pretzels spicier for a hot snack?
Absolutely! Add ¾ to 1 teaspoon of cayenne pepper, plus ½ teaspoon of red pepper flakes to your seasoning mixture. If you enjoy heat, you could also use hot paprika instead of the traditional lemon pepper seasoning. Start with the smaller amounts and increase if you prefer more intensity. Remember that the heat intensifies slightly as the pretzels bake and cool.
Why do my pretzels keep getting soft instead of staying crispy?
The most common cause is storing them in a container before they’re completely cooled. Warm pretzels release steam, which softens them when trapped in a sealed container. Always wait at least 45 minutes after removing from the oven before sealing. The second common cause is storing them in the refrigerator—the humid environment softens them quickly. Room temperature pantry storage is ideal.
Can I use flavored oils like garlic-infused or lemon-infused oils?
You technically can, but I don’t recommend it. Flavored oils are often made with fresh ingredients that can degrade at the oven temperature, and they may burn or become bitter. Additionally, some flavored oils contain additives that aren’t ideal for high-heat cooking. Stick with pure vegetable oil or light olive oil to maintain control over the final flavor and ensure food safety.
How do I know when they’re done baking?
The pretzels are done when they’re a light golden brown color and feel completely crispy when you press one gently. They should not feel soft or chewy at all. The timing of 50 to 60 minutes is a guide—oven temperatures vary, so start checking around the 45-minute mark. If the bottom pieces are browning too quickly while the tops are pale, your oven may run hot, so reduce temperature to 190°F and add time accordingly.
Can I make these pretzels in a slow cooker or air fryer instead?
The slow cooker won’t work well since the goal is to crisp and dry the pretzels, which the slow cooker can’t achieve. However, an air fryer is an excellent option! Use 350°F and cook in batches for about 12 to 15 minutes, shaking the basket every 5 minutes. Air fryers vary significantly, so start checking at 10 minutes. You’ll use less oil when air frying, so reduce to about ½ cup oil in your seasoning mixture. The results are similarly crunchy with slightly less oiliness.
More Recipes You’ll Love
- Korean Asparagus – A quick, flavor-packed side dish that brings bold seasoning to simple vegetables, perfect for pairing with savory snacks on entertaining platters.
- Kroll’s Corner Cheeseburger Sliders – These satisfying sliders work wonderfully on the same entertaining spread as lemon pepper pretzels for a complete snack experience.
- Lamb Crusted – If you’re entertaining and want a heartier appetizer alongside these pretzels, this impressive dish delivers restaurant-quality results at home.
- Icecream Cookie – These fun cookies provide the perfect sweet ending after enjoying savory snacks, completing your entertaining spread beautifully.
I hope you’ll give these lemon pepper pretzels a try soon. They’ve become a staple in my kitchen for moments when I need to feel like I’ve done something special with minimal effort. That’s what cooking should feel like—joyful and accessible, impressive yet simple. Mix a batch this weekend, fill a pretty jar, and discover why these pretzels have a way of bringing people together. Remember: good food is a good mood! With love and good seasonings, Lori
- Lemon Yogurt Chicken Recipe
- Cheddar’s Lemon Pepper Chicken Recipe
- Lemon Curd Biscuits Recipe
- Lemon Curd Cookies Recipe

My name is Lori Walker. I’m a registered dietitian, food blogger and food enthusiast. I share easy healthy, delicious recipes on my blog and review necessary kitchen items. The recipes I share take less… Read more