This post contains affiliate links. As an Amazon Associate I earn from qualifying purchases.
Getting kids to eat homemade molasses cookies feels impossible until you pull a batch of warm, crackly-topped treats from the oven and watch their faces light up. I started documenting this recipe back in 2019 when my niece refused store-bought cookies but devoured these when she helped me mix the dough. There’s something about spiced cookies that speaks to kids—maybe it’s the warm cinnamon, maybe it’s the deep molasses flavor that feels like a secret ingredient only grown-ups understand. If you’re dealing with picky eaters at home, this recipe opens doors. And if you’re looking for similar crowd-pleasers, my soft gingerbread cookies with maple glaze follow the same winning approach.
Molasses Cookies the Whole Family Will Actually Eat (Picky Eaters Included)
I remember the exact moment I knew this recipe was special. My neighbor Sarah brought her daughter over, and Emma—who notoriously rejected anything “fancy”—asked for thirds. Three cookies. That’s when I realized these weren’t just good cookies; they were bridge-builders between resistant eaters and real, flavorful food. The key isn’t hiding anything or dumbing down the flavors. It’s the opposite: the molasses becomes this rich, almost caramel-like backdrop that kids recognize as something warm and comforting, not intimidating.
Why Kids Love This Version
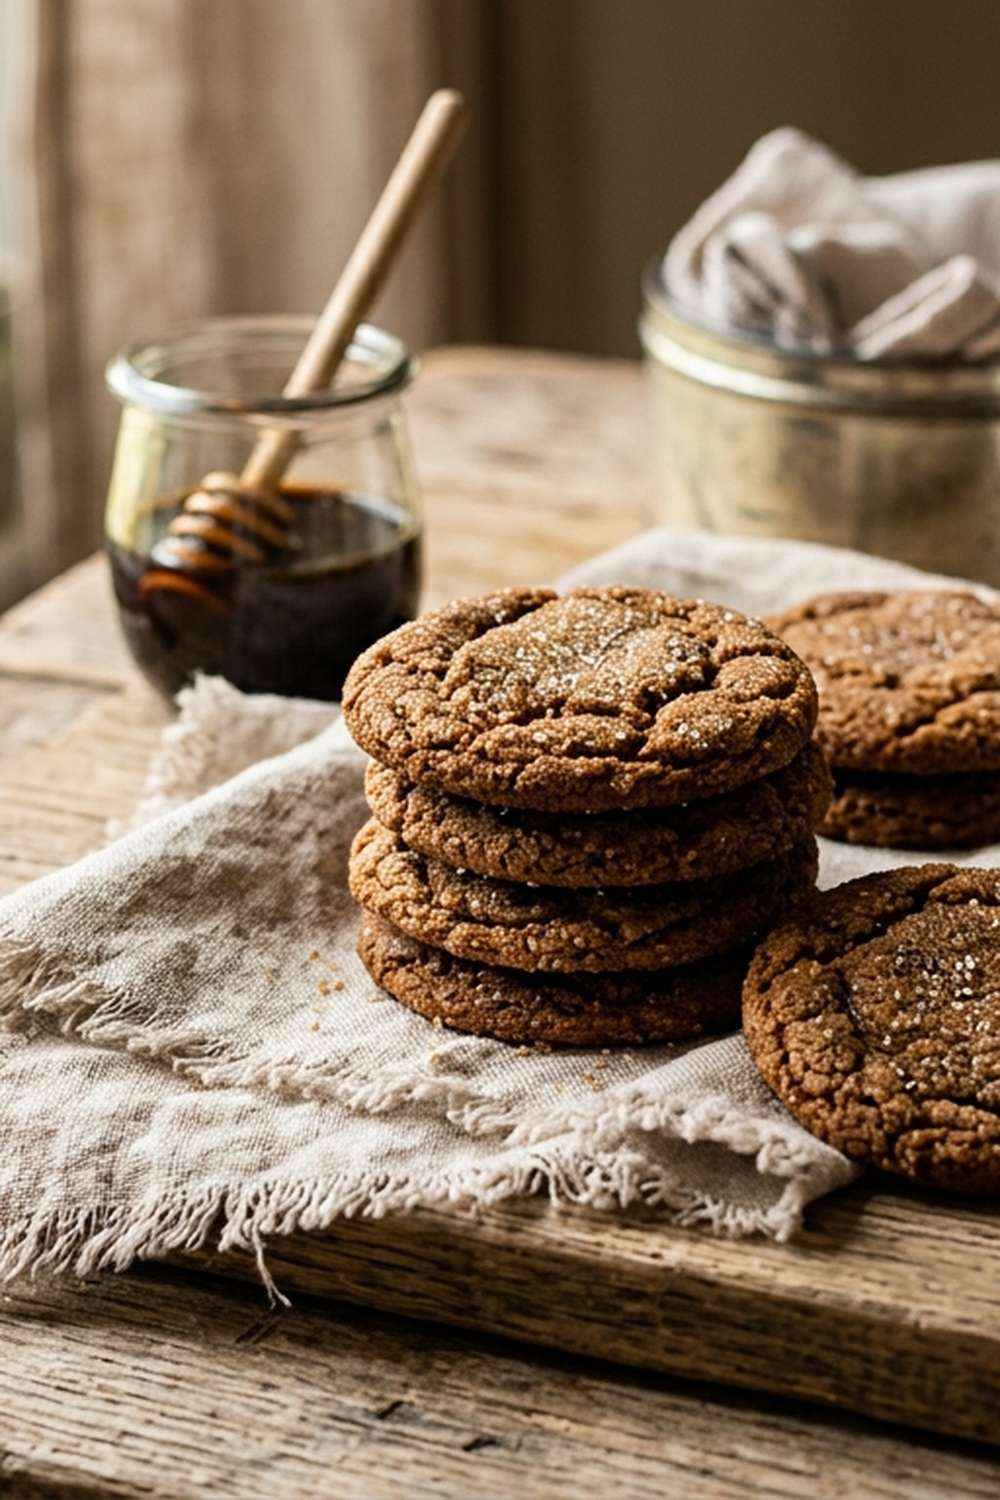
These molasses cookies succeed with picky eaters because they hit multiple sensory notes that children instinctively trust. The texture is chewy on the inside with a slight crackly surface—that combination satisfies kids who want structure but also softness. The spices (cinnamon, ginger, cloves) are gentle enough not to overwhelm young palates, but present enough that kids feel grown-up eating them.
- Chewy texture that doesn’t stick to teeth – children respond to cookies they can actually chew comfortably, not dense or hard varieties that frustrate developing jaws
- Warm spice blend that feels familiar – cinnamon appears in many foods kids already enjoy (toast, oatmeal, hot chocolate), so these spices register as “safe” rather than foreign
- Brown sugar adds subtle sweetness without being cloying – the molasses provides deep flavor so you don’t need excessive sugar, which means no energy spikes or crashes
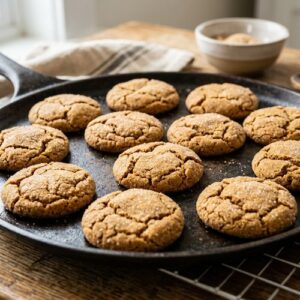
- Visual appeal with the crackly tops – kids eat with their eyes first, and that crackling surface looks intentional and impressive, making them want to taste what they see
How to Get Kids Involved in Making This
One of my core beliefs is that cooking together builds food confidence. When kids participate in creating something, they’re infinitely more likely to eat it. Here’s how to assign tasks by age so everyone contributes meaningfully.
- Ages 3-5: The sugar rollers – little ones love rolling pre-made dough balls in the coarse sugar. Set up a small bowl with sugar and let them work while you handle the oven. This feels like their job, builds ownership, and takes pressure off you.
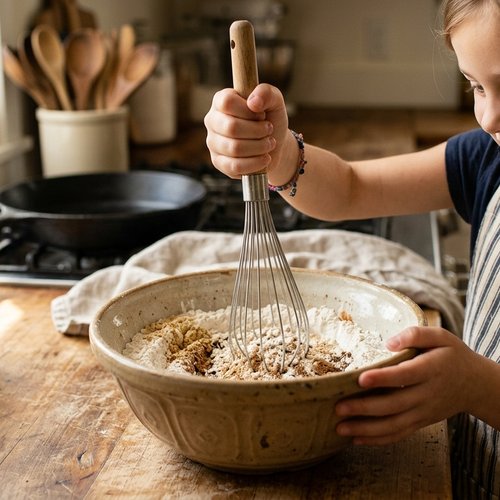
- Ages 6-9: The dry ingredient whiskers – school-age kids can whisk together flour, baking soda, and spices in a medium bowl. Supervise the measuring, but let them do the whisking. This teaches them how dry ingredients combine and why it matters.
- Ages 10+: The full mixer responsibility – older kids can cream butter and sugars, add molasses and egg, then help fold in dry ingredients on low speed. They’re learning actual baking technique and building real kitchen skills.
The Ingredients – Hidden Nutrition, Visible Deliciousness
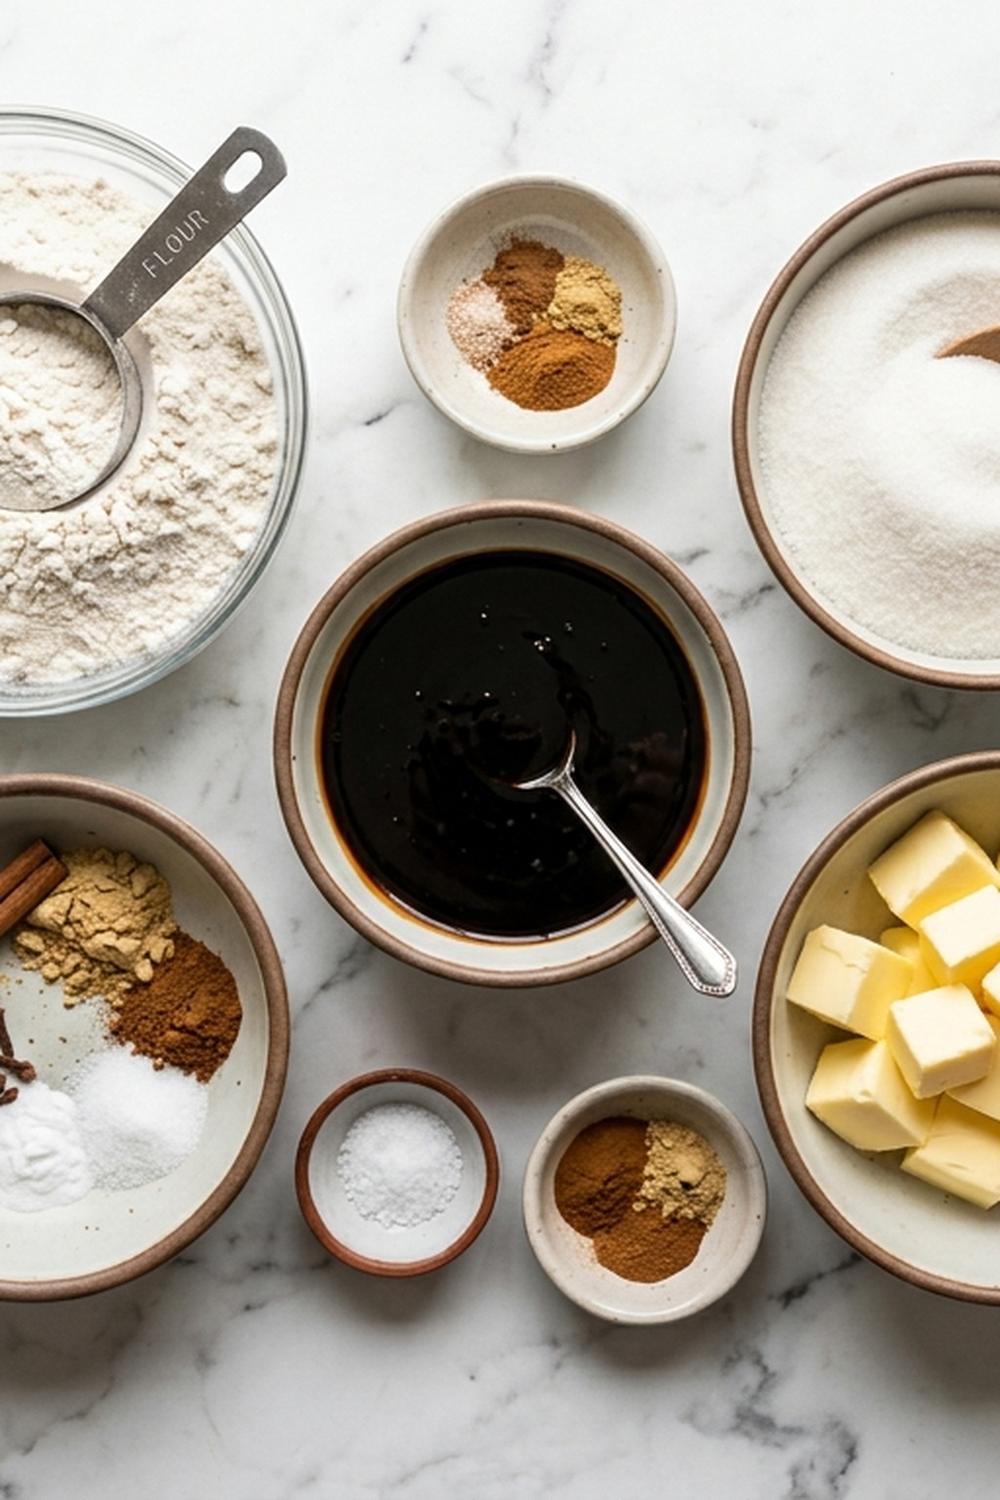
I approach these cookies from a registered dietitian’s perspective, meaning every ingredient serves a purpose. The molasses isn’t just for flavor—it’s an iron-rich ingredient that supports growing bodies. The butter and egg provide fat-soluble vitamins and choline for brain development. These aren’t health-food cookies, but they’re honest food, made with real ingredients kids can recognize.
For the Dough
- 1/4 cup granulated sugar (balances the brown sugar for proper texture)
- 1/4 teaspoon salt (essential for balancing sweetness and amplifying spice perception)
- 1/3 cup granulated or coarse sugar (for rolling, creates the signature crackly surface)
- 1 and 1/2 teaspoons baking soda (leavening agent that makes cookies spread just right)
- 1/4 teaspoon ground cloves (small amount adds complexity without overpowering)
- 1/2 cup packed light brown sugar (provides molasses-like depth even before the molasses ingredient)
- 2 and 1/4 cups all-purpose flour (spooned and leveled, never packed)
- 2 teaspoons ground ginger (warming spice that feels cozy)
- 3/4 cup unsalted butter (softened to room temperature for easy creaming)
- 1 large egg (room temperature for smooth incorporation)
- 1/4 teaspoon nutmeg (enhances warmth without being obvious)
- 1/3 cup unsulphured molasses (not blackstrap—it’s too intense for kids; I prefer Grandma’s brand)
- 2 teaspoons pure vanilla extract (not imitation, which kids can actually taste the difference)
- 1 and 1/2 teaspoons ground cinnamon (familiar spice that builds trust with hesitant eaters)
Yield: Makes 36 cookies (perfect for a family of 4 with some for lunchboxes and freezer storage)
How to Make Molasses Cookies for the Whole Family
This is where cooking transforms from a solo task into a family experience. I’ve built these instructions around moments where kids can jump in, where you can breathe, and where the dough develops properly. No rushing, no stress—just good food getting made together.
Step 1: Combine Your Dry Ingredients
In a medium mixing bowl, whisk together the flour, baking soda, ginger, cinnamon, cloves, nutmeg, and salt. If you have kids ages 6+, this is their moment—let them whisk and feel the ingredients combine. Whisking takes about 1-2 minutes and helps ensure the leavening agent distributes evenly. Set this bowl aside; you’ll need it in just a moment.
Step 2: Cream the Butter and Sugars
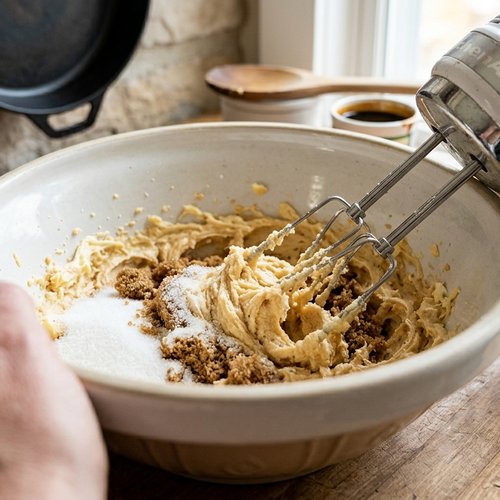
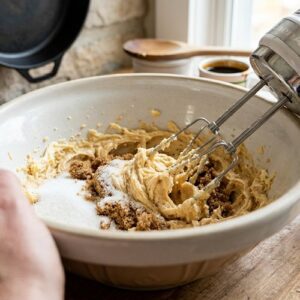
In a large mixing bowl, using either a handheld mixer or stand mixer with paddle attachment, beat the softened butter with both brown and granulated sugars together on high speed for about 2 minutes. You’re looking for a light, creamy texture—the mixture should look almost fluffy. This is where kids can watch the transformation happen, which feels like magic. This creaming step is crucial; it incorporates air that helps your cookies achieve that coveted tender crumb.
Step 3: Add the Molasses, Egg, and Vanilla
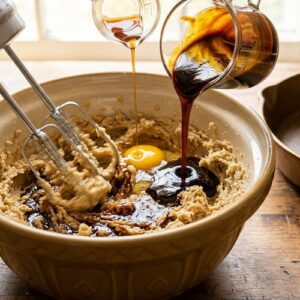
With the mixer still running on medium speed, pour in the molasses and beat until combined—this takes about 30 seconds. The mixture might look separated momentarily; that’s normal. Then add the egg and vanilla extract and beat for about 1 minute until everything comes together smoothly. Have kids watch for the moment everything becomes one unified color—that’s how they know this step is complete. Scrape down the sides and bottom of the bowl with a rubber spatula as needed to ensure all ingredients incorporate evenly.
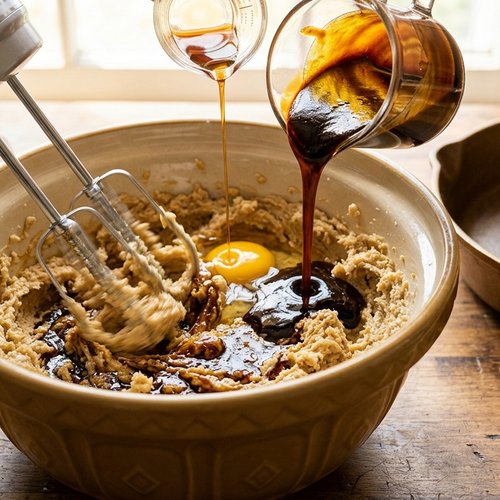
Step 4: Fold in the Dry Ingredients
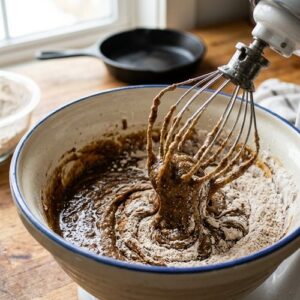
Reduce mixer speed to low. Slowly add the dry ingredient mixture to the wet ingredients, mixing just until combined. This is critical: overmixing at this stage develops gluten and makes cookies tough. The dough will be slightly sticky—this is exactly right. Stop mixing as soon as you see no streaks of flour remaining. If kids are helping, this is their cue to step back and let you finish; mixers on low speed are still potentially unsafe for small fingers.
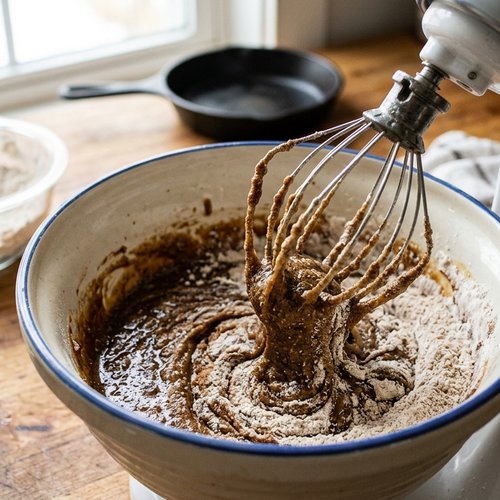
Step 5: Chill the Dough
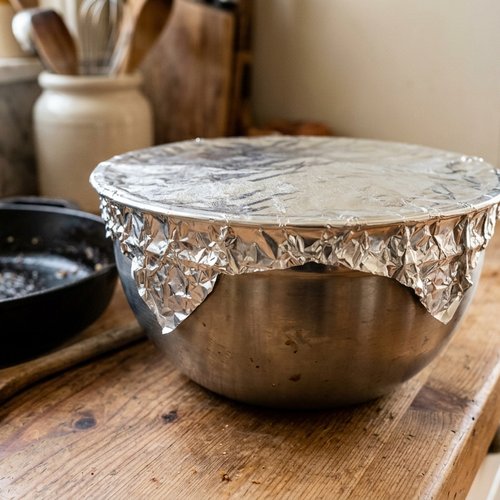
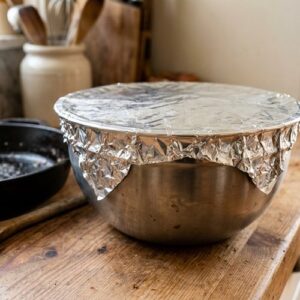
Cover the mixing bowl tightly with aluminum foil or plastic wrap. Refrigerate for at least 1 hour. You can chill for up to 2-3 days—this is my favorite make-ahead feature. If you’re chilling overnight, simply remove the dough 30 minutes before baking so it reaches cool room temperature, which prevents the cookies from spreading too thin in the oven.
Step 6: Preheat and Prepare Your Baking Sheets
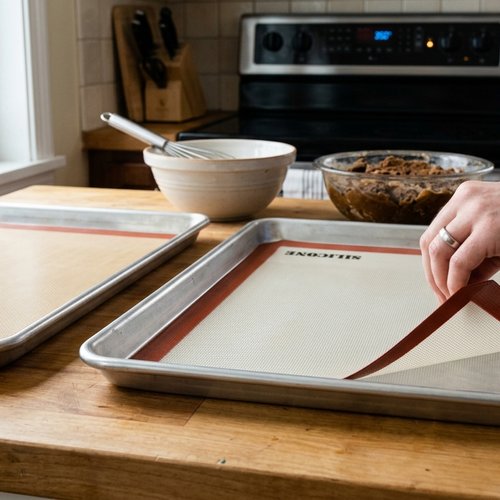
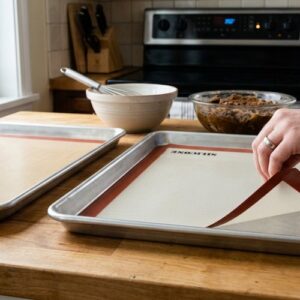
When ready to bake, preheat your oven to 350°F (177°C). Line two large baking sheets with parchment paper or silicone baking mats. Silicone mats are my top recommendation for these cookies—they ensure even browning on the bottoms. Setting up your workspace now means you’re not fumbling while dough is sitting out.
Step 7: Shape and Roll in Sugar
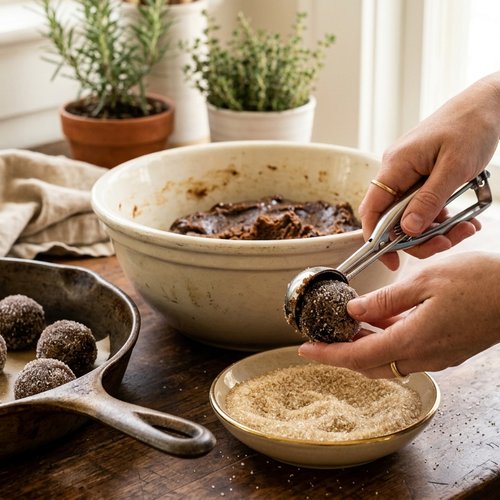
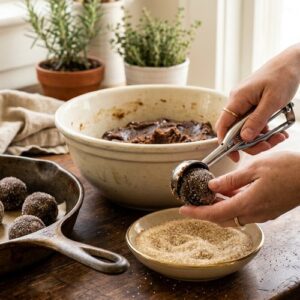
Remove the chilled dough from the refrigerator. Using a tablespoon measure or small cookie scoop, form the dough into 1-tablespoon-sized balls. This is perfect for kids ages 5+—rolling dough balls is engaging, builds fine motor skills, and they’ll love watching their creation bake. Roll each ball in granulated or coarse sugar, coating all sides. The sugar creates that signature crackly surface and provides visual feedback that cookies are ready to bake.
Step 8: Arrange on Baking Sheets with Proper Spacing
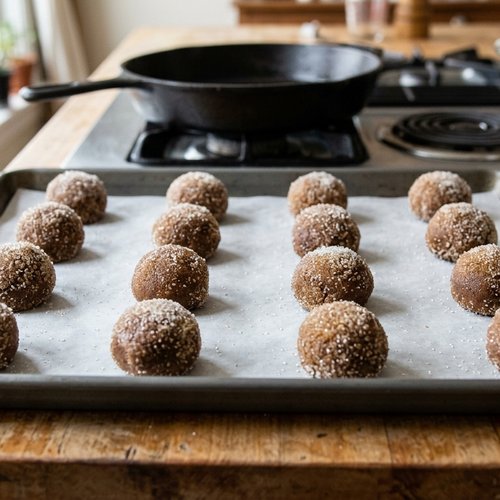
Place sugar-coated dough balls on your prepared baking sheets, spacing them about 3 inches apart. They’ll spread during baking, and proper spacing prevents them from merging together. If you have a second oven or can bake in batches, plan accordingly—these cookies need room to breathe.
Step 9: Bake Until Edges Set
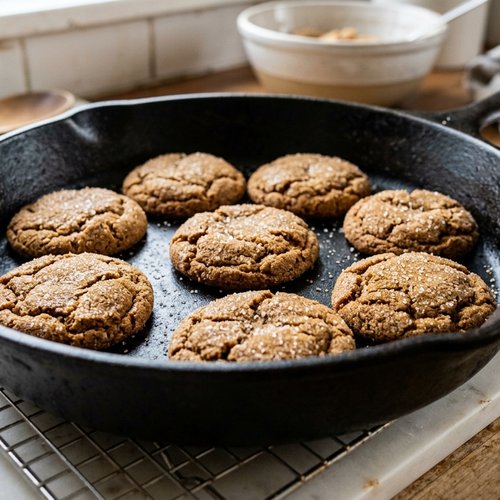
Bake for 11-12 minutes, or until the edges appear set but the centers still look slightly underbaked. This is the secret to chewy cookies: you’re pulling them out while the center is still soft, and residual heat finishes the cooking. If the tops aren’t showing the characteristic cracks yet, remove one baking sheet from the oven and gently bang it on the counter 2-3 times. This helps the warm cookies spread slightly and crack on top, which looks beautiful and indicates perfect doneness.
Step 10: Cool Properly for Perfect Texture
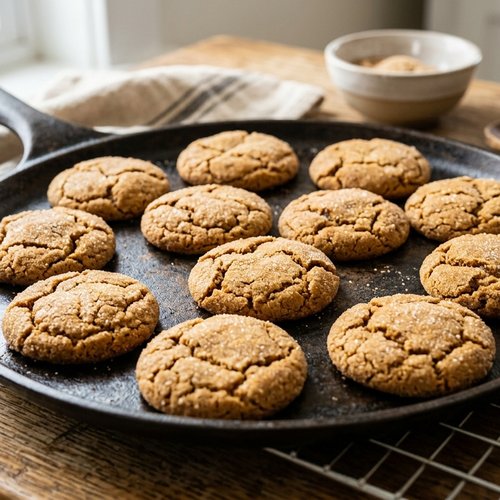
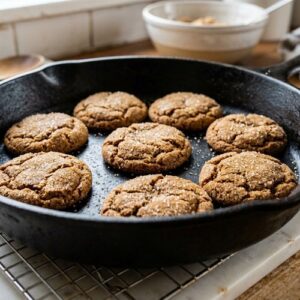
Remove cookies from the oven and let them rest on the baking sheet for exactly 5 minutes. Don’t skip this step—it allows the cookies to set just enough to transfer without falling apart, but not so long that they harden. After 5 minutes, transfer to a wire cooling rack and let cool completely. This usually takes another 15-20 minutes. Patience here pays off in perfect texture.
Expert’s Nutritional Tip
As a registered dietitian, I always pay attention to molasses in recipes. It’s one of the few sweetening ingredients that actually contains trace minerals like iron, calcium, and potassium. A single molasses cookie contributes meaningful iron to a growing child’s diet—something you won’t get from a cookie made with only refined sugar. The unsulphured variety I recommend contains these nutrients in their most bioavailable form, meaning children’s bodies can actually absorb and use them. This doesn’t make these cookies “health food,” but it does mean they’re nutritionally honest in a way many desserts aren’t.
Customization Station: Let Everyone Build Their Own
Picky eaters feel empowered when they have control. Here’s how to set up a simple customization station where kids choose how their cookies look and taste, which transforms them from reluctant eaters into invested participants.
- Rolling sugar options: set out regular granulated sugar, coarse decorating sugar, and colored sugar in small bowls so kids choose their coating
- Post-baking toppings: once cookies cool, offer optional drizzles of melted white chocolate or a light dusting of cinnamon sugar for kids who want to personalize
Scaling for Different Family Sizes
This recipe as written makes 36 cookies, which is perfect for a family of 4 with extras for lunchboxes and freezer storage. For a family of 2: make the full batch and freeze half the shaped dough balls in an airtight container for up to 3 months. Bake directly from frozen, adding just 1-2 minutes to baking time. For a family of 6+: double the entire recipe—simply use two mixing bowls or mix in two batches. Everything scales perfectly. You’ll need 4 baking sheets total and about 25-30 minutes of hands-on time.
Can I Store Molasses Cookies Recipe?
Room temperature storage: keep cookies in an airtight container at room temperature for up to 1 week. The cookies soften slightly over time, which most people prefer. Lunchbox tip: these travel beautifully—they don’t crumble easily and hold up well in backpacks. Freezer storage: freeze baked cookies in an airtight freezer bag for up to 3 months. Thaw at room temperature for 15 minutes before eating. Dough freezing: this is my favorite make-ahead hack—freeze shaped dough balls on a baking sheet, then transfer to a freezer bag and store for up to 3 months. Bake directly from frozen, adding 2-3 minutes to baking time. No thawing required.
Nutrition Information
Per cookie (based on 36 cookies per batch): 85 calories, 3.5g fat, 13g carbohydrates, 0.3g protein, 12mg calcium, 0.4mg iron (nutrition calculated from USDA database standards). For context, each cookie provides about 4% of a child’s daily iron needs—that’s meaningful, especially for kids ages 4-8 who need 10mg daily. The molasses specifically contributes this iron. The whole egg provides choline, which supports brain development and memory formation—critical during school-age years. The fat from butter helps absorb fat-soluble vitamins like A, D, E, and K. One cookie isn’t a complete nutrition profile, but it’s an honest dessert with real nutritional substance.
Make-Ahead Guide
I design recipes around real life, which means planning ahead. Here’s how to integrate these cookies into your week:
Option 1: Bake and Freeze (My Preferred Method) – Make the full batch and bake all cookies. Cool completely, then layer in an airtight container with parchment paper between layers. Freeze for up to 3 months. You can pull out a few cookies any time for lunchboxes or snacks. Thaw at room temperature for 15 minutes.
Option 2: Dough and Bake Fresh – Make the dough up to 3 days ahead, refrigerated in an airtight container. On baking day, let dough come to cool room temperature (30 minutes), then shape and bake. This gives you the satisfaction of fresh-from-the-oven cookies without the full time commitment on the day you serve them.
Option 3: Frozen Dough Balls – Shape the dough into balls, freeze on a tray, then transfer to a freezer bag. Bake directly from frozen—just add 2-3 minutes to baking time. Perfect for “surprise” fresh cookies with minimal effort.
Common Mistakes to Avoid
Mistake 1: Using blackstrap molasses. It’s too intense and bitter for cookies, especially for kids. Stick with unsulphured or regular molasses (Grandma’s brand is reliable). Blackstrap has 3-4 times more mineral content, but the flavor overwhelms the spices.
Mistake 2: Not bringing ingredients to room temperature. Cold butter and eggs don’t incorporate smoothly, leading to dense, tough cookies. Set butter and eggs on the counter 30 minutes before mixing.
Mistake 3: Skipping the 5-minute cooling period on the baking sheet. Pulling cookies off immediately makes them fall apart. Leaving them too long makes them harden and lose that chewy texture you’re aiming for. Five minutes is precise for a reason.
Mistake 4: Overmixing the dry ingredients into the wet ingredients. This develops gluten and creates tough cookies. Mix on low speed just until no flour streaks remain—then stop.
Seasonal Variations
Fall/Winter Version (as written): The warm spice blend as stated is perfect for cooler months. Serve with hot cider or warm milk.
Spring/Summer Lighter Version: Reduce cinnamon to 1 teaspoon and omit cloves entirely. Keep ginger and nutmeg, then add 1/2 teaspoon ground allspice. Add the zest of 1 lemon to the butter-sugar mixture. These feel brighter without losing the molasses character.
Holiday Gift Version: Make the recipe as stated, then package in cellophane bags tied with twine. These cookies are luxurious enough to gift and hold up perfectly for 2-3 days of travel.
What to Serve Alongside for a Complete Family Meal
These cookies stand beautifully on their own as a snack or dessert, but if you’re planning a gathering or casual dessert time, here’s what pairs naturally. Remember, the best approach with picky eaters is offering choices they recognize alongside something new they’re trying.
- Cold milk (dairy or non-dairy): the classic pairing that balances the molasses richness and makes cookies taste better by contrast
- Warm apple cider or hot chocolate: fall/winter pairings that extend the comfort-food feeling
- Fresh fruit platter (apple slices, berries, grapes): gives kids familiar options while the cookie is the adventurous choice
If you’re building a dessert spread, my carrot cake bars complement these beautifully—one is spiced and chewy, the other is cake-like with sweetness. Together they offer texture contrast that makes both taste better.

Molasses Cookies Recipe
Ingredients
For the Dough
- 1/4 cup granulated sugar balances the brown sugar for proper texture
- 1/4 teaspoon salt essential for balancing sweetness and amplifying spice perception
- 1/3 cup granulated or coarse sugar for rolling, creates the signature crackly surface
- 1 and 1/2 teaspoons baking soda leavening agent that makes cookies spread just right
- 1/4 teaspoon ground cloves small amount adds complexity without overpowering
- 1/2 cup packed light brown sugar provides molasses-like depth even before the molasses ingredient
- 2 and 1/4 cups all-purpose flour spooned and leveled, never packed
- 2 teaspoon ground ginger warming spice that feels cozy
- 3/4 cup unsalted butter softened to room temperature for easy creaming
- 1 large egg room temperature for smooth incorporation
- 1/4 teaspoon nutmeg enhances warmth without being obvious
- 1/3 cup unsulphured molasses (not blackstrap
- 2 teaspoon pure vanilla extract not imitation, which kids can actually taste the difference
- 1 and 1/2 teaspoons ground cinnamon familiar spice that builds trust with hesitant eaters
Instructions
Step 1: Combine Your Dry Ingredients
- In a medium mixing bowl, whisk together the flour, baking soda, ginger, cinnamon, cloves, nutmeg, and salt. If you have kids ages 6+, this is their moment—let them whisk and feel the ingredients combine. Whisking takes about 1-2 minutes and helps ensure the leavening agent distributes evenly. Set this bowl aside; you'll need it in just a moment.

Step 2: Cream the Butter and Sugars
- In a large mixing bowl, using either a handheld mixer or stand mixer with paddle attachment, beat the softened butter with both brown and granulated sugars together on high speed for about 2 minutes. You're looking for a light, creamy texture—the mixture should look almost fluffy. This is where kids can watch the transformation happen, which feels like magic. This creaming step is crucial; it incorporates air that helps your cookies achieve that coveted tender crumb.
Step 3: Add the Molasses, Egg, and Vanilla
- With the mixer still running on medium speed, pour in the molasses and beat until combined—this takes about 30 seconds. The mixture might look separated momentarily; that's normal. Then add the egg and vanilla extract and beat for about 1 minute until everything comes together smoothly. Have kids watch for the moment everything becomes one unified color—that's how they know this step is complete. Scrape down the sides and bottom of the bowl with a rubber spatula as needed to ensure all ingredients incorporate evenly.
Step 4: Fold in the Dry Ingredients
- Reduce mixer speed to low. Slowly add the dry ingredient mixture to the wet ingredients, mixing just until combined. This is critical: overmixing at this stage develops gluten and makes cookies tough. The dough will be slightly sticky—this is exactly right. Stop mixing as soon as you see no streaks of flour remaining. If kids are helping, this is their cue to step back and let you finish; mixers on low speed are still potentially unsafe for small fingers.
Step 5: Chill the Dough
- Cover the mixing bowl tightly with aluminum foil or plastic wrap. Refrigerate for at least 1 hour. You can chill for up to 2-3 days—this is my favorite make-ahead feature. If you're chilling overnight, simply remove the dough 30 minutes before baking so it reaches cool room temperature, which prevents the cookies from spreading too thin in the oven.
Step 6: Preheat and Prepare Your Baking Sheets
- When ready to bake, preheat your oven to 350°F (177°C). Line two large baking sheets with parchment paper or silicone baking mats. Silicone mats are my top recommendation for these cookies—they ensure even browning on the bottoms. Setting up your workspace now means you're not fumbling while dough is sitting out.
Step 7: Shape and Roll in Sugar
- Remove the chilled dough from the refrigerator. Using a tablespoon measure or small cookie scoop, form the dough into 1-tablespoon-sized balls. This is perfect for kids ages 5+—rolling dough balls is engaging, builds fine motor skills, and they'll love watching their creation bake. Roll each ball in granulated or coarse sugar, coating all sides. The sugar creates that signature crackly surface and provides visual feedback that cookies are ready to bake.
Step 8: Arrange on Baking Sheets with Proper Spacing
- Place sugar-coated dough balls on your prepared baking sheets, spacing them about 3 inches apart. They'll spread during baking, and proper spacing prevents them from merging together. If you have a second oven or can bake in batches, plan accordingly—these cookies need room to breathe.

Step 9: Bake Until Edges Set
- Bake for 11-12 minutes, or until the edges appear set but the centers still look slightly underbaked. This is the secret to chewy cookies: you're pulling them out while the center is still soft, and residual heat finishes the cooking. If the tops aren't showing the characteristic cracks yet, remove one baking sheet from the oven and gently bang it on the counter 2-3 times. This helps the warm cookies spread slightly and crack on top, which looks beautiful and indicates perfect doneness.
Step 10: Cool Properly for Perfect Texture
- Remove cookies from the oven and let them rest on the baking sheet for exactly 5 minutes. Don't skip this step—it allows the cookies to set just enough to transfer without falling apart, but not so long that they harden. After 5 minutes, transfer to a wire cooling rack and let cool completely. This usually takes another 15-20 minutes. Patience here pays off in perfect texture.
FAQs
Can I use dark molasses instead of light molasses?
Yes, and it’s actually my preference for deeper flavor. Dark molasses will make the cookies slightly darker and richer-tasting, but the recipe works identically. The baking time remains 11-12 minutes. Kids often can’t tell the difference between light and dark molasses cookies, so use whichever you have on hand.
What if my picky eater refuses the spices—can I reduce them?
You can reduce cinnamon to 1 teaspoon and ginger to 1 teaspoon, omit cloves entirely, and keep nutmeg at 1/4 teaspoon. The cookies will still work structurally and will taste more like brown sugar cookies with mild spice warmth. This is a good bridge for kids transitioning from plain desserts to spiced ones. Once they eat a few of these gentler versions, you can gradually increase spices in your next batch.
Why is my dough too sticky to work with?
Molasses cookies are naturally stickier than sugar cookies—this is normal and actually good (it means they’ll be chewy). If you can’t handle the dough at all, try chilling for an extra 30 minutes, wearing disposable gloves while rolling (makes handling easier), or using a small cookie scoop instead of hand-rolling. Don’t add extra flour, which makes cookies dense.
Can I bake these without a stand mixer?
Absolutely. Use a handheld mixer and the process takes the same time, just with your arm getting a small workout during the 2-minute creaming phase. Or cream butter and sugar by hand with a wooden spoon (takes about 5 minutes of vigorous beating), then add remaining ingredients. It works perfectly fine—I’ve done it many times.
My cookies spread too much and are too thin. What happened?
Most likely, your dough wasn’t chilled long enough, or your oven temperature is off. Always chill for at least 1 hour, and 2 hours is better. Use an oven thermometer to verify your temperature—if it’s running 10-15°F hot, cookies spread faster. If you chilled overnight, let dough warm to cool room temperature before baking. Starting with dough that’s too warm is the #1 reason for too-thin cookies.
More Family-Friendly Recipes
- Cinnamon Sugar Scones Recipe – another warm-spiced treat that kids help make from start to finish
- Soft Gingerbread Cookies and Maple Glaze – similar texture and spice approach with an optional glazing station
- Bread Pudding and Hot Butter Rum Sauce – another molasses-forward dessert for grown-up gatherings
- this simple cake – for when you want something creamy to balance the spiced cookies
I started recording family recipes back in 2019 because I realized something powerful: the recipes we make together become the memories we carry. These molasses cookies aren’t just about flour and spices—they’re about your daughter’s flour-covered hands as she whisks dry ingredients, your son’s concentration as he rolls sugar-coated balls, and the moment they bite into something warm and realize they made that. That’s where the real nutrition happens—not just in iron and choline, but in confidence, connection, and the deep knowing that good food comes from people who care. When your kids eat these cookies, they’re tasting your love and attention. And that changes everything. Good food is a good mood!

My name is Lori Walker. I’m a registered dietitian, food blogger and food enthusiast. I share easy healthy, delicious recipes on my blog and review necessary kitchen items. The recipes I share take less… Read more