This post contains affiliate links. As an Amazon Associate I earn from qualifying purchases.
There’s something magical about a dessert that brings brightness to any table. These lemon cream cheese bars are my go-to when I need something that feels fancy but comes together in under an hour. They pair beautifully with afternoon tea, after-dinner coffee, or alongside lighter spring menus. If you love citrus flavors, you’ll also adore my these homemade cookies, which follow a similar philosophy of simple ingredients creating impressive results.
A Memory That Led Me Here
I remember my grandmother pulling a sheet pan of these bars from her oven on a Sunday afternoon in early June. The kitchen filled with the most intoxicating lemon aroma—fresh, clean, alive. She’d dust them with confectioners’ sugar, and my cousins and I would sneak them off the cooling rack before dinner even started. Years later, when I began documenting family recipes in 2019, this one was at the top of my list. It’s remained one of my most-requested recipes because it captures that same feeling of joy and simplicity.
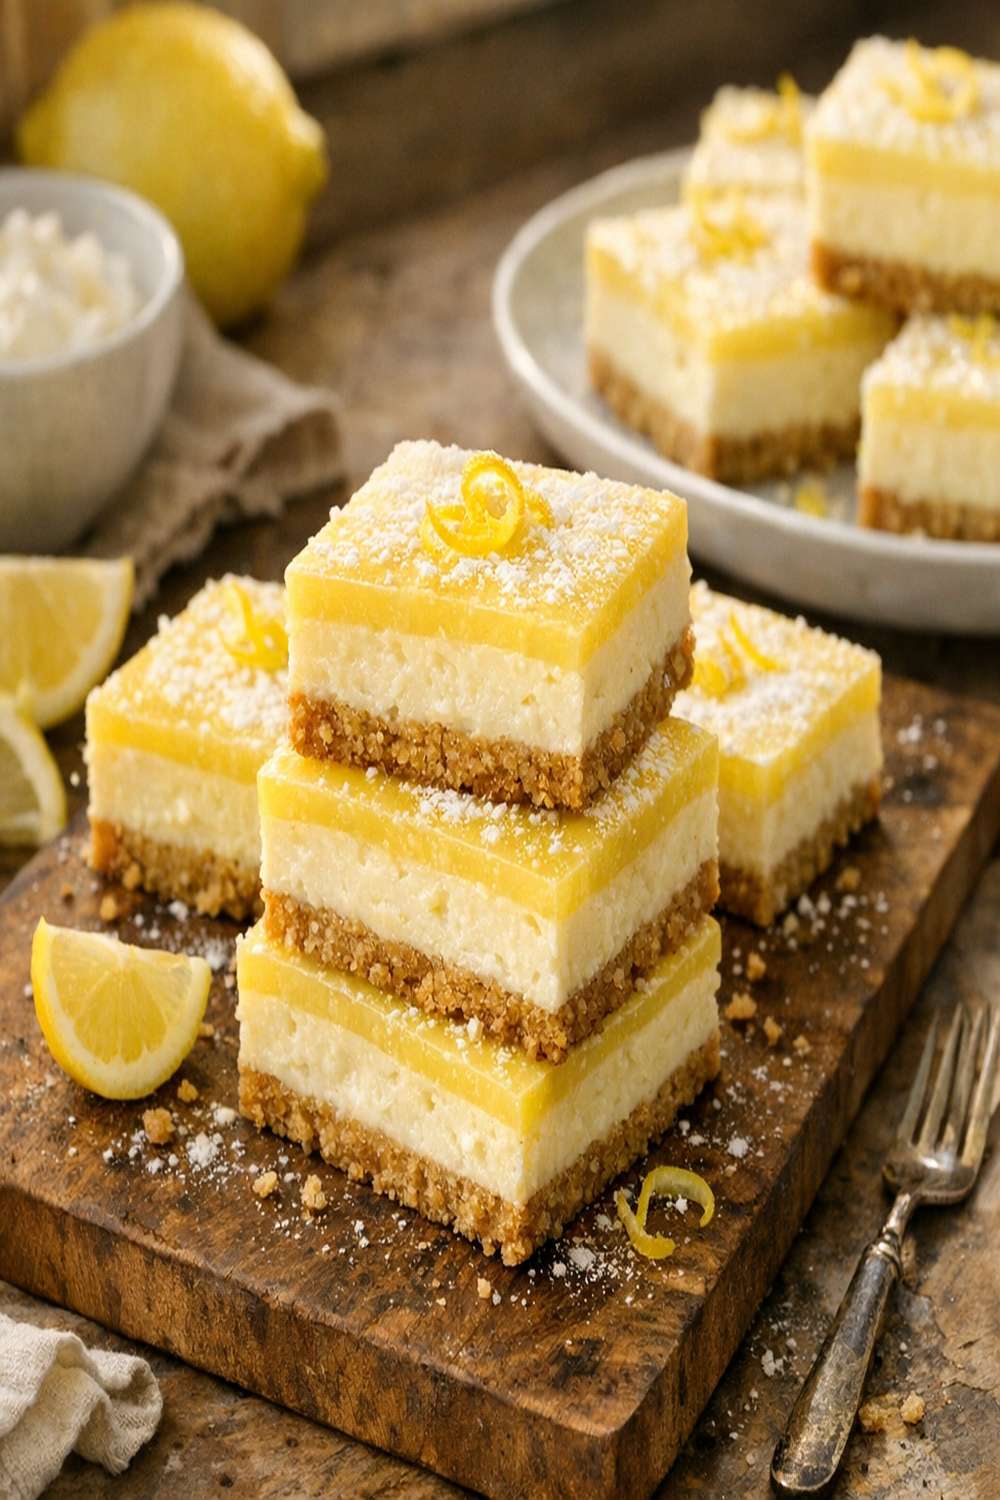
What is Lemon Cream Cheese Bars With Graham Cracker Crust Recipe?
Lemon cream cheese bars are a layered dessert featuring a buttery graham cracker base topped with a silky, tangy cream cheese filling infused with fresh lemon juice and zest. Unlike dense cheesecake, these bars are lighter and more delicate—they slice cleanly and melt on your tongue. The crust provides the perfect textural contrast to the creamy filling, while the lemon keeps everything bright and sophisticated.
This recipe draws from classic 1950s-style bar cookies that became popular at church potlucks and family gatherings. What makes it special is the balance: enough tang to feel refreshing, but tempered by rich cream cheese so it’s not overly sour. The graham cracker base absorbs just enough butter to stay crispy without becoming greasy, and a single egg creates a filling that’s firm enough to slice but tender enough to feel indulgent.
Why You’ll Love This Lemon Cream Cheese Bars With Graham Cracker Crust Recipe
- One-pan simplicity – No mixer required. You can whisk everything by hand in about five minutes, making this ideal for beginner bakers or anyone who hates cleanup.
- Fresh lemon flavor without bitterness – I use both juice and zest to capture bright citrus notes while the cream cheese mellows any harsh edges. The result tastes like summer.
- Perfect for make-ahead entertaining – These actually taste better after chilling overnight. The flavors meld beautifully, and you can serve them straight from the refrigerator.
- Naturally gluten-free adaptable – Simply swap the graham cracker crumbs for gluten-free crackers, and the recipe works beautifully. I’ve tested this countless times.
- Portion-controlled indulgence – Each bar is satisfying but not overwhelming. One is enough, though honestly, two won’t hurt you.
- Impressive without fuss – Guests always assume you spent hours on these. The secret is that you didn’t.
The Ingredients
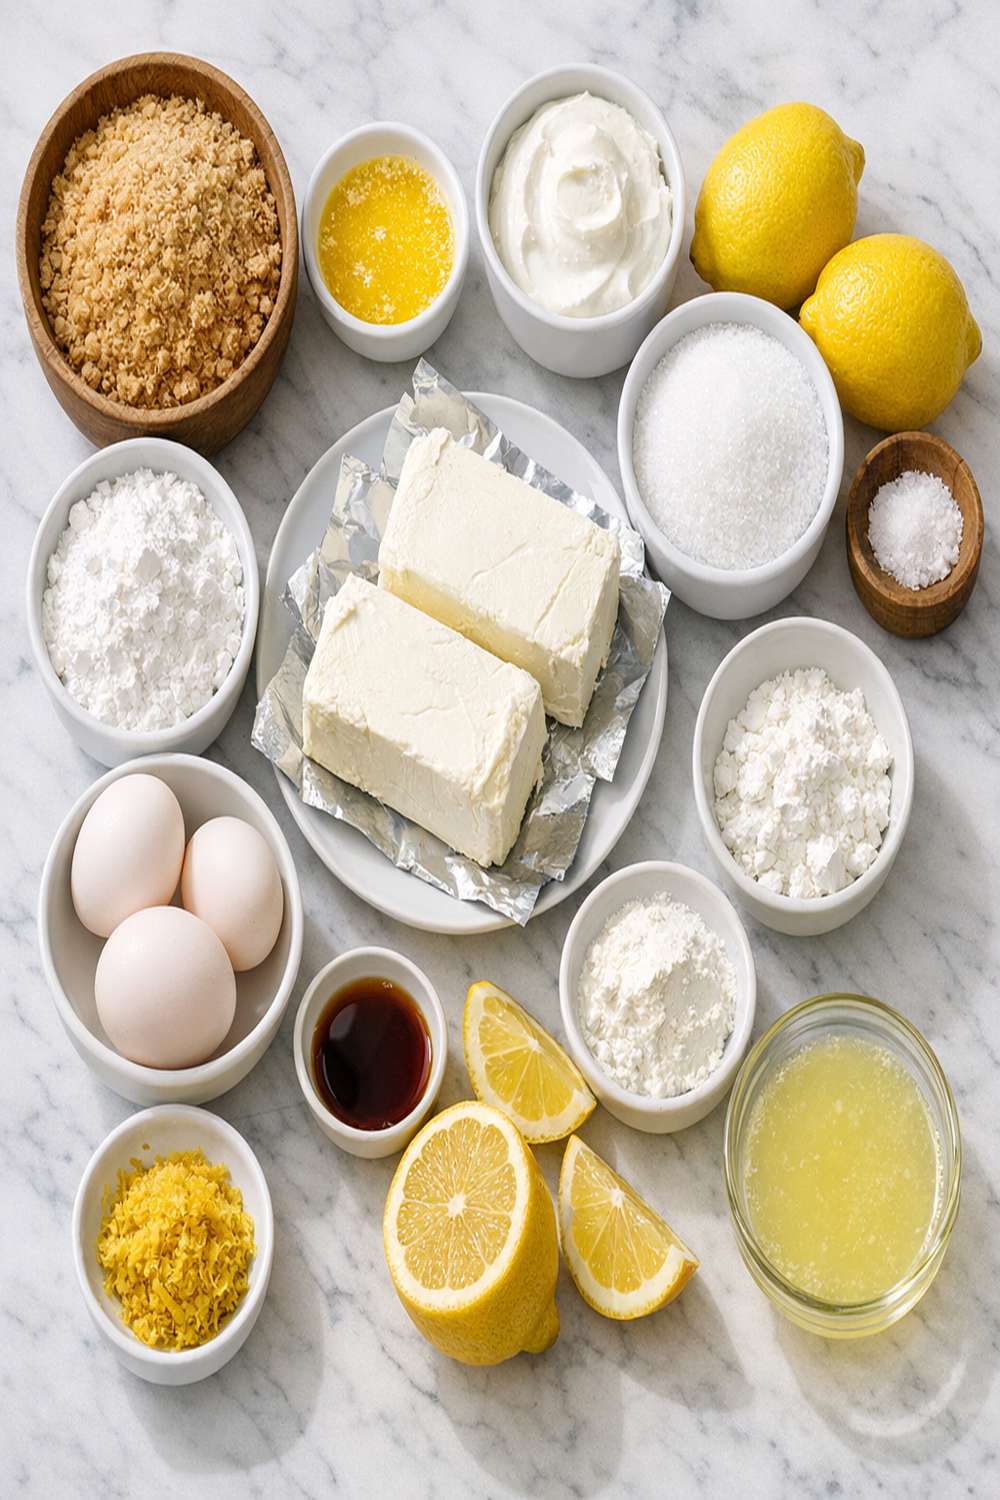
I’ve tested every single ingredient in this recipe on standard home equipment. Nothing here is exotic or hard to find. Most items live in my pantry year-round, and if cream cheese is softened properly, the whole filling comes together in under two minutes.
For the Crust
- 5 tablespoons unsalted butter (melted and slightly cooled)
- 1½ cups graham cracker crumbs (from about 10-12 full crackers, finely crushed)
- ⅓ cup granulated sugar (helps bind the crust and adds subtle sweetness)
For the Filling
- 1 teaspoon pure vanilla extract (rounds out the flavor profile)
- ⅓ cup fresh lemon juice (about 2-3 medium lemons, never use bottled)
- ¾ cup granulated sugar (creates the right sweetness balance against the lemon)
- 1 large egg (room temperature, lightly beaten—this is your binding agent)
- 1 tablespoon fresh lemon zest (from 1-2 lemons, use a microplane for best texture)
- 16 ounces cream cheese (softened to room temperature for a smooth, lump-free filling)
For Serving
- 2 tablespoons confectioners’ sugar (optional but lovely for dusting before serving)
Makes 16 bars
How to Make Lemon Cream Cheese Bars With Graham Cracker Crust Recipe?
I’ve written these steps to be as clear as possible. Read through them once before you start—it takes three minutes—and then you’ll move through the process with confidence. Everything happens in one 8×8-inch baking pan, which means less equipment and less stress.
Step 1: Prepare Your Pan and Preheat
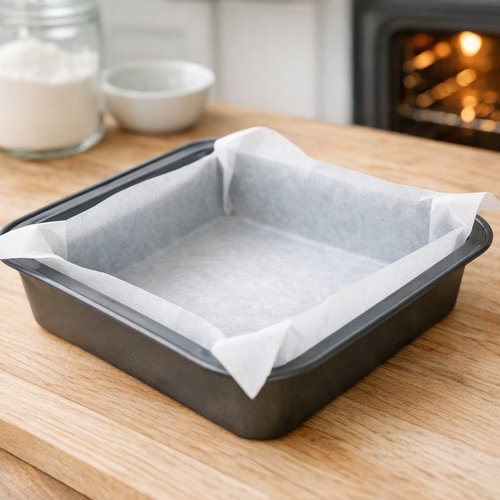
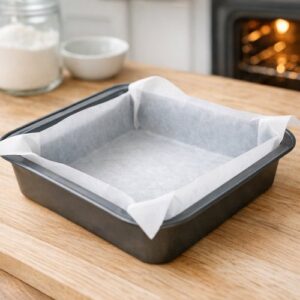
Preheat your oven to 350°F. Line an 8×8-inch baking pan with parchment paper, letting the edges hang over two sides—this makes removal effortless later. If you don’t have parchment, grease the pan generously with butter or cooking spray.
Step 2: Mix the Crust
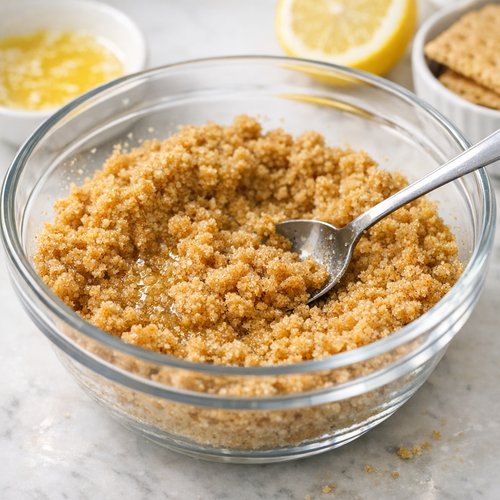
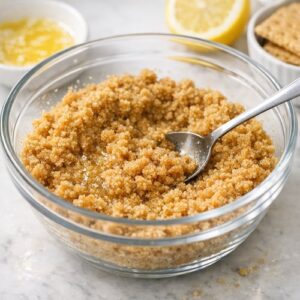
Pour your graham cracker crumbs into a small bowl—they should be fine and even, like wet sand. Some people use a food processor; I prefer crushing them by hand in a sealed bag with a rolling pin. Add the melted butter and sugar, stirring with a fork until the mixture looks like moist breadcrumbs. It should hold together when you squeeze it. If it feels too dry, add one more tablespoon of melted butter.
Step 3: Press Crust Into Pan
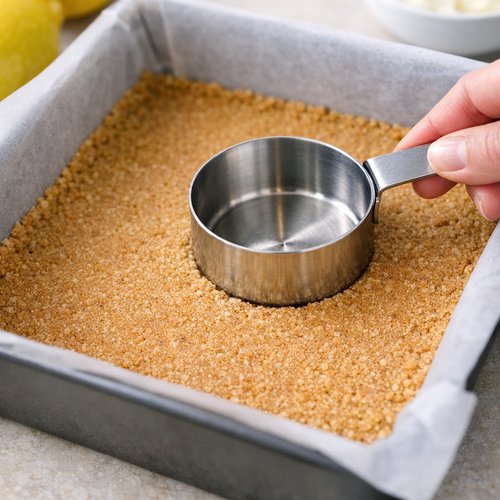
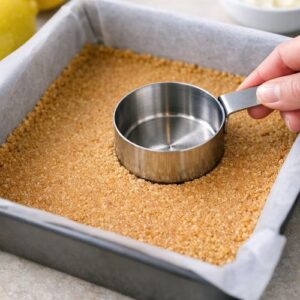
Spread the crumb mixture evenly across your prepared pan. Using the bottom of a measuring cup, press firmly and evenly until the crust is compact and level. This creates a sturdy base that won’t crumble when you slice later. The crust should reach about ⅜-inch thick.
Step 4: Soften Cream Cheese Properly
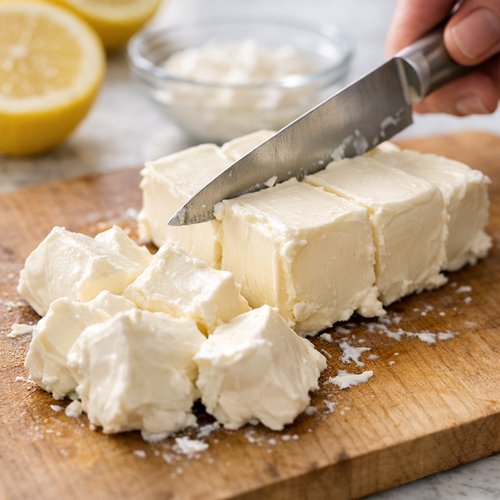
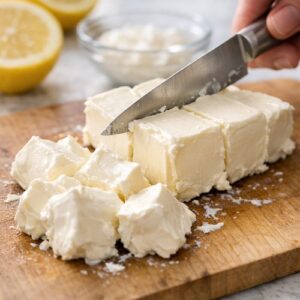
This step matters more than you’d think. Cream cheese at room temperature (about 68-70°F) whips smoothly without lumps. If yours is still cold, cut it into cubes and let it sit on the counter for 15-20 minutes. You’ll know it’s ready when a knife blade slides through easily without resistance.
Step 5: Combine Filling Base
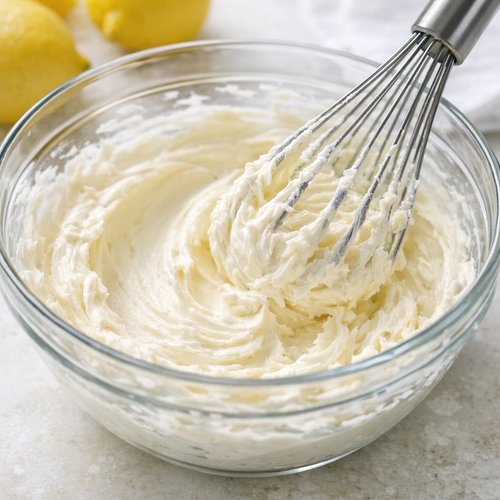
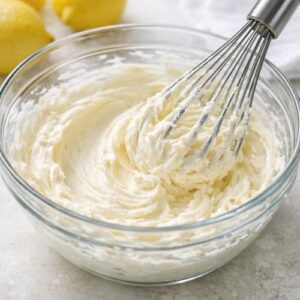
Place the softened cream cheese in a medium bowl. Using a whisk or wooden spoon, beat it for about 30 seconds until it looks creamy and pale. Add the sugar, lemon zest, and vanilla extract. Whisk vigorously for 1-2 minutes until the mixture is completely smooth with no visible lumps. This aeration is what creates that silky texture.
Step 6: Add Lemon and Egg
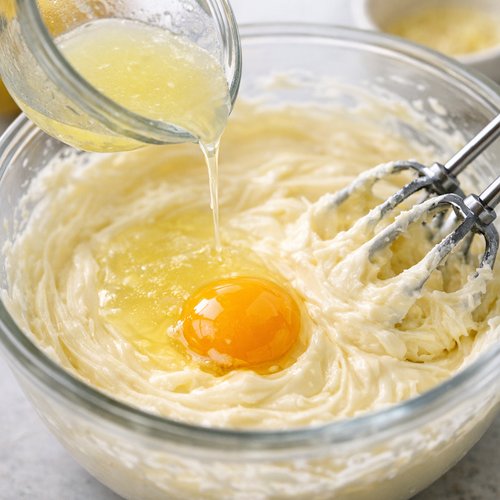
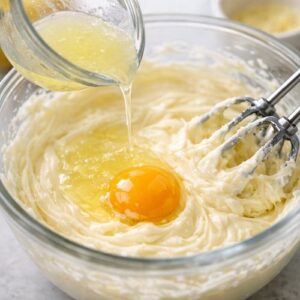
Pour the fresh lemon juice into your cream cheese mixture and stir gently until just combined—you want the filling pale yellow and uniform. Then add your lightly beaten egg, folding it in with just 6-8 gentle strokes. Do not overmix once the egg is added, as this can incorporate too much air and create a slightly grainy texture. The mixture should look smooth and pourable.
Step 7: Bake the Crust First
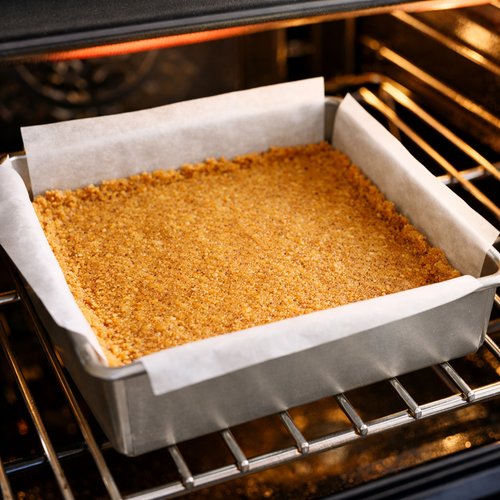
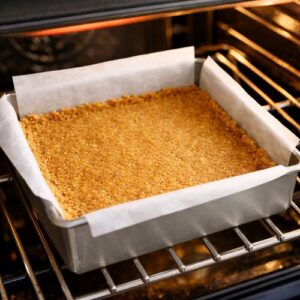
Place your crust-filled pan in the oven and bake for 8 minutes. This pre-bake step is my secret—it ensures the crust stays crispy and doesn’t absorb moisture from the filling. You’re not looking for browning, just a slight set to the structure. The crust should still be quite pale when you remove it.
Step 8: Pour Filling and Bake
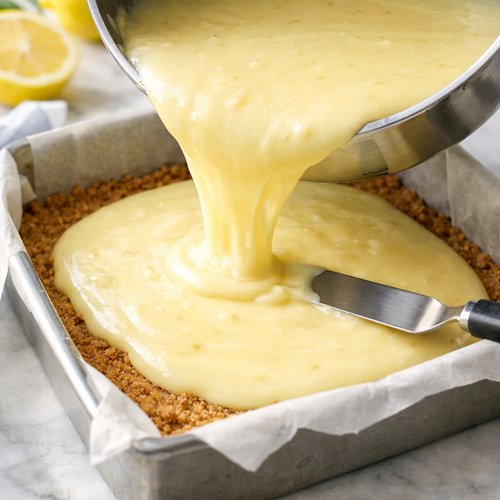
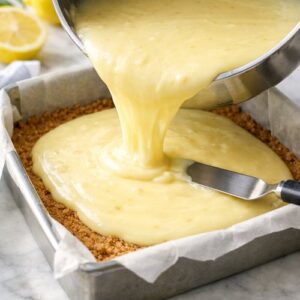
Remove the pan from the oven and carefully pour the lemon filling over the warm crust, spreading it gently to the edges. Return to the oven and bake for 18-22 minutes. The bars are done when the filling is set around the edges but still has the tiniest jiggle in the very center—about a 1-inch circle in the middle. This is crucial: overbaking makes them dry; underbaking makes them too soft to slice cleanly.
Step 9: Cool Completely
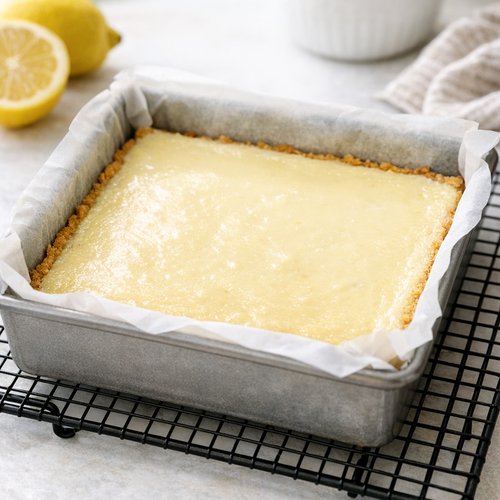
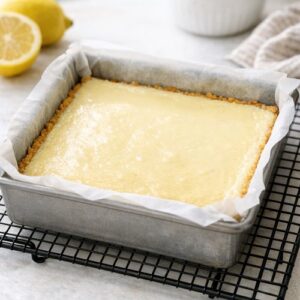
Remove the pan from the oven and set it on a cooling rack. Let it cool at room temperature for at least 45 minutes—don’t skip this step, even if you’re impatient. As the bars cool, the filling will continue to set gently. Once room temperature, transfer the pan to the refrigerator for at least 3 hours, preferably overnight.
Step 10: Slice and Serve
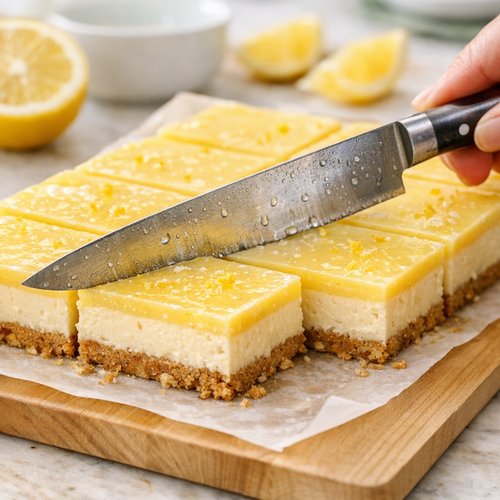
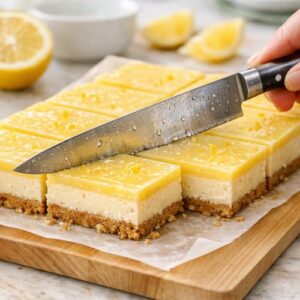
When fully chilled, use the parchment overhang to lift the entire slab out of the pan onto a cutting board. Using a sharp knife dipped in hot water (and wiped clean between cuts), slice into 16 even squares—aim for a 4×4 grid. The hot knife trick prevents the filling from sticking. Dust with confectioners’ sugar just before serving if desired.
Expert’s Nutritional Tip
As a registered dietitian, I notice that lemon juice doesn’t just add flavor—it contains citric acid, which enhances your body’s absorption of minerals in the cream cheese, particularly calcium. One bar provides approximately 120 mg of calcium, supporting bone health. The egg adds choline, which supports brain function, making this a smarter indulgence than you might expect. That said, these are still a treat, and portion control remains important.
Make-Ahead Guide
Prepare the day before: Mix the crust ingredients and store in an airtight container at room temperature for up to 24 hours. You can also press the crust into the pan, cover tightly with plastic wrap, and refrigerate overnight.
Prepare the filling up to 4 hours ahead: Whisk the cream cheese mixture (before adding the egg) and refrigerate in a covered bowl. Add the egg just before baking. This saves you time on busy days.
Bake and chill: Complete the entire recipe, but don’t slice until you’re ready to serve. Fully chilled bars stay perfect in an airtight container for up to 5 days.
Freeze for later: Slice the bars, layer them between parchment paper in a freezer container, and freeze for up to 2 months. Thaw in the refrigerator for 2-3 hours before serving.
Tips and Tricks
- Fresh lemon juice is non-negotiable – Bottled lemon juice contains preservatives that mute the brightness you’re after. Spend two minutes squeezing fresh lemons. Your bars will taste noticeably better. If your lemons feel hard, microwave them for 15 seconds to soften them and release more juice.
- Zest before juicing – Once a lemon is cut in half, it’s harder to zest. Use a microplane zester for fine, fluffy zest that distributes evenly. Avoid the white pith underneath, which tastes bitter.
- Room temperature matters – Cold cream cheese creates lumps that no amount of whisking fixes. Set it out while your oven preheats. This one change will transform your results.
- The jiggle test is real – Underbaked bars taste better than overbaked ones. That tiny wobble in the center continues to set as it cools. If you overbake, the filling becomes dense and slightly rubbery.
- Don’t skip the crust pre-bake – This 8-minute step prevents a soggy bottom. It’s the difference between crispy and sad.
- Chill overnight if possible – The flavors marry beautifully after sitting in the refrigerator. These bars are actually better the next day.
- Use parchment paper religiously – It makes cleanup instant and ensures perfectly shaped bars that lift out cleanly without crumbling.
Common Mistakes to Avoid
- Not softening cream cheese – Cold cream cheese creates a lumpy, unpleasant texture. This is the number-one mistake I see. Take the extra 15 minutes; it’s worth it.
- Overmixing after adding the egg – I know you want everything smooth, but overmixing incorporates air bubbles that can create a slightly grainy texture after baking. Fold gently until just combined.
- Using bottled lemon juice – It’s convenient, but the flavor is noticeably flat and slightly bitter. Fresh juice takes three minutes and makes all the difference.
- Skipping the crust pre-bake – Your crust will be soggy without this step. Those 8 minutes prevent a disappointing texture contrast.
- Not chilling long enough – These need at least 3 hours in the refrigerator, preferably overnight, to set properly. A warm bar will slice unevenly and fall apart.
Can I Store Lemon Cream Cheese Bars With Graham Cracker Crust Recipe?
Yes! These actually improve with storage. Keep them in an airtight container in the refrigerator for up to 5 days. The flavors deepen and meld beautifully. Cover them tightly to prevent them from absorbing any odors from your fridge.
For longer storage, these freeze exceptionally well. Layer sliced bars between parchment paper in a freezer-safe container and freeze for up to 2 months. Thaw in the refrigerator for 2-3 hours before serving—never at room temperature, as condensation can make them soggy.
Don’t freeze the entire unbaked batter, though. The egg and texture won’t hold up well. Always bake first, then freeze the finished bars.
Nutrition Information
Per bar (based on 16 servings): 185 calories, 12g fat, 18g carbohydrates, 3g protein, 120mg calcium. Data calculated using USDA FoodData Central for standard ingredients. Cream cheese provides 8g of fat per bar, which is primarily the satiating kind that keeps you satisfied longer. The single egg provides choline for cognitive support, while the lemon juice contains vitamin C—approximately 8mg per bar. These are indulgent but not without nutritional value.
Seasonal Variations
- Spring/Summer – Add 1 teaspoon of fresh lavender (dried and crumbled) to the filling for a floral twist. Reduce vanilla to ½ teaspoon. The combination of lemon and lavender feels ethereal.
- Fall/Winter – Substitute half the lemon juice (use ⅙ cup) with fresh orange juice and add ¼ teaspoon of cardamom. This creates a warmer, spiced version perfect for autumn gatherings.
- Berry addition – Fold ½ cup of fresh blueberries or raspberries into the filling just before pouring onto the crust. They’ll soften slightly during baking and create beautiful pockets of tartness.
- Citrus blend – Use a combination of lemon, lime, and orange zest (about 1 teaspoon of each) for a more complex citrus profile. Adjust the juice to maintain flavor balance.
What Can I Serve With Lemon Cream Cheese Bars With Graham Cracker Crust Recipe?
These bars shine alongside lighter accompaniments. The bright citrus pairs beautifully with afternoon tea, sparkling water with fresh mint, or chilled white wine. If you’re building a dessert spread, serve alongside cookies that have a different texture—Krolls Cookies or brownies create visual interest. For brunch, pair with fresh berries and Greek yogurt on the side.
- Herbal or chamomile tea – The floral notes complement the lemon beautifully. Serve warm or iced depending on the season.
- Sparkling lemonade – Sounds simple, but fresh lemonade alongside these bars feels festive and cohesive.
- Fresh whipped cream – A dollop on the side adds richness without overwhelming the delicate filling. A tiny squeeze of lemon zest on top ties everything together.
- Vanilla ice cream – A small scoop provides cool contrast. The cold temperature highlights the lemon flavor even more.
- Fresh fruit plate – Arrange these alongside strawberries, blueberries, and raspberries for a colorful, balanced dessert board.
Substitutes
- Lime instead of lemon – Use the same amounts of fresh lime juice and zest. The bars will be slightly more aromatic and floral. I actually prefer this version in summer.
- Gluten-free graham crackers – Substitute 1:1 for regular crackers. The crust will be just as crispy. Brands like Kinnikinnick and Simple Mills work beautifully.
- Salted butter instead of unsalted – If you only have salted butter, reduce the salt in the recipe (if any) and slightly reduce the amount used. This works, but unsalted gives you better control.
- Honey instead of granulated sugar (partial) – You can replace up to ¼ cup of granulated sugar with honey, but use slightly less liquid overall since honey is wet. The bars will be slightly softer but delicious.
- Almond flour crust – Replace half the graham crackers with finely ground almond flour for a nuttier crust with added protein. Add an extra tablespoon of butter to compensate for dryness.
- Neufchâtel cheese – This is a lighter version of cream cheese with slightly less fat. Use the same amount. The bars will be a tiny bit less rich but still delicious.
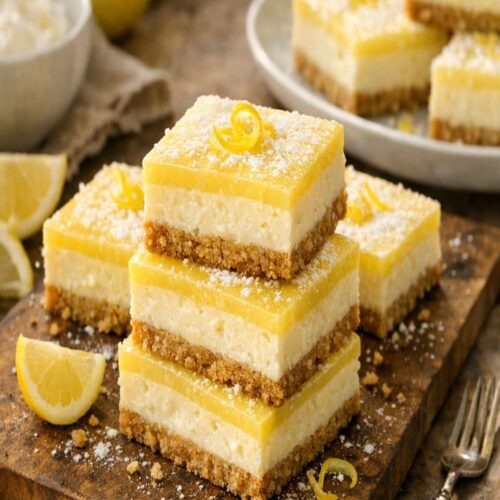
Lemon Cream Cheese Bars With Graham Cracker Crust Recipe
Ingredients
For the Crust
- 5 tablespoon unsalted butter melted and slightly cooled
- 1½ cup graham cracker crumbs from about 10-12 full crackers, finely crushed
- ⅓ cup granulated sugar helps bind the crust and adds subtle sweetness
For the Filling
- 1 teaspoon pure vanilla extract rounds out the flavor profile
- ⅓ cup fresh lemon juice about 2-3 medium lemons, never use bottled
- ¾ cup granulated sugar creates the right sweetness balance against the lemon
- 1 large egg (room temperature, lightly beaten
- 1 tablespoon fresh lemon zest from 1-2 lemons, use a microplane for best texture
- 16 ounce cream cheese softened to room temperature for a smooth, lump-free filling
For Serving
- 2 tablespoon confectioners' sugar optional but lovely for dusting before serving
Instructions
Step 1: Prepare Your Pan and Preheat
- Preheat your oven to 350°F. Line an 8x8-inch baking pan with parchment paper, letting the edges hang over two sides—this makes removal effortless later. If you don't have parchment, grease the pan generously with butter or cooking spray.
Step 2: Mix the Crust
- Pour your graham cracker crumbs into a small bowl—they should be fine and even, like wet sand. Some people use a food processor; I prefer crushing them by hand in a sealed bag with a rolling pin. Add the melted butter and sugar, stirring with a fork until the mixture looks like moist breadcrumbs. It should hold together when you squeeze it. If it feels too dry, add one more tablespoon of melted butter.
Step 3: Press Crust Into Pan
- Spread the crumb mixture evenly across your prepared pan. Using the bottom of a measuring cup, press firmly and evenly until the crust is compact and level. This creates a sturdy base that won't crumble when you slice later. The crust should reach about ⅜-inch thick.
Step 4: Soften Cream Cheese Properly
- This step matters more than you'd think. Cream cheese at room temperature (about 68-70°F) whips smoothly without lumps. If yours is still cold, cut it into cubes and let it sit on the counter for 15-20 minutes. You'll know it's ready when a knife blade slides through easily without resistance.
Step 5: Combine Filling Base
- Place the softened cream cheese in a medium bowl. Using a whisk or wooden spoon, beat it for about 30 seconds until it looks creamy and pale. Add the sugar, lemon zest, and vanilla extract. Whisk vigorously for 1-2 minutes until the mixture is completely smooth with no visible lumps. This aeration is what creates that silky texture.
Step 6: Add Lemon and Egg
- Pour the fresh lemon juice into your cream cheese mixture and stir gently until just combined—you want the filling pale yellow and uniform. Then add your lightly beaten egg, folding it in with just 6-8 gentle strokes. Do not overmix once the egg is added, as this can incorporate too much air and create a slightly grainy texture. The mixture should look smooth and pourable.
Step 7: Bake the Crust First
- Place your crust-filled pan in the oven and bake for 8 minutes. This pre-bake step is my secret—it ensures the crust stays crispy and doesn't absorb moisture from the filling. You're not looking for browning, just a slight set to the structure. The crust should still be quite pale when you remove it.
Step 8: Pour Filling and Bake
- Remove the pan from the oven and carefully pour the lemon filling over the warm crust, spreading it gently to the edges. Return to the oven and bake for 18-22 minutes. The bars are done when the filling is set around the edges but still has the tiniest jiggle in the very center—about a 1-inch circle in the middle. This is crucial: overbaking makes them dry; underbaking makes them too soft to slice cleanly.
Step 9: Cool Completely
- Remove the pan from the oven and set it on a cooling rack. Let it cool at room temperature for at least 45 minutes—don't skip this step, even if you're impatient. As the bars cool, the filling will continue to set gently. Once room temperature, transfer the pan to the refrigerator for at least 3 hours, preferably overnight.
Step 10: Slice and Serve
- When fully chilled, use the parchment overhang to lift the entire slab out of the pan onto a cutting board. Using a sharp knife dipped in hot water (and wiped clean between cuts), slice into 16 even squares—aim for a 4x4 grid. The hot knife trick prevents the filling from sticking. Dust with confectioners' sugar just before serving if desired.
Notes
FAQs
Can I make these in a 9×9 pan instead of 8×8?
Yes, but the bars will be slightly thinner and bake a minute or two faster. Start checking at 16 minutes instead of 18. You’ll get about 20 smaller bars instead of 16. The ratio of filling to crust will be slightly less, which is fine if you prefer lighter bars.
What if I don’t have fresh lemons?
Fresh is truly best, but in a pinch, you can use bottled lemon juice. Use the same amount, though the flavor will be noticeably flatter and potentially slightly bitter. Add an extra ¼ teaspoon of vanilla extract to round out the profile. If you have lemon extract (different from juice), use just ½ teaspoon in addition to the bottled juice. It’s not ideal, but it works.
Why is my filling lumpy?
The cream cheese was too cold when you started. Lumpy filling happens when cold cream cheese is beaten with sugar before it’s had time to soften. If this happens, strain the mixture through a fine-mesh sieve into a bowl, pressing gently with the back of a spoon. This removes lumps. Then proceed with the recipe. Next time, give yourself an extra 10 minutes for proper softening.
Can I use powdered sugar in the filling instead of granulated?
Not as a 1:1 swap. Powdered sugar contains cornstarch, which can make the filling slightly grainy. If you only have powdered sugar, use about ⅔ cup (since it’s denser) and sift it first to avoid lumps. The bars will set slightly differently, so watch them carefully during baking.
My bars are too soft to slice cleanly. What went wrong?
Either they weren’t chilled long enough (aim for 4-6 hours minimum), or the oven temperature was off and they underbaked slightly. Use an oven thermometer to verify your oven’s accuracy—many home ovens run hot or cold. Next time, use the hot-knife slicing method: dip a sharp knife in hot water, wipe it clean, then slice. This prevents dragging and sticking.
Can I double this recipe?
Yes! Use a 9×13-inch pan and double all ingredients. The baking time will increase to about 25-30 minutes. Watch for that tiny jiggle in the center before removing from the oven. These bars freeze beautifully, so doubling and freezing half is smart meal prep.
More Recipes You’ll Love
- Key Lime Cookie Bars – A tropical twist on this same concept with a buttery cookie crust and tangy lime filling.
- Large Batch Brownies – Perfect for pairing alongside these bars at dessert spreads or for contrast in flavor and texture.
- Krolls Cookies – A classic that pairs beautifully with lemon bars for a mixed dessert platter.
- These Homemade Levain Cookies – Worth adding to your recipe collection.
- My Go-To Cookie Recipe – Worth adding to your recipe collection.
- These Soft And Fluffy Muffins – Worth adding to your recipe collection.
- These Homemade Great Cookies – Worth adding to your recipe collection.
- This Creamy Cheesecake Recipe – Worth adding to your recipe collection.
- This Homemade Cheesecake Cake – Worth adding to your recipe collection.
Final Thoughts
I keep making these bars year after year because they never disappoint. They’re simple enough for a beginner to master, but elegant enough to impress at a dinner party. The fresh lemon flavor feels light and refreshing, the cream cheese filling is silky and indulgent, and the graham cracker crust provides just the right textural foundation. Most importantly, they bring genuine joy—to make, to serve, to eat.
These remind me why I started documenting family recipes in the first place: to preserve the moments when good food brings people together. My grandmother’s kitchen on that June afternoon, the lemon-scented air, the excitement of sneaking a warm bar before dinner—that’s what these bars represent to me.
I hope you’ll make them, and I hope they create their own memories in your kitchen. Whether you’re serving them at a spring brunch, packing them for a picnic, or sneaking one late at night with a cup of tea, I promise they’ll bring brightness to your day. Good food is a good mood!
- S’mores Brownies With Graham Cracker Crust Recipe
- Cherry Pie with Graham Cracker Crust and Streusel Topping
- Honey Baked Ham Lemon Cream Cake Recipe
- Lemon Curd Cookies Recipe

My name is Lori Walker. I’m a registered dietitian, food blogger and food enthusiast. I share easy healthy, delicious recipes on my blog and review necessary kitchen items. The recipes I share take less… Read more