This post contains affiliate links. As an Amazon Associate I earn from qualifying purchases.
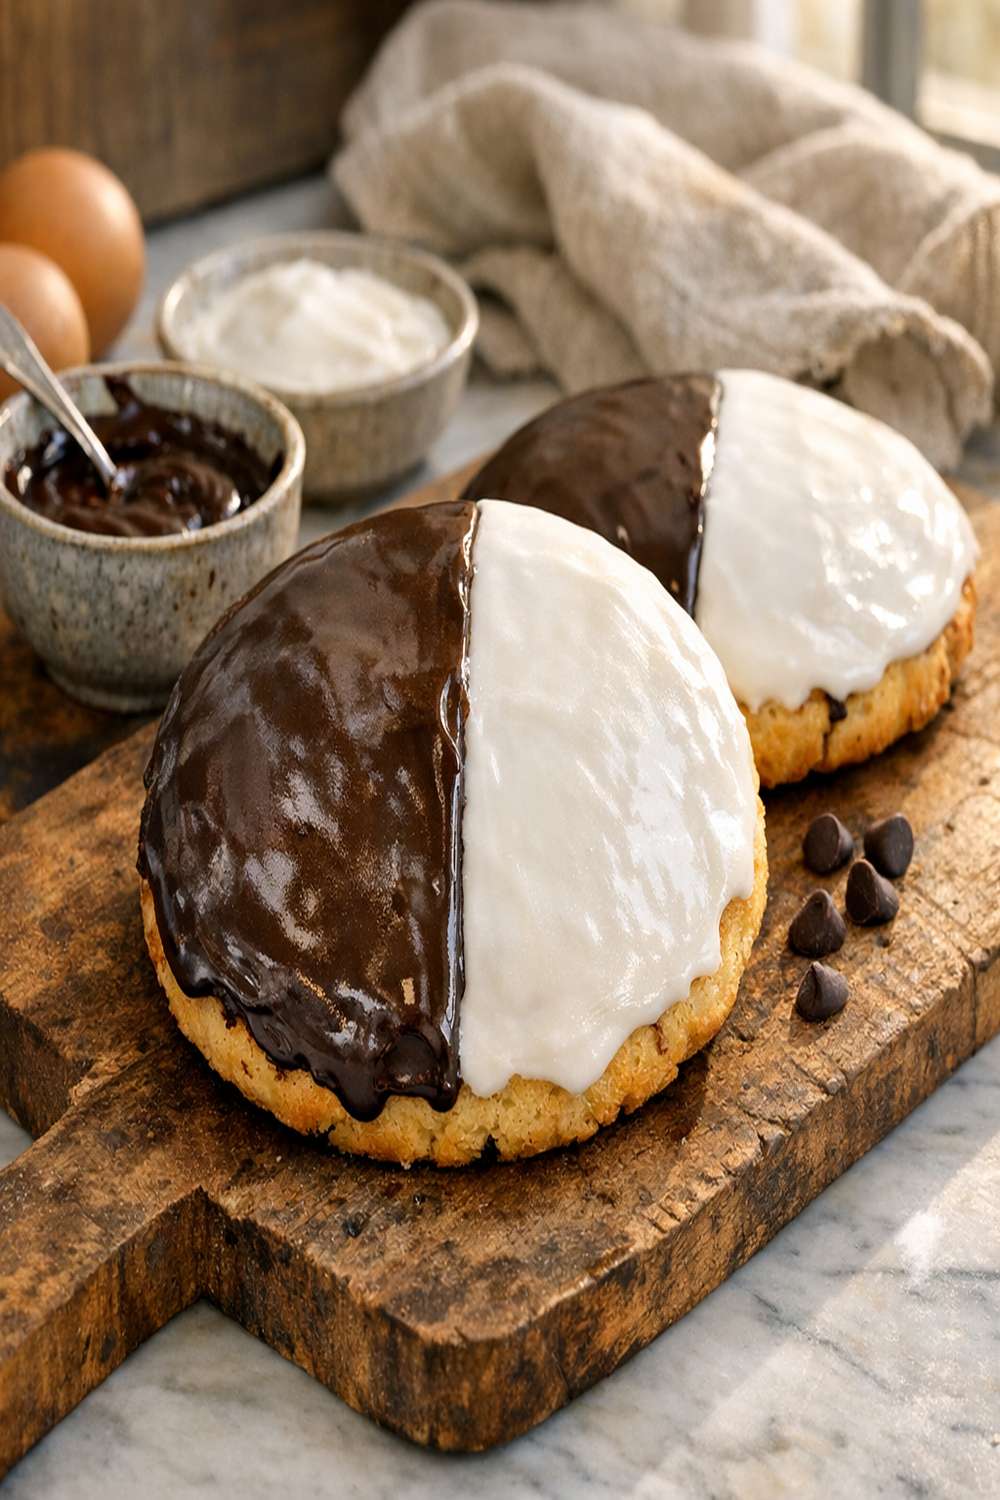
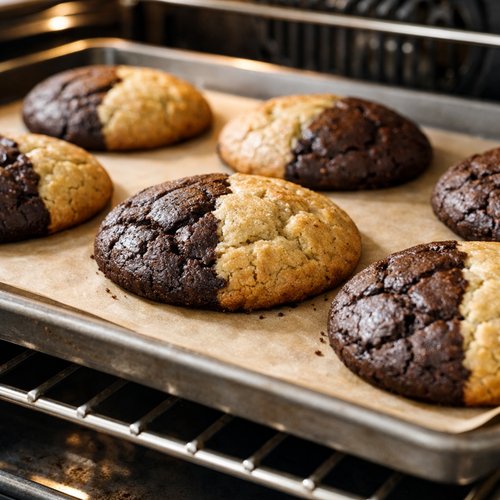
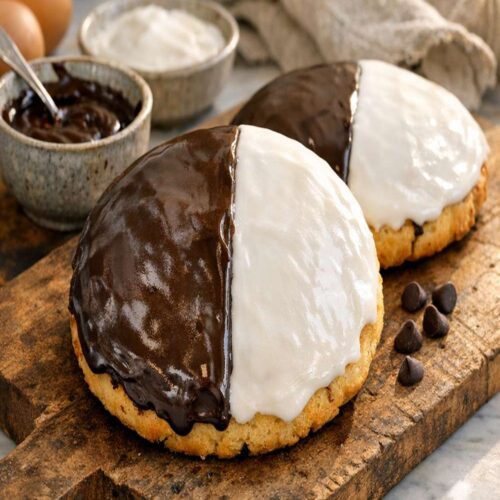
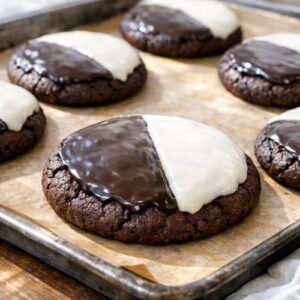
There’s something magical about biting into a giant, chewy cookie that has dark chocolate cake on one side and creamy white chocolate on the other. These levain-style black and white cookies are the kind of treat that pairs beautifully with a warm cup of coffee or cold glass of milk. If you’re looking for showstopper desserts that feel bakery-quality, I also love making large batch brownies for feeding a crowd.
The Story Behind My Favorite Cookie Discovery
I’ll never forget the day my grandmother brought home a box of black and white cookies from the local bakery in the city. I was eight years old, and I’d never seen anything like them—half chocolate, half vanilla white chocolate, each cookie the size of my palm. She broke one in half and let me taste both sides at once. That contrast of flavors and textures stuck with me for decades.
When I started recording our family recipes in 2019, I realized I’d never learned how to make these myself. So I tested and tested until I created a version that captures that exact memory: a giant, chewy cookie with deep chocolate cake flavor balanced by sweet white chocolate chips. This recipe makes approximately twelve 6-ounce cookies, and each one is a celebration of that childhood moment.
What is a Levain Black and White Cookie?
A levain black and white cookie is a New York City bakery staple—a giant, soft, cake-like cookie that’s half dark chocolate and half white chocolate. The term “levain” refers to the bakery’s famous style: oversized, thick-centered cookies with chewy edges. These aren’t thin, crispy cookies; they’re pillowy, substantial treats that feel indulgent.
The magic happens when you combine unsweetened cocoa powder with brown sugar for deep, almost fudgy chocolate flavor on one half, then balance it with creamy white chocolate chips on the other. The result is a cookie that feels fancy enough for a special occasion but simple enough to bake on a Tuesday night using equipment you already have at home.
What makes this version special is the combination of cornstarch and a specific creaming technique that gives these cookies their signature chewiness. The cornstarch is a professional baker’s secret—it inhibits gluten development, keeping the texture tender and soft rather than tough.
Why You’ll Love This Black and White Cookie Recipe
- Bakery-Quality Results at Home – These cookies look and taste like they came from a New York City bakery, but you’re making them in your own kitchen with ingredients you already have on hand.
- Built-In Portion Control – Weighing the dough into 6-ounce balls means every cookie bakes evenly and feeds one or two people perfectly, no guessing required.
- Contrast of Flavors You’ll Crave – The dark, sophisticated chocolate plays beautifully against the sweet, creamy white chocolate, creating a flavor experience that keeps you coming back for more.
- Chewy, Not Cake-Like – Many homemade cookies turn out either too dry or too soft, but this recipe nails that middle ground: structured enough to hold together, tender enough to melt in your mouth.
- Make-Ahead Friendly – You can prepare the dough days in advance or freeze baked cookies for quick treats when cravings strike.
- Simple Ingredient List – No unusual items or specialty supplies needed, just butter, sugar, eggs, flour, and chocolate chips.
The Ingredients
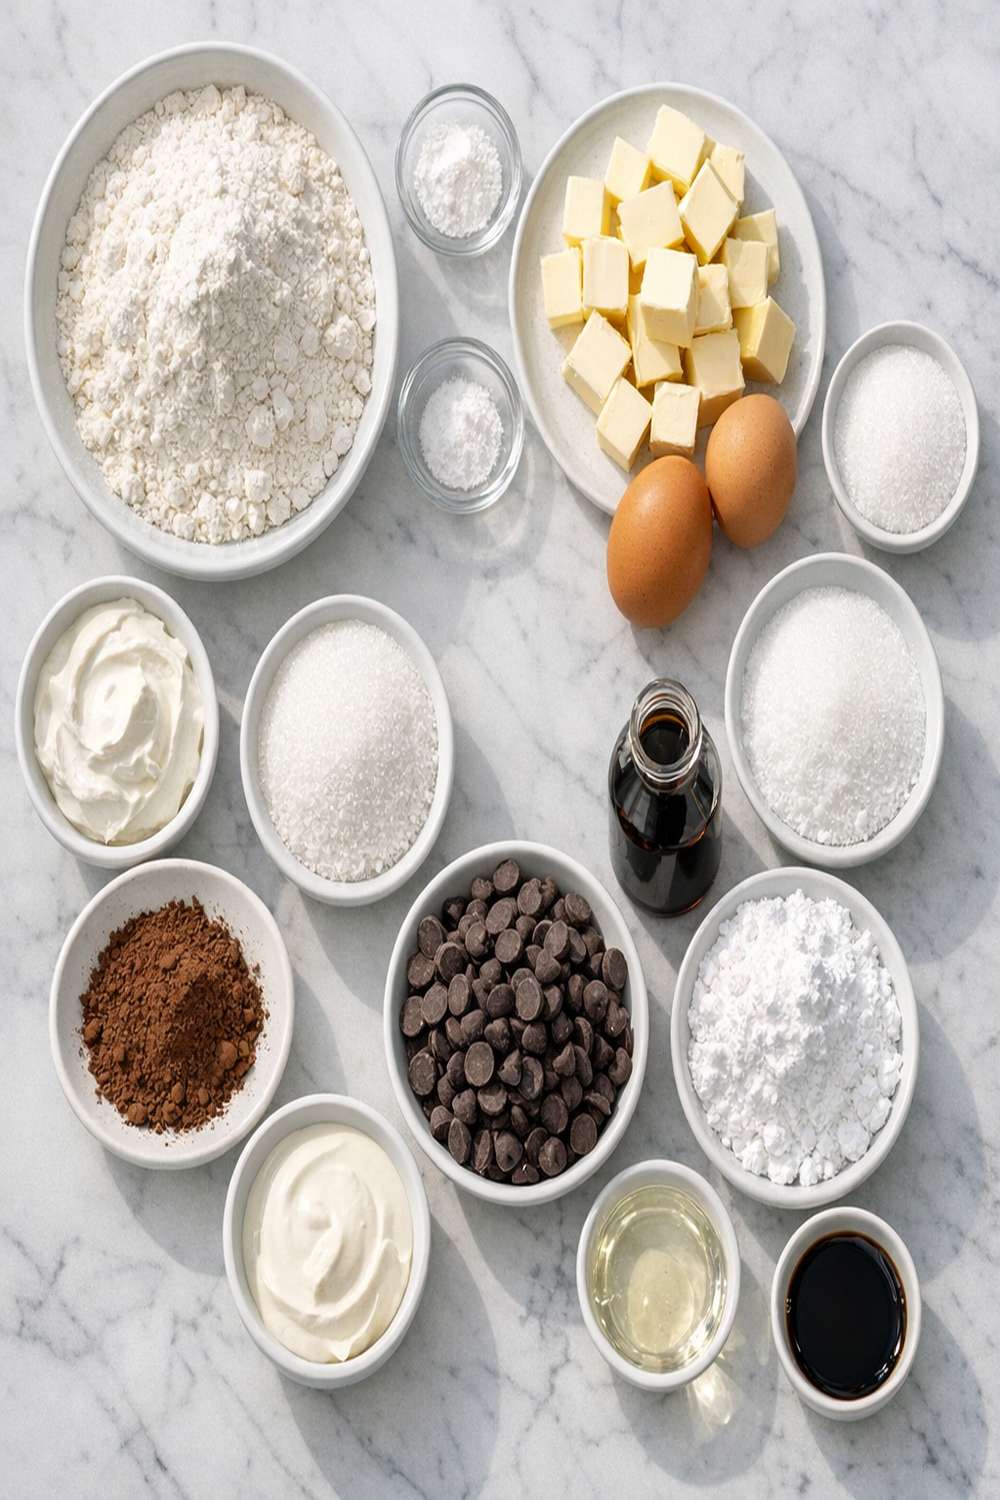
I’ve organized these ingredients by type so you can gather everything before you start mixing. Most of these are pantry staples you may already have. I’ve included helpful notes based on my testing—small details that make a real difference in how these cookies turn out.
For the Cookie Base
- ¾ cup granulated sugar (white, not turbinado)
- ¾ teaspoon baking soda (not baking powder)
- ½ teaspoon salt (enhances all flavors, don’t skip this)
- 1 cup unsalted butter (cold or barely softened, cut into small cubes)
- 1 cup packed brown sugar (light or dark, both work beautifully)
- 2 large eggs (room temperature gives smoother mixing)
For the Dry Ingredients
- 1 teaspoon cornstarch (this is your secret weapon for chewiness)
- ½ cup dark unsweetened cocoa powder (Dutch-processed or natural both work)
- 2½ cups all-purpose flour (spooned and leveled, never packed)
For the Chocolate Components
- 1 teaspoon pure vanilla extract (optional but recommended for deeper flavor)
- 1 cup milk chocolate chips (adds richness to the dark chocolate flavor)
- 11 ounces white chocolate chips (quality matters here—avoid chocolate-flavored coating)
Yield: Makes 12 giant cookies (6 ounces each)
How to Make Black and White Cookies?
I’m going to walk you through this step-by-step, the way I’d teach a friend in my own kitchen. Each step is detailed so you understand the “why” behind what you’re doing. This approach removes guesswork and guarantees excellent results every single time you bake.
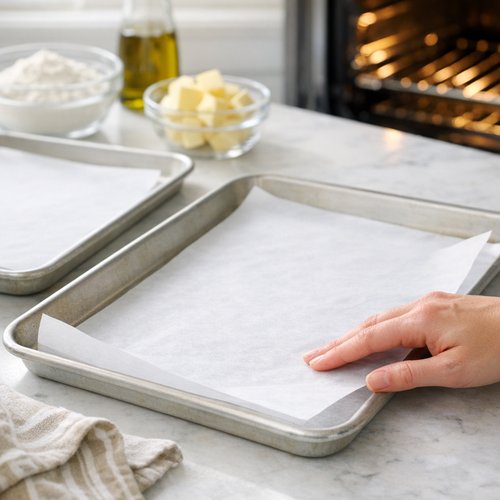
Step 1: Preheat Your Oven and Prepare Your Pans
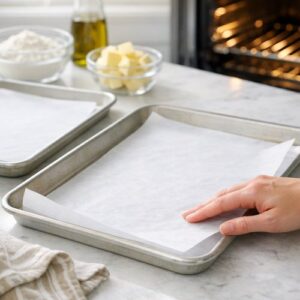
Set your oven to 400°F and position a rack in the center. While the oven heats, prepare your baking sheets. This is important: use light-colored baking sheets, not dark ones. Dark sheets conduct heat too aggressively and can over-brown the bottoms of these thick cookies before the centers bake through. If you only have dark sheets, try placing a second light-colored sheet underneath as an insulator.
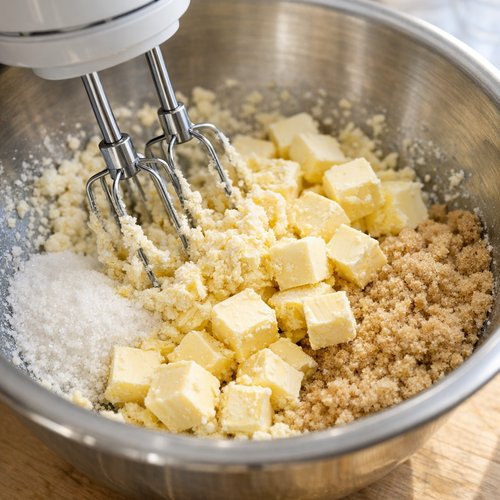
Step 2: Cream Butter and Sugars Together
In a large mixing bowl, combine your cold butter cubes with both sugars. Using an electric mixer on medium-high speed, beat for 3 to 4 minutes until the mixture becomes light, fluffy, and noticeably pale. You’re aerating the butter, which creates lift and a tender crumb structure.
About halfway through this mixing time, pause and scrape down the sides of the bowl with a rubber spatula. This ensures every bit of butter gets incorporated evenly, preventing any hard butter pieces that could create tough streaks in your cookies.
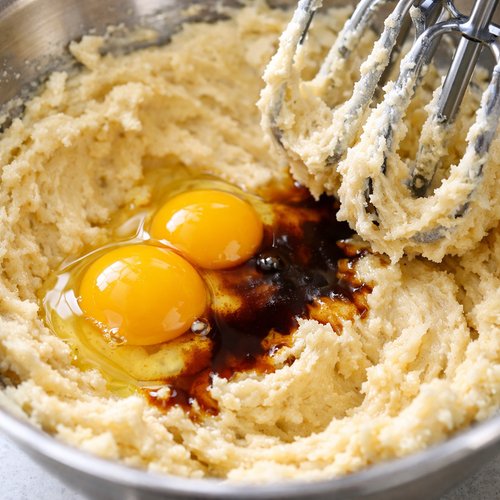
Step 3: Add Eggs and Vanilla
Crack your eggs directly into the creamed mixture and add the vanilla extract if you’re using it. Mix on medium speed for about 1 minute until everything looks smooth and creamy. The mixture should be homogeneous and smooth—no visible egg white streaks or lumps of undissolved butter.
This step matters because eggs act as both a binder and a tenderizer. Mixing them in thoroughly creates structure that supports those large, heavy chocolate chips without the cookie spreading too thin during baking.
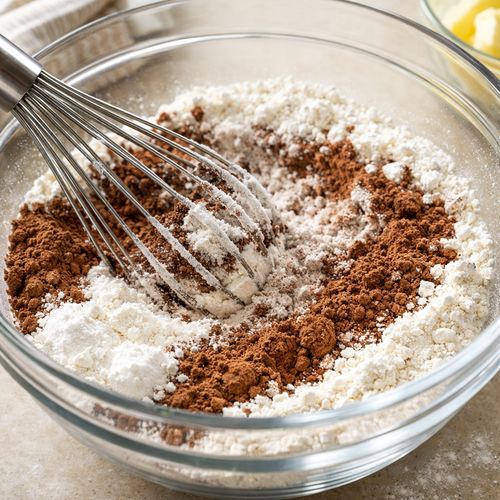
Step 4: Combine All Dry Ingredients
In a separate bowl, whisk together your flour, unsweetened cocoa powder, cornstarch, baking soda, and salt. Whisking for about 30 seconds aerates the dry ingredients and distributes the leavening agent evenly. This prevents pockets of baking soda that could create an unpleasant soapy flavor.
The cornstarch is doing important work here. It reduces the gluten network in the flour, which is exactly what you want for a tender, chewy cookie rather than a tough, dense one.
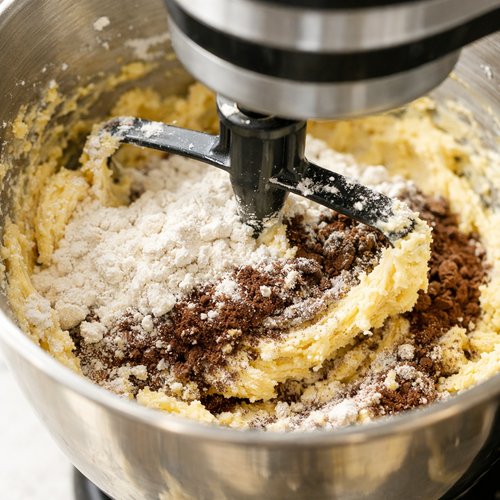
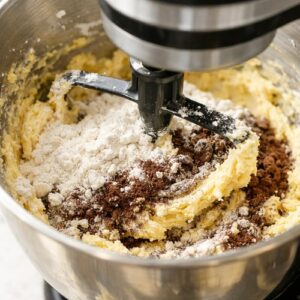
Step 5: Fold Dry Ingredients Into Wet Ingredients
Lower your mixer to low speed and add the dry ingredient mixture to the butter-egg mixture. Fold gently for about 30 seconds to 1 minute, just until combined. You want a few flour streaks visible at the end—this is intentional. Overmixing develops gluten, which creates tough cookies instead of tender ones.
The dough should look shaggy and textured at this point, not smooth and uniform. That’s exactly right.
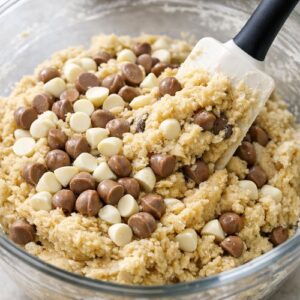
Step 6: Fold in the Chocolate Chips
Add your white chocolate chips and milk chocolate chips to the dough and fold gently by hand using a rubber spatula. Mix just until the chips are distributed throughout, about 30 to 45 seconds. A few streaks of undistributed dough are fine—you want to avoid overworking this dough.

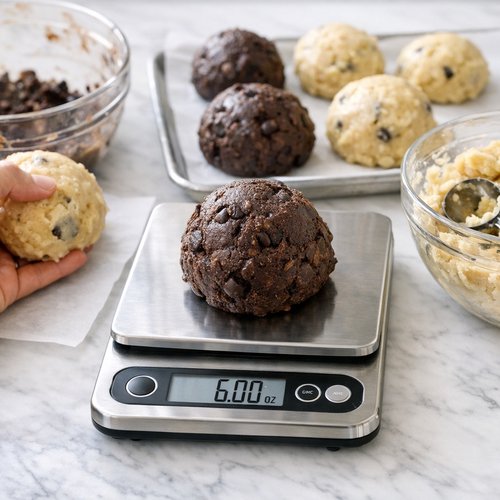
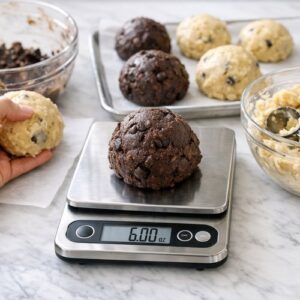
Step 7: Portion the Dough Into Giant Cookie Balls
Here’s where a food scale becomes your best friend. I recommend using one because it guarantees perfectly even baking—no guessing about whether your cookies are the right size. Divide your dough into 12 equal portions of 6 ounces each. Roll each portion gently into a smooth ball and place on your prepared light-colored baking sheets, leaving about 3 inches between each cookie for spreading.
These cookies will spread during baking, so proper spacing is important. If your baking sheet feels crowded, use two sheets instead of forcing all 12 cookies onto one.
Step 8: Bake Until Just Set
Place your baking sheets in the preheated 400°F oven and bake for 9 to 11 minutes. You’re looking for the edges to look set and slightly darker while the center still appears soft and slightly underdone. The cookies will continue cooking from residual heat after they come out of the oven.
At 9 minutes, check one cookie by pressing gently in the center—it should feel barely firm, with a little give. If the centers still feel soupy, check again in 1-minute intervals. Overbaking by even 2 minutes creates dry, cakey cookies instead of chewy ones.
Step 9: Cool Before Serving
Remove the baking sheets from the oven and let the cookies rest on the hot pan for at least 10 minutes without moving them. This is critical. During this resting period, the structure sets up completely and the cookies develop their signature chewiness. The cookies will feel soft and pliable when first removed from the oven, but they’ll firm up beautifully as they cool.
After 10 minutes, you can gently transfer them to a wire cooling rack if you’d like, but honestly, they’re perfect eaten warm right off the pan with a cold glass of milk.

Tips and Tricks
- Use a Kitchen Scale for Consistent Results – Weighing your dough portions guarantees every cookie bakes for the same amount of time and develops the same texture. It removes the biggest variable in cookie baking: inconsistent sizing.
- Don’t Skip the Cornstarch – This ingredient is non-negotiable if you want authentic levain-style chewiness. It’s inexpensive and available in any grocery store’s baking aisle.
- Room-Temperature Eggs Mix More Smoothly – Cold eggs don’t incorporate as easily and can create lumpy batters. Take eggs out of the fridge 15 minutes before you start baking.
- Invest in Quality White Chocolate – Cheap white chocolate “coating” contains very little cocoa butter and tastes artificial. Real white chocolate lists cocoa butter in the first few ingredients.
- Light Baking Sheets Are Non-Negotiable – This seems like a small detail, but dark sheets are the #1 reason homemade cookies brown too quickly on the bottom. Even a dull silver sheet works better than a dark one.
- The Resting Period After Baking is Sacred – Don’t move these cookies around while they’re hot. That 10-minute rest is when the magic happens and they develop their signature texture.
- Underbake Slightly for Maximum Chewiness – These cookies should look barely set when they come out of the oven. That soft center bakes through as they cool.
Expert’s Nutritional Tip
As a registered dietitian, I love these cookies because the brown sugar provides molasses, which contains trace minerals like potassium and magnesium beyond what white sugar offers. The cocoa powder is also rich in polyphenols—compounds with antioxidant properties. That said, these are absolutely indulgent treats meant to be enjoyed in moderation as part of a balanced diet, typically one cookie as a satisfying dessert for one or two people.
Common Mistakes to Avoid
- Overmixing the Dough – The biggest mistake I see is mixing too long after adding flour. Overmixing develops gluten and creates tough, cake-like cookies instead of tender ones. Stop mixing the moment you don’t see dry flour streaks anymore.
- Using Dark Baking Sheets – This might seem minor, but it’s the #1 reason homemade cookies have burnt bottoms and underbaked centers. Light-colored sheets are essential for even baking.
- Not Resting the Cookies After Baking – Impatience ruins these cookies. Those 10 minutes on the hot pan are when the structure sets and the chewiness develops. Skip this and you get crumbly cookies instead.
- Opening the Oven Door to Check Progress – Every time you open the door, heat escapes and baking times become unpredictable. Trust the timing and check only when you’re close to the done time.
Can I Store Black and White Cookies?
Yes! These cookies keep beautifully when stored properly. Let them cool completely to room temperature first, then place them in an airtight container at room temperature. They’ll stay fresh and chewy for up to 5 days. I often notice they become even chewier on day 2 as moisture redistributes through the cookie.
For longer storage, freeze baked cookies in a freezer-safe container with parchment paper between layers for up to 3 months. Let them thaw at room temperature for about 20 minutes before eating. You can also freeze the dough balls for up to 2 months—just add 1 to 2 minutes to the baking time when baking from frozen.
I don’t recommend refrigerating these cookies because the cold actually speeds up staling. Room temperature or frozen are your best bets.
Make-Ahead Guide
As someone who tests recipes in real home kitchens, I’ve learned that cookie dough is one of the most forgiving things to make ahead. Here’s my tested approach:
- Make Dough Up to 3 Days Ahead – Mix the dough, portion it into balls, and refrigerate in an airtight container. When you’re ready to bake, place the cold dough balls directly on the baking sheet and add 1 to 2 minutes to the baking time.
- Freeze Unbaked Dough Balls – Place portioned balls on a baking sheet, freeze until solid (about 2 hours), then transfer to a freezer bag. Bake from frozen anytime, adding 2 to 3 minutes to the baking time.
- Bake and Freeze Completely Baked Cookies – These keep perfectly for 3 months. Thaw at room temperature for 20 minutes and they taste freshly made.
Seasonal Variations
While these black and white cookies are perfect year-round, here are ways to adapt them by season:
- Fall Version – Replace 2 tablespoons of flour with pumpkin pie spice and add 1 teaspoon pure vanilla extract for depth. The spice notes echo autumn flavors beautifully.
- Winter Version – Add ½ teaspoon peppermint extract and substitute crushed candy canes for half of the white chocolate chips. Beautiful and festive.
- Spring Version – Use lemon zest mixed into the white chocolate chips for a bright, citrusy contrast to the dark chocolate.
- Summer Version – Make these as written and serve them slightly chilled or at room temperature with a refreshing beverage. The cool, creamy white chocolate is perfect in warm weather.
Nutrition Information
Each cookie (one 6-ounce portion) contains approximately 520 calories, 24g fat, 73g carbohydrates, and 6g protein, based on USDA data for standard ingredients. The cocoa powder provides 2g dietary fiber and contributes antioxidants.
These are indulgent treats meant to be enjoyed mindfully. One cookie makes a satisfying dessert when paired with beverages like coffee or milk. If you’re looking for a nutritionally lighter dessert option, I also enjoy making my kale and blueberry salad for when I want something refreshing.
What Can I Serve With Black and White Cookies?
These substantial cookies are complete on their own, but here are pairings that make them even better:
- Cold Milk (Whole or 2%) – The classic pairing. The cool creaminess balances the rich chocolate beautifully.
- Hot Coffee or Tea – A warm beverage contrasts perfectly with the cool, chewy cookie. Coffee’s slight bitterness complements the dark chocolate.
- Vanilla Ice Cream – Warm cookie plus cold ice cream equals nostalgia in every bite. Vanilla is the perfect neutral canvas.
- Whipped Cream – A dollop of fresh whipped cream on a warm cookie feels decadent and special.
- Espresso – For serious chocolate lovers, a shot of espresso alongside emphasizes the cocoa flavors even more.
Substitutes
- Cake Flour Instead of All-Purpose – If you want an even softer, more tender crumb, use 1 cup cake flour combined with 1½ cups all-purpose flour instead of 2½ cups all-purpose. This reduces protein content and creates a more delicate texture.
- Salted Butter for Unsalted – You can use salted butter if unsalted isn’t available, but reduce the added salt in the recipe to ¼ teaspoon to avoid over-salting.
- Dark Chocolate Chips for Milk Chocolate – If you prefer deeper chocolate flavor, use dark chocolate chips (70% cacao) instead of milk chocolate. The result will be less sweet.
- Coconut Oil for Half the Butter – Substitute ½ cup melted coconut oil for ½ cup of the butter for a slightly lighter texture and subtle coconut undertone (this is optional and changes flavor profile).
- Brown Butter for Regular Butter – Brown your butter before creaming for a more sophisticated, nutty depth. Cool it slightly before using.
Levain Black And White Cookie Recipe
Ingredients
For the Cookie Base
- ¾ cup granulated sugar white, not turbinado
- ¾ teaspoon baking soda not baking powder
- ½ teaspoon salt enhances all flavors, don't skip this
- 1 cup unsalted butter cold or barely softened, cut into small cubes
- 1 cup packed brown sugar light or dark, both work beautifully
- 2 large eggs room temperature gives smoother mixing
For the Dry Ingredients
- 1 teaspoon cornstarch this is your secret weapon for chewiness
- ½ cup dark unsweetened cocoa powder Dutch-processed or natural both work
- 2½ cup all-purpose flour spooned and leveled, never packed
For the Chocolate Components
- 1 teaspoon pure vanilla extract optional but recommended for deeper flavor
- 1 cup milk chocolate chips adds richness to the dark chocolate flavor
- 11 ounce white chocolate chips (quality matters here
Instructions
Step 1: Preheat Your Oven and Prepare Your Pans
- Set your oven to 400°F and position a rack in the center. While the oven heats, prepare your baking sheets. This is important: use light-colored baking sheets, not dark ones. Dark sheets conduct heat too aggressively and can over-brown the bottoms of these thick cookies before the centers bake through. If you only have dark sheets, try placing a second light-colored sheet underneath as an insulator.
Step 2: Cream Butter and Sugars Together
- In a large mixing bowl, combine your cold butter cubes with both sugars. Using an electric mixer on medium-high speed, beat for 3 to 4 minutes until the mixture becomes light, fluffy, and noticeably pale. You're aerating the butter, which creates lift and a tender crumb structure. About halfway through this mixing time, pause and scrape down the sides of the bowl with a rubber spatula. This ensures every bit of butter gets incorporated evenly, preventing any hard butter pieces that could create tough streaks in your cookies.

Step 3: Add Eggs and Vanilla
- Crack your eggs directly into the creamed mixture and add the vanilla extract if you're using it. Mix on medium speed for about 1 minute until everything looks smooth and creamy. The mixture should be homogeneous and smooth—no visible egg white streaks or lumps of undissolved butter. This step matters because eggs act as both a binder and a tenderizer. Mixing them in thoroughly creates structure that supports those large, heavy chocolate chips without the cookie spreading too thin during baking.

Step 4: Combine All Dry Ingredients
- In a separate bowl, whisk together your flour, unsweetened cocoa powder, cornstarch, baking soda, and salt. Whisking for about 30 seconds aerates the dry ingredients and distributes the leavening agent evenly. This prevents pockets of baking soda that could create an unpleasant soapy flavor. The cornstarch is doing important work here. It reduces the gluten network in the flour, which is exactly what you want for a tender, chewy cookie rather than a tough, dense one.

Step 5: Fold Dry Ingredients Into Wet Ingredients
- Lower your mixer to low speed and add the dry ingredient mixture to the butter-egg mixture. Fold gently for about 30 seconds to 1 minute, just until combined. You want a few flour streaks visible at the end—this is intentional. Overmixing develops gluten, which creates tough cookies instead of tender ones. The dough should look shaggy and textured at this point, not smooth and uniform. That's exactly right.
Step 6: Fold in the Chocolate Chips
- Add your white chocolate chips and milk chocolate chips to the dough and fold gently by hand using a rubber spatula. Mix just until the chips are distributed throughout, about 30 to 45 seconds. A few streaks of undistributed dough are fine—you want to avoid overworking this dough.
Step 7: Portion the Dough Into Giant Cookie Balls
- Here's where a food scale becomes your best friend. I recommend using one because it guarantees perfectly even baking—no guessing about whether your cookies are the right size. Divide your dough into 12 equal portions of 6 ounces each. Roll each portion gently into a smooth ball and place on your prepared light-colored baking sheets, leaving about 3 inches between each cookie for spreading. These cookies will spread during baking, so proper spacing is important. If your baking sheet feels crowded, use two sheets instead of forcing all 12 cookies onto one.
Step 8: Bake Until Just Set
- Place your baking sheets in the preheated 400°F oven and bake for 9 to 11 minutes. You're looking for the edges to look set and slightly darker while the center still appears soft and slightly underdone. The cookies will continue cooking from residual heat after they come out of the oven. At 9 minutes, check one cookie by pressing gently in the center—it should feel barely firm, with a little give. If the centers still feel soupy, check again in 1-minute intervals. Overbaking by even 2 minutes creates dry, cakey cookies instead of chewy ones.

Step 9: Cool Before Serving
- Remove the baking sheets from the oven and let the cookies rest on the hot pan for at least 10 minutes without moving them. This is critical. During this resting period, the structure sets up completely and the cookies develop their signature chewiness. The cookies will feel soft and pliable when first removed from the oven, but they'll firm up beautifully as they cool. After 10 minutes, you can gently transfer them to a wire cooling rack if you'd like, but honestly, they're perfect eaten warm right off the pan with a cold glass of milk.
Notes
FAQs
Why Are My Cookies Spreading Too Much?
Overly spread cookies usually mean the butter was too warm during creaming or the dough was too warm when you placed it on the baking sheet. Make sure your butter is cold or barely softened before creaming, and consider chilling the dough balls for 30 minutes before baking if your kitchen is warm. Also, check that you’re using a light-colored baking sheet—dark sheets cause uneven spreading.
Can I Make These Cookies Without a Food Scale?
You can, but results will be less consistent because cookies baked at different sizes will finish at different times. If you don’t have a scale, use a ¼-cup cookie scoop and fill it level with the rim, then gently roll into balls. All your cookies will be similar in size this way.
Why Are the Bottoms Burning While Centers Are Underdone?
This almost always indicates you’re using dark baking sheets. Dark metal conducts heat too aggressively on the bottom. Switch to light-colored sheets immediately. If you’re already using light sheets, try placing a second light sheet underneath as an insulator, or position your oven rack one notch higher.
How Do I Know When These Are Done Baking?
Look for edges that appear set and slightly darker, while the center still looks soft and slightly underdone. At 9 minutes, gently press the center of one cookie with your finger—it should feel barely firm with a little give. The cookies will continue cooking from residual heat after removal from the oven. If you overbake by 2 minutes, they’ll be cakey instead of chewy.
What’s the Difference Between This and Regular Chocolate Chip Cookies?
These cookies are chunky, cake-like, and indulgent compared to crispy chocolate chip cookies. The addition of cornstarch creates a chewier structure, the high proportion of chocolate chips (both white and milk chocolate) makes them denser, and the baking temperature of 400°F (rather than 375°F) creates a particular texture. These are designed to be substantial treats rather than thin, delicate cookies.
More Recipes You’ll Love
- Large Batch Brownies – If you love dark chocolate flavor, these fudgy brownies deliver the same satisfaction in bar form, perfect for feeding a crowd or meal prepping.
- Pumpkin Bread – Another substantial, indulgent treat that’s cake-like and perfect for sharing, with warm spice notes that feel comforting year-round.
- my weeknight pasta – For when you want to balance out dessert time with a savory, satisfying main course that feels restaurant-quality.
- Kroll’s Corner Cheeseburger Sliders – These handheld treats pair perfectly with cookies for casual entertaining and feeding groups without fuss.
- These Homemade Maple Cookies – Worth adding to your recipe collection.
- My Favorite Bakery-Style Muffins – Worth adding to your recipe collection.
I hope you fall in love with these black and white cookies the way I did that day in my grandmother’s kitchen. They’re proof that some of the most treasured food memories come from simple combinations of quality ingredients baked with intention. Good food really is a good mood, and these cookies deliver both every single time. Happy baking!
With joy and in your kitchen,
Lori

My name is Lori Walker. I’m a registered dietitian, food blogger and food enthusiast. I share easy healthy, delicious recipes on my blog and review necessary kitchen items. The recipes I share take less… Read more