This post contains affiliate links. As an Amazon Associate I earn from qualifying purchases.
Picture this: you’re standing in your kitchen on a crisp autumn evening, guests arriving in less than an hour. You need something that looks fancy but won’t stress you out—something that tastes like you spent all day cooking when really, you’ve got this handled in minutes. That’s when these little golden shells filled with melted brie and jam come to the rescue. I discovered these beauties while recreating some of my grandmother’s party favorites back in 2019, and they’ve become my go-to showstopper. Whether you’re hosting a wine night or bringing appetizers to a celebration, these bites deliver elegance without the fuss. If you’re looking for other impressive small plates, my this simple cake pairs beautifully on the same table for a well-rounded spread.
When to Make Mini Brie Cheese Bites Recipe
These little treasures are genuinely versatile. They work for intimate gatherings, large celebrations, and every season in between. Here’s when I reach for them again and again:
- Holiday Parties (November through December) – They look sophisticated on a holiday table and can be assembled hours ahead, then baked just before guests arrive for maximum impact
- Wine Tastings and Cocktail Hours – The sweet-savory combination complements both red and white wines beautifully, making them the perfect complement to your favorite pour
- Spring Entertaining and Bridal Showers – These bites feel light and celebratory, especially when paired with fresh fruit and sparkling beverages on a sunny afternoon
- Last-Minute Potluck Contributions – When you need something impressive but have minimal prep time, these deliver every single time
- Weeknight Dinner Party Starters – Skip the stress of complex appetizers and let these elegant bites set the tone for an unforgettable meal
What Makes This Mini Brie Cheese Bites Recipe Special
Here’s what I’ve learned working with home cooks over the years: the best recipes are the ones that feel achievable. This one checks every box. You’re working with just three simple ingredients—crispy phyllo shells, creamy brie, and your favorite jam or preserve. The magic happens when these elements come together in the oven for just seven minutes.
What elevates this beyond ordinary finger food is the textural contrast. You get that satisfying crunch from the toasted shells, the luxurious melt of warm brie in the center, and the bright burst of fruity sweetness from your preserve. It’s restaurant-quality in presentation but honestly, genuinely simple to execute. I’ve tested these on standard kitchen equipment—a regular baking sheet, a basic oven—and they perform beautifully every time.
This recipe also honors my philosophy about real-world testing. Nothing fancy required. No special tools. Just good food that makes people happy.
Scaling for Your Crowd
The beauty of this recipe is that it scales seamlessly. Whether you’re cooking for two or twenty, the timing stays the same—only your quantities change.
- Intimate Dinner for Two (3-4 bites each) – Use 6-8 mini phyllo shells, 2 ounces of brie, and 1 tablespoon of your chosen preserve. Bake on a small sheet for exactly 7 minutes at 350°F
- Standard Dinner Party (6-8 people, 3-4 bites per person) – Use the full recipe as written: one package of 15 mini shells, 4-6 ounces of brie, and 2-3 tablespoons of preserve. Perfect timing, no adjustments needed
- Large Gathering (15+ people, 2-3 bites per person) – Double the recipe by preparing two full packages of phyllo shells simultaneously. Arrange on two separate baking sheets and bake together on different oven racks, rotating halfway through for even browning. Add one additional minute to baking time
- Crowd of Twenty-Five (cocktail party) – Triple the ingredients and bake in three batches, keeping the first batch warm on a serving platter while the others finish in the oven
The Ingredients
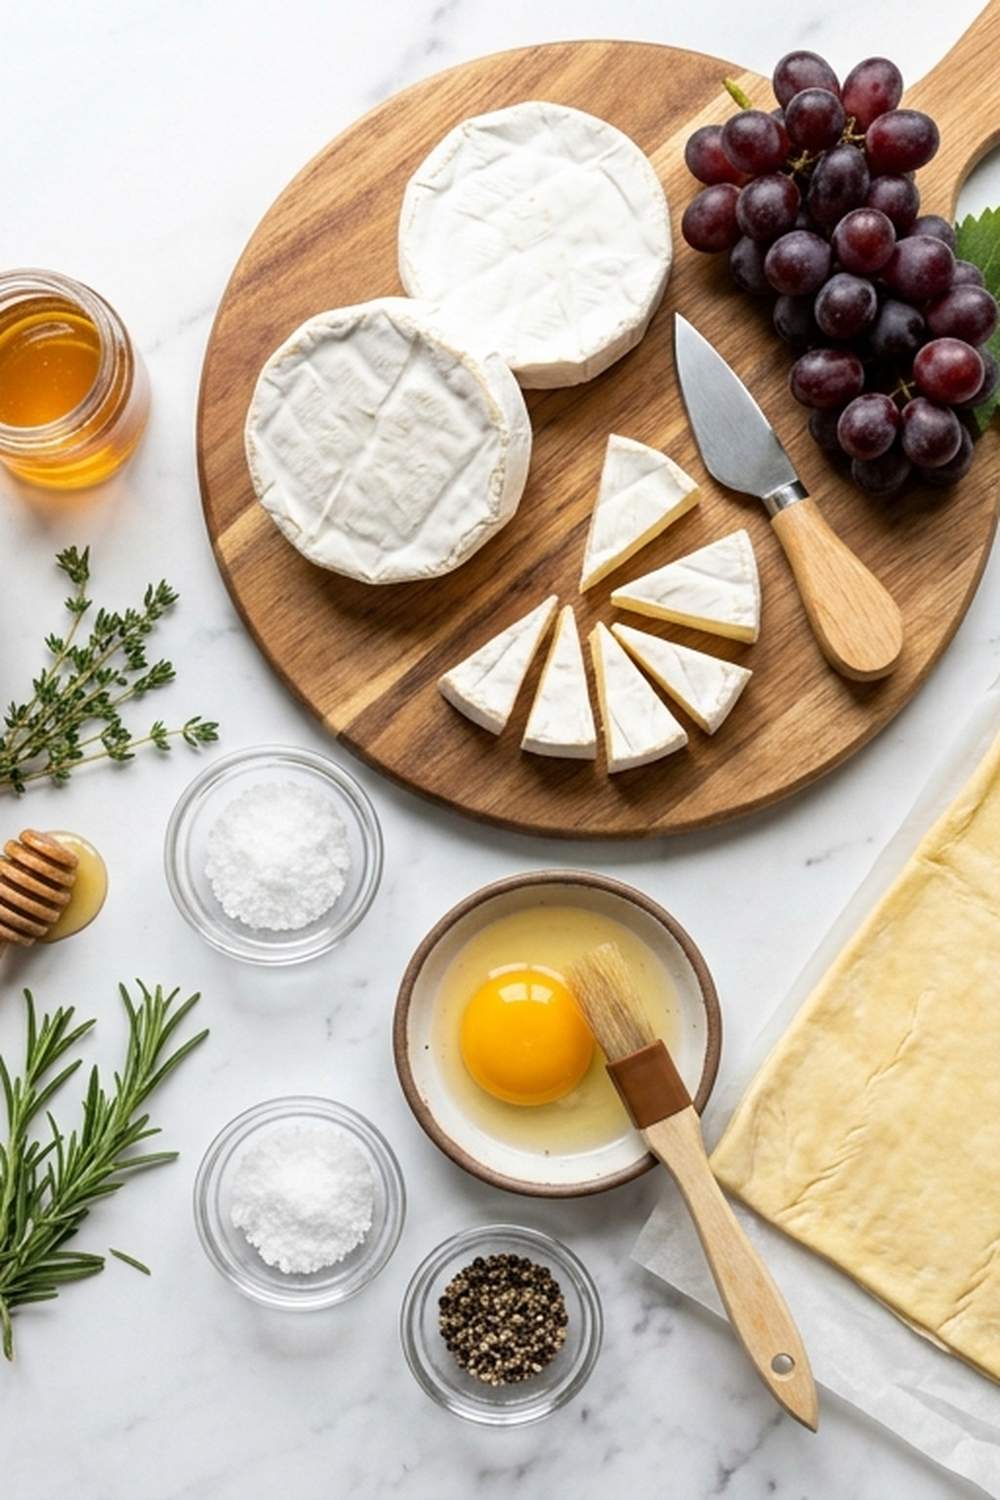
Here’s everything you need for an impressive spread that will have your guests asking for the recipe:
- Sea salt and freshly cracked black pepper to taste (optional but highly recommended for balance)
- 1 jar your favorite preserve, fruit butter, or sauce such as apricot, fig, apple butter, or cranberry (aim for about 2 to 3 tablespoons total for this batch)
- 4 to 6 ounces brie cheese without the rind (chill in the freezer for 10 minutes before cutting—this makes removing the casing easier and prevents the cheese from getting sticky)
- 1 package mini phyllo shells, containing approximately 15 pieces (these come frozen in most grocery stores near the dessert section)
- Fresh thyme leaves for garnish (optional, adds an elegant finishing touch)
How to Make Mini Brie Cheese Bites Recipe for Your Occasion
This is where the magic happens—and honestly, it’s so straightforward that you’ll wonder why you don’t make these every week. The entire process takes about 15 minutes from start to finish, with most of that being hands-off oven time. Let me walk you through each step so you feel confident and in control.
Step 1: Prepare Your Oven and Baking Sheet
Start by preheating your oven to 350 degrees Fahrenheit. This temperature is critical—it’s hot enough to melt the brie and crisp the shells without burning them. While the oven heats, remove your package of mini phyllo shells from the freezer if they’re frozen. You don’t need to thaw them; they go straight onto your baking sheet. Line a standard baking sheet with parchment paper or leave it bare—these little shells are sturdy and won’t stick. Arrange all 15 shells in a single layer across the sheet, spacing them about an inch apart so the heat circulates evenly.
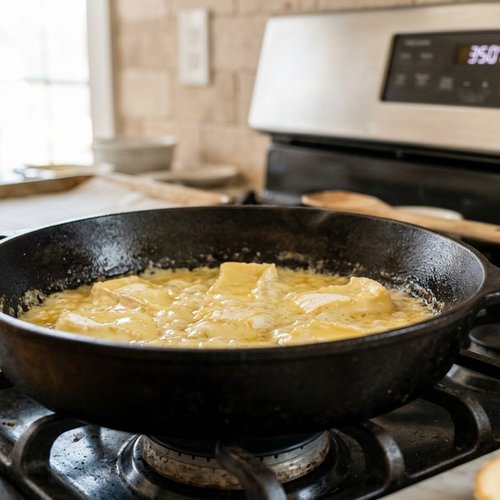
Step 2: Prepare the Brie Cheese
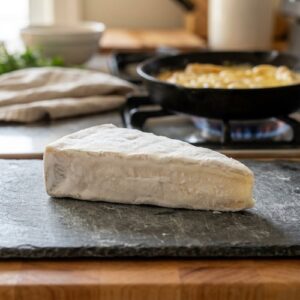
This step makes all the difference in terms of ease and timing. Remove your brie from the refrigerator and place it in the freezer for 10 to 15 minutes. This slight chill makes the rind significantly easier to remove and prevents the cheese from becoming too soft and unmanageable. Once chilled, gently peel away the white outer rind using a small paring knife—think of it like removing the label from a wheel of cheese. Discard the rind. Cut the cheese into small cubes roughly ½ inch in size. You’ll get better coverage and more even melting with smaller pieces. Set the cubes aside on a small plate.
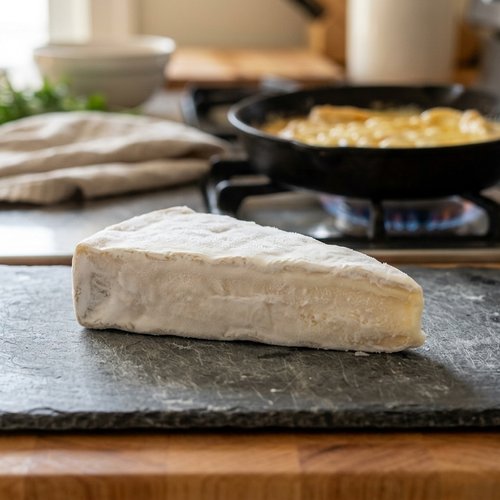
Step 3: Fill Each Shell with Brie
Now comes the assembly—this is where you engage your guests mentally. Place one brie cube into each of the 15 phyllo shells. Work your way across the baking sheet, filling each shell with a single piece of cheese. The shells are sturdy enough to hold the cheese without it toppling, but work gently. This step takes about three minutes and is honestly quite meditative. You’ll feel like you’re really creating something special.
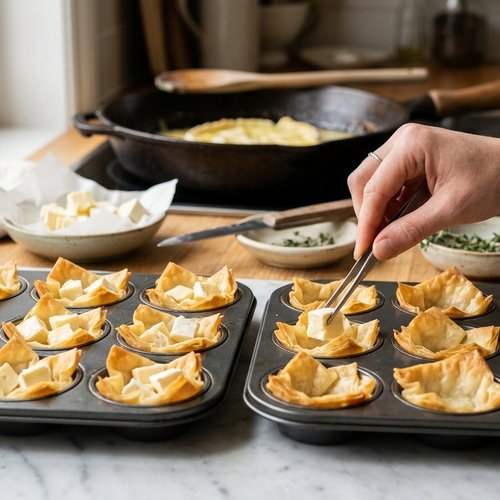
Step 4: Add Your Preserve Layer
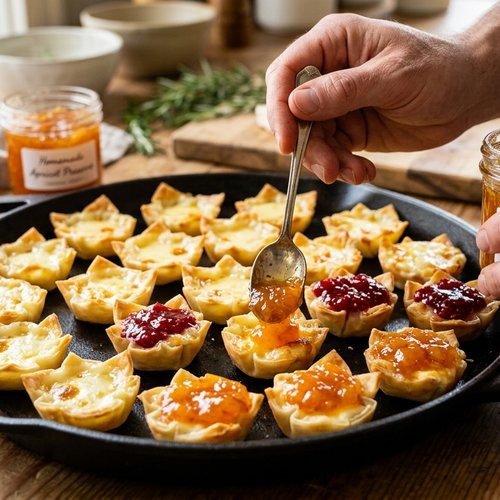
This is the flavor game-changer. Using a small spoon, add approximately ½ teaspoon of your chosen preserve to the top of each brie-filled shell. This is more than a garnish—it’s essential to the flavor balance. The preserve will melt slightly into the brie as it cooks, creating this beautiful sweet-savory harmony. Don’t oversaturate; you’re looking for just enough to flavor the cheese without making the shells soggy. If using a thicker preserve like apple butter, you might need slightly less. If using a thinner jam, aim for a generous ½ teaspoon.
Step 5: Bake Until the Brie Melts
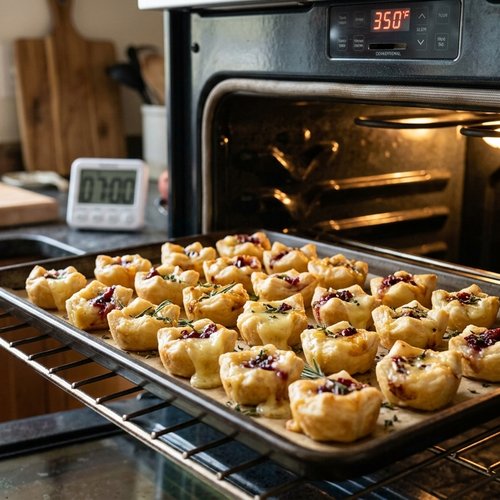
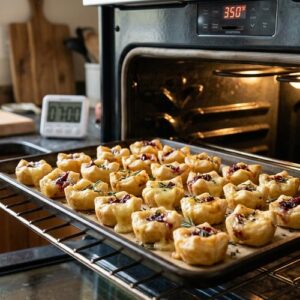
Place your baking sheet into the preheated 350°F oven. Set a timer for 7 minutes. This is critical timing—not 6 minutes, not 8. Watch them during this window because every oven behaves slightly differently. You’re looking for the brie to be completely melted and slightly softened and the phyllo shells to turn a beautiful golden-brown color. The shells should be crispy and warm to the touch. If you’re baking two sheets simultaneously on different racks, add one minute and rotate the sheets halfway through. The brie is done when you can see it gently bubbling around the edges of the shells.
Step 6: Cool Briefly Before Serving
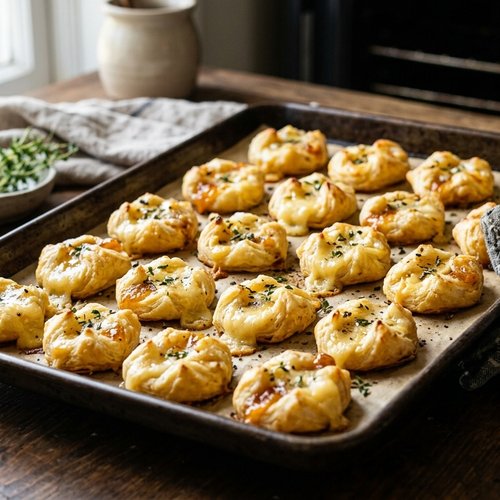
Remove the baking sheet from the oven using proper oven mitts—these little bites come out genuinely hot. Let them rest on the baking sheet for 2 to 3 minutes before transferring to your serving platter. This brief rest allows the brie to set slightly so it doesn’t drip off when your guests pick them up. However, you want to serve them while still warm for maximum flavor impact and that perfect molten center.
Expert’s Nutritional Tip
As a registered dietitian, I always think about the nutritional profile of recipes I share. These bites pack real nutrition alongside their impressive presentation. Brie contains conjugated linoleic acid (CLA), a fatty acid linked to positive health markers, and it’s also a source of calcium for bone health. The phyllo shells are dramatically lower in fat than traditional pastry crusts—you’re getting that crispy texture with a fraction of the butter. The preserve adds natural fruit compounds and antioxidants. When balanced on a plate with vegetables, lean proteins, and whole grains, these make excellent appetizers that contribute nutritionally to your meal, not just taste incredible.
Make-Ahead Timeline
- Three Days Before – Purchase all ingredients and store properly. Brie keeps beautifully in the refrigerator, phyllo shells stay frozen, and your preserve is shelf-stable
- One Day Before – Remove brie from the refrigerator and let it come to room temperature for 30 minutes, then prepare it as directed in Step 2. Cut into cubes, place in an airtight container, and refrigerate. This saves you 5 minutes the day of your event
- Day Of, Up to Two Hours Before Guests Arrive – Arrange phyllo shells on your baking sheet and fill each with a brie cube and preserve topping. Cover loosely with plastic wrap and keep at room temperature until ready to bake
- Thirty Minutes Before Serving – Preheat your oven and bake according to Step 5. Bake immediately before guests arrive for maximum crispness and warmth
How to Present and Plate Mini Brie Cheese Bites Recipe
Presentation matters enormously with appetizers because they’re the first impression your meal makes. I always think about how these little bites will look on the table and how guests will interact with them.
- Arrange on a Slate Board or Wooden Platter – Transfer the warm bites directly from the baking sheet onto a beautiful serving board, leaving slight space between each bite. The contrast of the golden shells against the dark board is visually stunning and says “I care about presentation”
- Garnish with Fresh Herbs – Sprinkle fresh thyme leaves or microgreens across the platter just before serving. This adds color, freshness, and signals quality to your guests
- Add Small Napkins Nearby – Place cocktail napkins on one corner of the platter so guests can easily grab a bite without mess. This is a small detail that makes the difference between a casual spread and a polished presentation
- Keep Them Warm – If you’re baking in batches, place the finished bites on a warm platter and loosely cover with foil to keep them warm while the second batch bakes. They’re best served within 15 minutes of coming out of the oven
Seasonal Variations
- Spring and Summer Version – Swap your preserve for lemon curd or apricot jam. Add a tiny basil leaf on top after baking. The bright, citrusy notes feel fresh and celebratory for warm-weather entertaining. Serve these at garden parties and outdoor celebrations
- Fall and Winter Version – Use fig jam, apple butter, or cranberry sauce—these deeper, spiced flavor profiles feel luxurious and warming. Add a small pinch of crushed pistachios on top for color and texture contrast. These are perfect for holiday parties and cozy dinner gatherings
What to Serve Alongside Mini Brie Cheese Bites Recipe
These bites shine brightest when surrounded by complementary flavors and textures. Here’s how I build a complete appetizer spread around them:
- Crunchy Vegetables – Arrange fresh bell peppers, cucumber slices, and cherry tomatoes on the same platter. The crisp, cool vegetables balance the warm, rich bites perfectly
- Crusty Bread or Crackers – Offer a basket of toasted crostini or quality crackers. Some guests love adding the brie bite to a cracker for extra substance
- Charcuterie Elements – Place sliced prosciutto, salami, or aged cheese nearby. The salty cured meats complement the sweet-savory profile beautifully
- Wine Pairing – Serve with a crisp white wine like Pinot Grigio or a light-bodied red like Pinot Noir. The acidity cuts through the richness of the brie
- Complementary Appetizers – If you want to build a full spread, add my Cannoli Dip Recipe for a dessert-forward option, or provide Crunchy Tacos Recipe as a more substantial savory option to balance the richness
Can I Store Mini Brie Cheese Bites Recipe?
These are best enjoyed immediately after baking, but I understand real life happens. Here’s what you need to know about storage:
Within Two Hours of Baking – These are at their absolute peak: crispy shells, perfectly melted brie, and that ideal warm temperature. This is your target window for serving.
Up to Four Hours Later – If you have leftovers (rare in my experience!), store them in an airtight container at room temperature. They’ll lose some crispness but remain quite delicious. Simply reheat in a 325°F oven for 3-4 minutes to restore the texture.
Unbaked, Prepared Bites – You can assemble these completely and refrigerate for up to 8 hours before baking. Simply follow the recipe as written and add one additional minute to the baking time since they’ll be cold when they go into the oven. This is genuinely valuable for entertaining because it eliminates last-minute stress.
Freezing Recommendations – I don’t recommend freezing baked bites as the texture becomes compromised. However, you can freeze the unbaked, assembled bites for up to one month. Bake from frozen, adding 2-3 minutes to the baking time.
Nutrition Information
Based on USDA nutritional databases, per serving (calculated as 1 bite from a batch of 15):
Calories: 95 | Protein: 3g | Fat: 7g (saturated 4g) | Carbohydrates: 6g | Fiber: 0g | Sodium: 145mg
This is genuinely reasonable for an appetizer, especially one that feels this indulgent. The brie provides calcium and vitamin B12, while the phyllo delivers the satisfying crunch with minimal added fat compared to traditional pastry. Pair with vegetables and whole grains at your meal for balanced nutrition.
Common Mistakes to Avoid
- Forgetting to Freeze the Brie First – I learned this the hard way early in my recipe testing. Room-temperature brie becomes a sticky mess that’s difficult to cut into neat cubes and won’t distribute evenly in the shells. The 10-15 minute freezer trick saves you significant frustration
- Skipping the Parchment Paper – While these shells don’t stick badly, parchment paper makes cleanup effortless and prevents any browning on the bottom of your sheet. It’s a two-second step that dramatically improves your experience
- Oversaturating with Preserve – More isn’t always better. Too much jam makes the shells soggy and overwhelming in sweetness. That ½ teaspoon per bite is precisely calibrated for flavor balance
- Baking Too Long – Set a timer. I can’t stress this enough. Even two minutes too long means burnt shells and separated brie. Your oven might run hot, so keep an eye on them starting at the 5-minute mark

Mini Brie Cheese Bites Recipe
Ingredients
- Sea salt and freshly cracked black pepper to taste optional but highly recommended for balance
- 1 jar your favorite preserve, fruit butter, or sauce such as apricot, fig, apple butter, or cranberry aim for about 2 to 3 tablespoons total for this batch
- 4 to 6 ounces brie cheese without the rind (chill in the freezer for 10 minutes before cutting
- 1 package mini phyllo shells, containing approximately 15 pieces these come frozen in most grocery stores near the dessert section
- Fresh thyme leaves for garnish optional, adds an elegant finishing touch
Instructions
Step 1: Prepare Your Oven and Baking Sheet
- Start by preheating your oven to 350 degrees Fahrenheit. This temperature is critical—it's hot enough to melt the brie and crisp the shells without burning them. While the oven heats, remove your package of mini phyllo shells from the freezer if they're frozen. You don't need to thaw them; they go straight onto your baking sheet. Line a standard baking sheet with parchment paper or leave it bare—these little shells are sturdy and won't stick. Arrange all 15 shells in a single layer across the sheet, spacing them about an inch apart so the heat circulates evenly.
Step 2: Prepare the Brie Cheese
- This step makes all the difference in terms of ease and timing. Remove your brie from the refrigerator and place it in the freezer for 10 to 15 minutes. This slight chill makes the rind significantly easier to remove and prevents the cheese from becoming too soft and unmanageable. Once chilled, gently peel away the white outer rind using a small paring knife—think of it like removing the label from a wheel of cheese. Discard the rind. Cut the cheese into small cubes roughly ½ inch in size. You'll get better coverage and more even melting with smaller pieces. Set the cubes aside on a small plate.
Step 3: Fill Each Shell with Brie
- Now comes the assembly—this is where you engage your guests mentally. Place one brie cube into each of the 15 phyllo shells. Work your way across the baking sheet, filling each shell with a single piece of cheese. The shells are sturdy enough to hold the cheese without it toppling, but work gently. This step takes about three minutes and is honestly quite meditative. You'll feel like you're really creating something special.

Step 4: Add Your Preserve Layer
- This is the flavor game-changer. Using a small spoon, add approximately ½ teaspoon of your chosen preserve to the top of each brie-filled shell. This is more than a garnish—it's essential to the flavor balance. The preserve will melt slightly into the brie as it cooks, creating this beautiful sweet-savory harmony. Don't oversaturate; you're looking for just enough to flavor the cheese without making the shells soggy. If using a thicker preserve like apple butter, you might need slightly less. If using a thinner jam, aim for a generous ½ teaspoon.

Step 5: Bake Until the Brie Melts
- Place your baking sheet into the preheated 350°F oven. Set a timer for 7 minutes. This is critical timing—not 6 minutes, not 8. Watch them during this window because every oven behaves slightly differently. You're looking for the brie to be completely melted and slightly softened and the phyllo shells to turn a beautiful golden-brown color. The shells should be crispy and warm to the touch. If you're baking two sheets simultaneously on different racks, add one minute and rotate the sheets halfway through. The brie is done when you can see it gently bubbling around the edges of the shells.
Step 6: Cool Briefly Before Serving
- Remove the baking sheet from the oven using proper oven mitts—these little bites come out genuinely hot. Let them rest on the baking sheet for 2 to 3 minutes before transferring to your serving platter. This brief rest allows the brie to set slightly so it doesn't drip off when your guests pick them up. However, you want to serve them while still warm for maximum flavor impact and that perfect molten center.

Notes
FAQs
Can I use a different type of cheese instead of brie?
Absolutely, though brie is genuinely ideal because it melts smoothly and doesn’t separate. Camembert works beautifully (they’re related), as does goat cheese, though goat cheese will be tangier. Avoid hard cheeses like cheddar—they don’t melt evenly in this short timeframe. If using goat cheese, reduce the amount slightly since it’s more assertive in flavor.
What’s the best preserve to use for a dinner party?
Apricot and fig are my go-to recommendations because they’re classic, complement brie beautifully, and read as sophisticated to guests. Apple butter works wonderfully for fall gatherings. Cranberry sauce is perfect for holiday parties. Avoid overly chunky preserves or those with seeds that might interfere with the texture. Test your choice first if it’s something you haven’t used before.
Can I make these vegetarian and vegan?
The recipe as written is already vegetarian. For vegan versions, substitute cashew-based vegan cheese or other cultured nut cheeses that melt well. The baking time might need adjustment since plant-based cheeses behave differently. Test with a single bite first to ensure proper melting before committing to the full batch.
How do I prevent the phyllo shells from burning?
Use parchment paper and keep a close eye during the final two minutes of baking. Every oven has its own temperature personality. If your oven runs hot, reduce the temperature to 325°F and add one minute to baking time. The shells should be golden, not dark brown.
Can I prepare these the morning of my event?
Yes, absolutely. Assemble them completely (phyllo, brie, preserve) up to 8 hours before baking. Cover loosely with plastic wrap and keep at room temperature. Bake them 30 minutes before guests arrive. This strategy eliminates last-minute stress and is how I approach entertaining in my own kitchen.
More Recipes for Your Table
- Cheesecake Bites Recipe – Elegant, bite-sized desserts that pair beautifully after a savory course
- Cinnamon Sugar Scones Recipe – Perfect for brunch entertaining when you want warm, fresh-baked accompaniments
- this simple cake – An excellent make-ahead dessert option for larger gatherings that complements these savory bites
These Mini Brie Cheese Bites represent everything I believe in about home cooking: simple ingredients, big flavor, and the ability to look absolutely polished without the stress. I started collecting family recipes in 2019 because I realized those moments around the table—when food brings people together—are what life is really about. This recipe is my reminder that you don’t need complicated techniques or fancy equipment to create something memorable.
The next time you’re thinking about hosting, remember these little golden shells. Remember that your guests will be impressed, that you can prepare them ahead of time, and that you’ve got this completely under control. Real entertaining is about connection, not stress. These bites are your secret weapon for pulling off an impressive gathering while still enjoying the people around your table.
Good food is a good mood!

My name is Lori Walker. I’m a registered dietitian, food blogger and food enthusiast. I share easy healthy, delicious recipes on my blog and review necessary kitchen items. The recipes I share take less… Read more