This post contains affiliate links. As an Amazon Associate I earn from qualifying purchases.
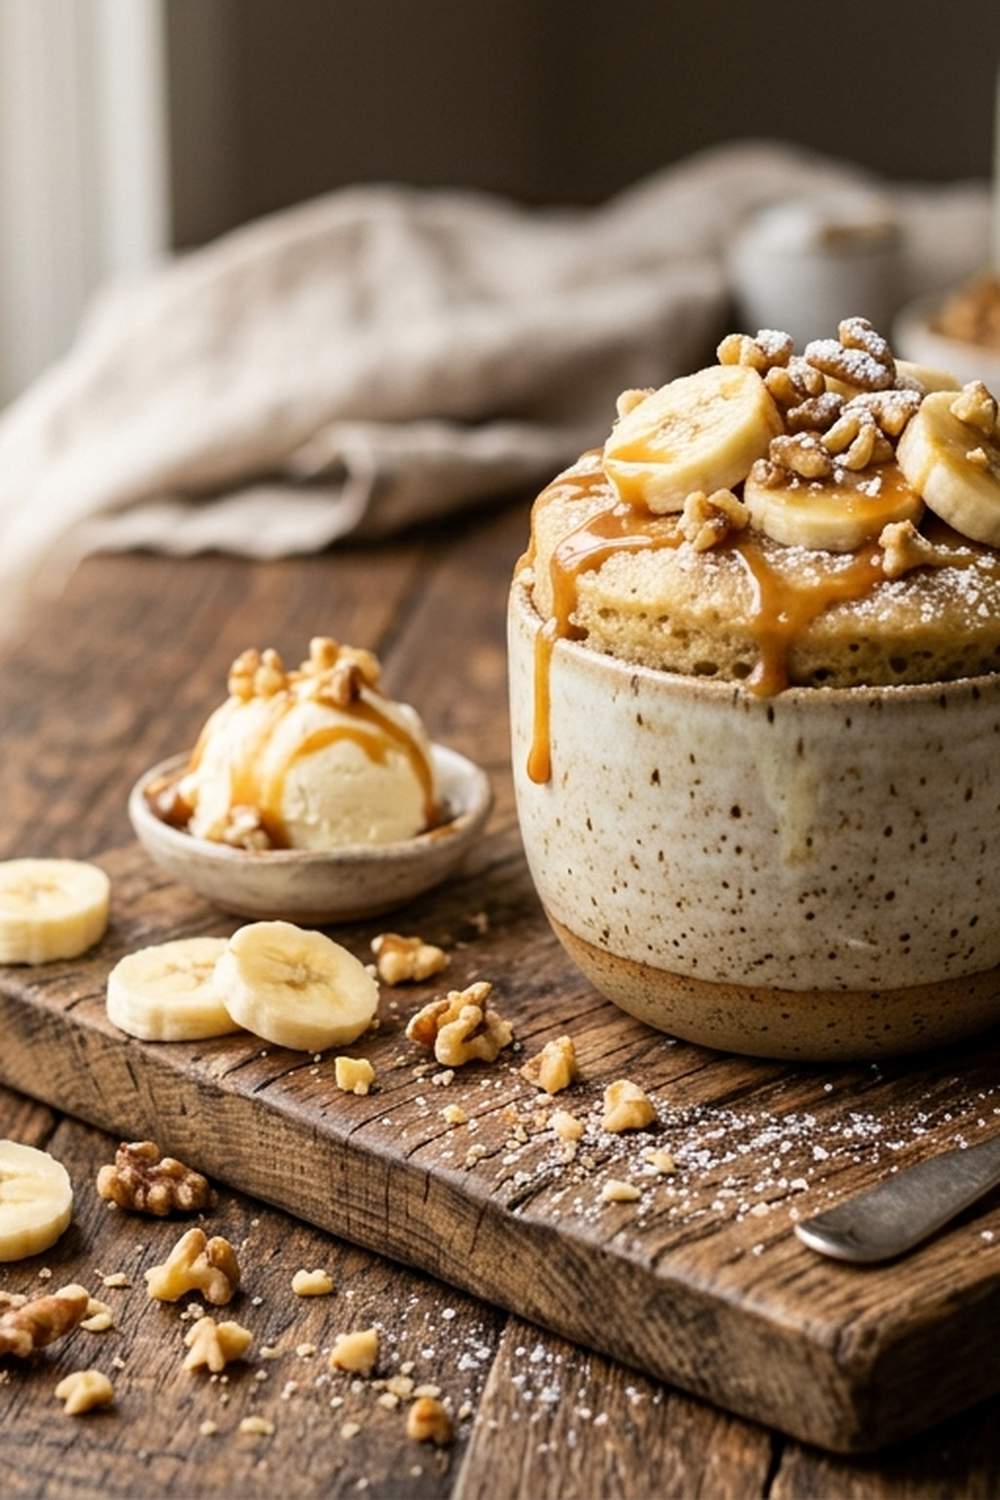
Learning to make a microwave banana cake isn’t just about having dessert ready in minutes—it’s about mastering a technique that unlocks dozens of other single-serving treats you can pull together faster than you’d think possible. When you understand how to build a tender cake in your microwave, you’ll never feel trapped by cravings again. This skill transforms those moments when you want something warm and comforting into victories instead of frustrations. I’ve built my recipe collection around this exact principle, and I’m thrilled to share what I’ve learned through real kitchen testing on standard equipment.
Master the Technique Behind Microwave Banana Cake (And Never Struggle With Single-Serving Desserts Again)
I’ll never forget the Saturday afternoon in 2019 when my daughter asked for homemade cake, but I had exactly three ingredients and no oven time. I was standing in my kitchen, frustrated, when I remembered something my grandmother used to mention about mug cakes in the microwave. I decided to test it properly—not as a gimmick, but as a real cooking method. I started documenting the exact timing, temperatures, and techniques, measuring results on my 1200-watt microwave. That first attempt taught me something revolutionary: microwave cakes aren’t inferior shortcuts. They’re a completely different cooking technique with their own rules and rewards.
What shocked me most was discovering that the same fundamental principle applies to dozens of microwave desserts. Once I understood how moisture, heat distribution, and timing work together in a microwave environment, I could adapt the technique for everything from individual brownies to steamed puddings. That day became the foundation of my approach to easy, stress-free home cooking.
The Core Technique Explained
The technique at the heart of microwave banana cake is controlled wet-mixture microwave baking. This is fundamentally different from traditional oven baking because microwave heat works by agitating water molecules rather than surrounding food with dry, circulating heat.
Here’s what makes this technique special: when you combine wet ingredients (banana, egg, milk, oil) with dry ingredients (flour, baking powder, salt) in a microwave-safe bowl, you’re creating an environment where baking powder can activate immediately. The microwave’s intense, moisture-rich heat causes your batter to set quickly while remaining tender. The banana acts as a natural moisture regulator, preventing the cake from drying out during the rapid cooking process.
The science matters here. Baking powder creates tiny air pockets throughout your batter. In a traditional oven, these pockets expand slowly over 20-30 minutes. In a microwave, they expand in 90 seconds to 2 minutes. The key is not overcooking—you’re looking for the moment when the center just sets, before the edges become rubbery. This is why I always recommend checking at 90 seconds and adding time in 20-second increments rather than cooking the full time upfront.
What This Technique Unlocks
Once you master controlled wet-mixture microwave baking, you’ll unlock a whole category of emergency desserts that actually taste homemade. These aren’t just survival foods—they’re genuinely delicious when you understand the technique:
- Individual chocolate lava cakes – uses the same wet-mixture principle with cocoa powder for an ultra-tender center
- Microwave brownies for one – builds on the same moisture-control technique with darker, more intense flavors
- Vanilla or spice mug cakes – applies the exact same batter-building and timing approach with flavor variations
- Microwave pudding cakes – expands the technique by managing liquid separation intentionally
- Steamed microwave cheesecakes – takes the moisture-control principle into no-bake territory
- Microwave fruit crisps – adapts the quick-heat principle for topping-based desserts
The Ingredients—Chosen to Teach the Technique
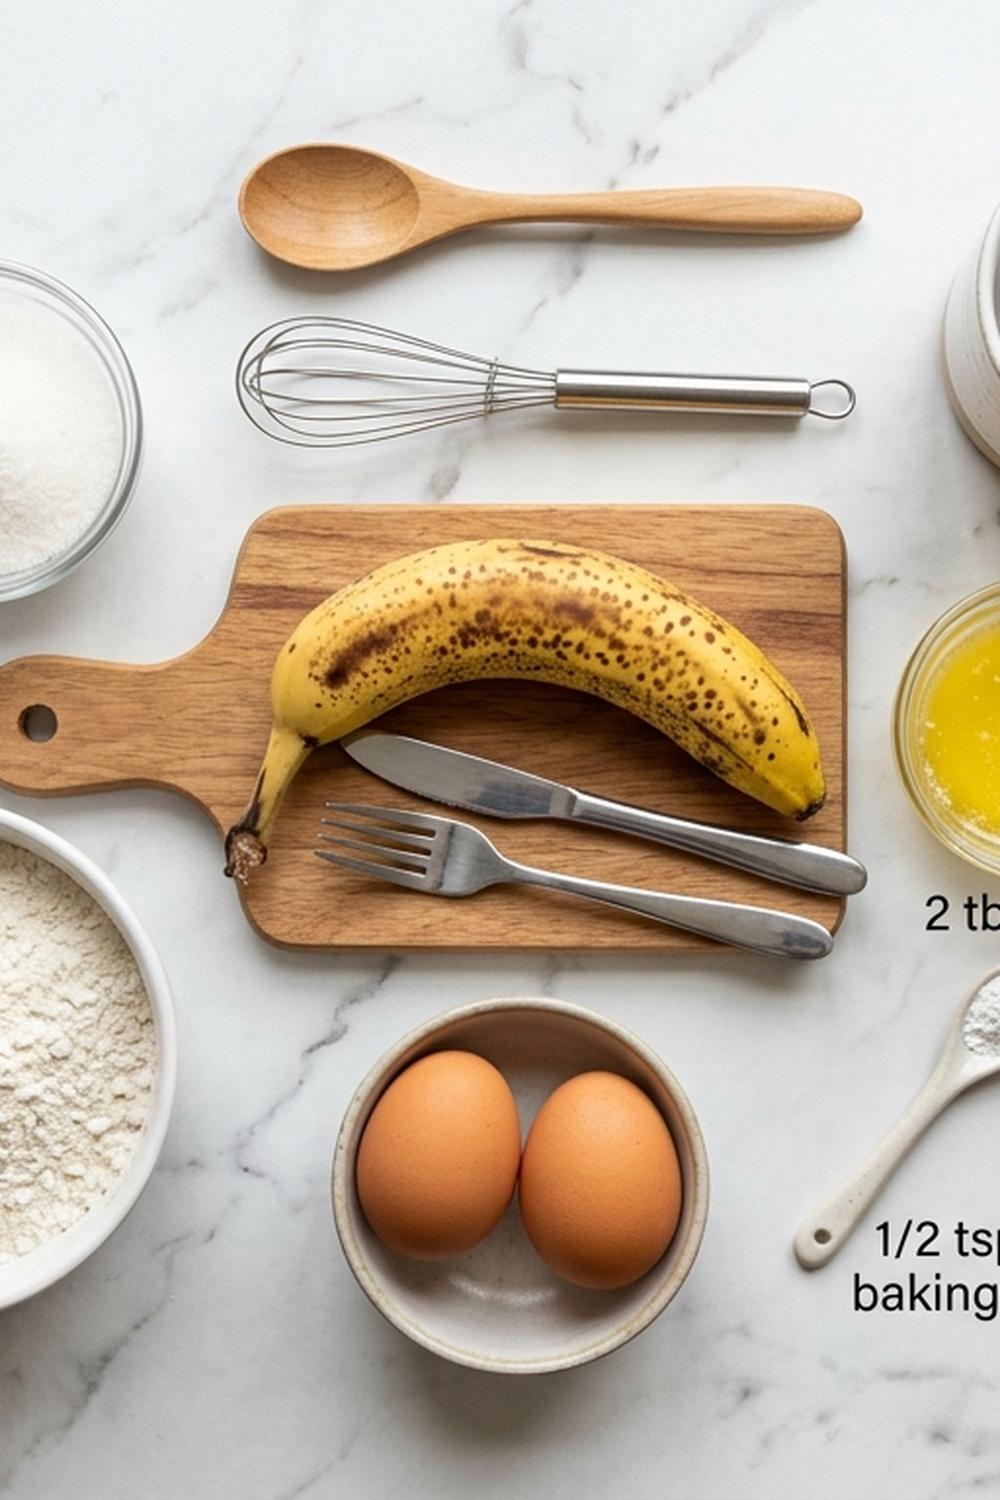
I’ve selected each ingredient specifically to help you understand how microwave baking works. Every component teaches you something about moisture, binding, structure, and texture in rapid-heat cooking environments.
- 2 tablespoons vegetable oil – keeps the cake moist during microwave cooking and prevents a dense, cake-like result
- ⅓ cup dark brown sugar (2 oz/57 g) – dissolves easily into wet ingredients and adds moisture retention compared to white sugar
- 6 tablespoons all-purpose flour (1¾ oz/50 g) – provides structure while staying minimal to avoid a heavy cake in microwave conditions
- ¼ teaspoon cinnamon (optional) – complements banana while adding warmth without affecting texture
- 1 medium overripe banana (4 oz/115 g) – provides natural sweetness, moisture, and binds the batter while preventing dryness in microwave heat
- Pinch of salt – balances sweetness and enhances the banana flavor
- 2 tablespoons whole milk (full-fat) – ensures tender crumb and prevents the microwave from creating a rubbery texture
- ½ teaspoon baking powder – creates the lift and air pockets essential to microwave cake texture
- ½ teaspoon vanilla extract – enhances flavor without adding excess liquid that would affect cooking time
- 1 large egg at room temperature – acts as the primary binder and provides structure that holds the cake together during rapid microwave expansion
- 1 tablespoon honey (optional but recommended) – adds subtle sweetness and increases moisture retention
Expert’s Nutritional Tip: The overripe banana is your secret weapon here. As bananas age, their starches convert to natural sugars and their pectin increases. This means an overripe banana provides better binding power and moisture control than a firm banana—something I discovered through careful testing and now recommend to anyone learning this technique.
The Masterclass: How to Make Microwave Banana Cake
This isn’t just a recipe—it’s a teaching moment where every step builds your understanding of how microwave baking actually works. Pay attention to the sensory cues I mention. They’ll guide you far beyond this single recipe.
Step 1: Prepare Your Banana and Combine Wet Ingredients
Grab a medium bowl that’s safe for microwaves—ceramic, glass, or microwave-safe silicone all work beautifully. Break your overripe banana into chunks and place it in the bowl. Now here’s the technique: mash your banana with a fork until you’ve broken down about 90% of the lumps, but don’t aim for complete smoothness. Tiny banana flecks actually improve your final texture. Mashing thoroughly ensures even distribution of moisture throughout your batter.
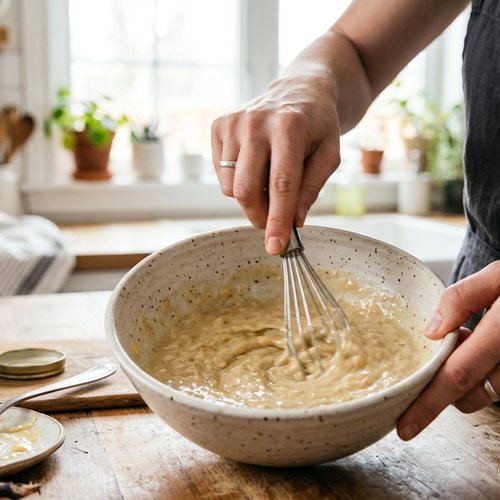
Add your room-temperature egg to the banana. Room temperature matters because cold eggs won’t incorporate as smoothly into your batter, which affects how evenly the cake cooks in the microwave. Add the dark brown sugar, whole milk, vegetable oil, and vanilla extract. Now whisk these ingredients together vigorously for about 30 seconds until everything is well combined and the mixture looks uniform. You’re creating an emulsion here—the oil and milk are binding together with the egg and banana to create a smooth base. This uniformity is critical because uneven wet mixtures cook unevenly in microwaves.
Step 2: Combine Your Dry Ingredients Separately
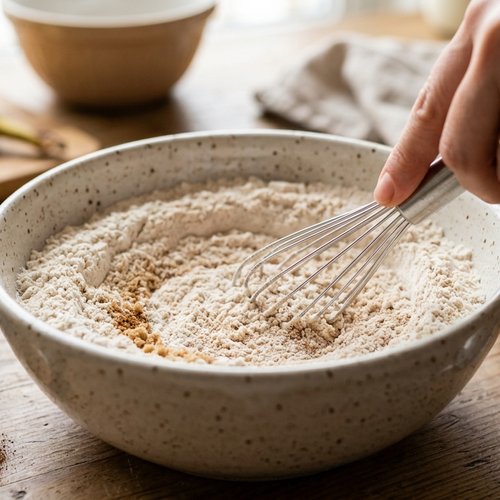
In a separate small bowl, add your all-purpose flour, baking powder, and salt. Stir these together for about 15 seconds with a small whisk or fork to distribute the baking powder evenly throughout the flour. This is more important than you might think. Baking powder that’s clumped together will create irregular pockets of rise in your cake, leading to an uneven texture. By mixing the dry ingredients first, you ensure that every bite of your finished cake will have consistent lift.
Step 3: Combine Wet and Dry Ingredients With Intention
Pour your dry ingredient mixture into your wet ingredients. Here’s where technique really matters: stir gently but thoroughly until you see no streaks of flour remaining and the batter looks smooth and uniform. This should take about 20-30 seconds. I’m intentionally asking you not to overmix. When you overmix cake batter, you develop gluten strands that make your cake tough and dense—even in a microwave. The flour just needs to be moistened and incorporated, not beaten into submission.
Your finished batter should look like thick pancake batter—smooth, pourable, but definitely thicker than a liquid. If it looks too thick, add a teaspoon of milk. If it looks too thin, add a teaspoon of flour. You’re aiming for a batter that flows slightly when you tilt the bowl but holds its shape.
Step 4: Microwave With Strategic Timing
Pour your batter into a microwave-safe mug or small bowl. If you’re using a standard ceramic mug, the batter should fill it about two-thirds of the way. Microwave on high power for 90 seconds. This is your baseline time for a 1200-watt microwave. After 90 seconds, carefully remove the mug (it will be hot!) and check the center of the cake with a toothpick or thin knife.
Here’s what you’re looking for: the cake should look mostly set on top with perhaps just a tiny bit of moisture in the very center. If you see liquid batter, it needs more time. If the toothpick comes out with just a few moist crumbs, you’re at the perfect point. If you need additional cooking, return it to the microwave in 20-second increments, checking after each one. Most cakes finish between 2 and 2 minutes 20 seconds total.
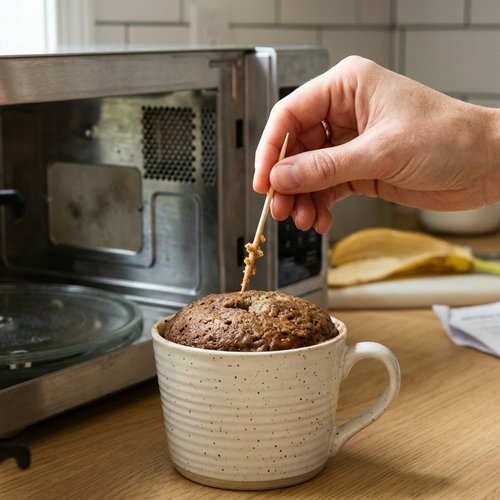
Why the strategic increments? Microwave cake is a race against textural disaster. Cook it too long by even 30 seconds and you’ll go from tender to rubbery. The 20-second increments let you stop at exactly the right moment.
Step 5: Cool Briefly and Garnish Generously
Let your cake rest in the mug for about 2 minutes. This brief cooling period allows the structure to set completely and makes it easier to handle. The cake will continue cooking slightly during this rest period due to carryover heat—this is intentional and helps ensure the center finishes perfectly.
Top your cake with whipped cream, a drizzle of caramel sauce, and chopped toasted nuts. The cold cream and rich sauce create a textural contrast that elevates this simple cake into something special. Serve immediately while the cake is still warm and the textures are at their best.
How to Know You’ve Mastered the Technique
True mastery of microwave banana cake isn’t about following a recipe perfectly—it’s about recognizing the sensory cues that tell you the cake is done exactly right. Here’s what success looks and feels like:
- Visual doneness indicator: The top of the cake looks set and slightly springy when you gently touch it near the edge, but the very center still shows a tiny bit of moisture. The sides should look slightly lighter in color than the center, indicating even heat distribution.
- Texture indicator: When you insert a toothpick into the center, it comes out with just a few small, moist crumbs clinging to it—not wet batter, but not completely dry either. This is the “moist crumb” stage that separates a tender cake from a dry one.
- Aroma indicator: Your kitchen smells like warm banana cake—sweet, slightly caramelized, inviting. If you smell anything burnt or overly sulfurous, you’ve likely gone a bit too long.
- Temperature indicator: The mug or bowl is hot enough that you need both hands to hold it comfortably, but not so hot that you can’t hold it for a few seconds. This tells you the heat has penetrated throughout the cake.
Common Technique Mistakes and How to Fix Them
- Overmixing the batter: If your cake comes out dense and tough, you likely overmixed the dry and wet ingredients. The gluten in the flour was overdeveloped. Solution: next time, mix just until the flour disappears—about 15-20 seconds of gentle stirring, not vigorous beating.
- Using cold eggs directly from the refrigerator: Cold eggs don’t incorporate smoothly, leading to an uneven, slightly curdled-looking batter that cooks unevenly. Solution: remove your egg from the refrigerator 15 minutes before you plan to bake, or place it in warm water for 2 minutes to bring it to room temperature.
- Cooking too long: If your cake is rubbery and slightly shrunken from the sides of the mug, you’ve cooked it too long. Microwave heat is intense, and every additional 10 seconds matters. Solution: start checking at 90 seconds, and remember that the cake continues cooking slightly during the resting period. It’s better to slightly undercook and let carryover heat finish the job.
- Skipping the resting period: If your cake feels fragile and crumbly when you try to serve it, the structure didn’t have time to fully set. The 2-minute rest is when the cake continues cooking gently and the structure solidifies. Solution: always let your cake rest for at least 2 minutes, even if you’re hungry.
- Using a bowl that’s too large: If your cake spreads thin and cooks unevenly, your bowl might be too wide. The batter needs to have enough depth to cook through properly. Solution: use a standard 8-10 ounce mug or small cereal bowl so the batter is about 1.5 inches deep.
Practice Variations to Build Your Skill
Now that you understand the core technique, challenge yourself with these progressively more complex variations. Each one teaches you something new about how microwave baking works:
Variation 1: Chocolate Banana Cake (Beginner Challenge) – Replace 1 tablespoon of flour with 1 tablespoon unsweetened cocoa powder. This teaches you how to handle dry ingredients with varying densities. Cocoa is lighter and more absorbent than flour, so you’ll notice the batter looks slightly thicker. This is normal. The cooking time stays the same or might be 10-20 seconds faster since cocoa adds density. This simple swap teaches you how ingredient substitutions affect microwave baking fundamentals.
Variation 2: Peanut Butter Banana Cake (Intermediate Challenge) – Add 1 tablespoon of natural peanut butter to your wet ingredients (mix it in with the banana). This teaches you how to incorporate thicker, denser ingredients into microwave batters. You’ll notice the batter becomes thicker and slightly stiffer. Cooking time might increase by 15-30 seconds because peanut butter adds moisture that needs extra heat. This variation shows you how ingredient additions affect cooking time predictions.
Variation 3: Banana Cake With Caramelized Topping (Advanced Challenge) – Increase your brown sugar to ⅜ cup and sprinkle ½ teaspoon of additional brown sugar mixed with a tiny pinch of cinnamon directly on top of the batter before cooking. Watch carefully at the 90-second mark—the sugar on top will caramelize slightly, creating a crunchy exterior that contrasts with the tender interior. This teaches you about surface texture development in microwave cooking and how toppings behave under microwave heat.
Can I Store Microwave Banana Cake?
This is one of my favorite questions because the answer teaches you something important: microwave cakes have different storage properties than oven-baked cakes due to their moisture content.
Room temperature storage: Your microwave banana cake stays fresh at room temperature in a covered container for up to 2 days. However, I recommend eating it within 4 hours of making it for the best texture. Microwave cakes dry out a bit faster than oven-baked cakes because of their higher initial moisture content and the way microwave cooking affects the crumb structure.
Refrigerator storage: If you must store it longer, cover your cake and refrigerate it for up to 4 days. The cold will make it slightly firmer and less tender, but it will stay fresh. Reheat individual slices in the microwave for 15-20 seconds before serving to restore some of the original tenderness.
Freezer storage: You can freeze baked microwave cake in an airtight container for up to 1 month. Thaw it at room temperature for about 30 minutes before eating. Honestly, I rarely recommend freezing individual microwave cakes because the whole point is making them fresh and fast. But if you want to bake a batch ahead, this works.
Make-Ahead Guide: Here’s what I do for meal prep: keep overripe bananas in your freezer in an airtight bag. When you’re ready for cake, thaw one banana, and you can make fresh cake anytime. You can also pre-measure your dry ingredients into small containers or bags ahead of time. When cravings strike, you’ll have everything ready to mix and microwave within 5 minutes.
Nutrition Information
Based on USDA nutritional data for the standard recipe (serves 1), this microwave banana cake contains approximately 420 calories, with 18g protein, 52g carbohydrates, and 18g fat. The fiber content is 2g, and sodium is 180mg.
What’s particularly noteworthy from a nutritional standpoint is that this single serving provides about 12% of your daily potassium thanks to the banana, plus the egg contributes high-quality protein and choline, which supports brain health. The brown sugar adds trace minerals like iron and calcium that white sugar lacks.
Expert’s Nutritional Perspective: As a registered dietitian, I love recommending this recipe to people who want something genuinely homemade without artificial ingredients. Every component here is recognizable food. There’s no mysterious additives or preservatives—just banana, egg, simple pantry staples. The quick microwave cooking also preserves more B vitamins in the egg compared to traditional baking methods that involve longer heat exposure. If you’re looking to reduce sugar, you can substitute half the brown sugar with unsweetened applesauce without significantly affecting the cooking time or texture.
What to Serve With Microwave Banana Cake
While this cake is wonderful on its own, pairing it thoughtfully transforms it from a simple dessert into a complete experience. I choose accompaniments that complement the technique and highlight the tender, moist crumb you’ve worked to achieve:
- Whipped cream with a touch of vanilla: The cool, airy texture contrasts beautifully with the warm cake. The vanilla echoes the cake’s flavor without overwhelming it. This pairing teaches you about textural contrast—something that’s essential in good food design.
- Salted caramel drizzle: The salt balances the sweetness of both the cake and the caramel, while the warm sauce creates temperature contrast. This combination is why caramel has been paired with banana for generations.
- Toasted pecans or walnuts: Nutty, crunchy toppings add depth to a cake that’s naturally soft. Toasting the nuts first brings out their oils and flavors. This teaches you how toasting transforms ingredients.
- Greek yogurt with honey: A tangier accompaniment that lets the banana flavor shine. The yogurt’s protein makes this feel more substantial as a snack.
- Fresh strawberries or raspberries: Bright, acidic fruit cuts through the richness and adds color. This is a technique I use constantly—acid and freshness balance richness and warmth.
If you’re serving this as part of a larger meal, consider pairing it with something like Cinnamon Sugar Scones for a mini dessert spread, or serve it after a main course like my weeknight pasta for a comforting full meal.
Microwave Cake With Banana Recipe
Ingredients
- 2 tablespoon vegetable oil - keeps the cake moist during microwave cooking and prevents a dense, cake-like result
- ⅓ cup dark brown sugar - dissolves easily into wet ingredients and adds moisture retention compared to white sugar 2 oz/57 g
- 6 tablespoon all-purpose flour - provides structure while staying minimal to avoid a heavy cake in microwave conditions 1¾ oz/50 g
- ¼ teaspoon cinnamon - complements banana while adding warmth without affecting texture optional
- 1 medium overripe banana - provides natural sweetness, moisture, and binds the batter while preventing dryness in microwave heat 4 oz/115 g
- Pinch of salt - balances sweetness and enhances the banana flavor
- 2 tablespoon whole milk - ensures tender crumb and prevents the microwave from creating a rubbery texture full-fat
- ½ teaspoon baking powder - creates the lift and air pockets essential to microwave cake texture
- ½ teaspoon vanilla extract - enhances flavor without adding excess liquid that would affect cooking time
- 1 large egg at room temperature - acts as the primary binder and provides structure that holds the cake together during rapid microwave expansion
- 1 tablespoon honey - adds subtle sweetness and increases moisture retention optional but recommended
Instructions
Step 1: Prepare Your Banana and Combine Wet Ingredients
- Grab a medium bowl that's safe for microwaves—ceramic, glass, or microwave-safe silicone all work beautifully. Break your overripe banana into chunks and place it in the bowl. Now here's the technique: mash your banana with a fork until you've broken down about 90% of the lumps, but don't aim for complete smoothness. Tiny banana flecks actually improve your final texture. Mashing thoroughly ensures even distribution of moisture throughout your batter. Add your room-temperature egg to the banana. Room temperature matters because cold eggs won't incorporate as smoothly into your batter, which affects how evenly the cake cooks in the microwave. Add the dark brown sugar, whole milk, vegetable oil, and vanilla extract. Now whisk these ingredients together vigorously for about 30 seconds until everything is well combined and the mixture looks uniform. You're creating an emulsion here—the oil and milk are binding together with the egg and banana to create a smooth base. This uniformity is critical because uneven wet mixtures cook unevenly in microwaves.
Step 2: Combine Your Dry Ingredients Separately
- In a separate small bowl, add your all-purpose flour, baking powder, and salt. Stir these together for about 15 seconds with a small whisk or fork to distribute the baking powder evenly throughout the flour. This is more important than you might think. Baking powder that's clumped together will create irregular pockets of rise in your cake, leading to an uneven texture. By mixing the dry ingredients first, you ensure that every bite of your finished cake will have consistent lift.
Step 3: Combine Wet and Dry Ingredients With Intention
- Pour your dry ingredient mixture into your wet ingredients. Here's where technique really matters: stir gently but thoroughly until you see no streaks of flour remaining and the batter looks smooth and uniform. This should take about 20-30 seconds. I'm intentionally asking you not to overmix. When you overmix cake batter, you develop gluten strands that make your cake tough and dense—even in a microwave. The flour just needs to be moistened and incorporated, not beaten into submission. Your finished batter should look like thick pancake batter—smooth, pourable, but definitely thicker than a liquid. If it looks too thick, add a teaspoon of milk. If it looks too thin, add a teaspoon of flour. You're aiming for a batter that flows slightly when you tilt the bowl but holds its shape.
Step 4: Microwave With Strategic Timing
- Pour your batter into a microwave-safe mug or small bowl. If you're using a standard ceramic mug, the batter should fill it about two-thirds of the way. Microwave on high power for 90 seconds. This is your baseline time for a 1200-watt microwave. After 90 seconds, carefully remove the mug (it will be hot!) and check the center of the cake with a toothpick or thin knife. Here's what you're looking for: the cake should look mostly set on top with perhaps just a tiny bit of moisture in the very center. If you see liquid batter, it needs more time. If the toothpick comes out with just a few moist crumbs, you're at the perfect point. If you need additional cooking, return it to the microwave in 20-second increments, checking after each one. Most cakes finish between 2 and 2 minutes 20 seconds total. Why the strategic increments? Microwave cake is a race against textural disaster. Cook it too long by even 30 seconds and you'll go from tender to rubbery. The 20-second increments let you stop at exactly the right moment.
Step 5: Cool Briefly and Garnish Generously
- Let your cake rest in the mug for about 2 minutes. This brief cooling period allows the structure to set completely and makes it easier to handle. The cake will continue cooking slightly during this rest period due to carryover heat—this is intentional and helps ensure the center finishes perfectly. Top your cake with whipped cream, a drizzle of caramel sauce, and chopped toasted nuts. The cold cream and rich sauce create a textural contrast that elevates this simple cake into something special. Serve immediately while the cake is still warm and the textures are at their best.
Notes
FAQs
Why does my cake come out rubbery instead of tender?
Rubbery texture usually means overcooking. Microwave cakes are cooked at such high intensity that even 20 seconds can mean the difference between tender and tough. Here’s the fix: start checking at 90 seconds, and remember that the cake continues cooking during the resting period. If you see liquid batter, cook in 20-second increments rather than guessing. Also, check that you’re using whole milk rather than skim—the fat content directly affects how tender the cake will be. Finally, make sure you’re not overmixing the batter, which develops gluten and creates toughness.
Can I make this in a regular coffee mug or does it need to be microwave-safe?
Most ceramic and glass mugs are microwave-safe, but always check for a microwave-safe label on the bottom before using. Some vintage mugs or specialty ceramics have metallic glazes or decorations that can cause sparking. When in doubt, use a small microwave-safe bowl instead. The key is that your vessel is nonmetal and holds your batter without spillover as it rises. I personally use standard ceramic mugs I’ve verified as microwave-safe—they’re the perfect size and shape for single-serving microwave cake.
What if my microwave has different wattage than 1200 watts?
Wattage absolutely affects cooking time, and this is one of the most important things to understand about microwave baking. Higher wattage (1400-1600W) cooks faster, so start checking at 75 seconds and add time as needed. Lower wattage (under 1000W) cooks slower, so start at 2 minutes and adjust from there. Here’s my professional tip: after your first cake, you’ll know your exact time. Write it down on a sticky note near your microwave. Every microwave cooks differently based on age, design, and wattage, so your personalized time is more valuable than any recipe.
Can I use frozen banana instead of fresh overripe banana?
Absolutely, and this is actually something I recommend for meal prep. Frozen bananas work beautifully because freezing breaks down the cell walls slightly, making them easier to mash and incorporate. Thaw your frozen banana first, and you may notice it releases extra liquid. This is fine—just drain some of it off if the batter looks too thin after mashing. Frozen bananas are sometimes even better than fresh because they’re usually very ripe when frozen, meaning they have maximum sweetness and binding power. I freeze overripe bananas specifically for this purpose.
What if I don’t have an egg—can I use a substitute?
This is where microwave baking gets tricky with substitutions. The egg serves dual purposes: binding and leavening through its protein structure. You can replace one large egg with 3 tablespoons of applesauce, but the cake will be denser and slightly less airy. You can also use 1 tablespoon ground flaxseed mixed with 3 tablespoons water (let it sit 5 minutes to thicken), but again, you’ll lose some lift. My recommendation: if you don’t have eggs, try the applesauce version and reduce the flour to 5 tablespoons to compensate for the extra moisture. Your cake won’t be identical to the original, but it will still be delicious. This is where understanding the technique matters more than following the exact recipe.
Seasonal Variations to Try
Spring Version: Add ½ teaspoon of lemon zest to your wet ingredients and reduce the vanilla to ¼ teaspoon. The bright lemon flavor cuts through the banana’s richness and feels fresh and light. Serve with fresh strawberries instead of caramel sauce.
Summer Version: Reduce the milk to 1 tablespoon and add 1 tablespoon of Greek yogurt to your wet ingredients. This creates a slightly tangier cake that pairs beautifully with fresh berries. The yogurt’s acidity feels refreshing on warm days.
Fall Version: Add ¼ teaspoon of cinnamon and ⅛ teaspoon of nutmeg to your dry ingredients. Top with a drizzle of maple syrup instead of caramel sauce. This version tastes like autumn in a mug and pairs wonderfully with warm coffee or tea.
Winter Version: Add ½ tablespoon of molasses to your wet ingredients along with ⅛ teaspoon of cloves. This deeper, spicier version feels cozy and warming during cold months. Serve with whipped cream and a dusting of cinnamon.
More Recipes Using This Technique
- Large Batch Brownies – expands the wet-mixture microwave technique to create rich, fudgy chocolate treats that use the same moisture-control principles
- this simple cake – applies the microwave technique to vegetable-based cakes with similar moisture and timing considerations
- this simple cake – takes single-serving microwave desserts into no-bake territory while maintaining the quick-prep advantage
- These Homemade Great Cookies – Worth adding to your recipe collection.
- This Homemade Ghost Recipe – Worth adding to your recipe collection.
You’ve now mastered a cooking technique that feels simple on the surface but contains real depth. You understand how microwave heat differs from oven heat. You know how to read sensory cues instead of relying on timers. You can troubleshoot problems because you understand the science behind them. Most importantly, you’ve unlocked the ability to have warm, homemade dessert anytime in under 5 minutes.
That’s not just about banana cake anymore. That’s about confidence in your kitchen. That’s about knowing you can create something delicious whenever the moment calls for it. That’s the real skill I wanted you to develop. Now go make this cake, taste that perfect tender crumb, and remember—you’re not following a recipe. You’re practicing a technique that will serve you forever. Good food is a good mood!

My name is Lori Walker. I’m a registered dietitian, food blogger and food enthusiast. I share easy healthy, delicious recipes on my blog and review necessary kitchen items. The recipes I share take less… Read more